
Philodendron birkin
Contents
- Top Tips
- Location, Water, Humidity & Fertilisation
- Common Issues
- Mosaic Virus (Symptoms, Causes & Actions Needed)
- Origins, Temperature, Propagation, Repotting & Toxicity.
Need the answer to a specific plant query? Book a 1-to-1 video call with Joe Bagley, the website's friendly author, to overcome and address your niggling problem! Available on iMessage, WhatsApp, Facebook Messenger & more.
Top Tips & Info
- Care Difficulty - Easy to Moderate
- A bright, indirect location is best, with the option for an hour of morning/evening sun during the autumn & winter months. Avoid placing it within a few metres of an operating heater, or in excessively dark locations to decrease the chance of root rot.
- Keep the soil evenly moist, allowing the top few inches to dry out in between waters. Remember - the light levels directly govern the amount of water you'll give.
- Reduce irrigations further during the colder months of the year, to replicate their much-needed dormancy period.
- Fertilise using a 'Houseplant' labelled feed every four waters in the spring and summer, reducing this to every six in the colder months.
- Repot every three years using 'Houseplant' compost and the next sized pot. Scroll down to the 'Repotting' section to learn more about repotting a specimen that's attached to a moss pole.
- Keep an eye out for Spider Mites & Mealybugs throughout the year and Thrips during the start of summer.
Location & Light - 🔸🔸
A bright, indirect location is best for all-round growth. If you're feeling a little extra, provide an hour of morning or evening sunlight during the autumn and winter months to keep the plant satisfied over the darkened period. Philodendrons that receive too much light will show symptoms of sun-scorch, that include pale-yellowed foliage, crispy brown patches and stunted growth. Alternatively, situations that don't boast enough light will result in slowed or elongated growth, mould developing on the soil and a heightened risk of root rot. Although most specimens will still do well in shadier spots, it's vital to decrease the amount of water to counteract the slowed rates of drying compost. Remember - the amount of light your plant receives will directly govern the frequency of waters that you should give.
Water - 🔸🔸
During the spring and summer, maintain proper soil moisture by only allowing the top third dry out in between irrigations. For confirmation, feel the weight of the pot; if it's still heavy from when you last hydrated, now isn't the time for another water. Reduce this slightly further during the colder months to replicate its dormancy period, and for the prevention of too moist soil. Also, try not to pour cold water directly into the compost as its root systems are susceptible to temperature change. Symptoms of this include slowed growth, yellow or brown edges that may travel to the leaf's centre, and a gradual decline of health. If you decide to use tap water, allow it to stand for at least 24hrs to allow the fluoride to settle and an increase of warmth within the container. Under-watering symptoms include stunted growth, dry spots appearing on the leaves and yellowing older leaves - this is either due to becoming pot-bound, too much light, or forgetfulness. Over-watering symptoms include yellowing lower leaves, mould developing on the compost and brown mushy patches developing on the leaves or stems. For more severe cases, remove the plant from the pot and inspect its roots. If you feel that root rot is to blame, remove the affected areas and replace with a fresh batch of houseplant soil within the same original pot.
Humidity - 🔸🔸🔸
Provide moist air all year round, especially in winter, while the heaters are operating. To achieve higher humidity, create a pebble tray by placing it on a bed of stones in a saucer of water. Then, once a month, gently hose the foliage down to hydrate the leaves and wash away any thin layers of dust from its pores. Keep the tray topped up with water to provide a little pocket of humidity around the foliage.
Fertilisation - 🔸🔸
Feed every four waters during the growing period and every six in the autumn and winter, using a 'Houseplant' labelled fertiliser. Never apply a 'ready to use’ product into the soil without a pre-water first, as it may burn the roots and lead to yellowed leaves.
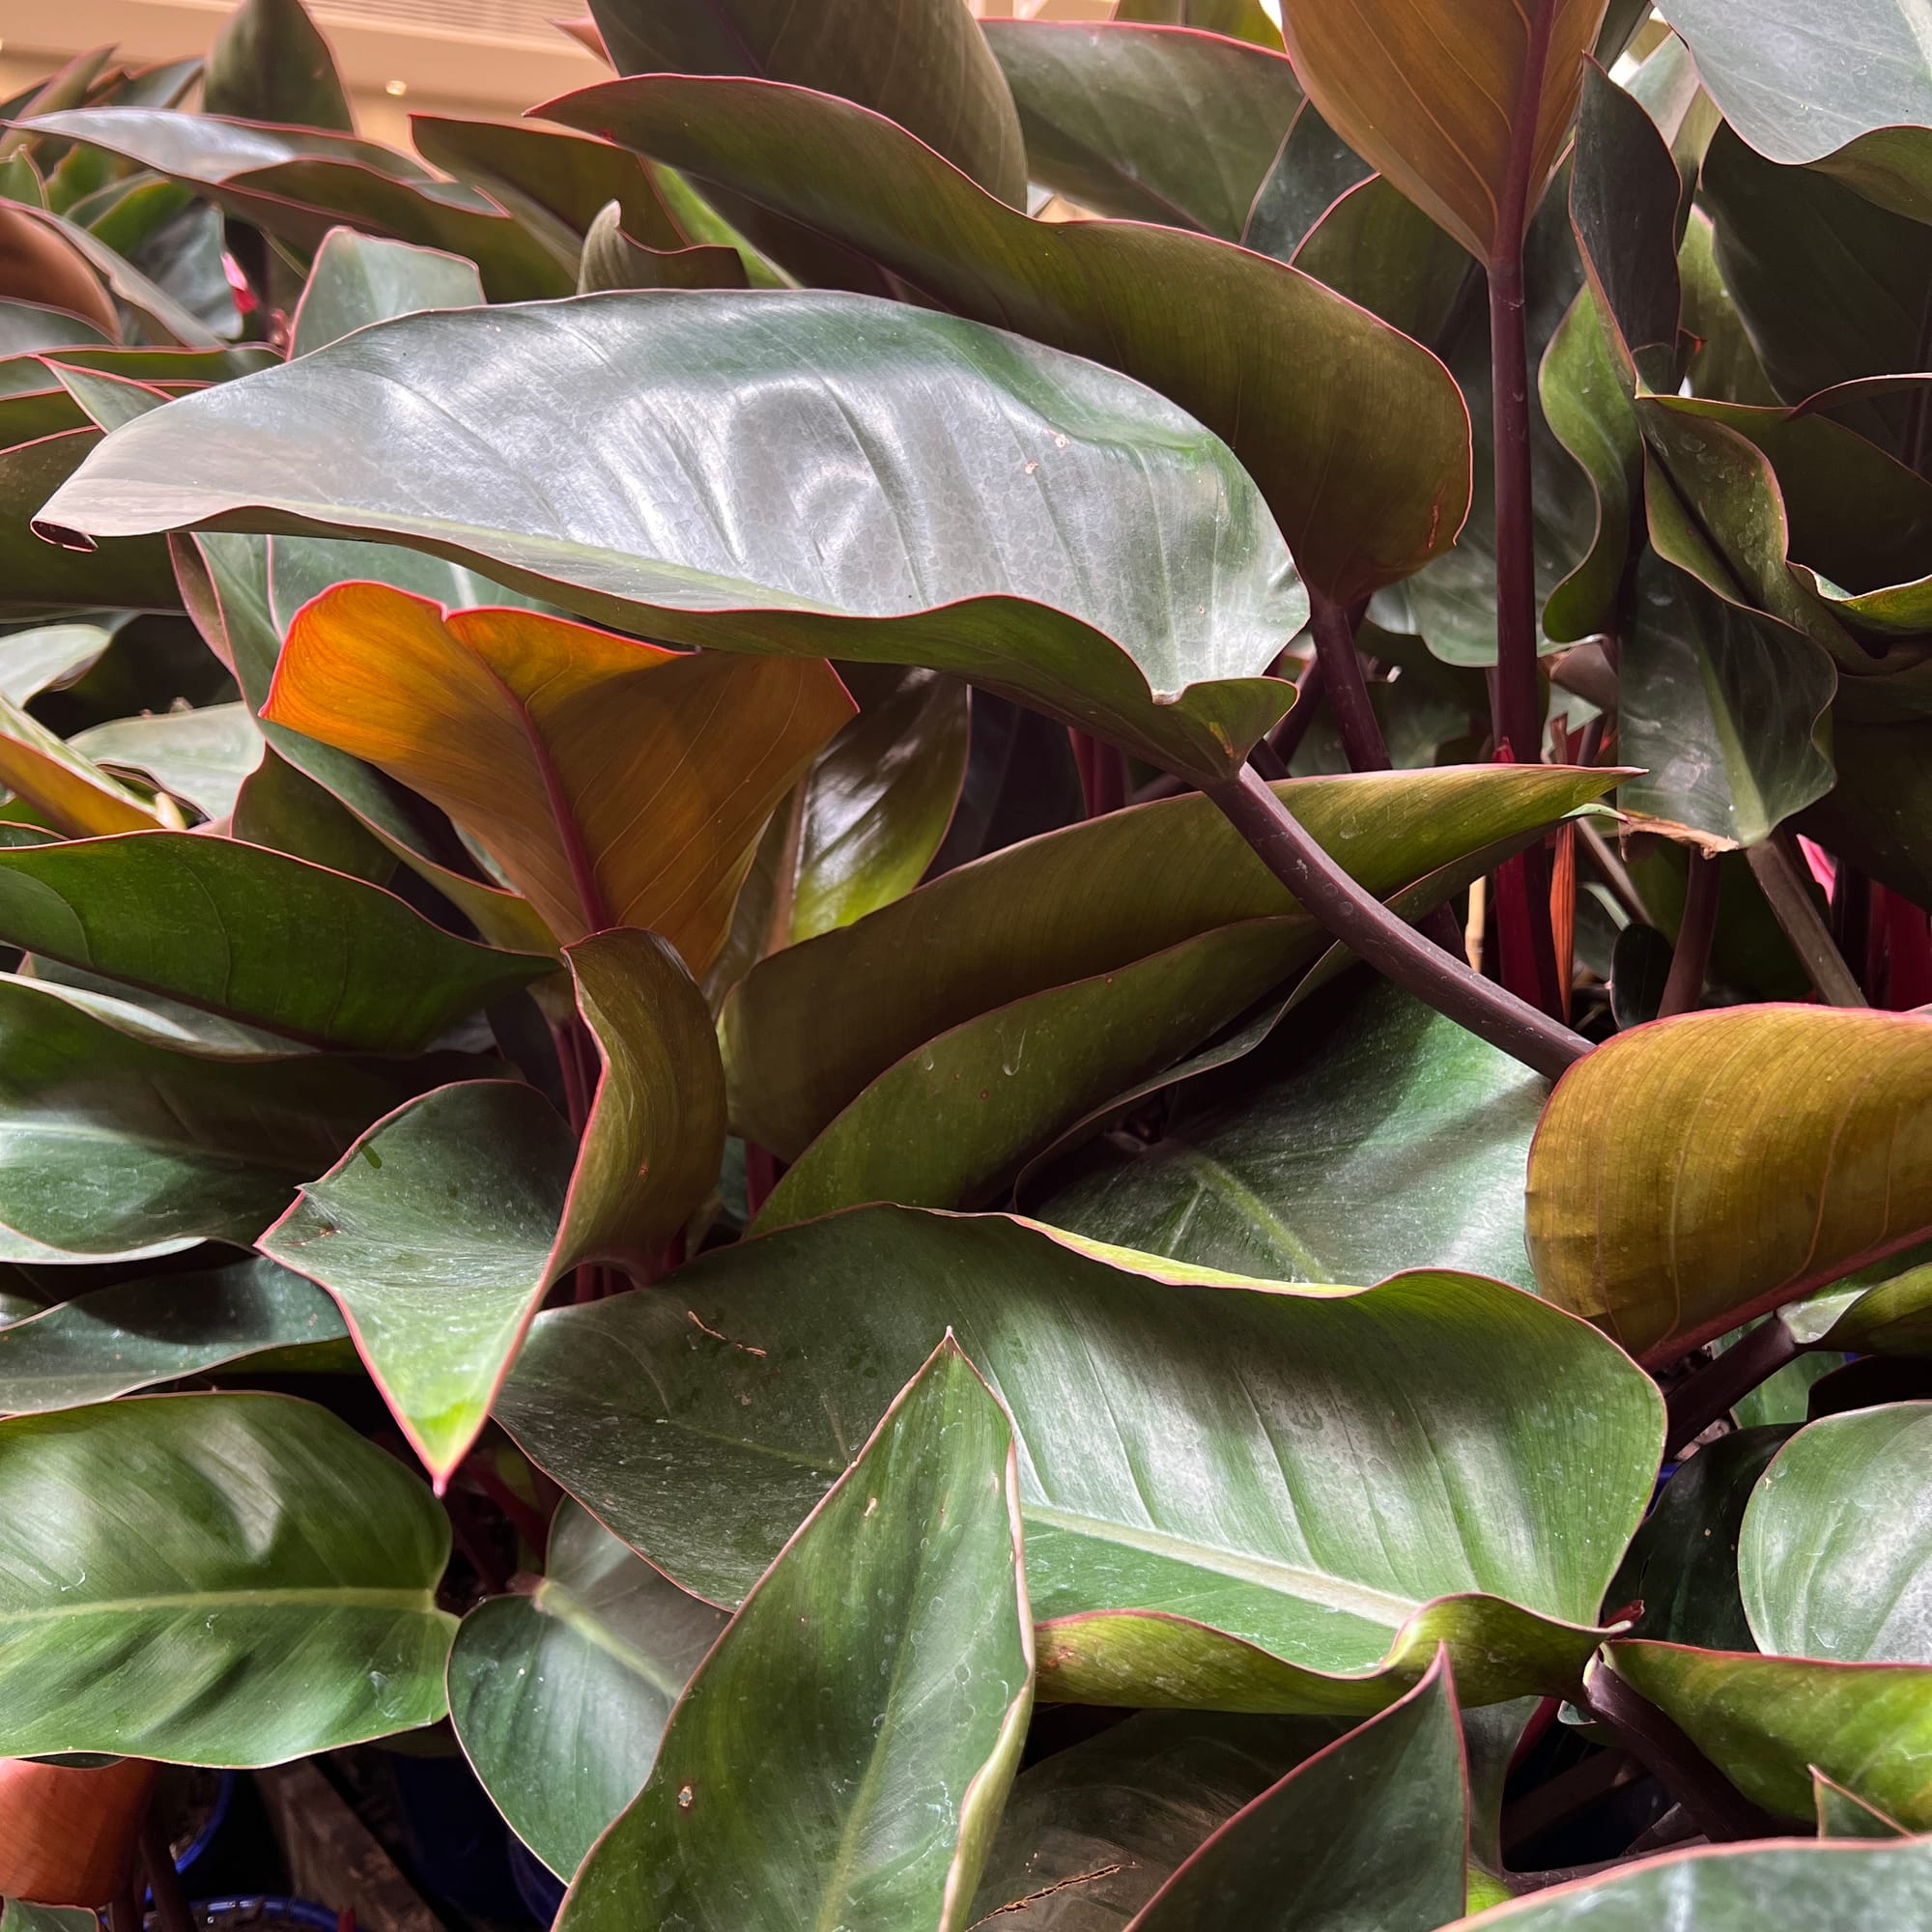 Looking for crimson-red foliage to add contrast to your houseplant collection? Look no further with the Philodendron erubescens - great for dark rooms & people who prefer to have a less water-dependant plant.
Common Issues with Philodendrons
An array of simultaneous cultivation issues will increase the chance of developing yellowed leaf-sections with browned halos. Firstly, the location may be too dark, with its compost staying too saturated in-between waters; if mould is growing across the soil, this is usually a bad sign. You're potentially using too cold water or tap water that hasn't been allowed to sit for 24hrs. This period of rest will not only bunk-up its temperature, but the harsh chemicals used to preserve water hygiene (fluoride & chloride) will begin to settle after a few hours. The final culprit might be lack of fertilisation, with regular feeds being paramount for long-lasting, healthy leaves. If the specimen hasn't been nourished in over two months, it'll begin to show signs of nutrient deficiencies seen in this article.
If this common problem has occurred with your specimen, remove the affected leaves (not areas) and improve the growing conditions considerably. Fertilise regularly with lukewarm water and be sure to allow the top third to dry out in between hydrations. Its new growth should be problem-free, but if you'd like to speak to ukhouseplants regarding this issue, don't be afraid to book a 1-to-1 call with Joe Bagley to help guide you the process!
Smaller leaves developing on a Philodendron cutting is entirely normal whilst it roots in the new soil. Be patient; new, larger growth will emerge as the weeks and months roll on!
Pests could arise at any time, with infestations starting from the original nursery or via contamination in your home. With this genus, Spider Mites and Mealybugs tend to be the usual inhabitants, with the first being minute and almost transparent, roaming the leaves in search of chlorophyll and a site to hide its eggs. The latter, however, will stand out much more, with white cottony webs developing across the foliage and stems. Thoroughly check the plant's cubbyholes before giving it the all-clear, or click on the appropriate links to learn more about eradicating these issues.
Thrips are another serious pest that causes havoc with Philodendrons. If you see small, tubular-shaped black or yellow pests roaming the foliage, you MUST act quickly as the leaves will turn yellow (pictured above) within a few days. Zoom in to see the small yellow larvae and click here for more information on Thrip eradication.
Environmental Shock is a familiar occurrence with newly-located specimens, that usually results in stunted growth and lower leaf loss (rare). When a plant is relocated into a new, unfamiliar setting, the effects can be catastrophic. The humidity, temperature and light levels will all suddenly shift into different proportions, inflicting great stress the individual. There are two options of addressing this issue; either wait it out or relocate it into a more Philodendron-friendly environment. As long as the specimen appears healthy with little change to its pre-existing leaves, new nodular growth should emerge in the following months.
Root rot is a common issue with specimens sat in too moist or waterlogged soil for long periods. Symptoms include rapidly yellowing leaves, stunted growth and a rotten brown base. Take the plant out of the pot and inspect health below the soil line. If the roots sport a yellow tinge, you're good to go, but if they're brown and mushy, action must be taken immediately. More information about addressing root rot can be found on this link.
Curled leaves and brown leaf-edges are the result of too little water and over-exposure to the sun. Philodendrons are best located in bright, indirect settings, and those that haven't acclimatised to the harsh rays will show signs of sun-scorch and environmental shock. A splash of winter sunlight is acceptable as long as the soil moisture is regularly observed, with complete avoidance once summer comes along.
Too low humidity can cause browning leaf tips with yellow halos. Although this won't kill your specimen, you may want to increase the local moisture to prevent the new growth from adopting these symptoms. Mist or rinse the foliage from time to time and create a humidity tray whilst the heaters are active to create a stable environment for your specimen.
Yellowing lower leaves are a clear sign of over-watering, usually caused by too little light. Although Philodendrons can do well in darker locations, the frequency of irrigations must be reduced to counteract the chance of root rot. People don't realise that a plant's root system needs access to oxygen too; when soil is watered, the air will travel upwards and out of the potting mix. A lack of accessible oxygen for the roots will cause them to subsequently breakdown over the oncoming days. Click on this link to learn more about root rot and how to address it, and always feel the pot's weight for confirmation (heaviness = good soil moisture, & vice versa).
Always use lukewarm water, and if you choose to use tap water, allow it to stand for at least 24hrs before application. Philodendrons tend to be quite sensitive to temperature change, so pouring cold tap water immediately into the pot will not only add fluoride into the soil, but it could even cause yellowed leaf-edges over time.
If your specimen is located in a dark environment, use a chopstick to gently stab the soil in various areas. You should aim to enter the compost between the base of the plant and the pot's edge, as failure to do so may lead to damaging its lower portion. Leave the holes open for a few days before re-surfacing the compost to avoid it becoming overly dry. Not only will the gentle shift in the soil's structure mimic the work of small invertebrates in the wild (worms, etc.), but it'll also add oxygen back into the compost, thus reducing the risk of root rot. Repeat this monthly, or whenever you feel the potting-mix isn't drying out quickly enough.
The browning of the cataphyll shouldn't of be a concern, as it's a wholly natural process which affects all specimens across the world. Remove the brown section once it becomes dry and crispy, using a clean pair of scissors or peeling it back by hand.
Failed propagated stem cuttings - There are several reasons why the cuttings haven't rooted well, including: the time of year (spring or summer is best), its size (Philodendron cuttings should have at least three leaves), poor growing conditions (replace water weekly for water-propagated cuttings, and avoid over-watering for soil-grown plants), and its growing environment (a bright sunless windowsill and warmth is important).
Mosaic Virus
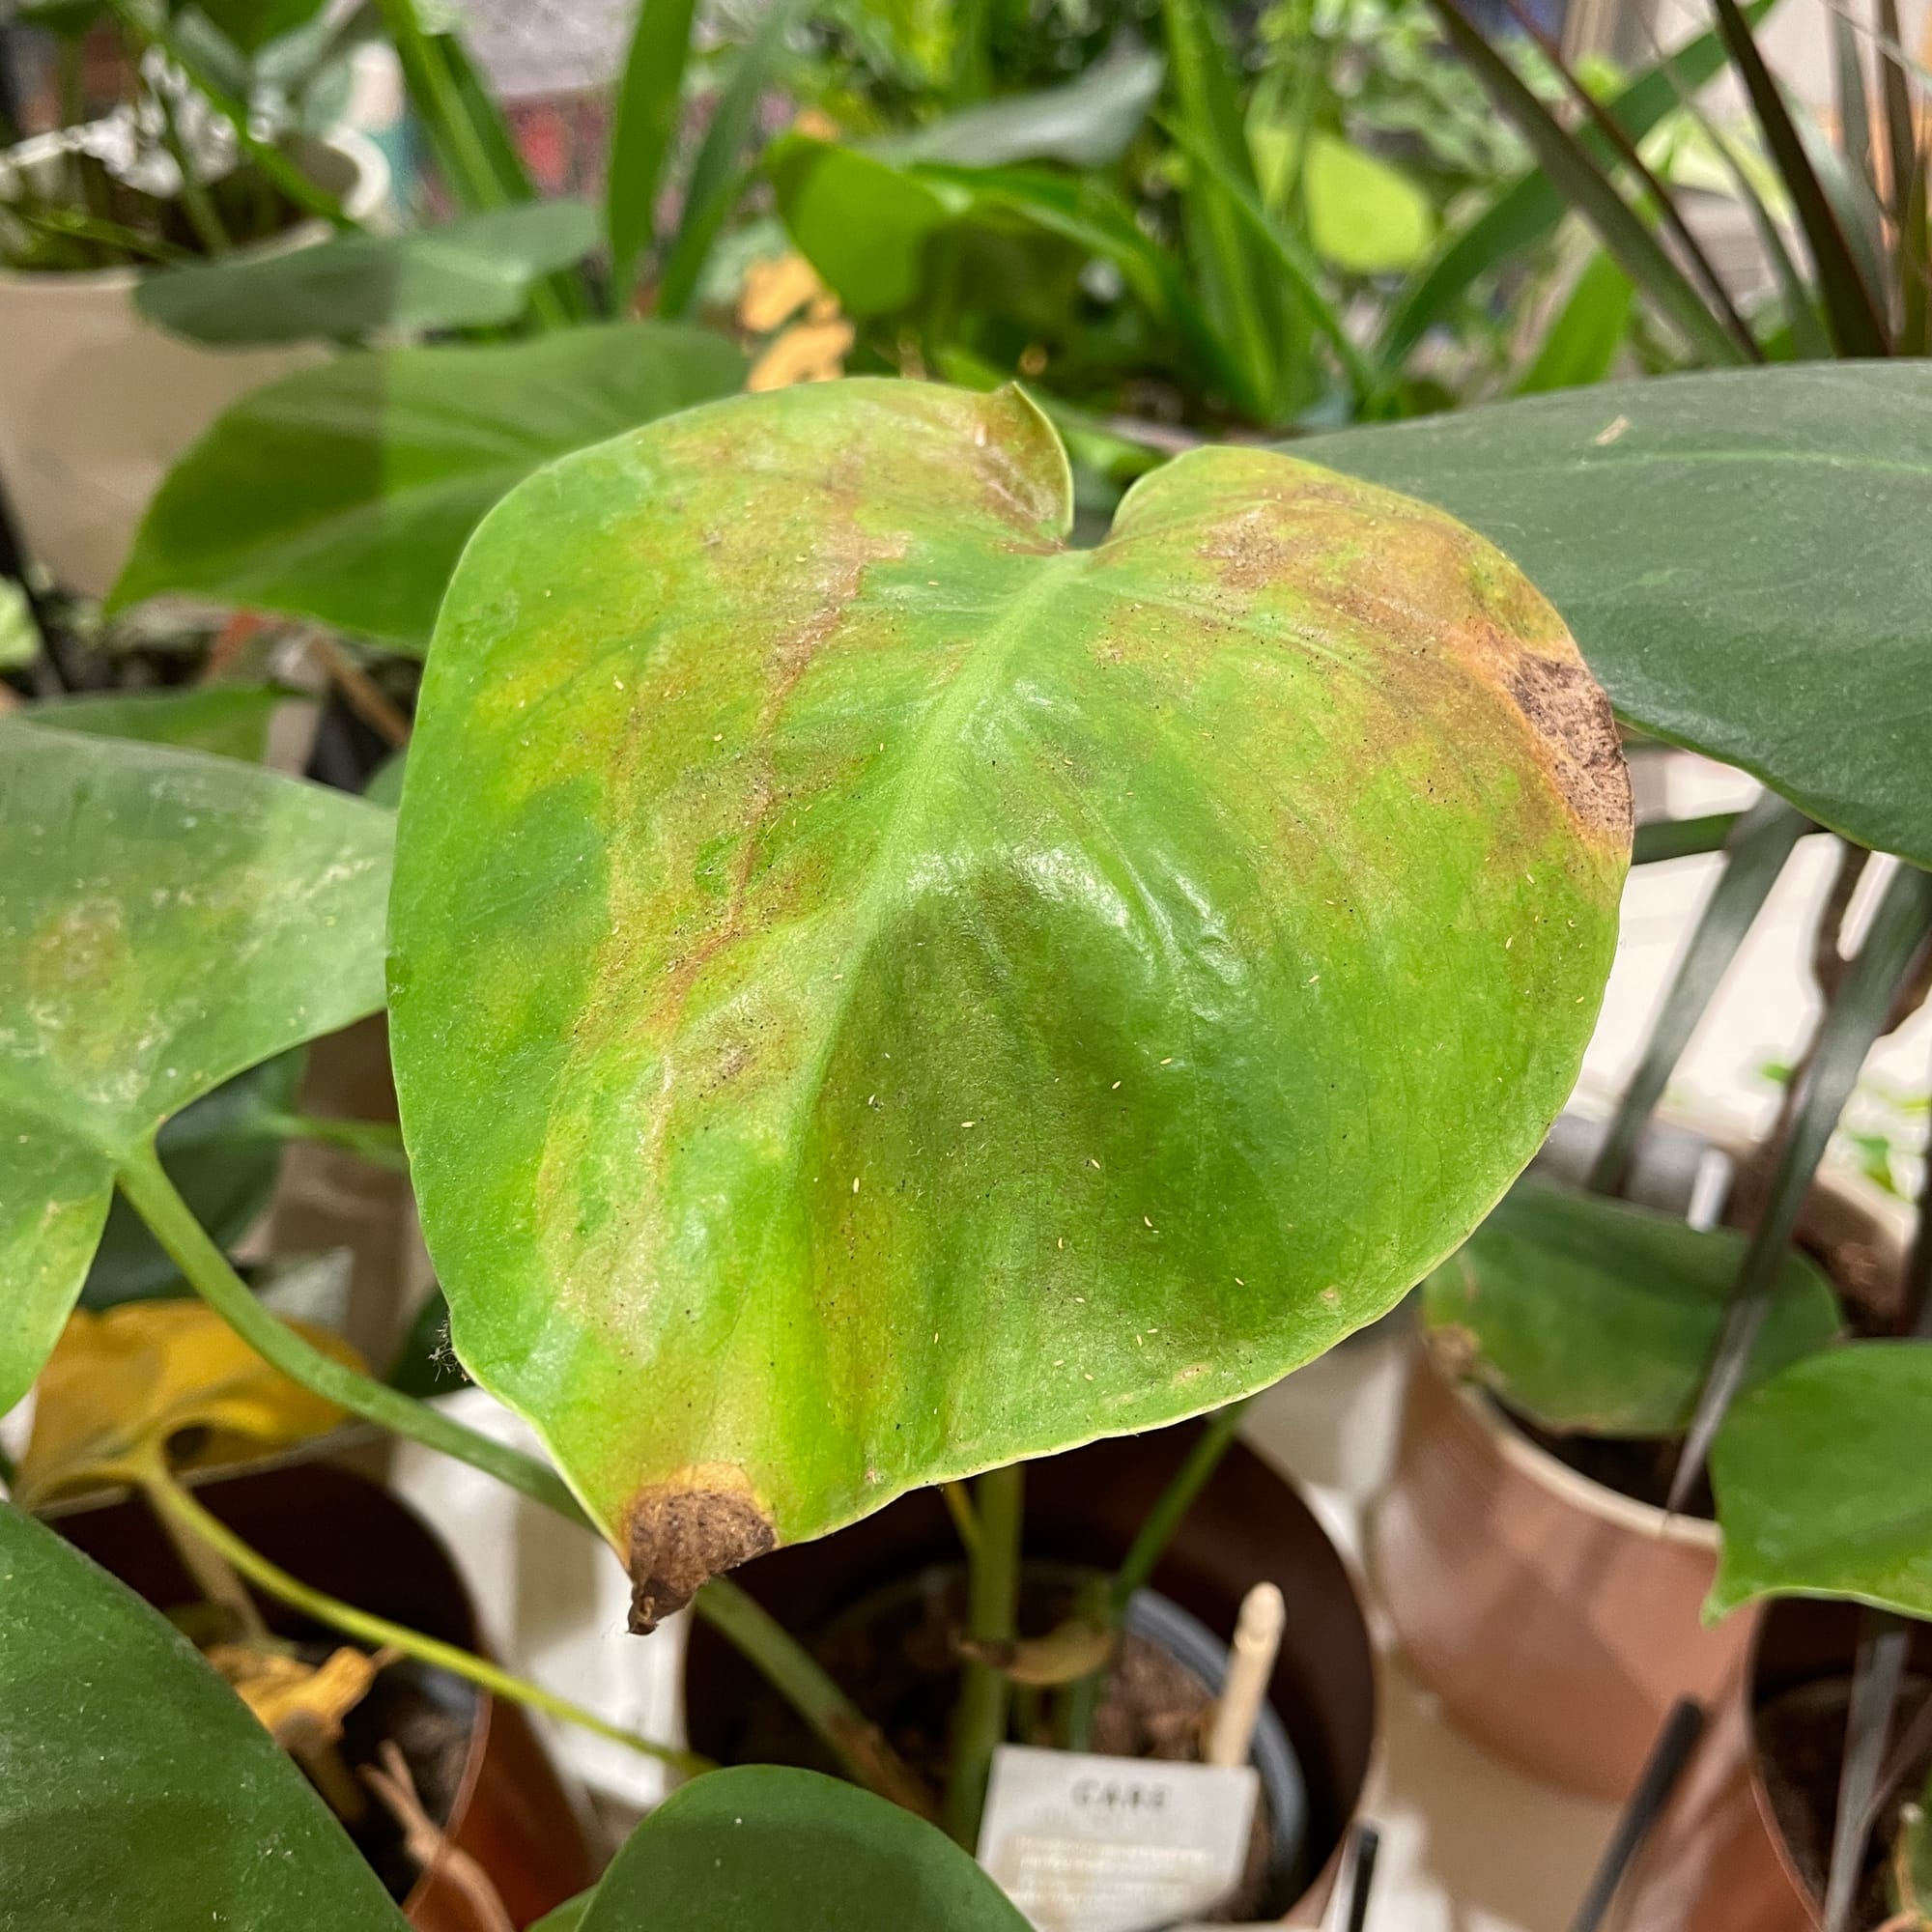
Symptoms - This virus is most likely to attack Aroids like Monstera and Philodendrons, causing small, yellow lesions or patterns to on the leaves. At first, symptoms look similar to a nutrient deficiency or over-exposure to the sunlight, but as conditions worsen, you'll eventually find colonies of deeper affected areas.
Causes - The virus is usually pre-existent within the plant's cellular make-up, but some cases may arise from neighbouring plants. Other reasons include the multi-use of pruning scissors without being washed in between utilisation, re-using old potting mix, and pests that may spread from plant to plant, thus taking the virus with them.
Action Needed
- Inspect and remove any seriously-affected areas with a clean pair of scissors. Be sure to thoroughly wash the utensil afterwards with hot soapy water to avert a spread.
- Take the plant outside and perform a gentle hose-down. Although this won't directly remove the disease, it'll remove the thin layer of dust that will increase photosynthesis and therefore energy production. Repeat this step monthly.
- Cast an eye over the plant for further development, removing any affected areas or fallen debris as you go.
- Quarantine the specimen at least 50cm (almost 2ft) from other plants and try to segregate accessories (watering cans, etc.).
- Unfortunately, there are no known products that can wholly remove this disease. It'll be highly unlikely to eradicate this problem, so keeping maintained control and regular feeds will help contain the disease.
- Supplement using a nitrogen-based fertiliser ('houseplant'-labelled feed) to help the development of new, disease-free growth. This will help the production of photosynthesis that'll promote stored energy within the plant, thus giving it the best chance of survival. If you have a newly-purchased specimen, be sure to contact the store or grower to make them aware of the virus, as this is most likely affecting other customers.
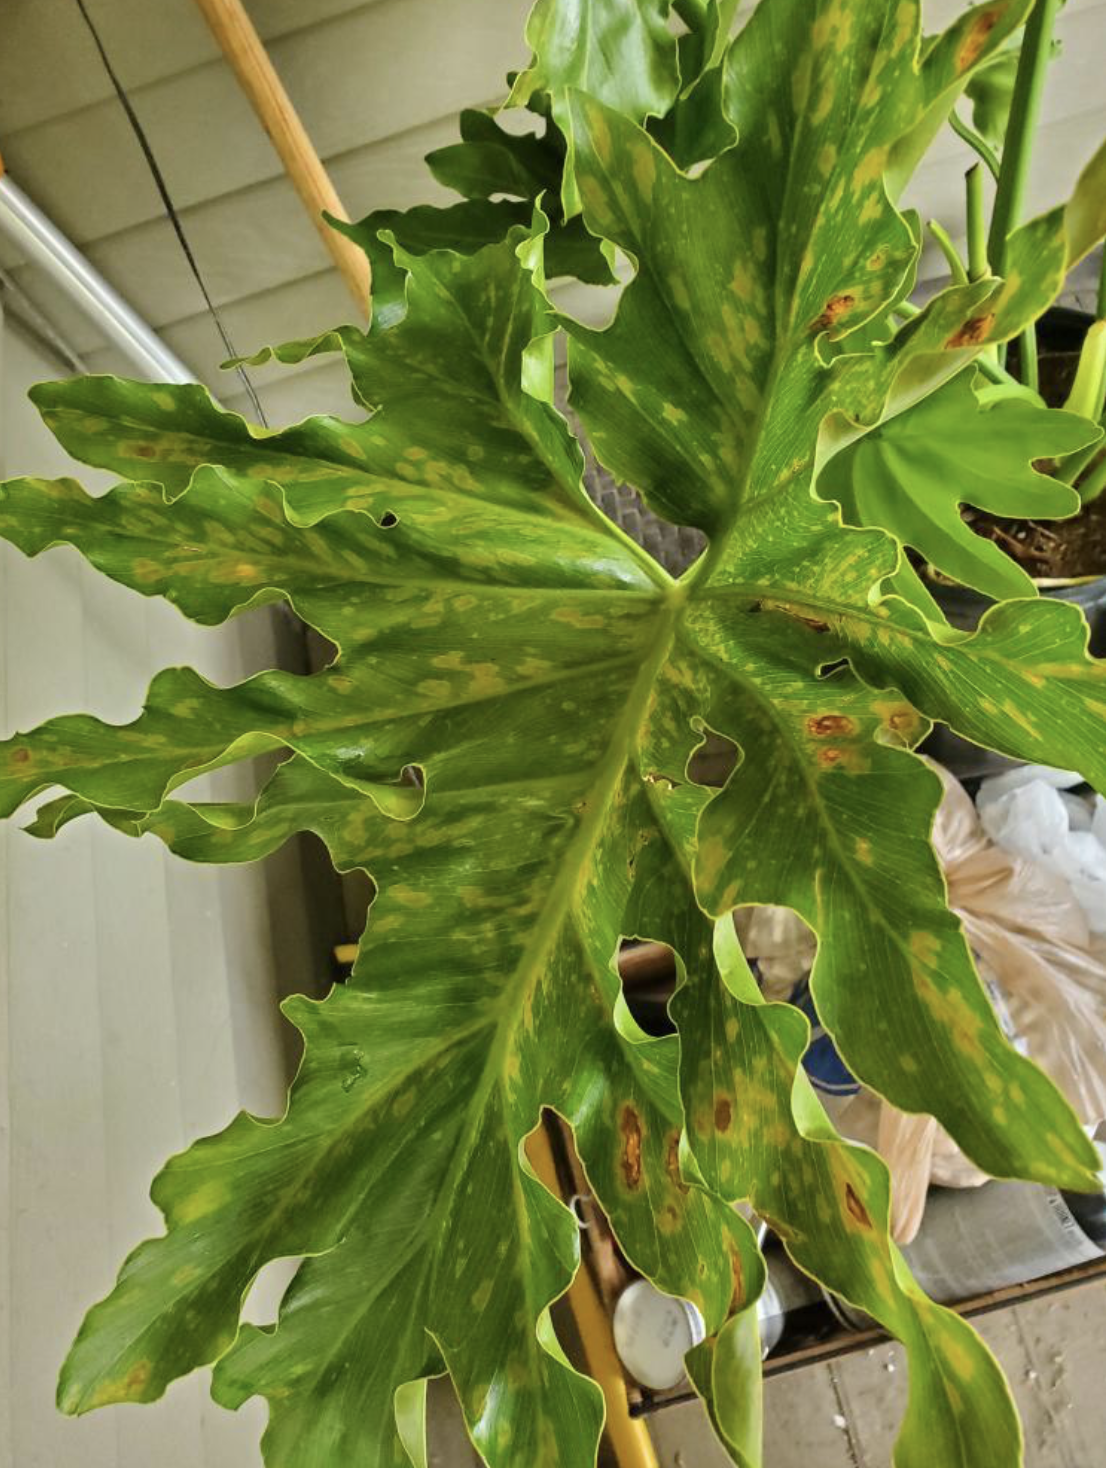 Another case of Mosaic Virus on a Philodendron selloum.
Origins
The genus, Philodendron, consists of 489 species ranging from southern Mexico to Northern South America, with all points in between. The genus was first taxonomically described in Schott in 1831, during a visit to the Americas. Its name comes from Greek meaning 'love or affection' (philo) and 'trees' (dendron), which refers their growth habits in the wild. Most Philodendrons are either epiphytes or hemiepiphytes, with the latter starting life as a seedling on the ground before needing support (by a nearby tree) to maintain vertical growth. In the wild, it's very rare to see one growing purely on the ground unsupported, due to their tendencies to fall over once they reach a certain height.
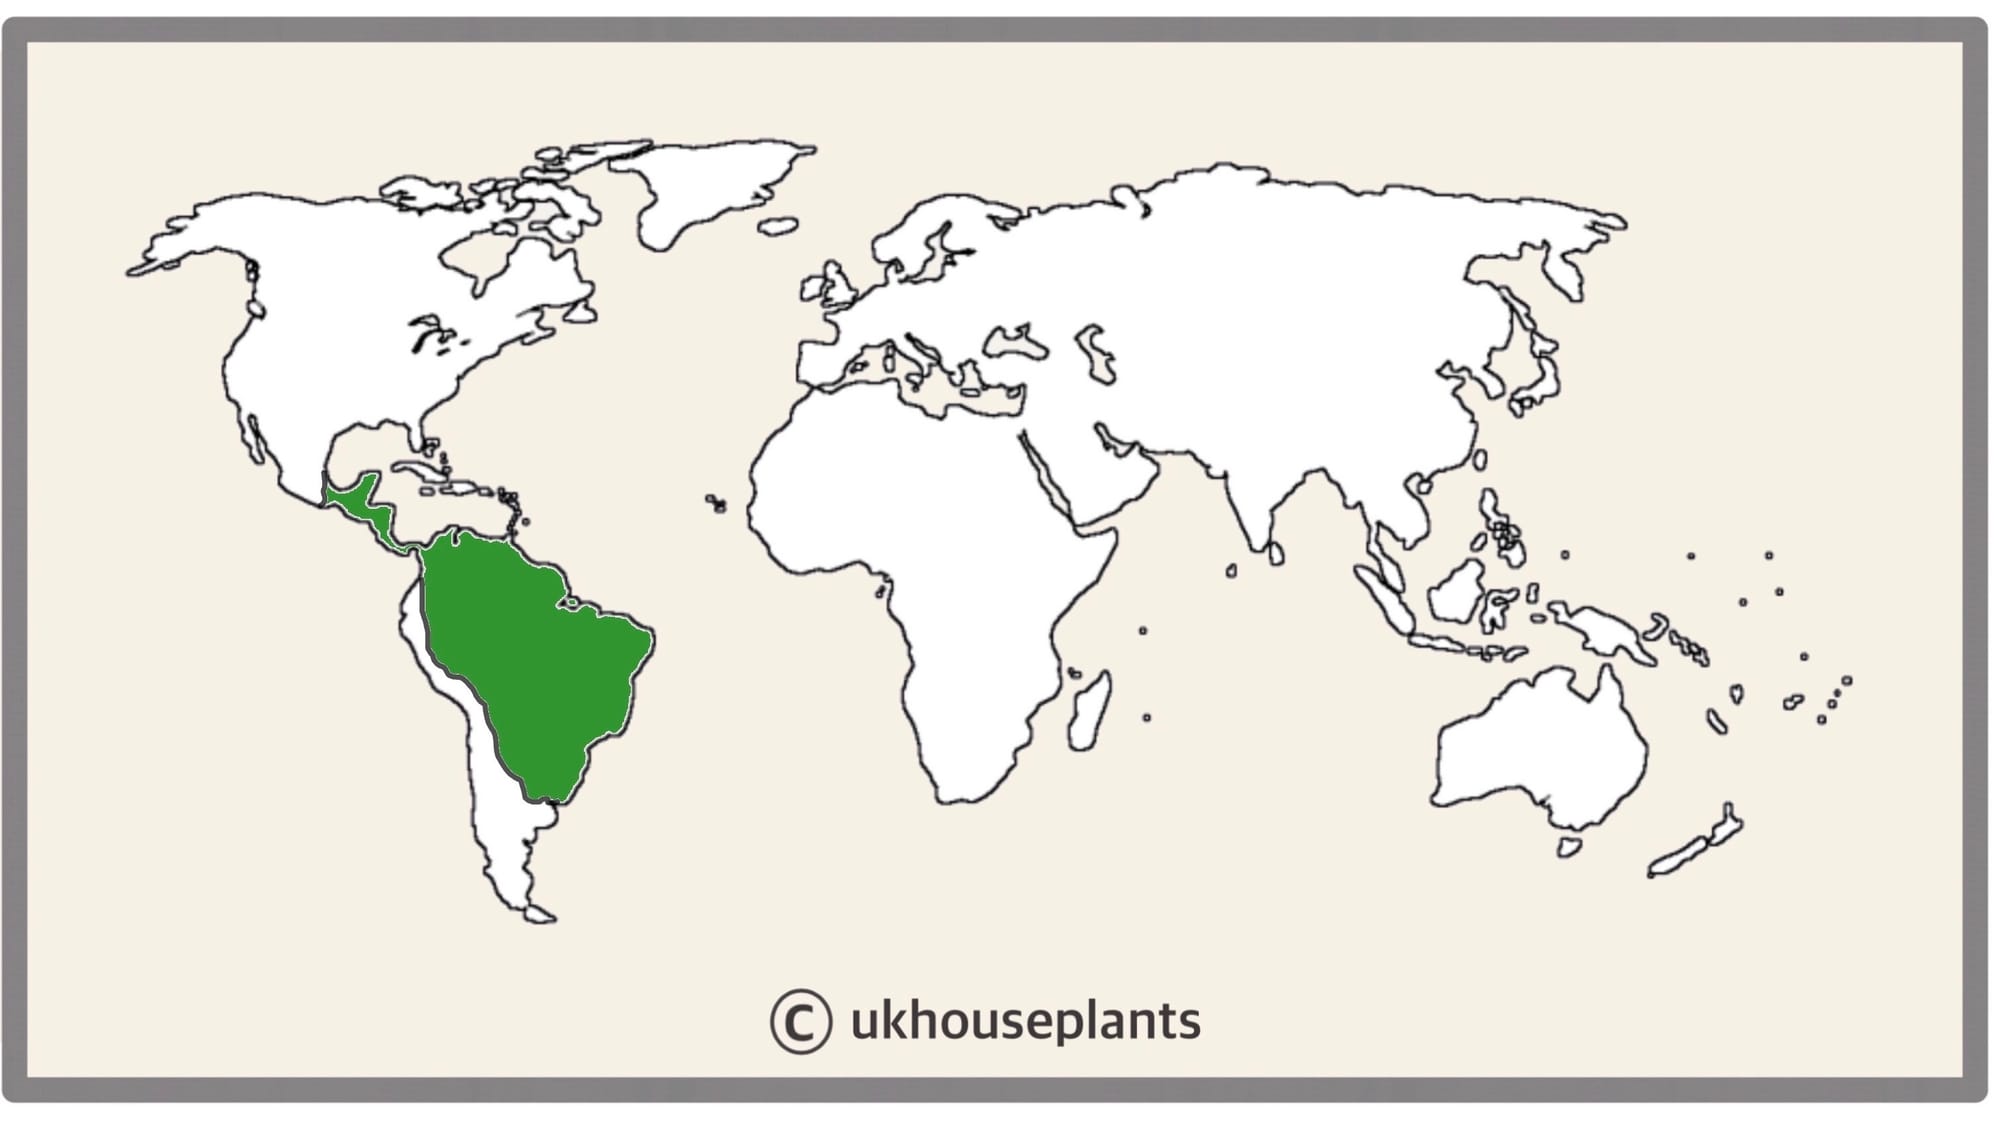 The Distribution of Philodendron.
Temperature
12° - 30°C (54° - 86°F)
H1b (Hardiness Zone 12) - Can be grown outdoors during the summer in a sheltered location with temperatures above 12℃ (54℉), but is fine to remain indoors, too. If you decide to bring this plant outdoors, don't allow it to endure more than an hour of direct sunlight a day as it may result in sun-scorch. Regularly keep an eye out for pests, especially when re-introducing it back indoors.
Spread
Up to 2.5m in height and 0.8m in width, with the ultimate height taking between 5 - 10 years to achieve. Philodendrons that naturally grow in the wild can reach heights of up to ten metres; however, with smaller root systems and less favourable growing conditions, they'll only grow to three metres indoors.
Pruning & Maintenance
Remove yellow or dying leaves, and plant debris to encourage better-growing conditions. While pruning, always use clean scissors or shears to reduce the chance of bacterial and fungal diseases. Never cut through yellowed tissue as this may cause further damage in the likes of diseases or bacterial infections. Remember to make clean incisions as too-damaged wounds may shock the plant, causing weakened growth and a decline in health.
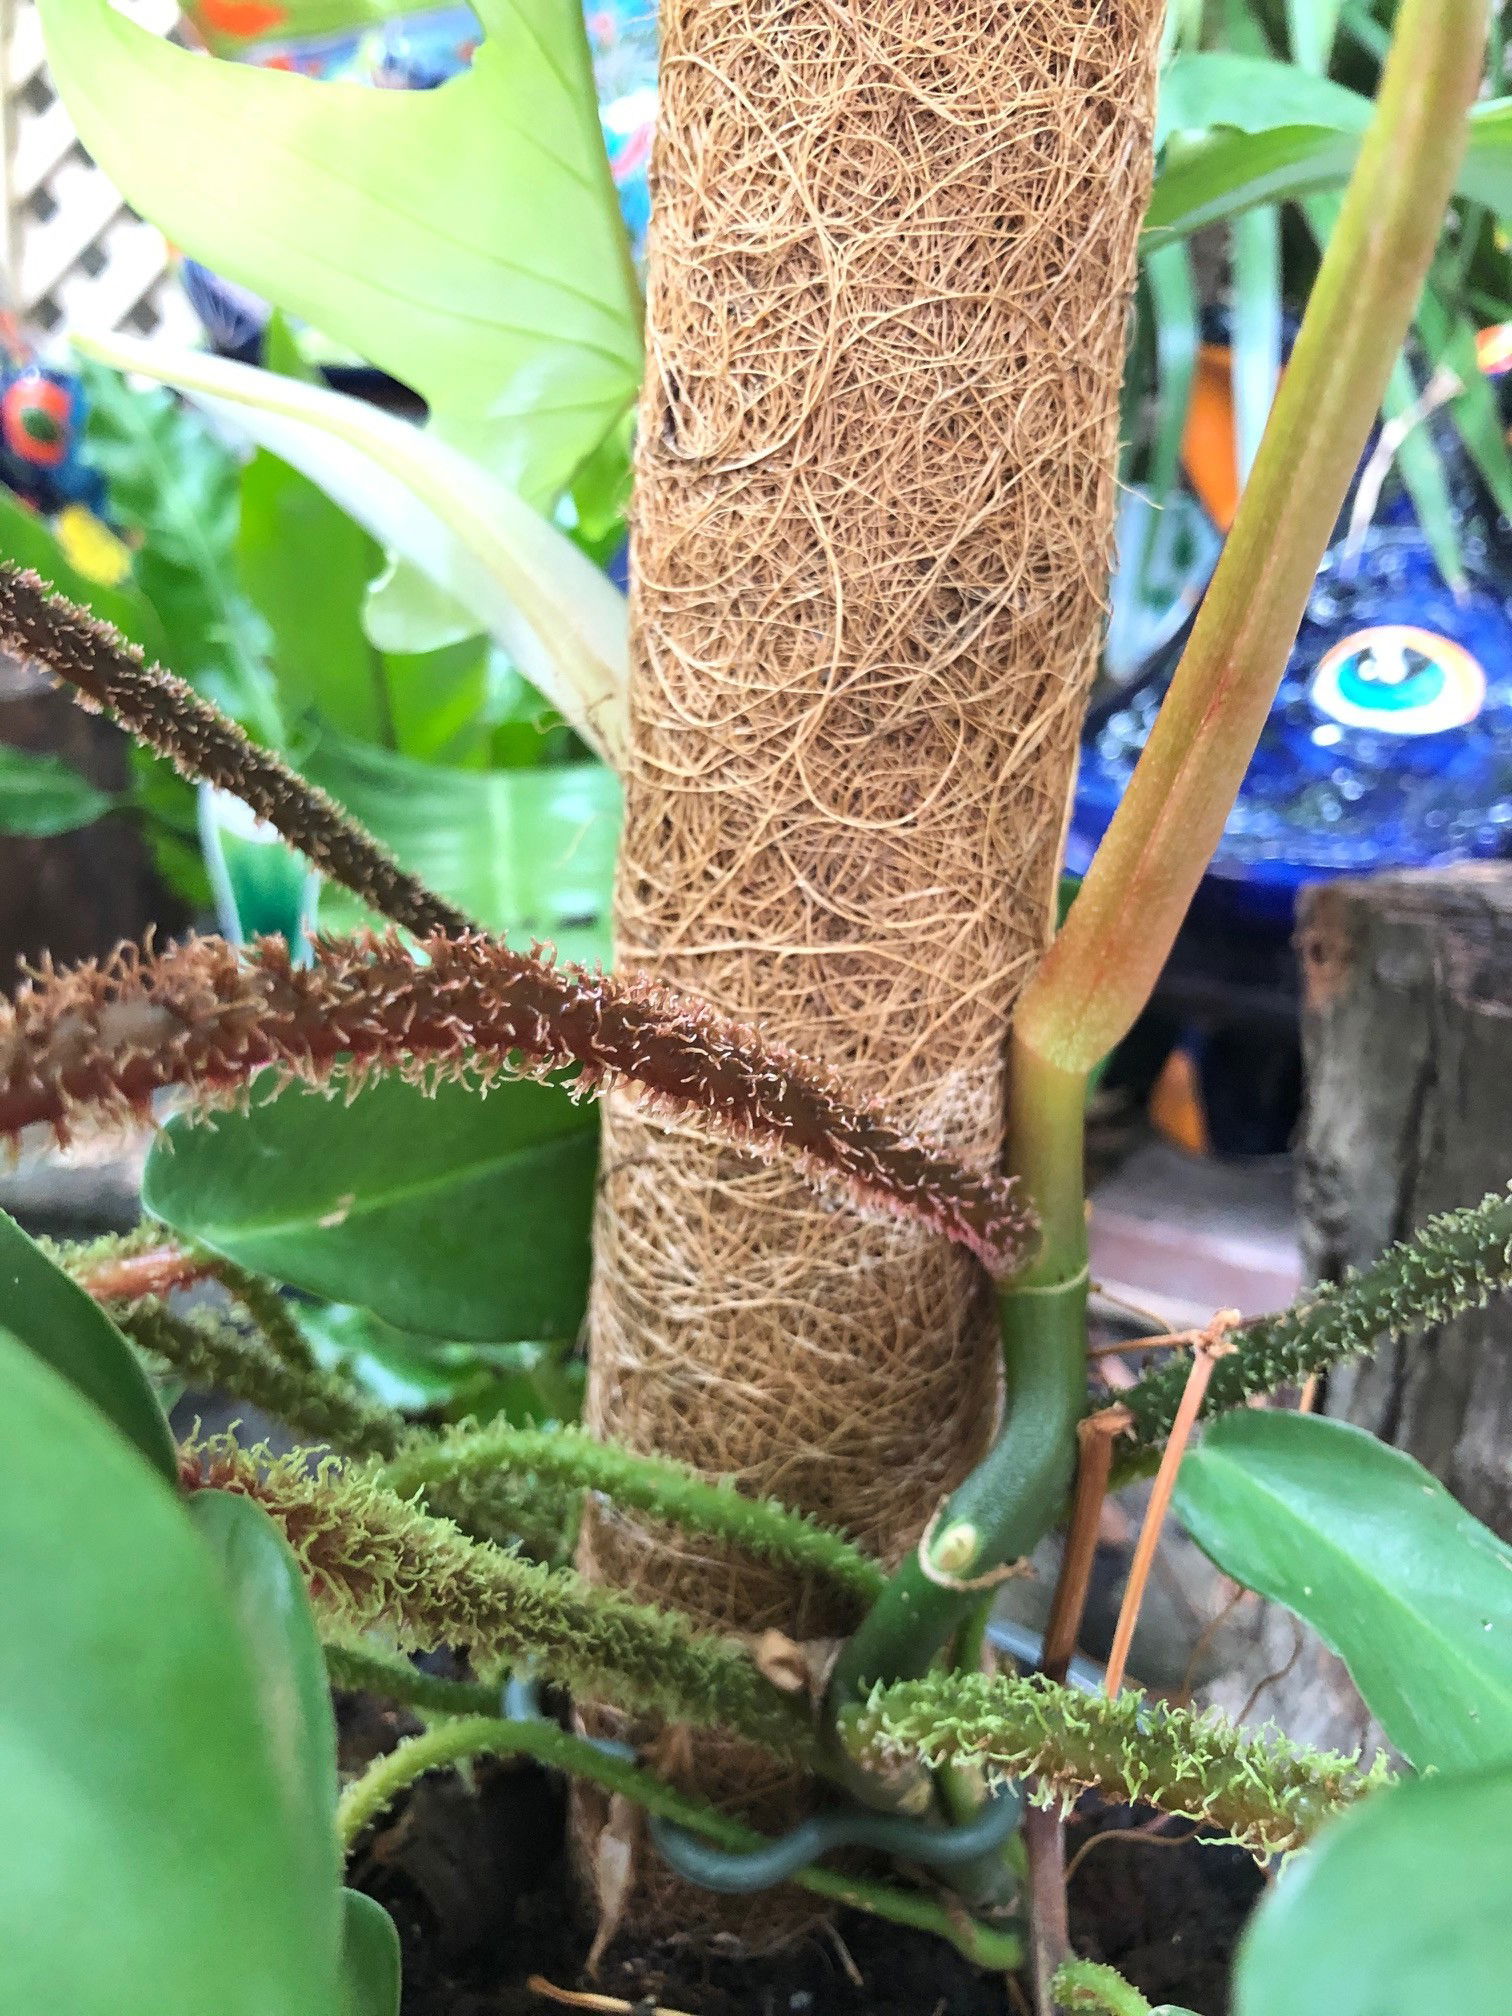 The name of the species pictured above, (P. squamiferum) derives from Latin translating to 'scale-bearing', in reference to its unusual petioles.
Propagation
Via Seed or Stem Cuttings.
Seeds (Moderate) - Soak the seeds in lukewarm water for around 24hrs in a dark location, preferably on top of an operating radiator. The best soil to use is a 'Houseplant' labelled potting mix, however, multipurpose compost with added perlite and sand is just as good. Set the seeds around half an inch into the potting mix, resisting the temptation to compact the soil. Maintain evenly moist soil and allow the excess water to freely drain from the pot's base to prevent water-logged conditions. The ideal location for successful germination is in a bright, indirect setting with temperatures above 18℃ (64℉) with bottom-heat. Keep the pot in a transparent bag to provide a stable level of humidity, along with longer lasting compost moisture. Germination may take up to a four months, so don't discard any unsuccessful seeds until this threshold has been surpassed. Remove the bag once the seedlings produces its second leaf and then split them up into their own 3cm pots.
Stem Cuttings via Water Propagation (Easy)
- Choose the healthiest, most established vines. This propagation method can be taken from spring to summer, using between two to five leaves, with the main stem being at least 10cm (3 inches) in length with two nodes (one for foliar development and the other for root growth). Although more nodes are fine, be sure only to submerge the bottom ones in water to avoid unneeded rooting elsewhere on the stem. (More on this later)
- Cut directly below a node using a clean knife to reduce bacteria count. Remove the lower half of the leaves and place the vines into a container of lukewarm water. Be sure to submerge at least one node into the water, or else the root development will be hindered.
- The leaves must stay above the waterline for the prevention of disease.
- Replace the water weekly, using lukewarm water to avert shocking the cutting with cold temperatures.
- Once the roots surpass 10cm (3 inches) in length, it's time to pot the cutting.
- Choose a potting mix - as long as it has a well-draining nature, most soils are fine. Either 'Houseplant' labelled compost or our Monstera & Philodendron Potting Mix is suitable for potting up.
- Use a 12cm (4 inch) plastic or coir pot that has suitable drainage holes. Try not to transplant the cuttings too deeply in the soil as rot may occur.
- Fill the bottom quarter of the pot with soil, before sitting the cutting on top. Fill the remaining gaps with compost until the soil line reaches four-fifths of the pot's height. Lightly tap the pot's side to consolidate the soil into place. (Don't press down on the soil!)
- Provide bright, indirect light in a windowsill or under a grow light, along good humidity by placing the potted plant into a transparent plastic bag for the first couple of weeks.
- Open the bag every two days for an hour for the prevention of disease. After a month of being placed in soil, remove it from the bag and follow the care tips provided above.
Stem Cuttings via Soil Propagation (Moderate)
This second option is still easy to perform, but it'll need some extra steps to avoid dehydration while the cutting roots in the soil.
- Choose the healthiest, most established vines. This propagation method can be taken from spring to summer, using between two to five leaves, with the vine being at least 10cm (3 inches) in length with two nodes (one for foliar development and the other for root growth). Although more nodes are fine, be sure only to submerge the bottom ones in water to avoid unneeded rooting elsewhere on the stem. (More on this later)
- Cut directly below a node using a clean knife to reduce bacteria count. Remove the lower half of the leaves and place the vines into a container of lukewarm water. Be sure to submerge at least one node into the soil, or else the root development will be hindered.
- Choose a potting mix - as long as it has a well-draining nature, most soils are fine. Either 'Houseplant' labelled compost or our Monstera & Philodendron Potting Mix is suitable for potting up.
- Use a 12cm (4 inch) plastic or coir pot that has suitable drainage holes. Try not to transplant the cuttings too deeply in the soil as rot may occur.
- Fill the bottom quarter of the pot with soil, before sitting the cutting on top.
- Fill the remaining gaps with compost until the soil line reaches four-fifths of the pot's height. Lightly tap the pot's side to consolidate the soil into place. The leaves must always stay above the soil-line for the prevention of disease.
- Provide bright, indirect light in a windowsill or under a grow light, along good humidity by placing the potted plant into a transparent plastic bag for the first couple of weeks. Humidity will be your cutting's best friend, so ensure the plant doesn't dehydrate because of dry air.
- Open the bag every two days for an hour for the prevention of disease. After a month of being placed in soil, remove it from the bag and follow the care tips provided above.
Flowers
As Philodendron is part of the Araceæ family, their flowers aren't showy. Much like a Peace Lily's flower body, their flowers consist of a white or green spathe (the spoon-like shell) with the spadix being the site pollination. Blooms can last up to five days and is usually visible during late spring or early summer around 30cm+ from the soil line.
Despite most Philodendrons' readiness to flower in the wild, those grown domestically will take many years to achieve a bloom.
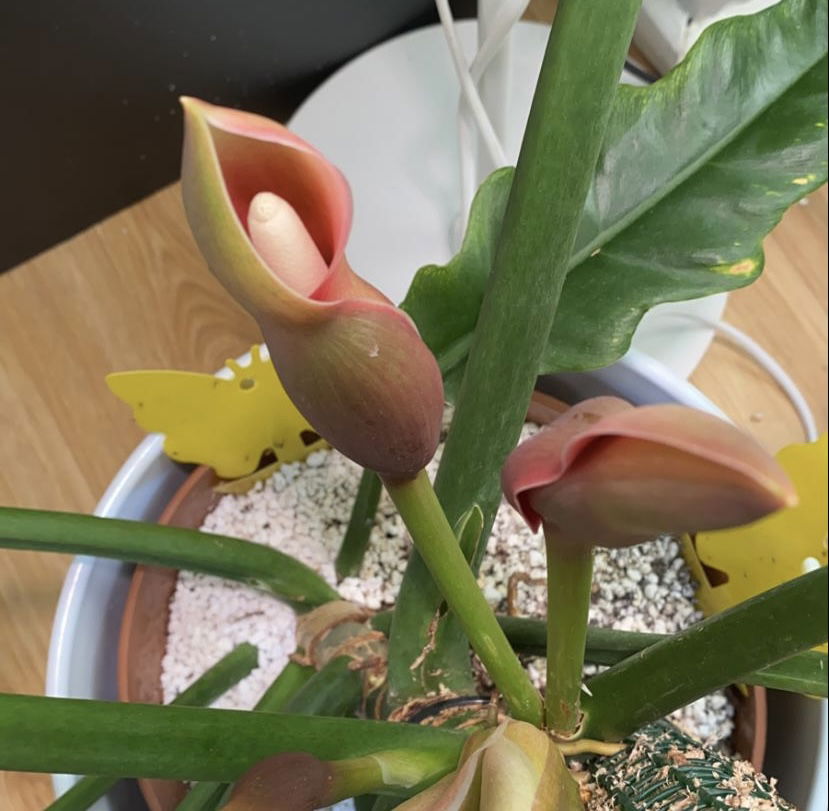 The flower of a Philodendron 'Narrow Escape'.
Repotting
Repot every three years in the spring, using a 'Houseplant' labelled compost and the next sized pot with adequate drainage. Hydrate the plant 24hrs before tinkering with the roots to prevent the risk of transplant shock. For those that are situated in a darker location, add a thin layer of small grit in the pot's base to improve drainage and downplay over-watering. Click here for a detailed step-by-step guide on transplantation, or via this link to learn about repotting with root rot.
If you're thinking of repotting a specimen that's growing up a moss pole, never remove the attached aerial roots as the disturbance could put further stress on the plant. Extend by purchasing another same-sized pole and pushing directly into the hollow hole in the original's top - its moss-like material may have to be cut off from the top to access the hollow centre. Get a long, sturdy stick that has a similar length to the two poles combined and place in the two's centre to support the weight. Always perform the repot BEFORE adding another pole, as it'll prove more challenging due to the weight distribution and overall balance. NEVER remove soil from the roots, or over-touch the root system, as this will cause transplant shock and possible death.
Book a 1-to-1 video call with Joe Bagley if you'd like a personal guide to repotting your houseplant. This will include recommending the right branded-compost and pot size, followed by a live video call whilst you transplant the specimen for step-by-step guidance and answer any further questions!
Pests & Diseases
Keep an eye out for mealybugs, spider mites, scale & thrips. Typical diseases associated with this genus are leaf-spot disease, botrytis & root rot. Click on this link for further information about how to identify and address any of these issues.
Toxicity
Members of the Aroid family contain poisonous calcium oxalate crystals, with other specimens including Alocasia, Peace Lilies & ZZ Plants. When digested, it may result in vomiting, a sense of nausea and a loss of appetite.
Retail Locations
Homebase, B&Q, IKEA, Dobbies, Blue Diamond, Online Stores.
Book a 1-to-1 Call with Joe Bagley
If you need further advice with your houseplants, book an advice call with ukhouseplants' friendly and expert writer today! This can be done via a video or audio call on most apps, including Facebook, FaceTime & Skype. A ten-minute call costs £5.99 (US$7), or £15.99 for thirty minutes. You can ask multiple questions, including queries on plants, pests, terrariums, repotting advice and anything in between. Please consider supporting this service to keep ukhouseplants thriving!
Comments