Spathiphyllum wallisii
Listen to the Peace Lily Podcast here!
Contents
- Top Tips
- Location, Light, Humidity & Fertilisation
- Dormancy Care & Annual Flowers
- Common Issues
- Origins, Temperature, Propagation, Repotting & Toxicity.
Need the answer to a specific plant issue? Book a 1-to-1 video call with THE HOUSEPLANT DOCTOR™, the website's friendly author, to overcome and address your niggling problem! Available on iMessage, WhatsApp, Facebook Messenger & more.
Top Tips & Info
- Care Difficulty - Very Easy
- Provide a bright, indirect location with the absence of prolonged exposure to the sun.
- Near-continual soil moisture is key for consistent growth, allowing the top third to dry out in between waters. The best way to check if it needs another drink is when the leaves (or flowers) begin to droop.
- Although average room humidity won't be too much of an issue, introduce a pebble tray to promote a more reliable environment.
- Fertilise using a 'Houseplant' labelled feed every four waters in the spring and summer, reducing this to every six in the colder months.
- Keep an eye out for Spider Mites that'll form webs on the under-leaves of the plant.
- Reduce the temperature during the dormancy period in winter for the best chance of developing flowers in the early spring.
- Repot every two or three years, using a 'Houseplant' labelled compost and the next sized pot with adequate drainage holes. Buy our premium Peace Lily Soil Mix here!
- Peace Lilies are the second best air-purifying houseplant (behind Florist Chrysanthemums) according to NASA's 'Clean Air Study' in 1989. These plants will absorb the five most common airborne toxins in a domestic household, including Benzene, Formaldehyde & Ammonia.
- Scroll down to 'Dormancy Care & Annual Flowers' to learn more about achieving blooms each year!
Location & Light - 🔸
Peace Lilies can thrive a whole range of indirect light levels, including excessively dark settings like Devil's Ivy and Thanksgiving & Christmas Cacti. Avoid intense direct sunlight for more than an hour a day as it'll cause terminal damage to its leaves; sun-scorch symptoms include pale-yellow leaves, stunted growth and brown patches. If this has happened to yours, relocate it to a slightly darker location and remove severely affected areas; although the already-damaged leaves will not return back to its former glory, new growth will be considerably greener if kept in good cultivation.
If you're searching for a shade-tolerate specimen, Peace Lilies are the one for you. Not only will they thrive in shaded areas, but cooler environments will also boast longer lasting flowers in the spring and summer months.
Water - 🔸🔸🔸
The best time to water a Peace Lily is once the leaves (or flowers) start to droop, which may be as often as every five days in warmer rooms. The wilting is usually harmless and should bounce back within eight hours. If the Lily is in bloom, avoid applying cold water due to the root system's sensitivity to temperature change that might shorten the flowering period. A final, and very useful tip, is to only water the outer edge of the rootball and not against its stem. The soil generally drains quicker at the edge of the soil compared to the centre, which is exactly what a Peace Lily will prefer. Under-watering symptoms include stunted growth, flower loss, wilting, crispy brown patches developing on its leaves, and gradual decline. These issues are usually down to too much sunlight or heat, a much needed repot or sheer forgetfulness. Over-watering symptoms include lower yellowing leaves, stunted growth, browned foliage, wilting or development of brown spots on its leaves. These issues are usually familiar with either too little light or heat, or overly soggy soil. If you feel that root rot is the case, be sure to click on this link for more info.
Humidity - 🔸🔸🔸
Create a humidity tray to provide a moist and stable environment for your plant. If the surrounding saturation is too low or the heat too high, its leaves may start to brown over and curl, especially in direct sunlight. Hose the foliage down from time to time to hydrate the leaves and keep the dust levels down. Inconsistent levels of surrounding air moisture will upset the Lily, resulting in flower loss and stunted growth.
Fertilisation - 🔸🔸
Feed every four waters during the growing period and every six in the autumn and winter, using a 'Houseplant' labelled fertiliser. Never apply a 'ready to use’ product into the soil without a pre-water first, as it may burn the roots and lead to yellowed leaves.
Dormancy Period & Annual Blooms
The combination of persistent droughts, cooler temperatures and long nights during winter will all contribute to the enhanced chance of flowers. Repotting isn't advised, and instead may hurt the chances because of transplant shock.
The following steps should be taken from late autumn to early spring to provide the best period of dormancy. Inflorescences should appear between mid-winter until early summer.
Sunlight
Provide a bright, indirect location with the avoidance of artificial lighting during the night. To prevent the chance of sun-scorch, never situate a Peace Lily in more than two hours of winter sun, or one hour in the summer sun.
Hydration
Reduce hydrations so that the soil becomes almost dry in between irrigations and avoid over-watering or the use of cold water for best results. Provide a pebble or humidity tray to counteract the dry air caused by operating radiators.
Occasional Feeds
During the dormancy period, only supplement once or twice to carry through until the following spring using a 'Houseplant' labelled fertiliser. If buds develop in the stem's centre, use a 'Flowering Plant' or Tomato fertiliser for the enriched levels of potassium that'll compliment flower development.
Reduce Everything
This one is to remind you that everything needs to be reduced - especially the temperature.
Temperature
This is the most significant step; reduce the temperature down by around 5℃ compared to the summertime or place in a room that's around 12℃ (54℉). The drop in temperature should ideally last until the inflorescence finishes blooming, although it can still be transferred into the main house as long as it sits on a pebble tray. You'll be at a significant disadvantage if the ambient temperature is kept constant throughout the year, as Peace Lilies will only respond with flowers in cooled environments. Never exceed the minimum temperature as it could lead to plant death or yellowed foliage at a bare minimum.
Common Issues with Peace Lilies
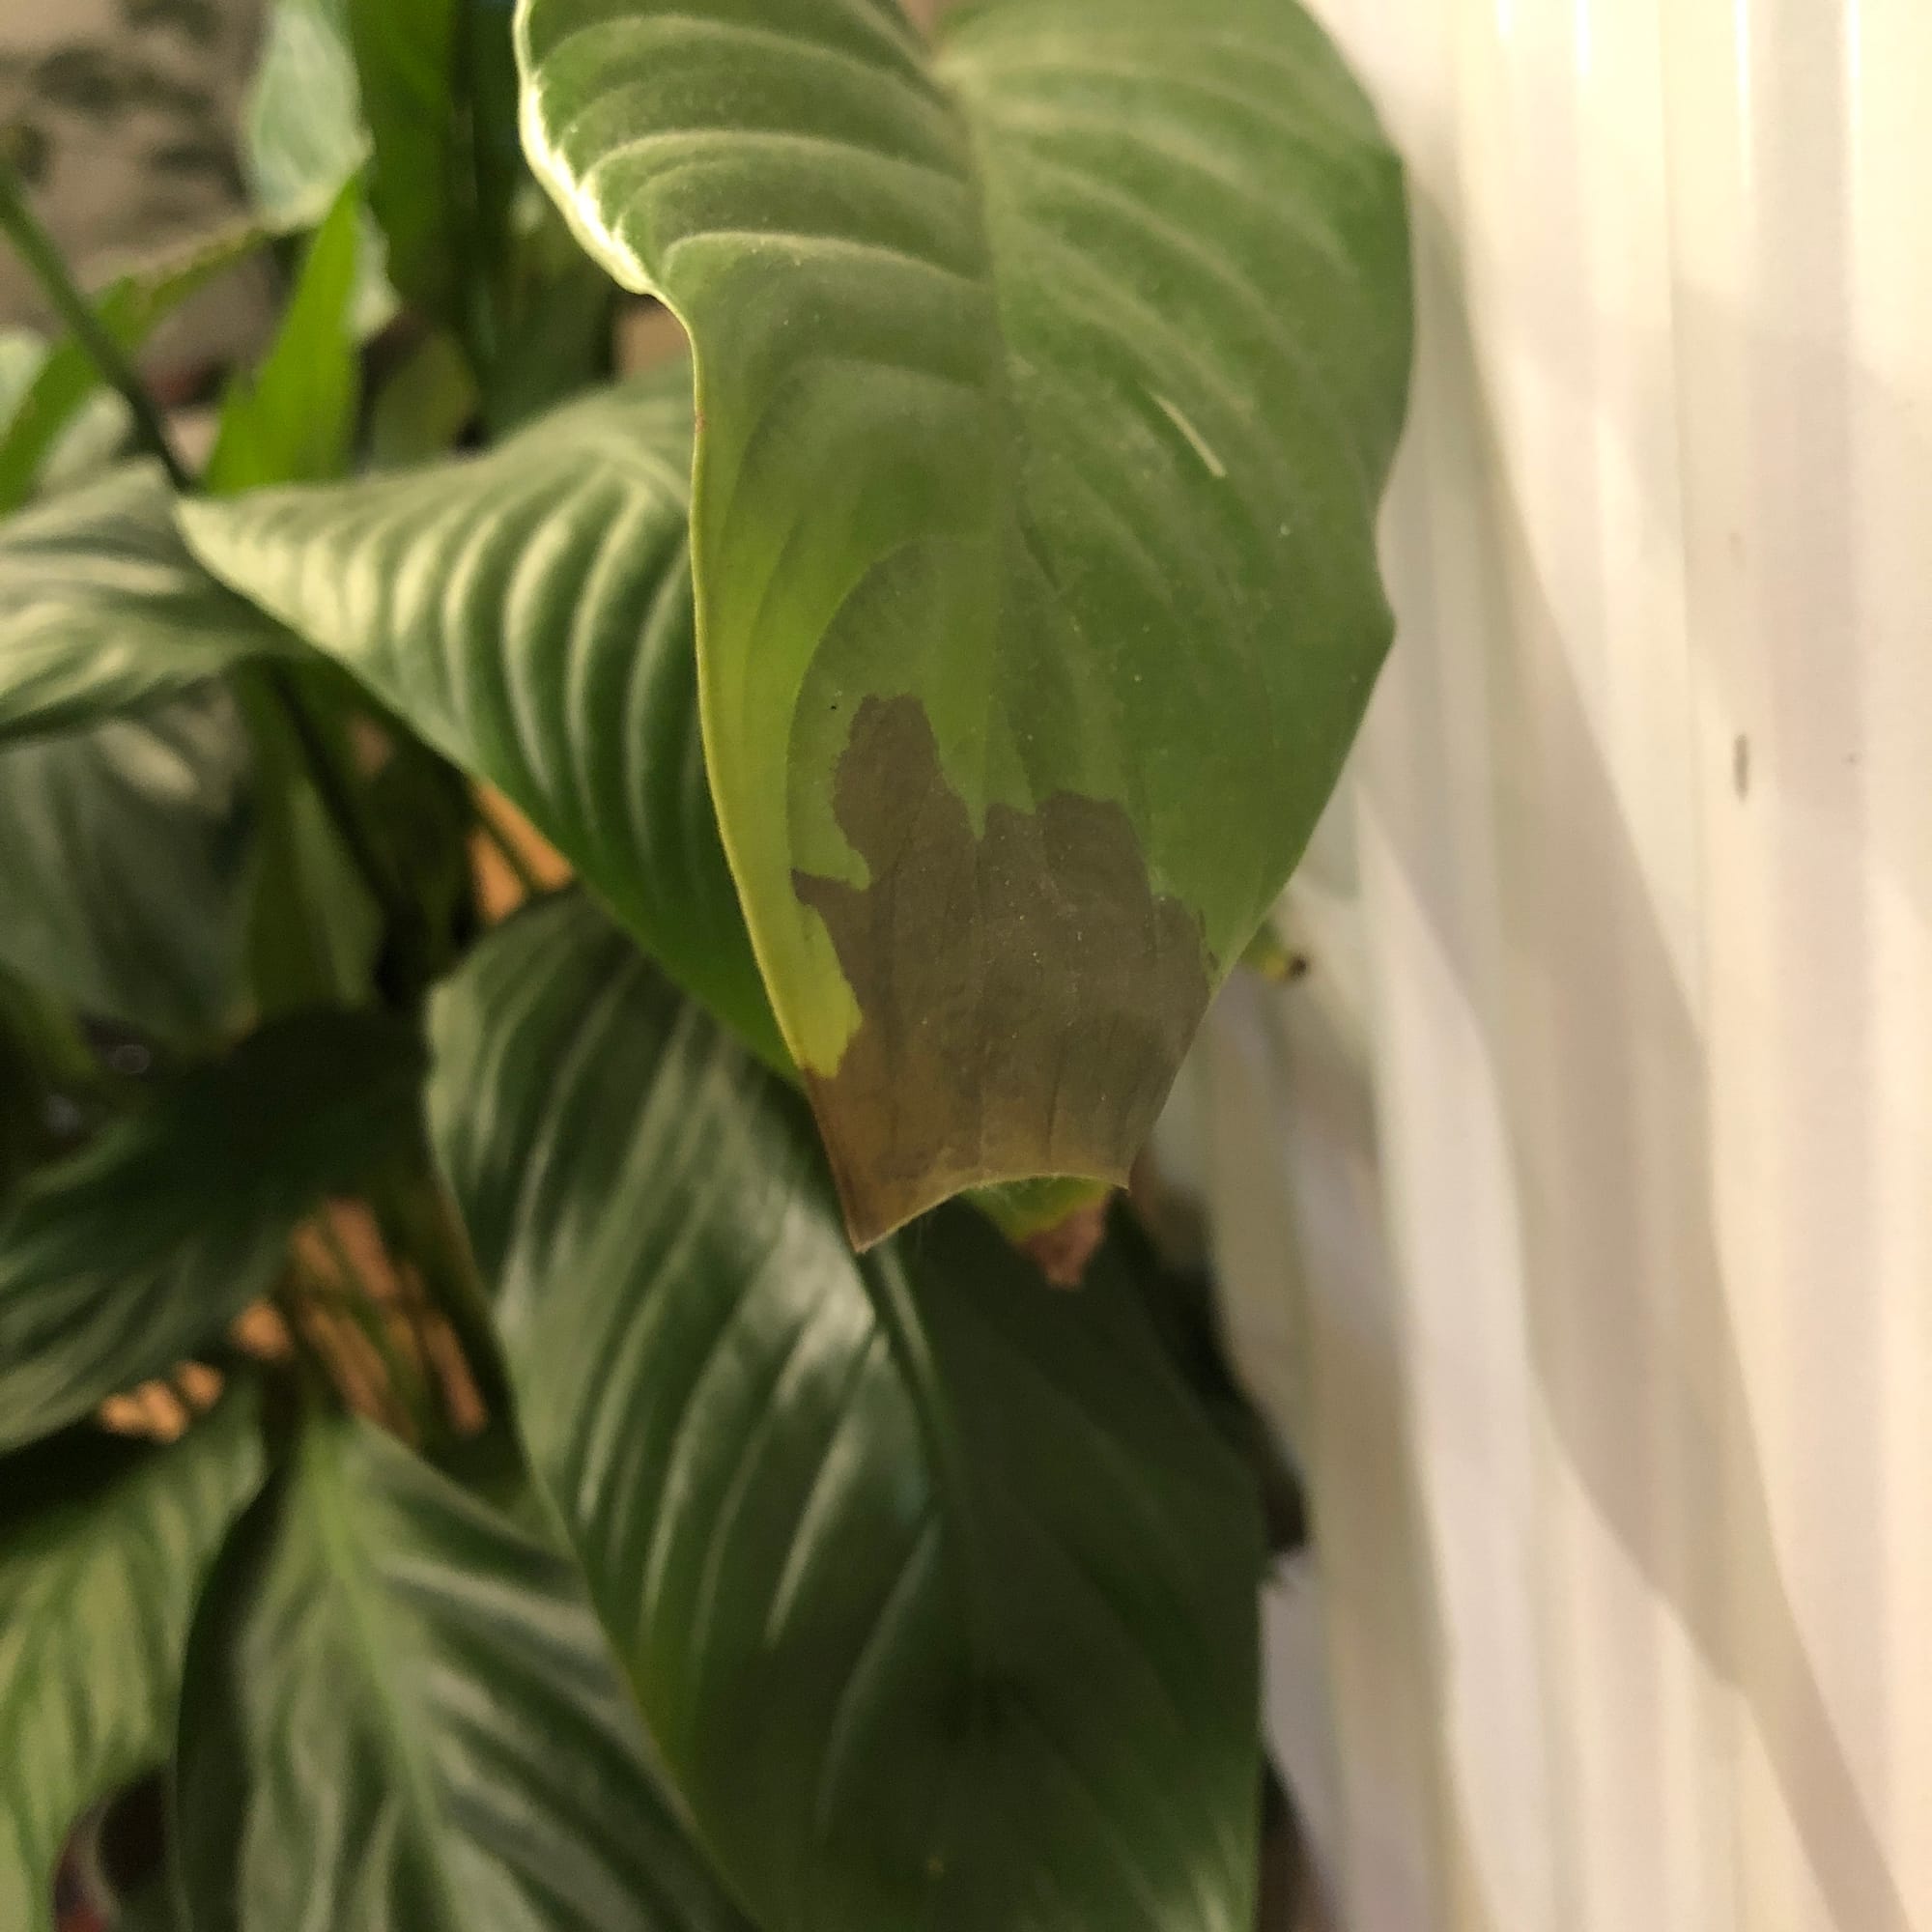
Too low humidity can cause browning leaf tips with yellow halos. Although this won't kill your specimen, you may want to increase the local moisture to prevent the new growth from adopting these symptoms. Mist or rinse the foliage from time to time and create a humidity tray whilst the heaters are active to create a stable environment for your specimen. A sudden decline in flower health is another key symptom of too dry air.
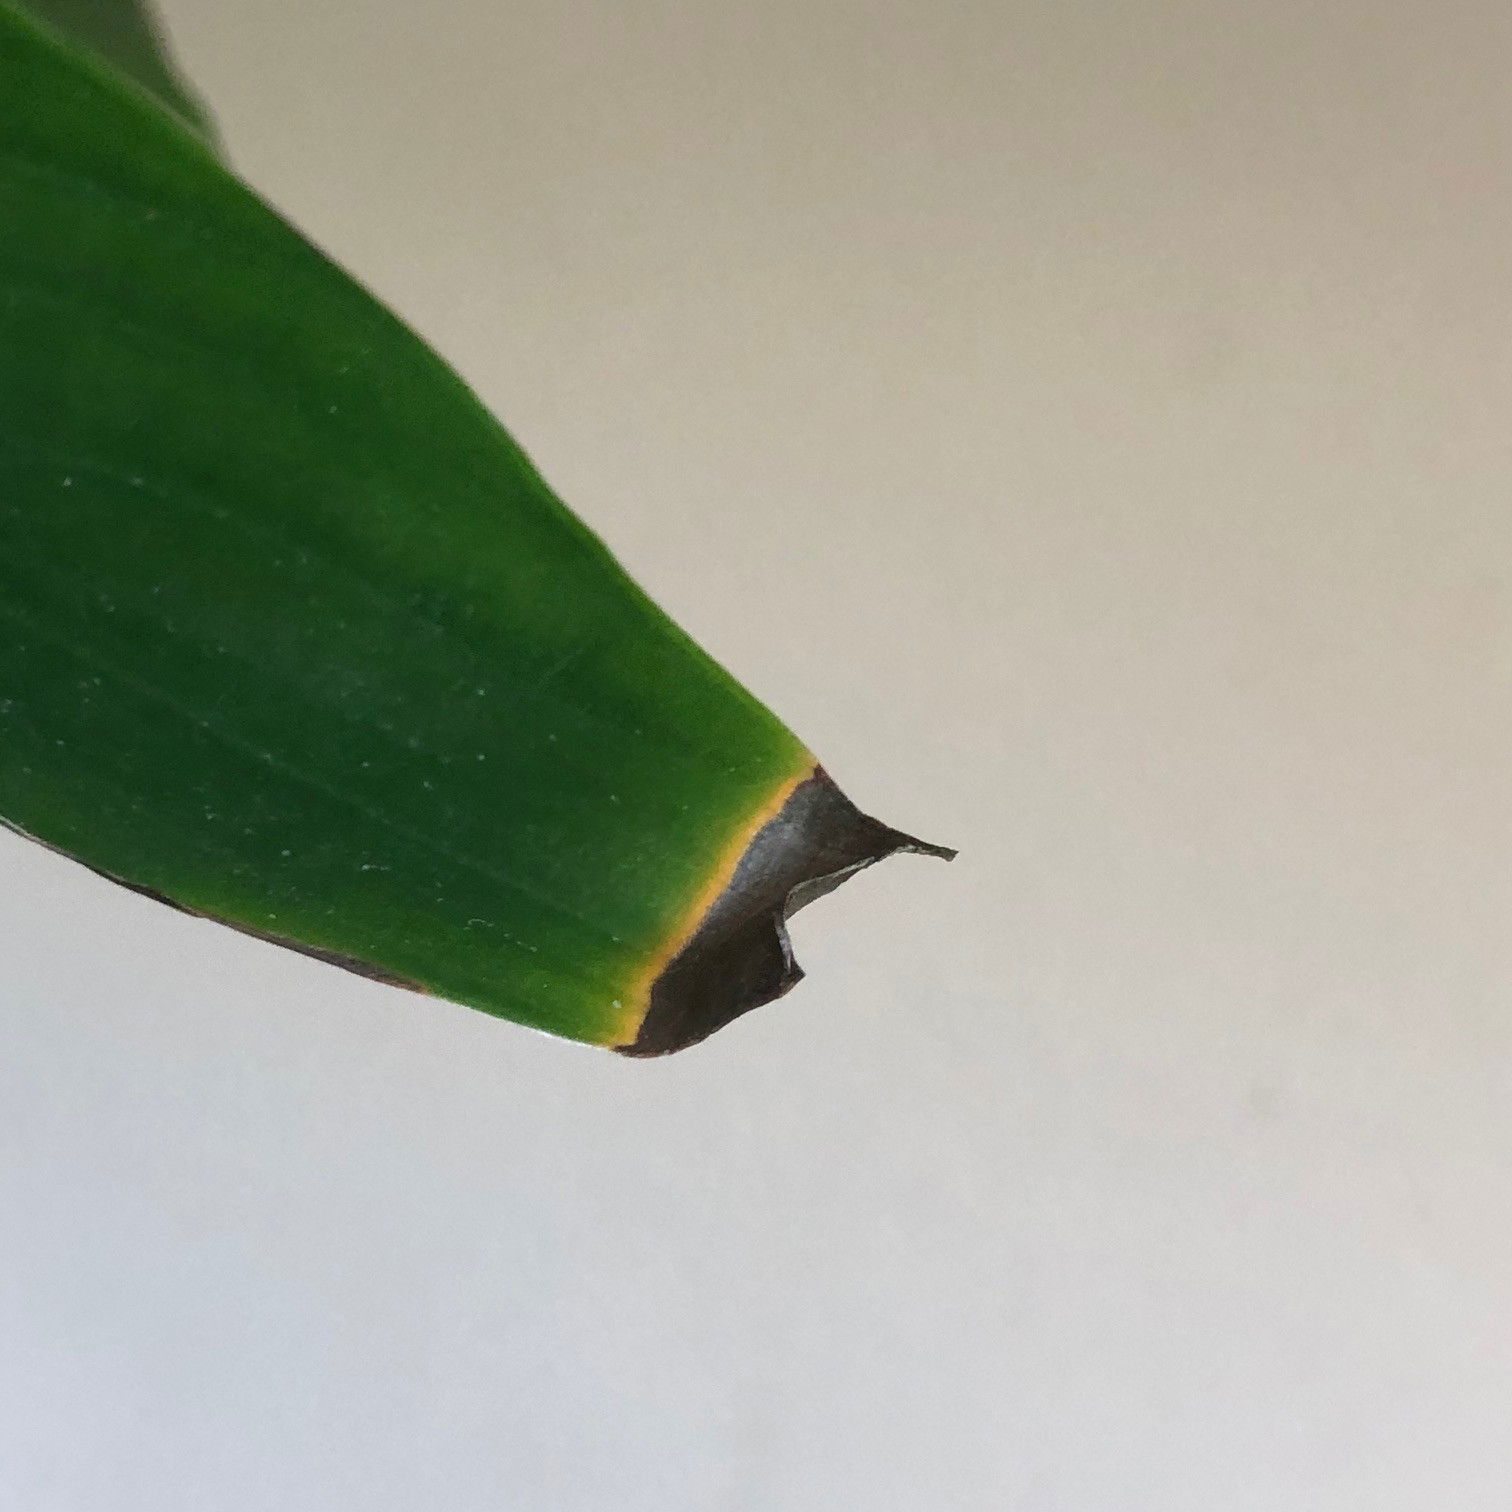 Crispy browned leaf-tips is caused by too low humidity, especially on its new leaves.
Root rot is a common issue with specimens sat in too moist or waterlogged soil for long periods. (Image below). Symptoms include rapidly yellowing leaves, stunted growth and a rotten brown base. Take the plant out of the pot and inspect health below the soil line. If the roots sport a yellow tinge, you're good to go, but if they're brown and mushy, action must be taken immediately. More information about addressing root rot can be found on this link.
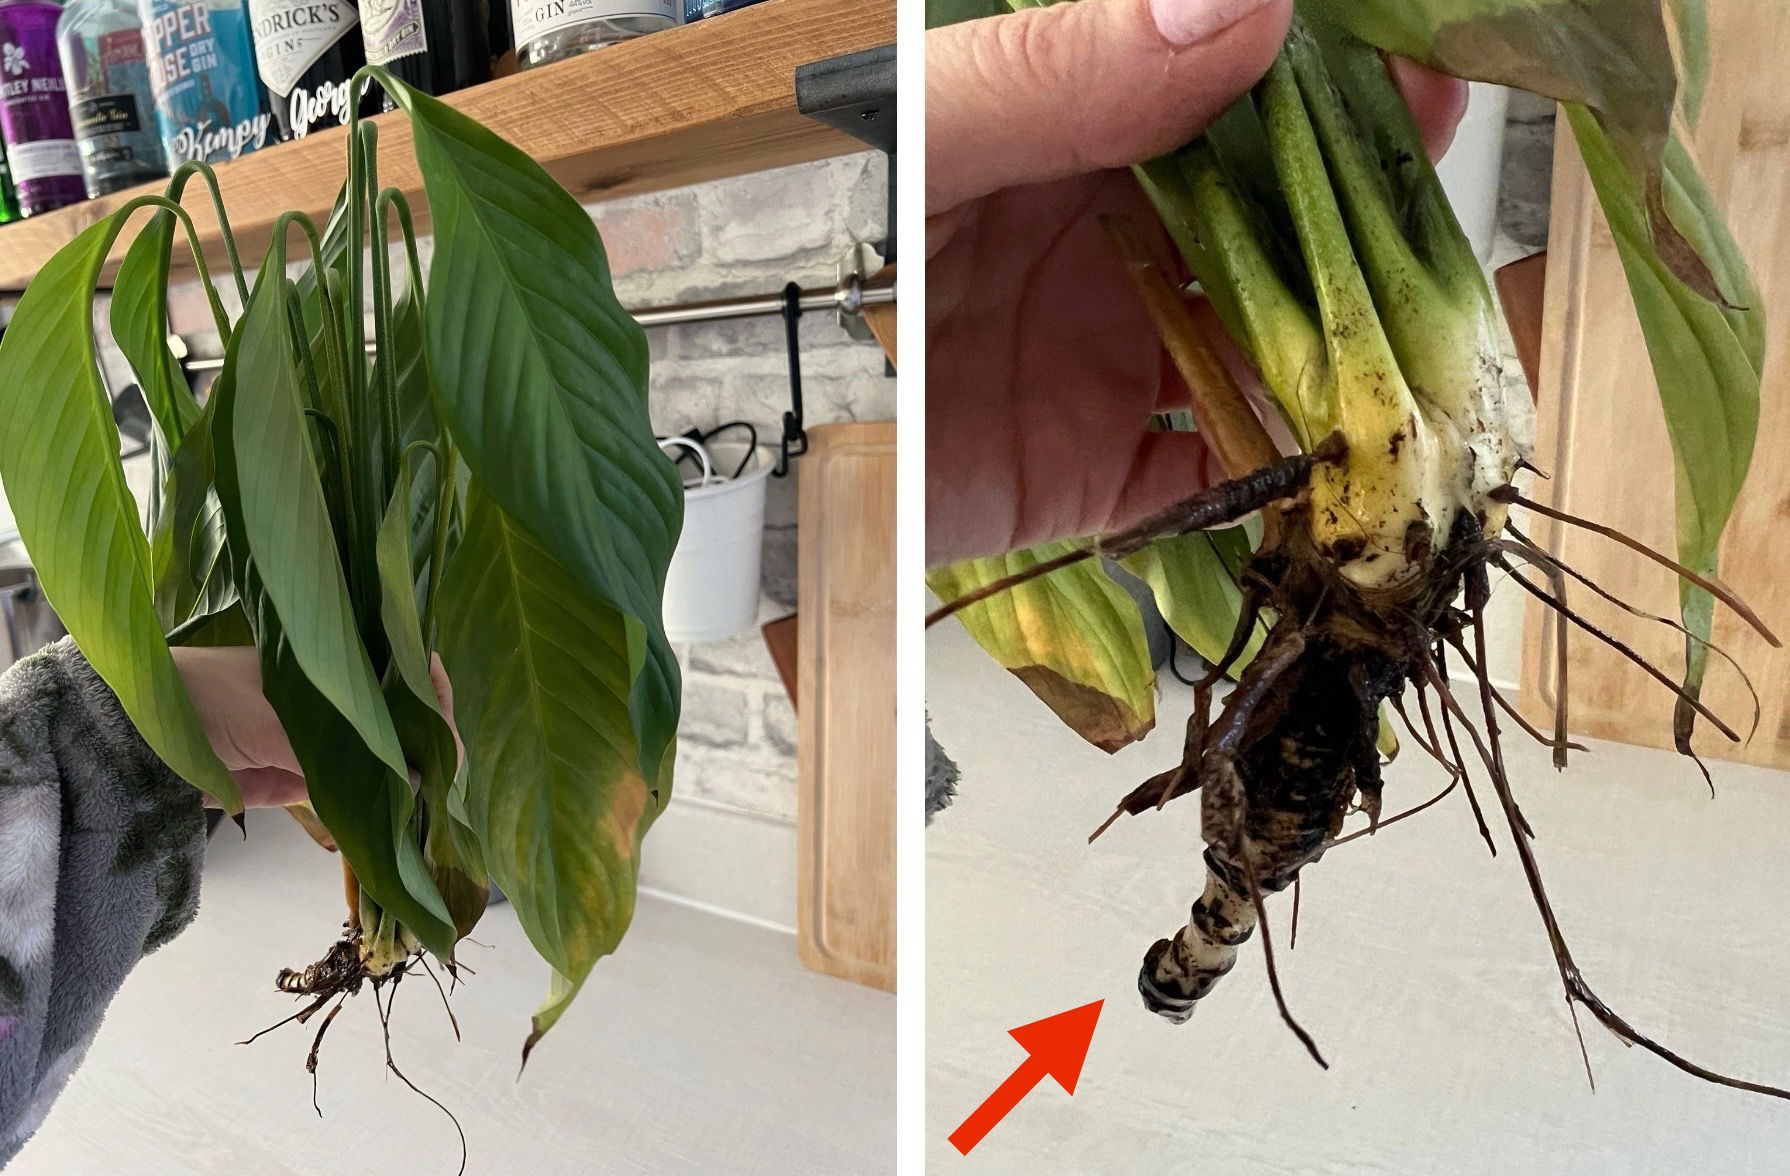 If your Peace Lily's roots are rotten, have a go at taking a stem cutting by rooting it in a jar of water. Ensure all dead roots & leaves are pruned off, as well as the stem's base being fully hardened & not softened/rotted. (Red Arrow). Submerge the stem's bottom half in water, ensuring the foliage stays above the waterline to avoid leaf-rot. Replace the water three times a week & use a rooting hormone if necessary.
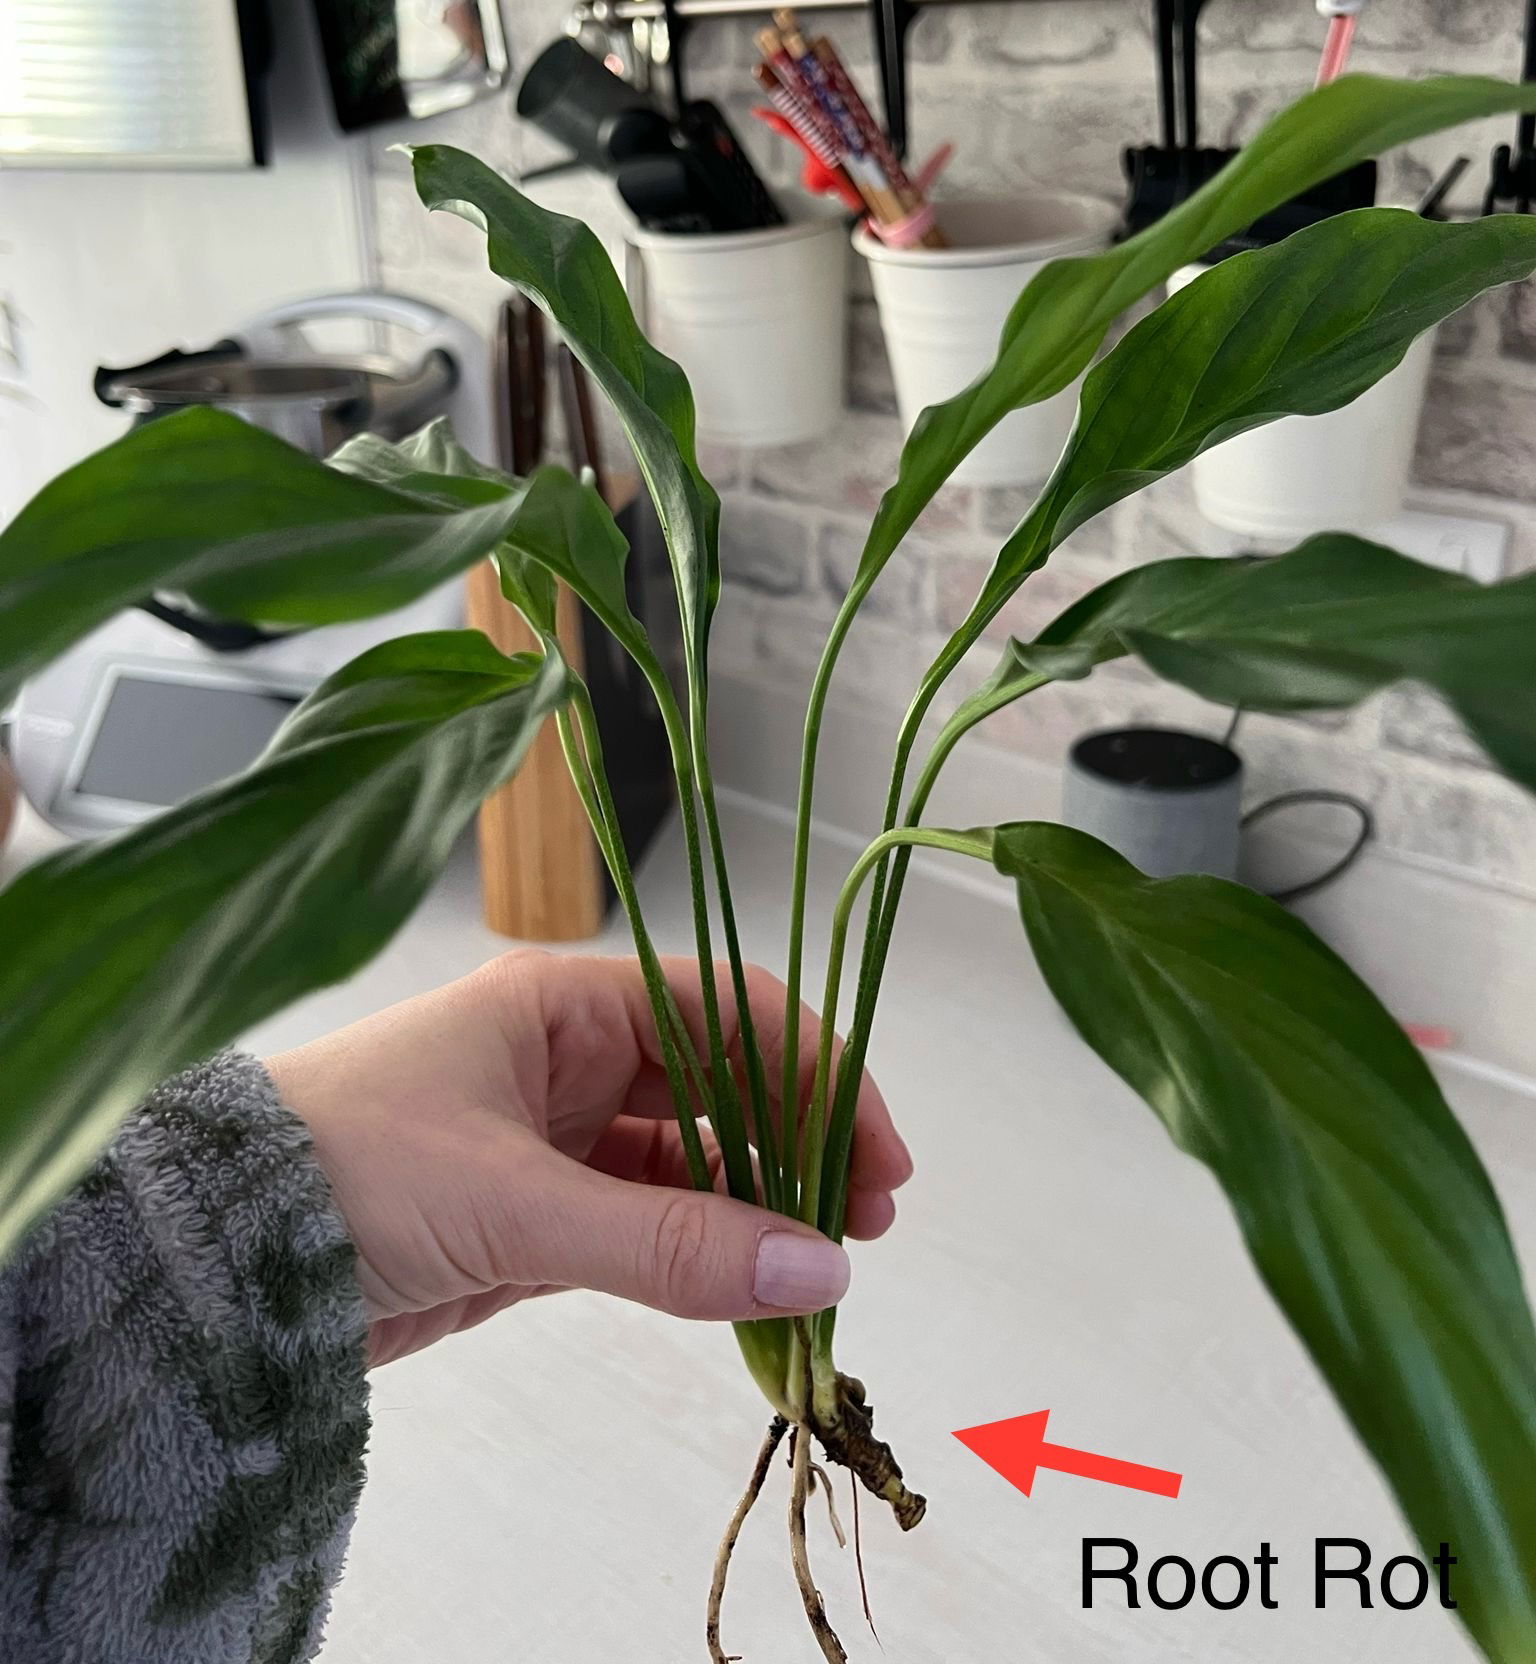 Another case of Root Rot where only the stem is alive below the foliage.
Yellowing lower leaves are a clear sign of over-watering, usually caused by too little light. Although Peace Lilies can do well in darker locations, the frequency of irrigations must be reduced to counteract the chance of root rot. People don't realise that a plant's root system needs access to oxygen too; when soil is watered, the air will travel upwards and out of the potting mix. A lack of accessible oxygen for the roots will cause them to subsequently breakdown over the oncoming days. Click on this link to learn more about root rot and how to address it, and always feel the pot's weight for confirmation (heaviness = good soil moisture, & vice versa).
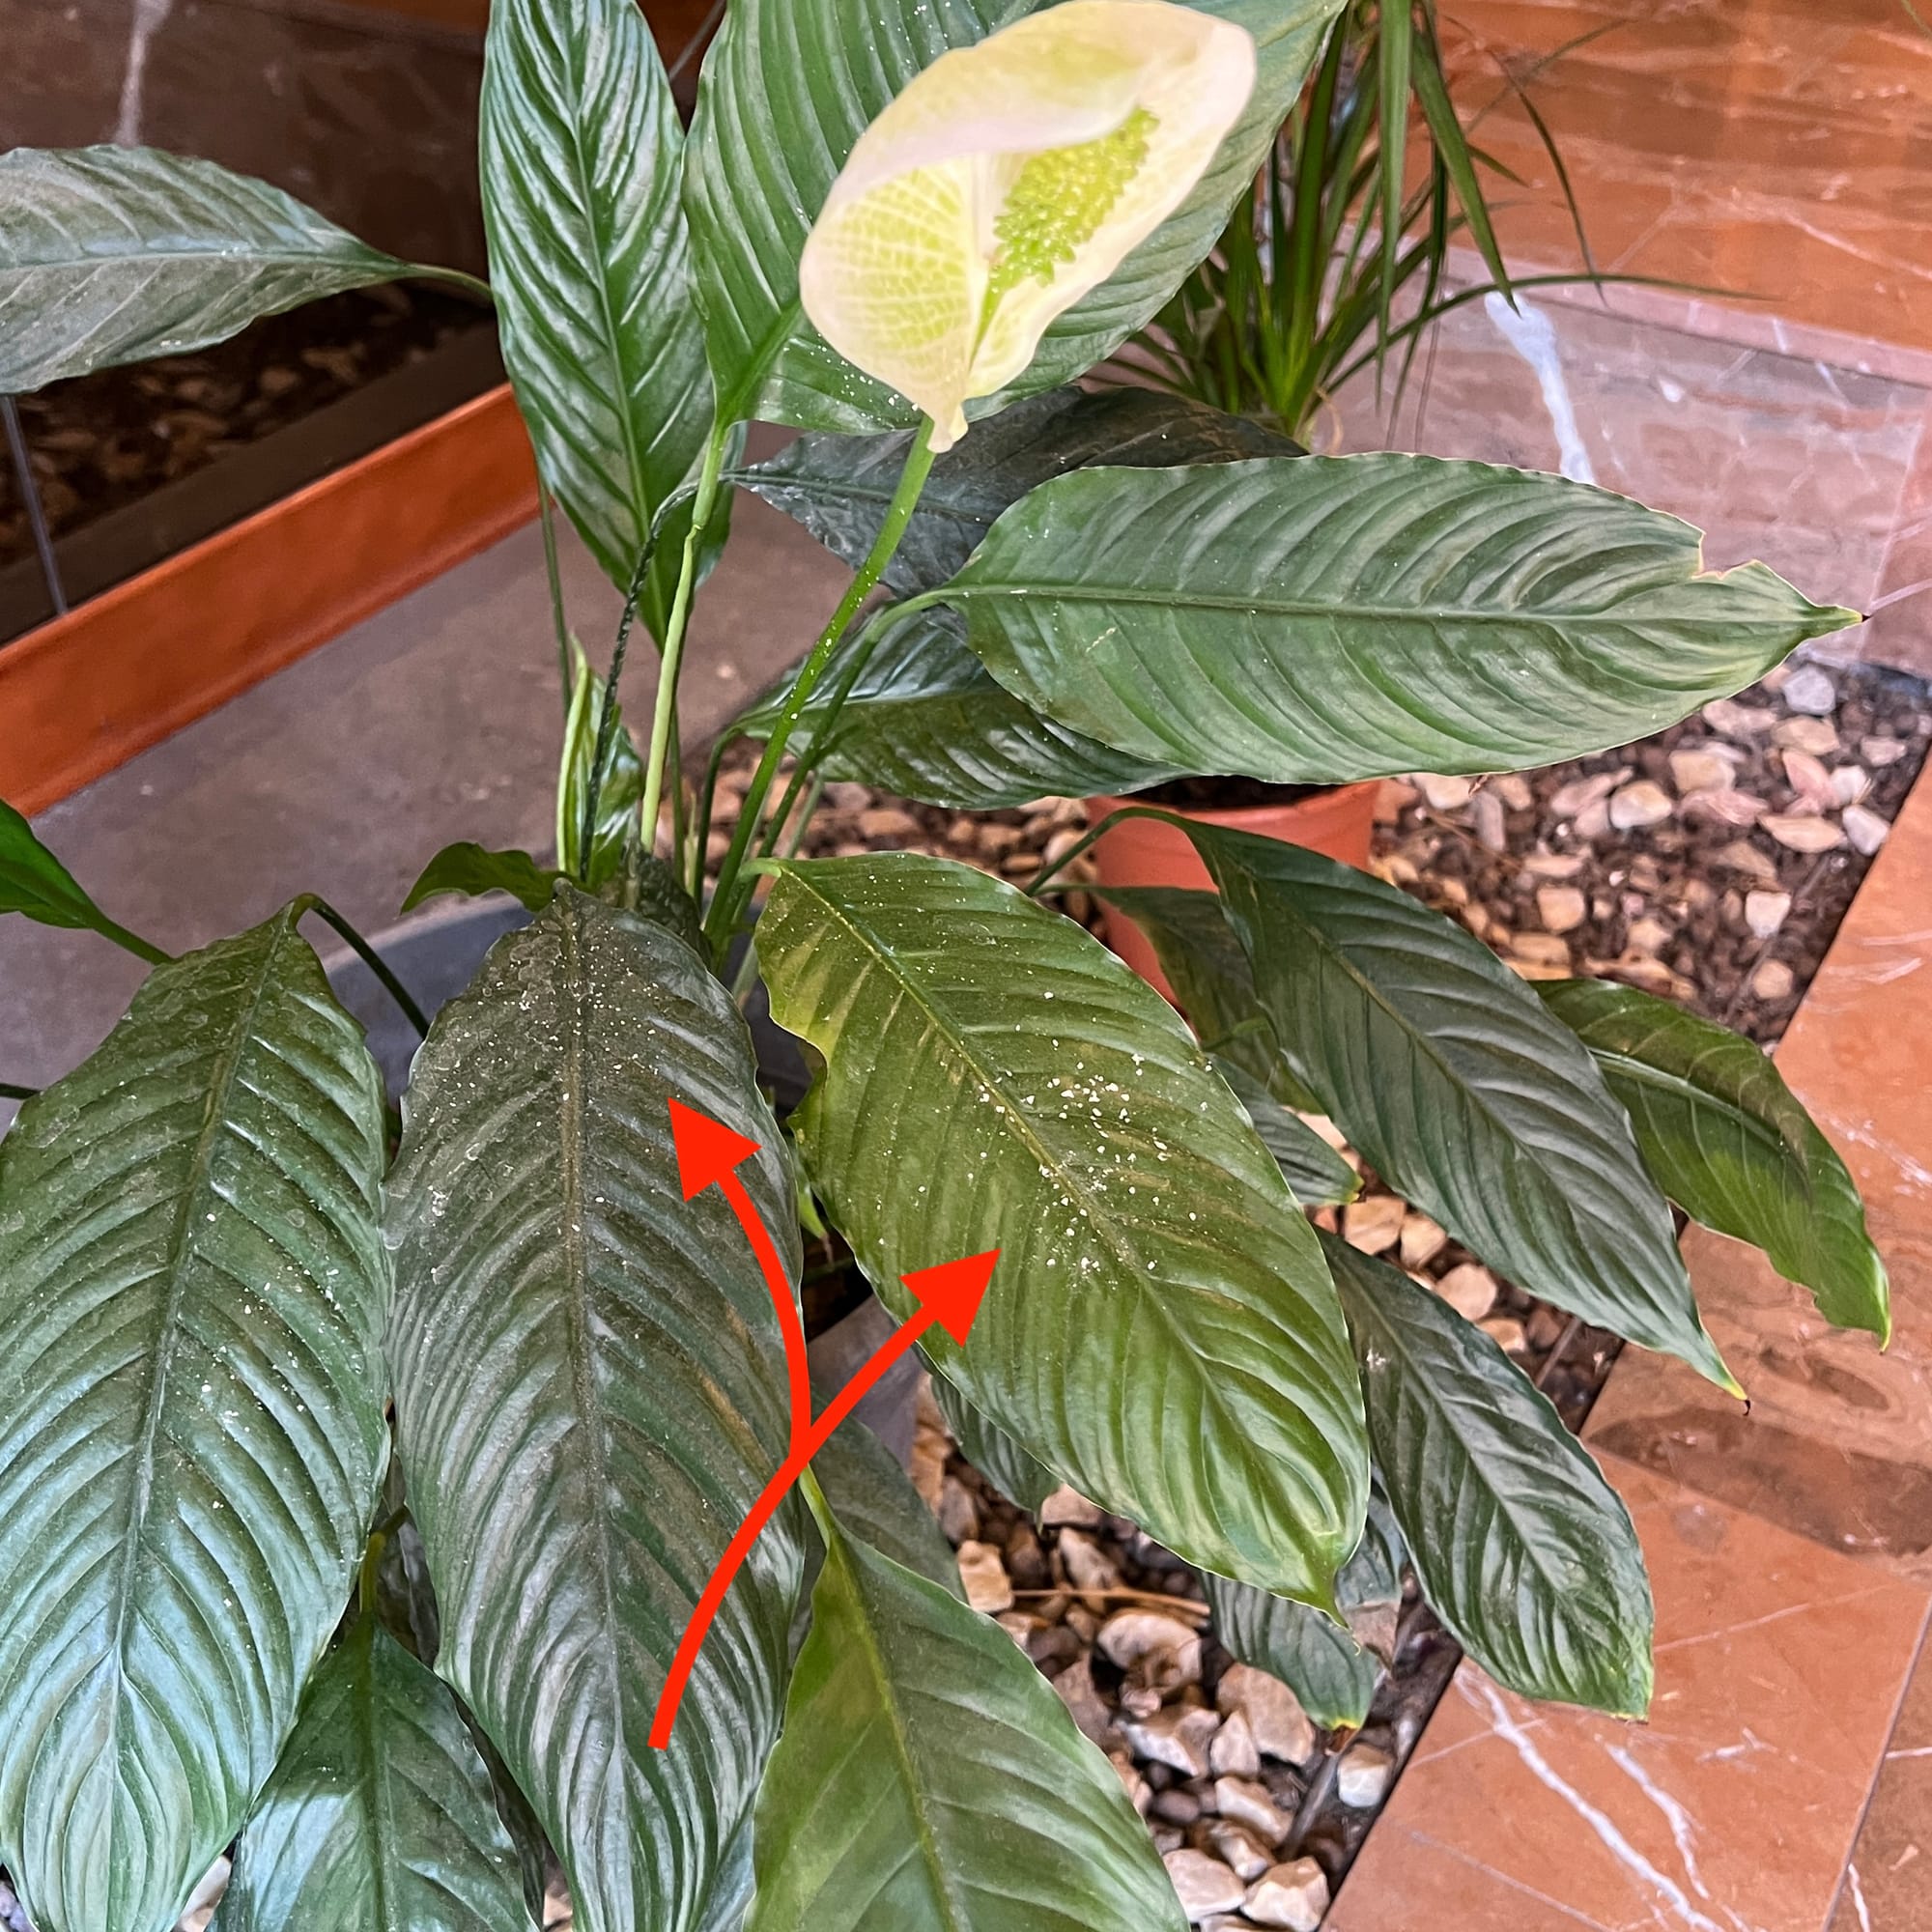
 Under-fertilisation. When the specimen next needs a water, dilute some feed into the solution and hydrate the soil thoroughly. Although the affected leaves won't revert back to their former green glory, the juvenile growth should look much better in due course. Prune off the damaged leaves to improve the overall appearance.
Curled leaves and brown leaf-edges are the result of too little water and over-exposure to the sun. Lilies are best located in bright, indirect settings, and those that haven't acclimatised to the harsh rays will show signs of sun-scorch and environmental shock. A splash of winter sunlight is acceptable as long as the soil moisture is regularly observed, with complete avoidance once summer comes along.
Spider Mites are minute chlorophyll sucking pests that can wreak havoc if left to manifest. Areas of attack are under the leaf, in circles and next to the midrib (central column), with symptoms including yellow mottled sections on its leaves and dirt sticking to the foliage. For further information on how to identify and address this issue, click on the hyperlink above.
A lack of flowers could be due to an array of different issues that include irregular watering habits, too little light and not enough fertilisation. Cold water must not be used during the flowering period (spring & summer) as sudden temperature changes can shock the plant, preventing further blooms. Although persistent droughts will also cause issues down the line, it's over-watering that must be regularly thought about. Peace Lilies respond better to flowering when the nighttime temperatures are below 15°C (59°F) with slightly drier soil during the winter months.
 If you notice white powder/dust on the leaves of your Peace Lily, the chances are it's just the pollen from a nearby flower; just wipe the leaves clean with a watery cloth and that's it! Why has my peace lily got white powder dust on the foliage?
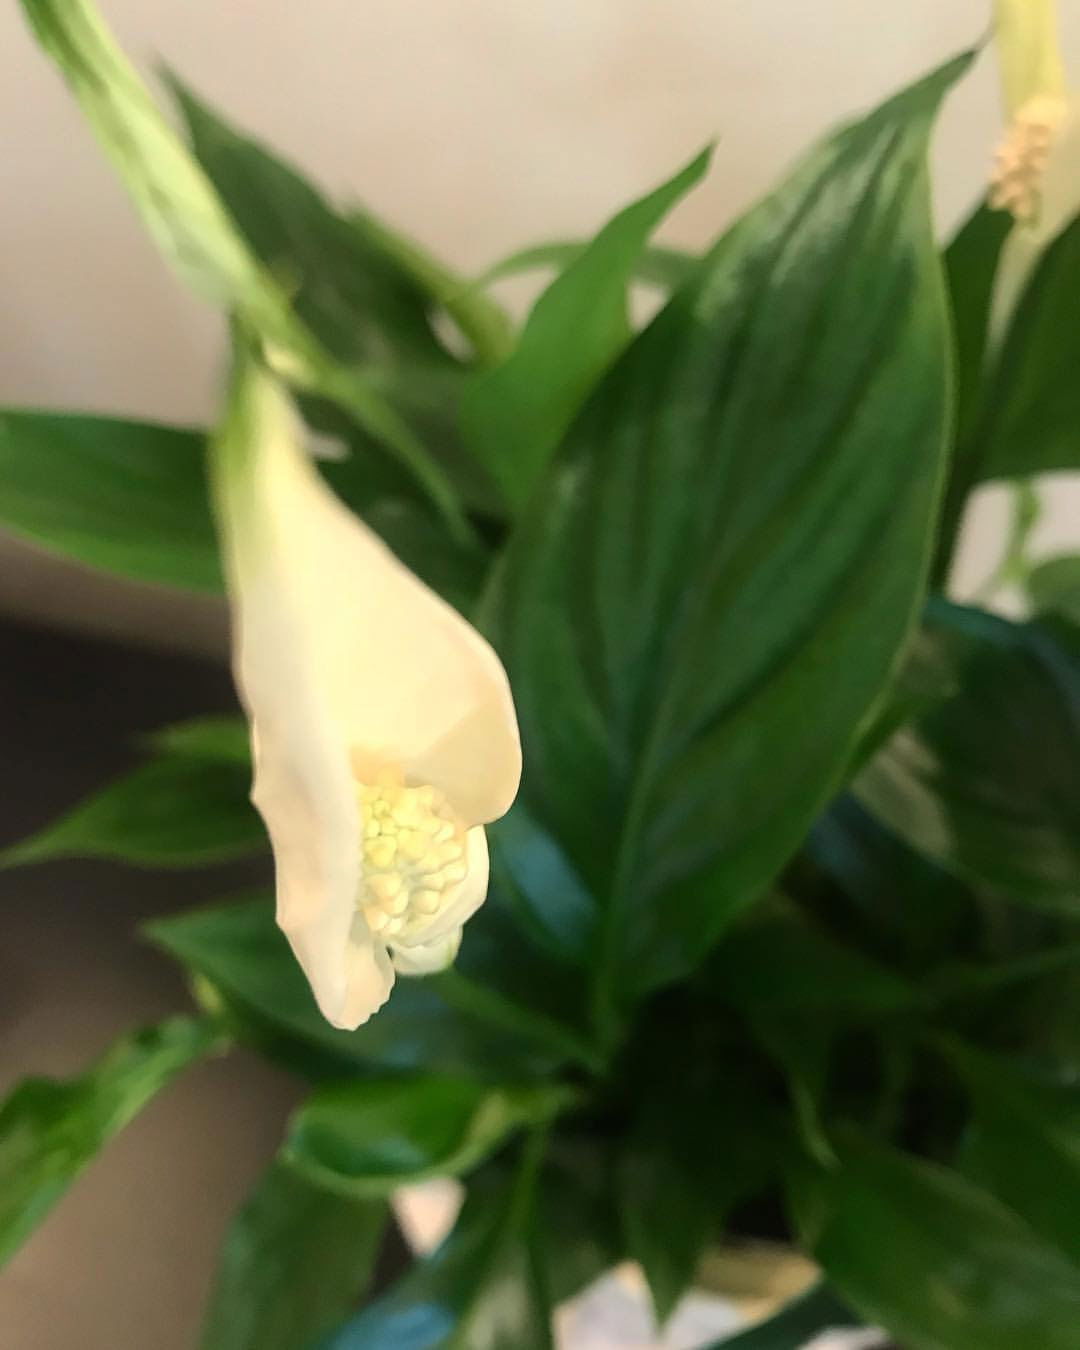
Green flowers that aren't white is a clear sign of too much sunlight. Due to the heightened levels of photosynthesis, the leaves will be doing overtime on the production of converting sunlight into energy, thus leading to the abnormality. Although this may seem worrying at first, this is a natural process that will not hurt the plant, as long as browning leaves don't occur. The final heads-up to mention is that the prolonged direct light may inhibit the number of future flowers during this specific blooming cycle.
Mould developing on the soil means two things - too little light and over-watering. Despite the harmlessness of the mould, it'll prove unsightly to most gardeners and is therefore removed once known. To remove, replace the top two inches of the soil for a fresh batch of a 'Houseplant' labelled compost. Either increase the amount of light received (no direct sunlight for the first few weeks to prevent environmental shock) or decrease the frequency of waters slightly. If the mould is accompanied by yellowing lower leaves, you may also have a case of root rot.
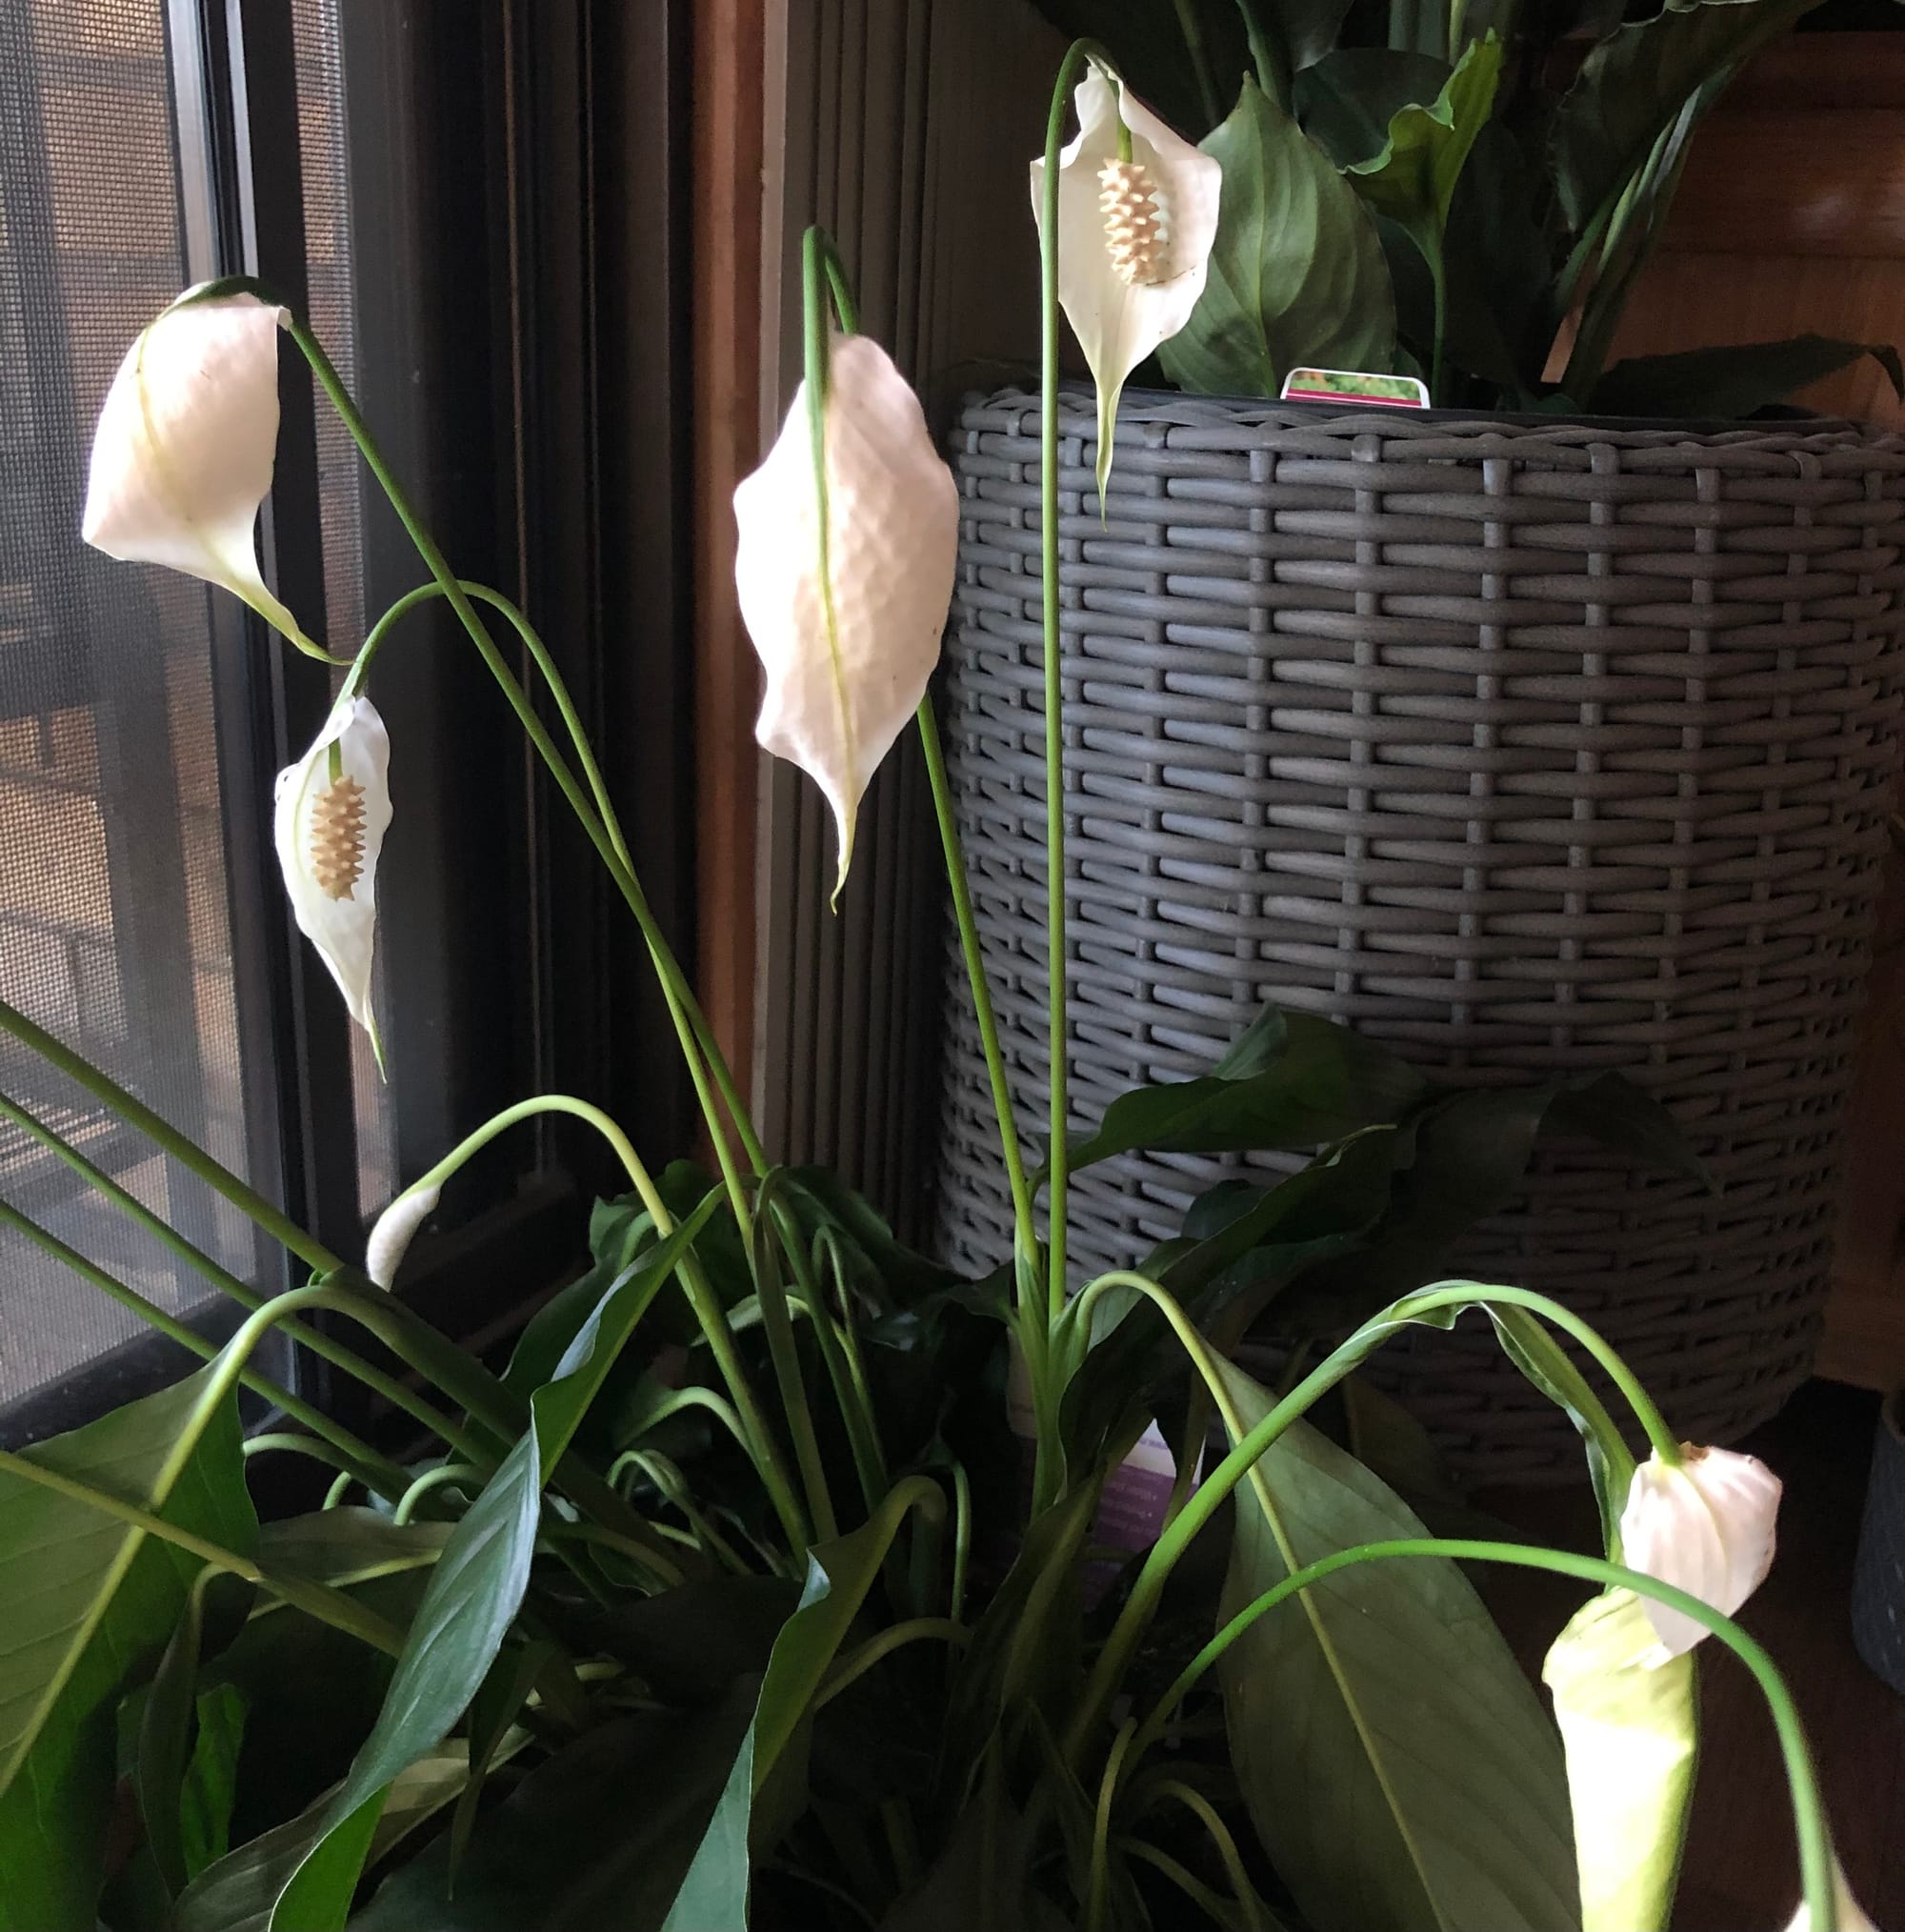 While your Peace Lily is flowering, a good indication that it needs a water is when the flowers wilt (they usually droop first before the foliage). Although this is harmless to the plant, we recommend improving your watering regime to elongate its overall flowering period.
If your specimen is located in a dark environment, use a chopstick to gently stab the soil in various areas. You should aim to enter the compost between the base of the plant and the pot's edge, as failure to do so may lead to damaging its lower portion. Leave the holes open for a few days before re-surfacing the soil to avoid it becoming overly dry. Not only will the gentle shift in the soil's structure mimic the work of small invertebrates in the wild (worms, etc.), but it'll also add oxygen back into the soil, thus reducing the risk of root rot. Repeat this monthly, or whenever you feel the potting-mix isn't drying out quickly enough.
Transplant shock is a big issue when it comes to repotting; give the plant a good soak 24hrs before the action and never tinker with the roots, unless it has been affected by root rot. Typical signs of transplant shock are largely similar to under-watering - wilting, yellowing leaves and stunted growth. For more information about addressing this issue, please click on this link and scroll down to the 'Transplant Shock' section.
Small flies hovering around your plant is entirely natural and may just indicate you're watering a little too often. Fungus Gnats are a common 'pest' with Peace Lilies due to their dependency to reliable soil moisture, but won't pose any risk to the plant's health. Simply replace the top quarter of the plant's potting mix for a fresh batch of 'Houseplant' labelled compost, typical found at most garden centres.
Origins
Spathiphyllum is a genus of around forty species originating from the tropics of South America and southeastern Asia. The genus was first described by Heinrich Schott in the early 1830s, with seeds first brought back to Europe fifty years later. The name is derived from the Greek with ‘spath’ translating to spoon, and ‘phyl’ meaning leaves, that refers to the shape of the flower's bract (spathe).
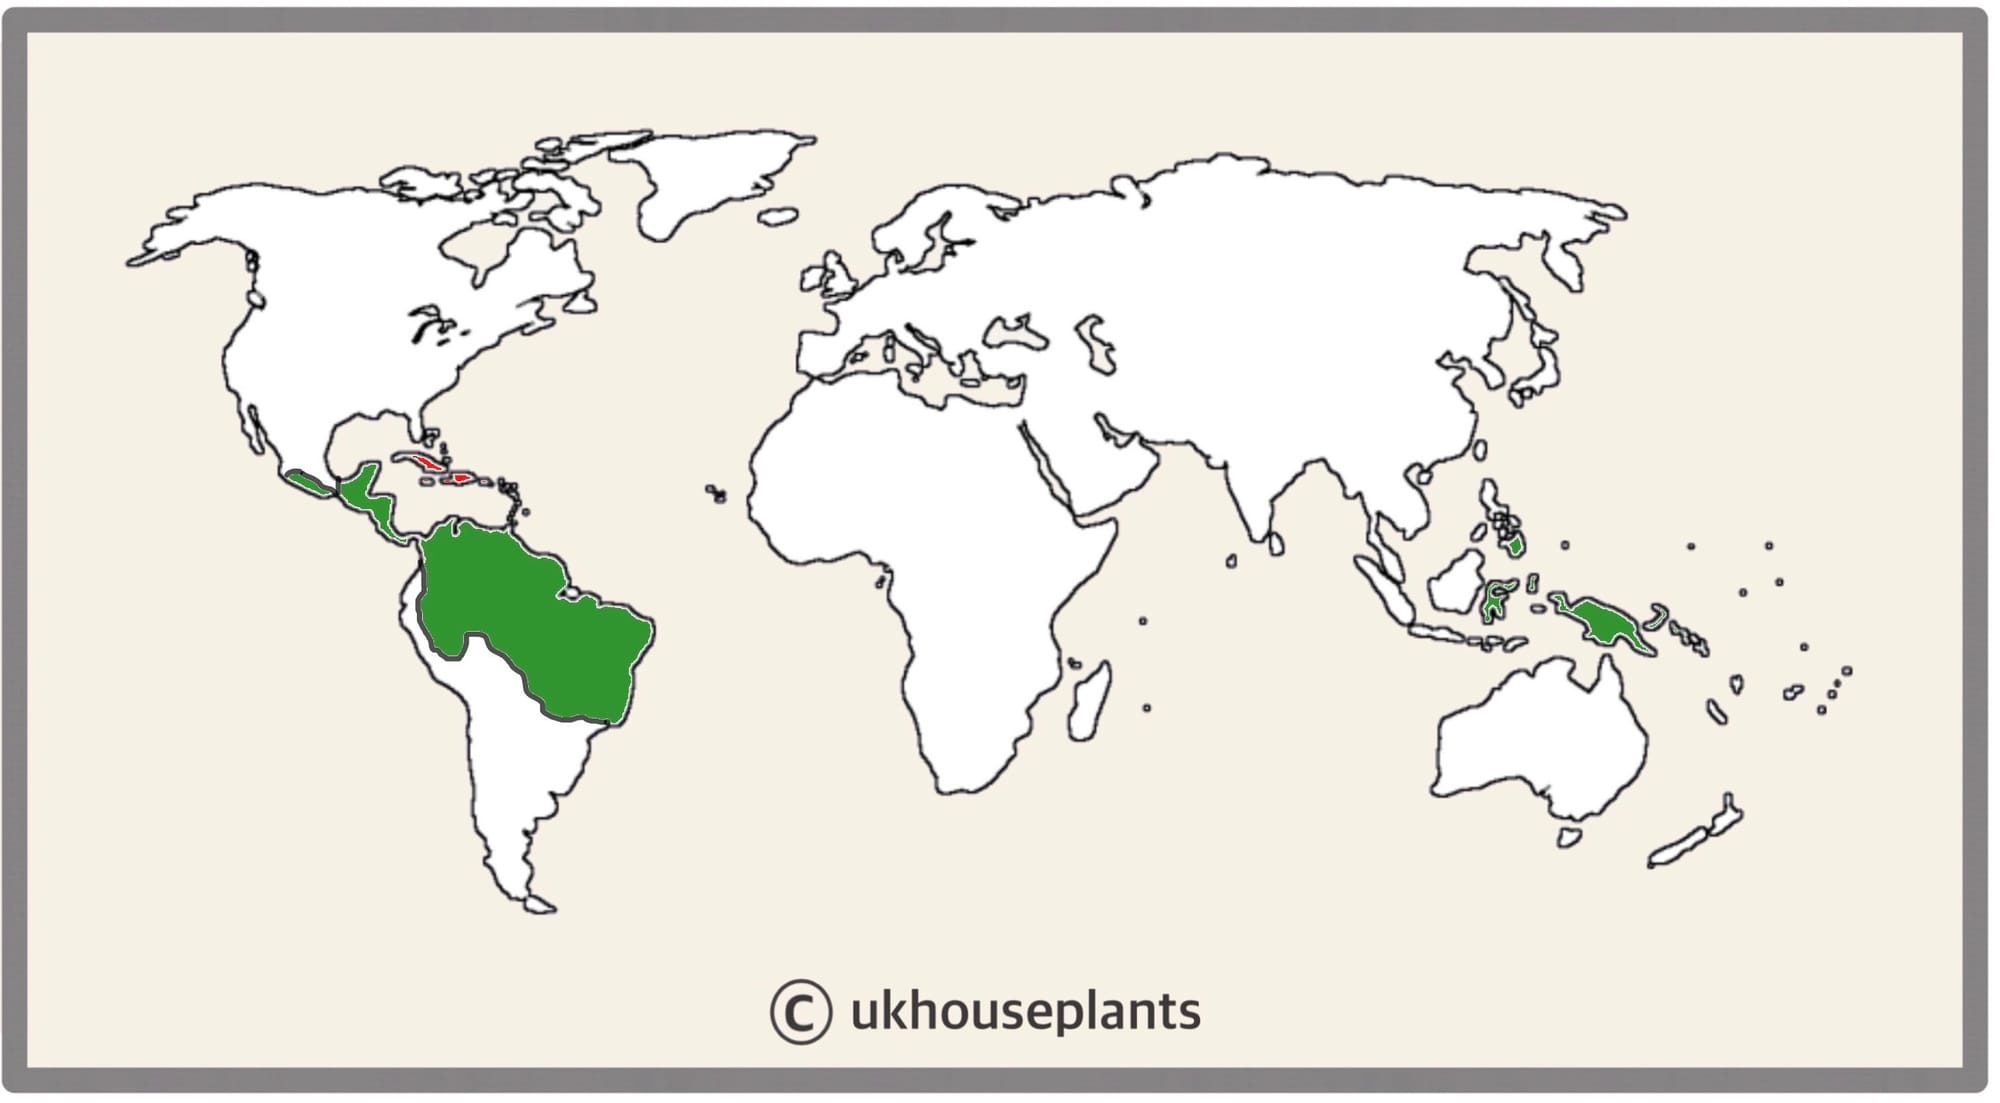 The Distribution of Peace Lilies in Green. (Introduced to Cuba, Dominican Republic & Puerto Rico in Red).
Temperature
10° - 25°C (50° - 80°F)
H1b (Hardiness Zone 12) - Can be grown outdoors during the summer in a sheltered location with temperatures above 12℃ (54℉), but is fine to remain indoors, too. If you decide to bring this plant outdoors, don't allow it to endure nay length of direct sunlight as it'll result in sun-scorch. Regularly keep an eye out for pests, especially when re-introducing it back indoors.
Pruning & Maintenance
For the dwarf variety, they can grow over 60cm in height (if grown in a pot) and 50cm in width once they reach maturity. The larger specimens (broader leafed variety) can grow up to 1.5m in height, and 1m in width if grown in a pot. The ultimate height for both will take between 5 - 10 years to achieve.
Pruning
Remove yellow or dying leaves, and plant debris to encourage better-growing conditions. While pruning, always use clean scissors or shears to reduce the chance of bacterial and fungal diseases. Never cut through yellowed tissue as this may cause further damage in the likes of diseases or bacterial infections. Remember to make clean incisions as too-damaged wounds may shock the plant, causing weakened growth and a decline in health.
Spent Flower Stalks - Once the flower has died off, cut the majority of the stem back to the foliage, leaving just enough to 'pull out' once the stem has become fully browned a few weeks later.
Propagation
Via Seed, Stem Cuttings or Division.
Seeds (Moderate) - Soak the small white seeds in lukewarm water for around 24hrs in a dark location, preferably on top of an operating radiator. The best soil to use is a 'Houseplant' labelled potting mix, however, 'Multipurpose' compost with added perlite and sand is just as good. Set the seeds around an inch into the potting mix, resisting the temptation to compact the soil. Maintain evenly moist soil and allow the excess water to freely drain from the pot's base to prevent water-logged conditions. The ideal location for successful germination is in a bright, indirect setting with temperatures above 18℃ (64℉) with bottom-heat. Keep the pot in a transparent bag to provide a stable level of humidity, along with longer lasting soil moisture. Germination may take up to a ten weeks, so don't discard any unsuccessful seeds until this threshold has been surpassed. Remove the bag once the seedlings produces its second leaf and then split them up into their own 7cm (3 inches) pots.
Basal Offset Division (Easy) - Your plant will produce several basal offsets that can be separated once they have a sufficient root system, and surpass 12cm (4.7 inches) in height. If possible, water the soil 24hrs before the main event to reduce the risk of transplant shock, when its dry root systems are over-fingered. Take the plant out of its pot and place your fingers close to the nodal junction - soil may have to be removed for better access. Push the chosen offset downwards until you hear a snap. Separate the foliage and its root system away from the mother plant, mentally noting the high risk of damage. Transplant in the appropriate sized pot with a fresh batch of 'Houseplant' soil. Maintain evenly moist soil and situate it in a bright, indirect location away from any direct sunlight. After eight weeks, treat it like a normal specimen, following the care tips above!
Stem Cuttings (Moderate) can be taken at the start of spring when there's more than 10cm (4 inches) of semi-wooded stem. This will take a while, as the plant will need to reach a certain level of maturity before its base becomes ready. While using clean secateurs, remove the top end of the stem just above a node. Gently remove the lower leaves and set the bottom half of the stem into water for root development. After three inches of root growth, set the rooted portion into a moist, well-draining potting mix. Although we'd recommend using a 'Houseplant' labelled soil, a general-purpose compost with added perlite and sand will work wonders, too. As long as there is a splash of perlite introduced into the mix, oxygen will flow liberally around the cutting's base to reduce the risk of basal rot. Wrap the plant (& its pot) in a transparent bag to maintain high humidity, due to the absence of roots that'll result in rapid moisture loss within the stem. Provide a bright, indirect location with continual soil moisture to quicken the rate of root development. Remove the bag after three weeks of substantial foliar growth and follow the care advice provided at the top of the article.
Flowers
As Peace Lilies are part of the Araceae family, their flowers aren't showy but still provide a beautiful contrast between its white spathe and the colour of the foliage. The flowers consist of a white or green spathe (the spoon-like shell) with the spadix being the site pollination. Individual flowers can last up to four weeks with the overall blooming process spanning two or three months in the winter, spring or summer months. The genus' name is directly named after its flowers; ‘Spath’ translates to spoon, ‘Phyl’ means leaves in Greek.
Repotting
Repot every two years in the spring, using a 'Houseplant' labelled and the next sized pot with adequate drainage. We wouldn't recommend planting directly in terracotta due to the pot becoming very cold when watered which may hurt the root health. They prefer warm climates or rooms, so always use plastic or coir pots for best results!
When it's time to repot, hydrate the plant 24hrs before tinkering with the roots to prevent the risk of transplant shock which is common with this plant (wilted leaves, yellowing, etc). Before potting your Peace Lily, be sure to have a check of its roots by looking at their colour; if the root strand is white/cream/light coloured you're good to go. For any issues of rotten or brown roots, be sure to have a look at our Root Rot article for more information.
Pests & Diseases
Keep an eye out for mealybugs, spider mites, scale & thrips that'll locate themselves in the cubbyholes and undersides of the leaves. Typical diseases that'll face a Peace Lily are leaf-spot diseases like anthracnose, botrytis petal blight (grey mould), powdery mildew, root rot & southern blight.
Small Flies (Fungus Gnats) in the Soil - As Peace Lilies prefer to be kept moist, you may have an issue of Fungus Gnats at some point. Don't worry as this pest can be removed easily by replacing the top two inches of its potting mix for a fresh batch of 'Houseplant' soil from a garden centre or our online store.
Toxicity
This plant is classified as poisonous. If parts of the plants are eaten, vomiting, nausea and a loss of appetite could occur. Consumption of large quantities must be dealt with quickly; acquire medical assistance for further information and actions.
Retail Locations
Blue Diamond, British Garden Centres, Dobbies, IKEA, B&Q, Homebase, Most Supermarkets like Tesco or Morrison's) & Online Stores.
Book a 1-to-1 Call with THE HOUSEPLANT DOCTOR™
If you need further advice with your houseplants, book an advice call with ukhouseplants' friendly and expert writer today! This can be done via a video or audio call on most apps, including Facebook, FaceTime & Skype. A ten-minute call costs £5.99 (US$7), or £15.99 for thirty minutes. You can ask multiple questions, including queries on plants, pests, terrariums, repotting advice and anything in between. Please consider supporting this service to keep ukhouseplants thriving!
Comments