Neoregelia ampullacea 'Green Fireball'
Contents
- Top Tips
- Location, Water, Humidity & Fertilisation
- Common Issues
- Origins, Temperature, Propagation, Repotting & Toxicity.
Need the answer to a specific plant query? Book a 1-to-1 video call with THE HOUSEPLANT DOCTOR™, the website's friendly author, to overcome and address your niggling problem! Available on iMessage, WhatsApp, Facebook Messenger & more.
Top Tips & Info
- Care Difficulty - Very Easy
- Warmth is important with Neoreglia, so ensure its home doesn't dip below 16°C! (61°F)
- Neoregelia are best suited for bright, indirect light, but can still be sat in partial shade when kept slightly drier. The ideal location would be somewhere within three metres of a window, or against a north-facing windowsill.
- Allow the top half of the soil to dry in between waters, keeping the central 'well' topped with 40ml of water. Do not over-water when situated in a shady location.
- Make sure that its well is topped with water to provide hydration and humidity.
- Fertilise using a 'Houseplant' labelled feed every four waters in the spring and summer, reducing this to every six in the colder months.
- Each individual plant will only flower once, so you'll have to wait until the 'pups' (basal offsets) reach maturity for another bloom. You can even separate the pups in the spring once they develop root caps on their base.
- Repot every three years using a 'Houseplant' potting mix; this is the perfect time for propagation and a quick check on the root/soil health.
Location & Light - 🔸🔸🔸
Neoregelia can withstand all ranges of indirect light, meaning that most locations in a home are accepted. Avoid intense sunlight as it'll quickly lead to sun-scorch and severe dehydration. Specimens placed in darker areas must be kept on the drier side to life, whereas brighter locations will require more soil moisture to lubricate photosynthesis. We'd recommend situating yours within three metres of a window, somewhere that boasts over-head light.
Water - 🔸🔸
Allow the soil's top half to dry out between waters, reducing this further in the autumn and winter. Be sure to keep the 'well' topped up with water if in a bright environment, as this will hydrate the plant and maintain high humidity. Under-watering symptoms include pale leaves, brown leaf patches, sunken foliage and crisping flowers; these issues are typically caused by intense sun or heat, being potbound, or pure forgetfulness. Over-watering symptoms include a rotten stem with yellowing leaves, flower collapse and 'pup' death. If this occurs AFTER the flowers have elapsed, this is a natural response after unsuccessful reproduction. For those that haven't flowered, possible reasons for the decline are too little light or heat, excess moisture within its foliage and a lack of drainage. Remember - those kept in darker locations must be irrigated less to avert the risk of 'heart rot'.
Humidity - 🔸🔸
Neoregelia tolerates average room humidity, but you can introduce a pebble tray if your home is considered dry. Perform a gentle hose-down to hydrate its leaves and reduce the number of dust particles resting on its foliage, at monthly intervals.
Fertilisation - 🔸
Fertilise every four waters during the growing period before reducing this to every six in the autumn & winter. Although an 'All-Purpose' fertiliser will still do the job, we'd recommend using a specific 'Houseplant' labelled fertiliser as it'll support the vital thirteen nutrients that this species will need to grow.
We recommend misting the foliage with a 'foliar feed' every two weeks to help vitalise its leaves, too. You can purchase this type of fertiliser at almost all garden centres!
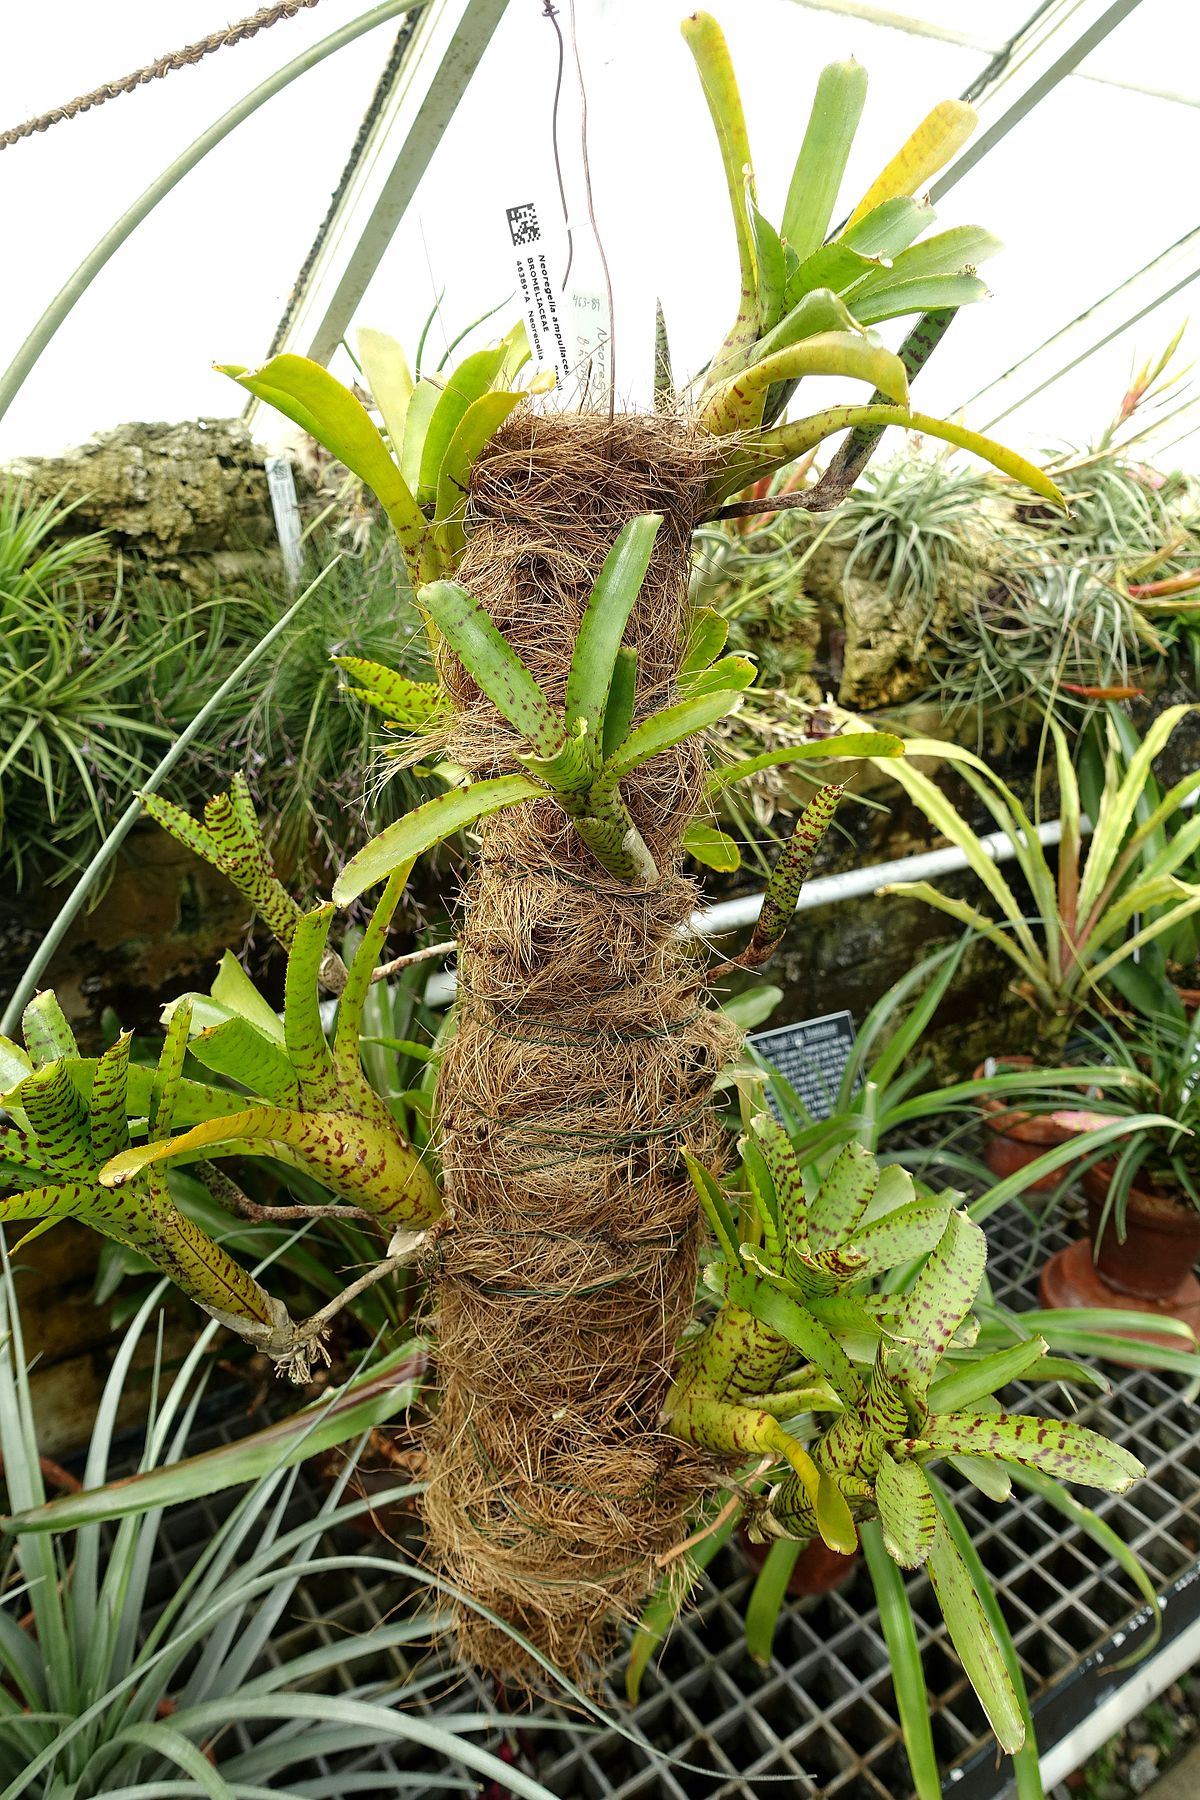 Neoregelia is a genus of epiphytic species, mostly occurring on trees or structures. The cup-like leaves have evolved to trap falling rainwater which then becomes a reservoir for hydration. Copyright: WikiSpecies
Common Issues with Neoregelia
Neoregelia that die shortly after the flowering process is a natural and common issue. If you're looking to preserve the plant for several years after the blooming period, be sure to provide a bright location and keep it under-watered with no moisture accumulating in its central 'well'. As over-watering and shady spots are the usual killers with recently-flowered individuals, keeping the foliage and soil on the drier side will allow it to enter its dormancy before developing basal offsets between its lower leaves. You can either leave the plant as it is or separate the offsets (pups) to grow in their own pots. Scroll down to 'Propagation' for more avid regarding this matter.
Alternatively, a lack of blooms from a non-flowered specimen is caused by an insufficient dormancy period, where the temperatures are kept more or less the same over the year. Reduce the temperature by a couple of degrees over the autumn and winter months, along with fewer irrigations to ensure a well-spent dormancy.
Yellowing lower leaves (closest to soil) could be a sign of over-watering, but equally is a byproduct of maturity. If the older leaves rapidly become yellow in quick succession, over-watering could be to blame. People don't realise that a plant's root system needs access to oxygen too; when soil is watered, the air will travel upwards and out of the potting mix. A lack of accessible oxygen for the roots will cause them to subsequently breakdown over the oncoming days. Click on this link to learn more about root rot and how to address it.
Mould or mushrooms developing on the soil means two things - too little light and over-watering. Despite the harmlessness, it'll prove unsightly to most gardeners and is therefore removed once known. To remove, replace the top two inches of the soil for a fresh batch of 'Houseplant' compost. Either increase the amount of light received (no direct sunlight for the first few weeks to prevent environmental shock) or decrease the frequency of waters slightly. If the mould is accompanied by yellowing lower leaves, you may also have a case of root rot.
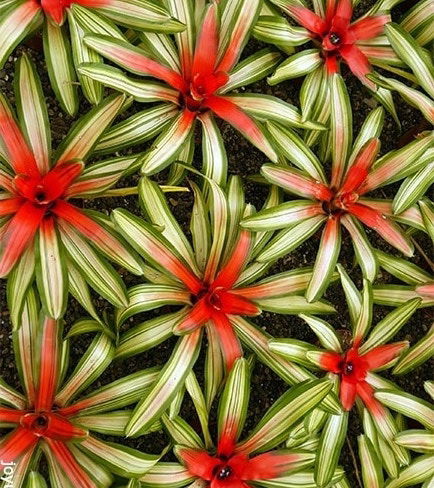
Your Neoregelia might be turning red due to one of these issues; excessive sunlight or that it's about to flower. This plant does best in a bright, sunless windowsill and can easily become scorched by the sun - relocate yours if it's overly exposed! If yours isn't in the sunlight, but is still turning red, your Neoregelia might be about to bloom. Ensure the plant is fertilised every third or fourth water and enjoy the flowers!
Rinse the leaves regularly. Although this isn't too much of an issue, a build-up of dust particles can clog up the plant's pores, causing lowered light capturing-efficiency. Rinse the topsides of the leaves down once a month to keep levels down and improve growing conditions.
Origins
Although the term, 'Neoregelia', first appeared in documentation around the 1930s by Lyman Smith, its original name was, in fact, Regelia. Johannes Schauer named the genus in honour of German botanist, Eduard August von Regel, a Director of Russia's St. Petersburg Botanic Gardens. Neo translates to 'new' or 'revived', illustrating its move to a new genus.
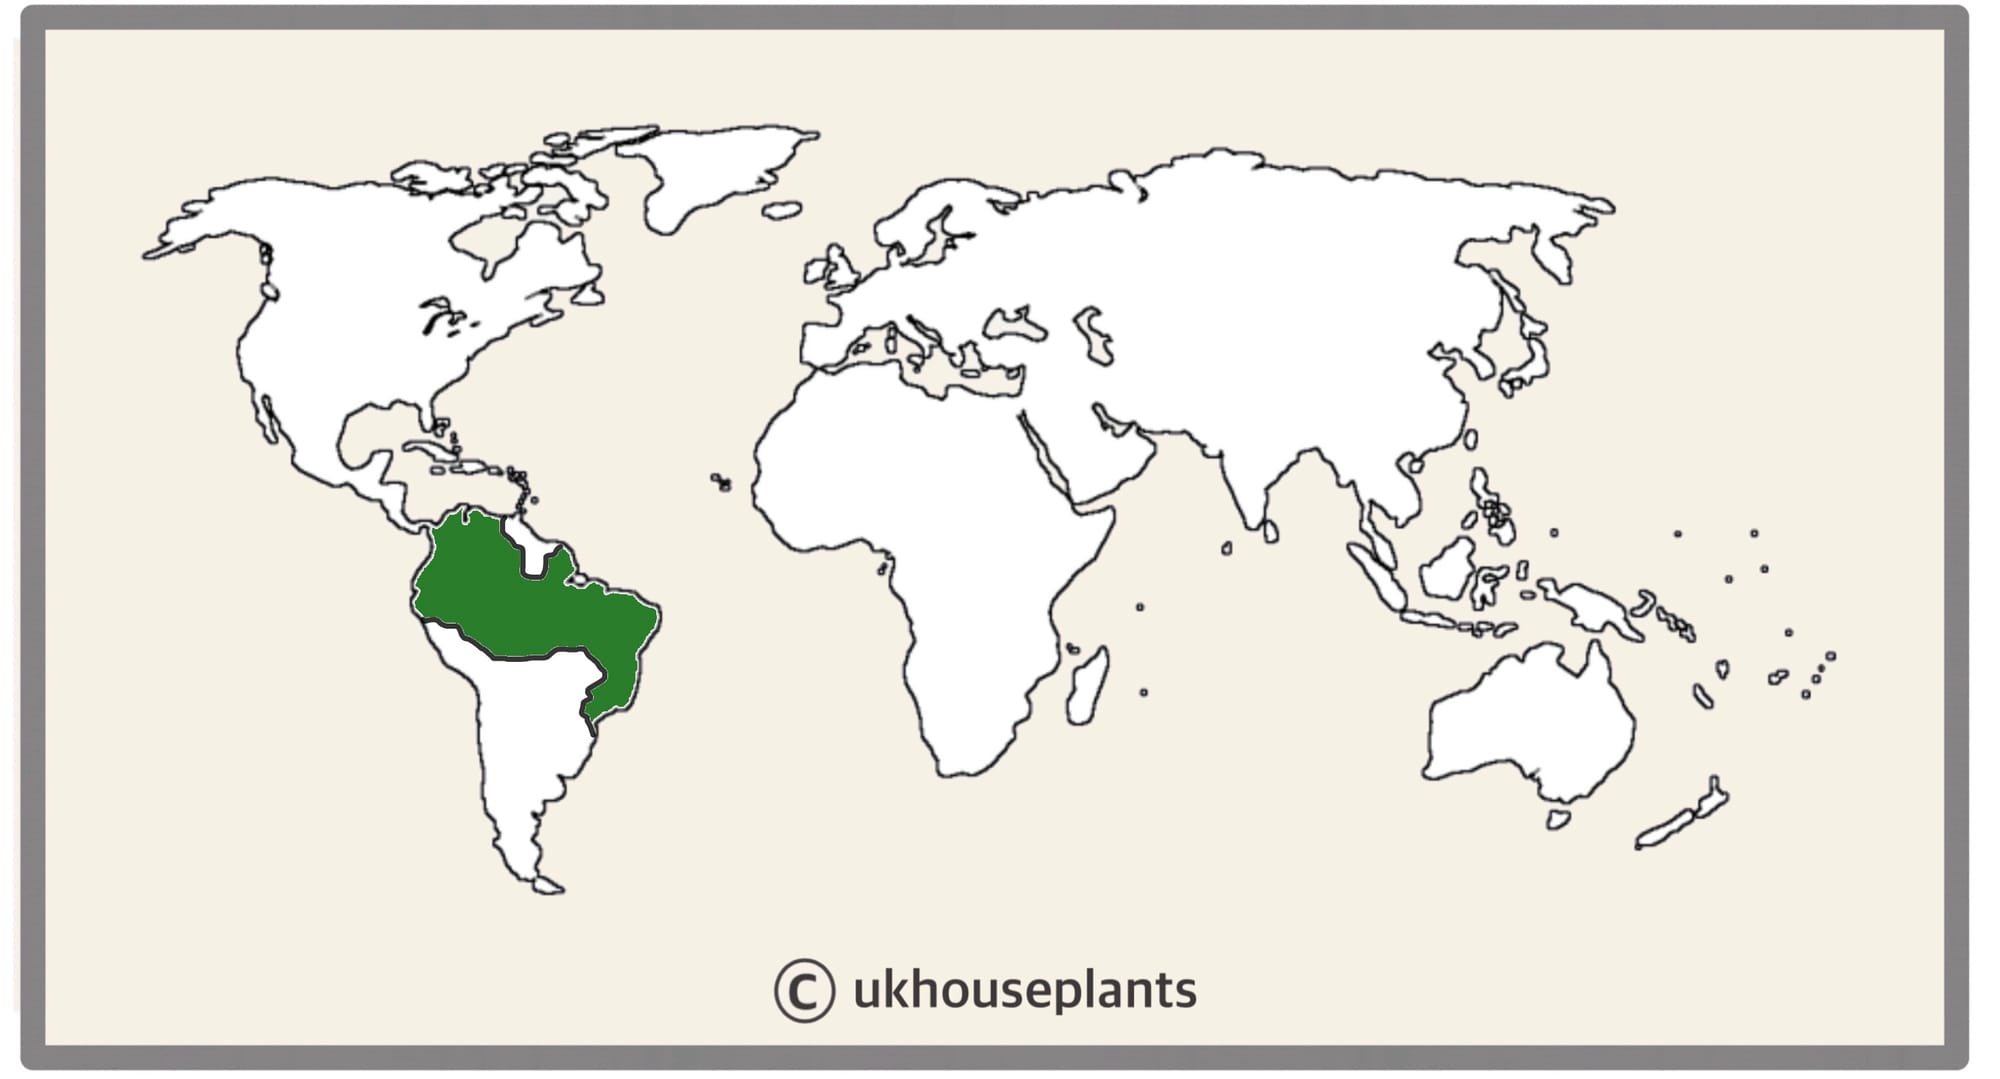 The Distribution of Neoregelia.
Temperature
12° - 30°C (54° - 86°F)
H1b (Hardiness Zone 12) - can be grown outdoors during the summer in a sheltered location with temperatures above 12℃ (54℉), but is fine to remain indoors, too. If you decide to bring this plant outdoors, don't allow it to endure any direct sunlight as it may result in sun-scorch and dehydration. Regularly keep an eye out for pests, especially when re-introducing it back indoors.
Spread
Up to 40cm in height and 50cm in width, with maturity being achieved in around 5 years.
Pruning & Maintenance
Remove yellow or dying leaves, and plant debris to encourage better-growing conditions. While pruning, always use clean utensils or shears to reduce the chance of bacterial and fungal diseases. Never cut through yellowed tissue as this may cause further damage in the likes of diseases or bacterial infections. Remember to make clean incisions as too-damaged wounds may shock the plant, causing weakened growth and a decline in health.
Remove the bract (flower stalk) close to the plant's well once it begins to wilt, keeping the well dry from there on in. If the open tissue from the stalk's base remains submerged in water, it could result in rot that may spread to the rest of the plant if untreated.
Propagation
Via Seed or Offset Division.
Offset Division (Easy) - Your plant will produce several basal offsets that can be separated once they have a sufficient root system and surpass the mother plant's height by half. As the 'pup' is suspended, separating the two will be easy. Use a clean pair of scissors and prune the 'umbilical cord' around an inch from the pup's base, noting the risk of a too-damaged wound. Choose an appropriate sized pot with a fresh batch of 'Houseplant' labelled compost, before filling the bottom third with the compost. Place the pup's base in the centre, pouring the remaining soil around the gaps. Don't worry if you submerge a few of its basal leaves, because as long as the central well is soil-free, you'll be good to go. Maintain evenly moist soil and situate it in a bright, indirect location away from any direct sunlight or cool draughts. Repot in around four month's time.
Flowers
The individual specimen will only flower once, but as mentioned above, pups will form at the base of the plant that'll eventually flower. The bloom can be up to 30cm in length and can last up to three months in the spring or summer. The bract's colour includes red, yellow, green, brown, purple or pink that are arranged in a zigzag pattern.
Are you interested in stimulating a show of blooms in the summer months? Reduce the ambient temperature throughout the autumn and winter, along with a reduction of watering to encourage a dormancy period. As the natural temperatures and daylight hours begin to increase in the spring, your specimen will slowly exit the resting period, potentially producing a bloom by mid-summer!
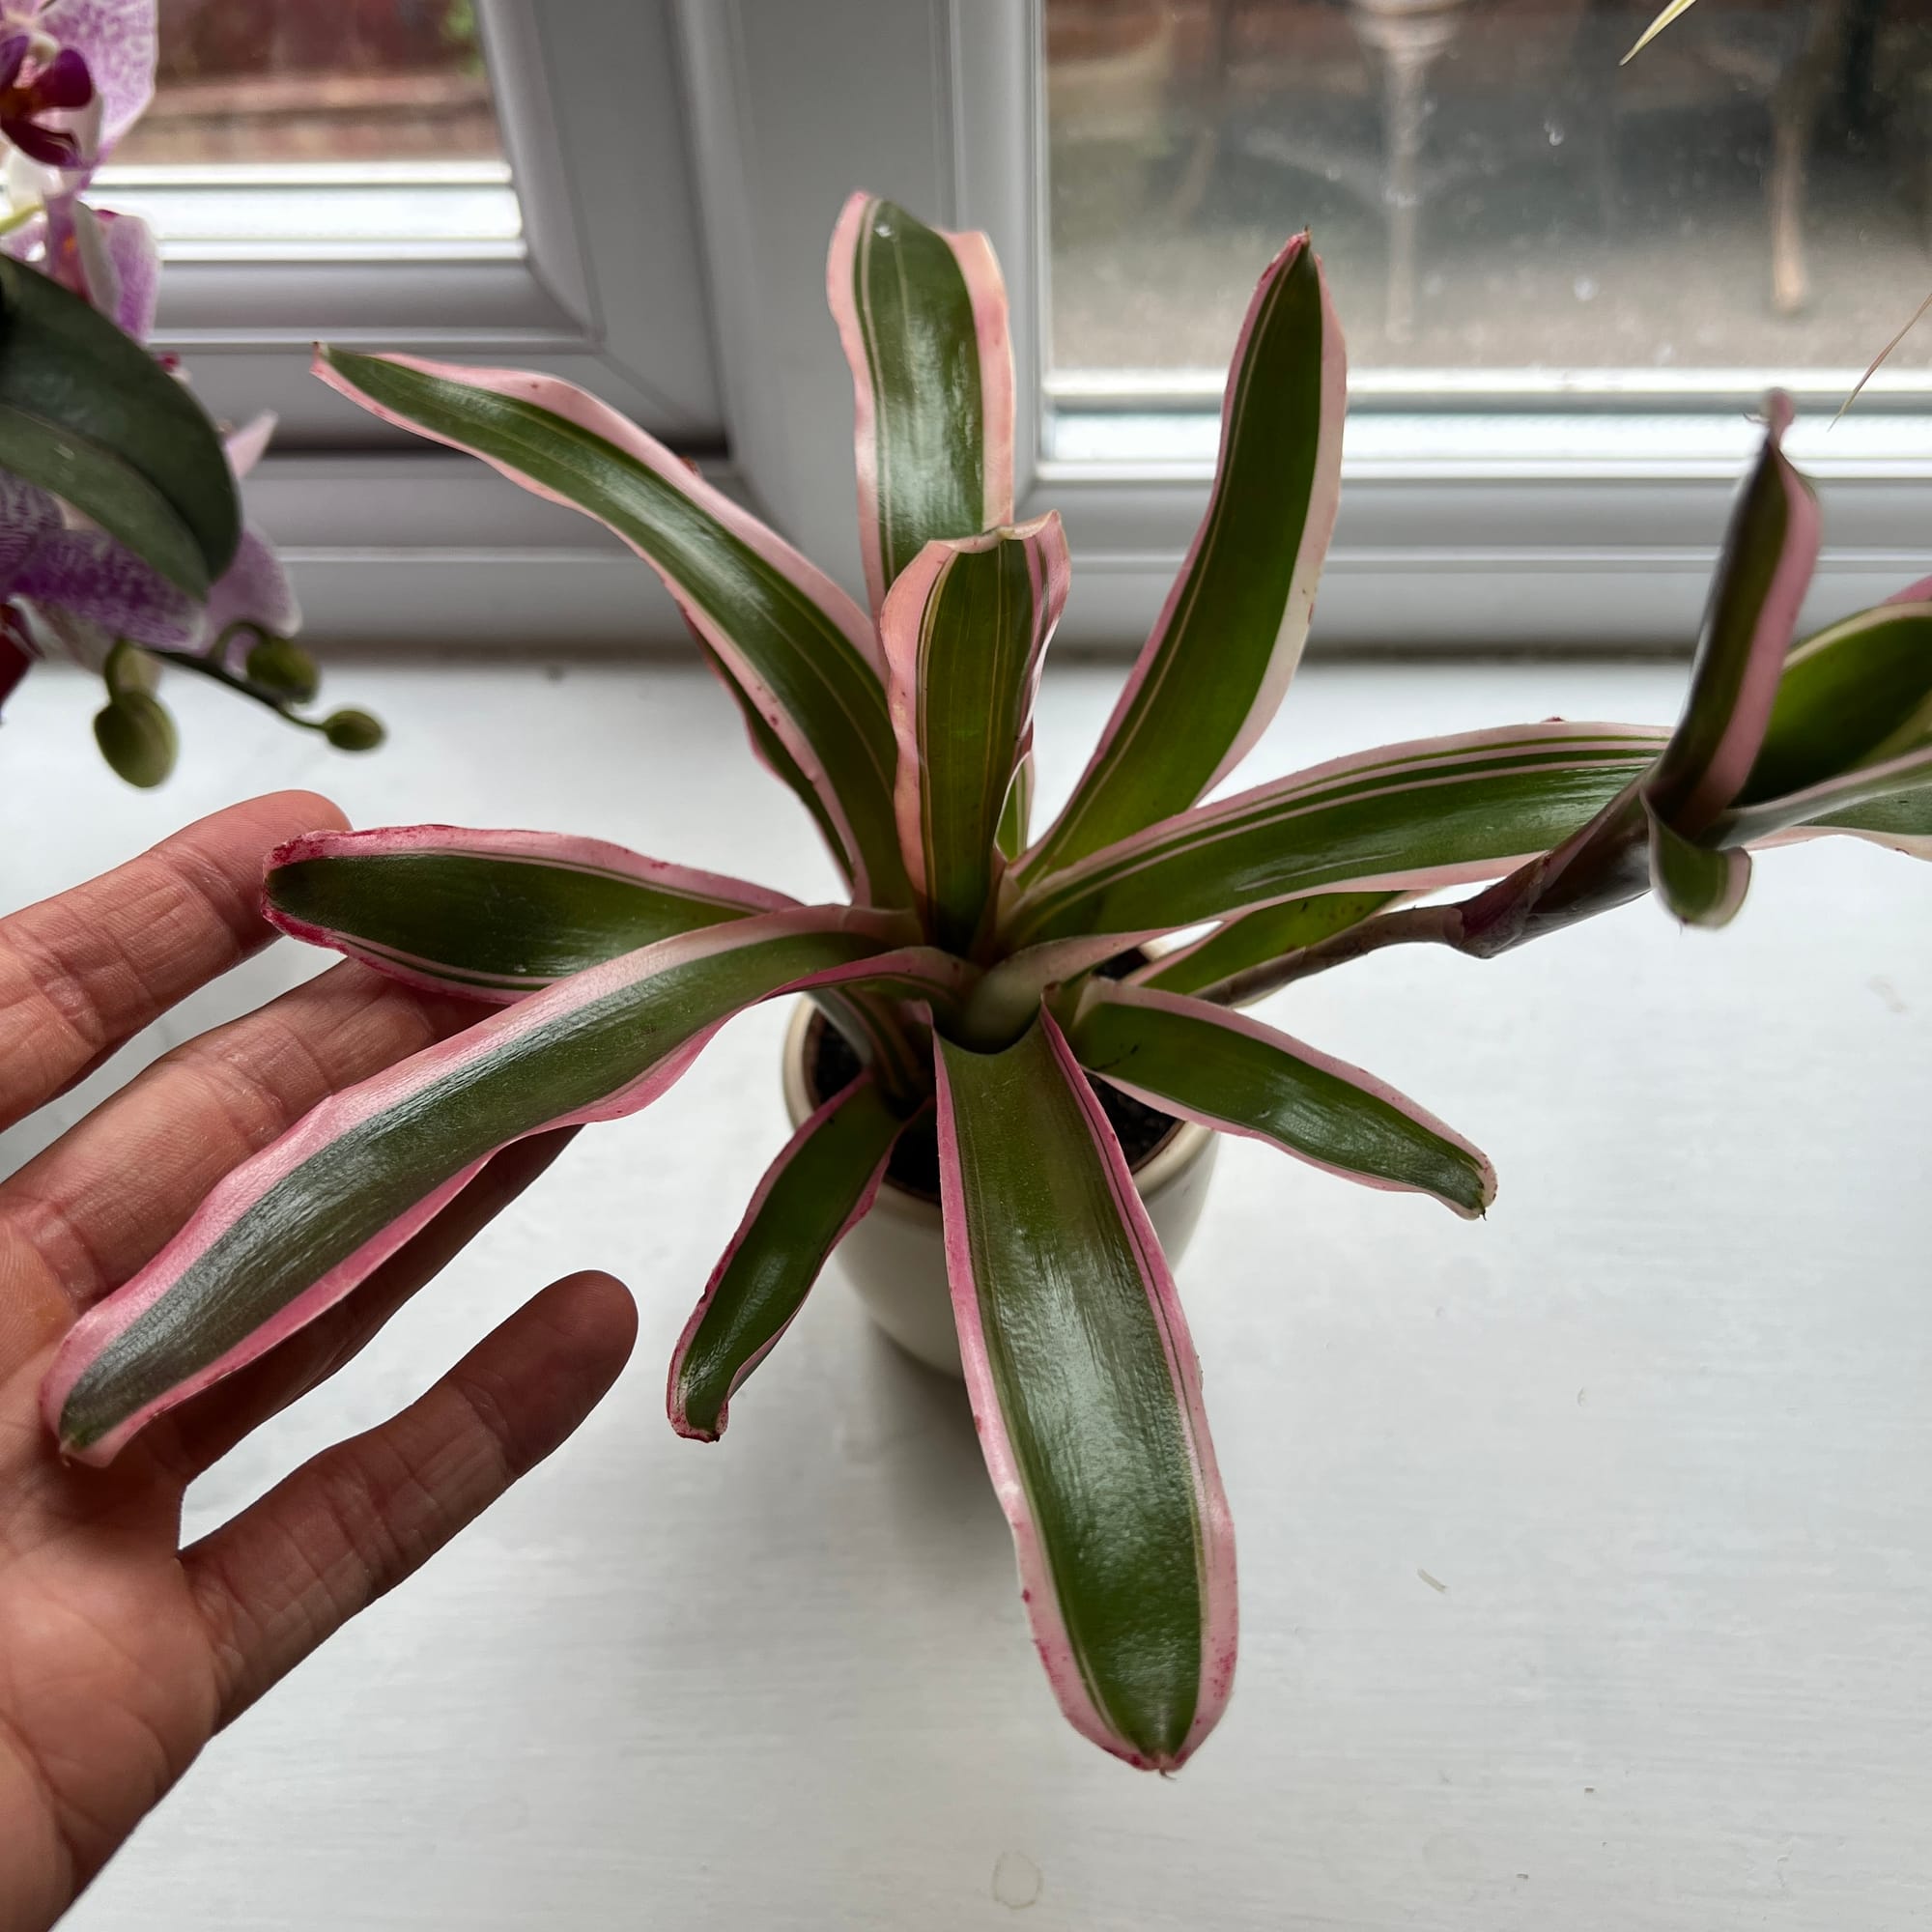
 With some species, the central leaves may even change its colour in order to attract airborne pollinators to the flower. Copyright: Joy Us Gardening
Repotting
Although this isn't entirely necessary, you can transplant it every few years in the spring using a 'Houseplant' labelled compost with the next sized pot. Hydrate the plant 24hrs before tinkering with the roots to prevent the risk of transplant shock. For those that are situated in a darker location, add an extra splash of perlite in the pot's base to improve drainage and downplay over-watering. Click here for a detailed step-by-step guide on transplantation, or via this link to learn about repotting with root rot.
Book a 1-to-1 video call with THE HOUSEPLANT DOCTOR™ if you'd like a personal guide to repotting your houseplant. This will include recommending the right branded-compost and pot size, followed by a live video call whilst you transplant the specimen for step-by-step guidance and answer any further questions!
Pests & Diseases
Keep an eye out for mealybugs, spider mites, scale, thrips & root mealybugs that'll locate themselves in the cubbyholes and undersides of the leaves, with the exception of the latter in soil. Common diseases associated with Neoregelia are root rot, leaf-spot disease, botrytis, rust, powdery mildew & southern blight - click here to learn more about these issues.
Toxicity
Not known to be poisonous when ingested by pets and humans. If large quantities are eaten, it may result in vomiting, nausea and a loss of appetite.
Retail Locations
Online Stores.
Book a 1-to-1 Call with THE HOUSEPLANT DOCTOR™
If you need further advice with your houseplants, book an advice call with ukhouseplants' friendly and expert writer today! This can be done via a video or audio call on most apps, including Facebook, FaceTime & Skype. A ten-minute call costs £5.99 (US$7), or £15.99 for thirty minutes. You can ask multiple questions, including queries on plants, pests, terrariums, repotting advice and anything in between. Please consider supporting this service to keep ukhouseplants thriving!
Neoregelia Neoregla Carolinae Fireball ' Pimiento Tequila Flandria Donga Marmorata Zoe Smithii Tricolor Vulgaris Ying Cheers Lilliputiana Liliputiana Cruenta Kahala Dawn Polly Morada Atlantis Pascoaliana Van Durne Ampullacea Ampulacea Schultesiana Tangerine Orange Crush Narciss Balboa Concentrica Franca Broemelia Bromeliad Amandae Madam Madame Nuance Foster's Dragon Donna Tiger Puppy Love Freddie Compacta x X Aculeatosea Carchardon Sunshine Miami Groucho Fancy Turmoil Tarapotiensis Demeter Yang Rosea Alba Truncata Varigata Variegata Martin Johannis Striata Princess Palmeras Palmares McKensie Notorius Vebbie Kerryi Kerrii Java Hannibal Green Apple Fire Ball Ninja Ajax Spectabilis Wilsoniana Olens Punctatissima Pauciflora angustibracteolata Atroviridifolia Bahiana Kautskyi Pendula McSmithii Jonesis Fluminensis Bromelioideae Bromeliaceae Regel Neo Neregelia Regelia Reglia Neoreglia Farinosa Amazonicae Subgenera Hylaeaicum
Comments