
Anthurium clarinervium. Copyright: GardenTags
Contents
- Top Tips
- Location, Water, Humidity & Fertilisation
- Common Issues
- Origins, Temperature, Propagation, Repotting & Toxicity.
Need the answer to a specific plant query? Book a 1-to-1 video call with THE HOUSEPLANT DOCTOR™, the website's friendly author to overcome and address your niggling problem! Available on iMessage, WhatsApp, Facebook Messenger & more.
Top Tips & Info
- Care Difficulty - Moderate
- Provide a bright, indirect setting away from the direct sunlight. Avoid placing it within a few metres of an operating heater or in excessively dark locations to decrease the chance of death.
- Keep the soil evenly moist, allowing the top third to dry out in between waters. Reduce this further during the colder months of the year to replicate their much-needed dormancy period.
- Introduce a pebble tray not only to increase the local humidity levels but also to reduce the risk of drying soil that could cause issues of weakened health.
- Fertilise using a 'Houseplant' labelled feed every four waters in the spring and summer, reducing this to every six in the colder months.
- Repot every two with a 'Houseplant' potting mix & the next sized pot with adequate drainage. You can also add 1 Part of 'Orchid Bark' to 4 Parts of 'Houseplant' compost, to complement its epiphytic nature.
- Keep an eye out for Spider Mites & Mealybugs throughout the year, & Thrips during the start of spring to late summer.
Location & Light - 🔸🔸
Perfecting the amount of light an Anthurium receives is crucial for a long-lasting specimen. During the spring and summer, be sure to provide a brightly lit spot away from any direct light. Excessive exposure during this time will negatively affect the plant in the likes of sun-scorch and dehydration. Once the autumn kicks in, be sure to include an hour or two of direct light per day to get it through the dormancy period, lasting until the following spring.Never situate this plant within four metres of an operating radiator.
A current trend in the indoor plant community is to locate rare Aroids (like Alocasia, Anthuriums & Philodendrons) in IKEA shelving that has added grow-lights.
Water - 🔸🔸
Allow the soil's top third to dry out in between waters, reducing this further in the autumn and winter. The best indication as to when the plant will require another water is once the pot feels light when lifted. Due to the sensitivity of its root systems, never apply cold water as it may weaken its health and well-being over time. For those that use tap water (instead of rainwater or fresh bottled water), allow it to stand for at least 24hrs to eliminate the high levels of chloride and fluoride found from the tap. Under-watering symptoms include brown leaf edges and stunted or deformed growth; these issues are typically down to either too much light/heat or forgetfulness. Over-watering symptoms include yellowing leaves with brown halos, little to no new growth and a wobbly or rotten stem. In severe cases, the chances of saving the plant can be slim, so performing stem cuttings is the only option to keep the specimen alive - scroll down to 'Propagation' for more information.
Remember - The amount of light and current season of the year will directly govern the frequencies of waters per month. Specimens placed in darker areas must be kept on the drier side to life, whereas brighter locations will require more soil moisture to lubricate photosynthesis.
Humidity - 🔸🔸
Create a humidity tray to provide a moist and stable environment for your plant. If the surrounding saturation is too low or the heat too high, its leaf-tips may start to brown over and curl, especially in direct sunlight. Hose the foliage down from time to time to hydrate the leaves and keep the dust levels down. Remember not to over-mist the specimen if it's sat on a pebble tray as it may cause issues of rot.
Do not solely rely on misting to provide a moist environment; constant humidity fluctuations may result in poor growth and yellow lower leaves.
Fertilisation - 🔸🔸
Fertilise every four waters during the growing period before reducing this to every six in the autumn & winter. Although an 'All-Purpose' fertiliser will still do the job, we'd recommend using a specific 'Houseplant' labelled fertiliser as it'll support the vital thirteen nutrients that this species will need to grow. Regular supplements will reduce the risk of browning lesions with yellowed halos, mentioned below.
Common Issues with Anthurium Clarinervium
An array of simultaneous cultivation issues will increase the chance of developing yellowed leaf-sections with browned halos - see image below for visual reference. Firstly, the location may be too dark, with its compost staying too saturated in-between waters; if mould is growing across the soil, this is usually a bad sign. Further, you're potentially using too cold water or tap water that hasn't been allowed to sit for 24hrs. This period of rest will not only bunk-up its temperature, but the harsh chemicals used to preserve water hygiene (fluoride & chloride) will begin to settle after a few hours. If possible, use fresh bottled water from a shop or supermarket to prevent further chemical burns. The final culprit might be lack of fertilisation, with regular feeds being paramount for long-lasting, healthy leaves. If the specimen hasn't been nourished in over two months, it'll begin to show signs of nutrient deficiencies seen in this article. If this common problem has occurred with your specimen, remove the affected leaves (not areas) and improve the growing conditions considerably. Fertilise regularly with lukewarm water and be sure to allow the top third to dry out in between hydrations. If you'd like to speak to ukhouseplants regarding this issue, don't be afraid to book a 1-to-1 call with Joe Bagley to help guide you through the step-by-step process!
If your Anthurium develops basal collapse, it may spell the end of its life. Be sure to take the plant out of the pot and inspect its roots - yellowed roots are healthy, whereas brown and rotten roots signal issues of rot. Prune away any rotten areas and check its base for a softened profile. Remove any individual plants that have a rotten bottom and repot the healthy specimens in a fresh batch of 'Houseplant' compost. Provide a brighter location and reduce the number of waters slightly to avoid further rot. Take several stem cuttings as a last resort if there is no sign of health below the soil line, following the information mentioned in 'Propagation' towards the end of this article.
Always use lukewarm water, and if you choose to use tap water, allow it to stand for at least 24hrs before application. Anthuriums tend to be quite sensitive to temperature change, so pouring cold tap water immediately into the pot will not only add fluoride into the soil, but it could even cause yellowed leaf-edges over time.
A dark location (shelves, etc.) will promote the plant to develop small or no juvenile leaves, giving the impression of 'leggy' or naked growth. The length between the nodes will also dramatically become larger, harvesting less energy that can be converted into sortable sugars. Be sure to increase the amount of indirect light somewhat, and give the specimen a gentle supplement of 'Houseplant' labelled feed to help with its stored energy.
Never situate it within four metres of an operating heat source, for instance, a heater or fireplace. Due to the heightened temperature, the plant will soak up far more moisture than those situated in cooler locations, increasing the chance of droughts and browning leaf-edges.
Pests could arise at any time, with infestations starting from the original nursery or via contamination in your home. Spider Mites and Mealybugs to tend to be the usual inhabitants, with the first being minute and almost transparent, roaming the leaves in search of chlorophyll and a site to hide its eggs. The latter, however, will stand out much more, with white cottony webs developing across the foliage and stems. Thoroughly check the plant's cubbyholes before giving it the all-clear, or click on the appropriate links to learn more about eradicating these issues!
Too low humidity can cause browning tips with yellow halos on juvenile leaves. Although this won't kill your specimen, you may want to increase the local moisture to prevent the new growth from adopting these symptoms. Mist or rinse the foliage from time to time and create a humidity tray while the heaters are active to create a stable environment. Browning leaf tips are an inevitable part of a leaf's maturity though, so never be too disheartened if your specimen is showing signs of this!
Transplant shock is a big issue when it comes to heavy-handed repots. Give the plant a good soak 24hrs before the action and never tinker with the roots, unless it has been affected by root rot. Typical signs of transplant shock are largely similar to under watering, with wilting, yellowing leaves and stunted growth among the most common symptoms. Click here to learn more about addressing transplant shock and a step-by-step guide on performing the perfect transplant.
Mould developing on the soil means two things - too little light and over-watering. Despite the harmlessness, it'll prove unsightly to most gardeners and is therefore removed once known. To remove, replace the top two inches of the soil for a fresh batch of 'Houseplant' compost. Either increase the amount of light received (no direct sunlight for the first few weeks to prevent environmental shock) or decrease the frequency of waters slightly. If the mould is accompanied by yellowing lower leaves, you may also have a case of root rot.
Origins
Eizi Matuda first documented this species in 1952, during a voyage to south-east Mexico to study its fauna and flora. He placed it in Anthurium, a genus constructed by Wilhelm Heinrish Schott in the 1830s, using the specific epithet of 'clarinevium', which can be translated from modern Latin to mean 'distinctly nerved or veined'.
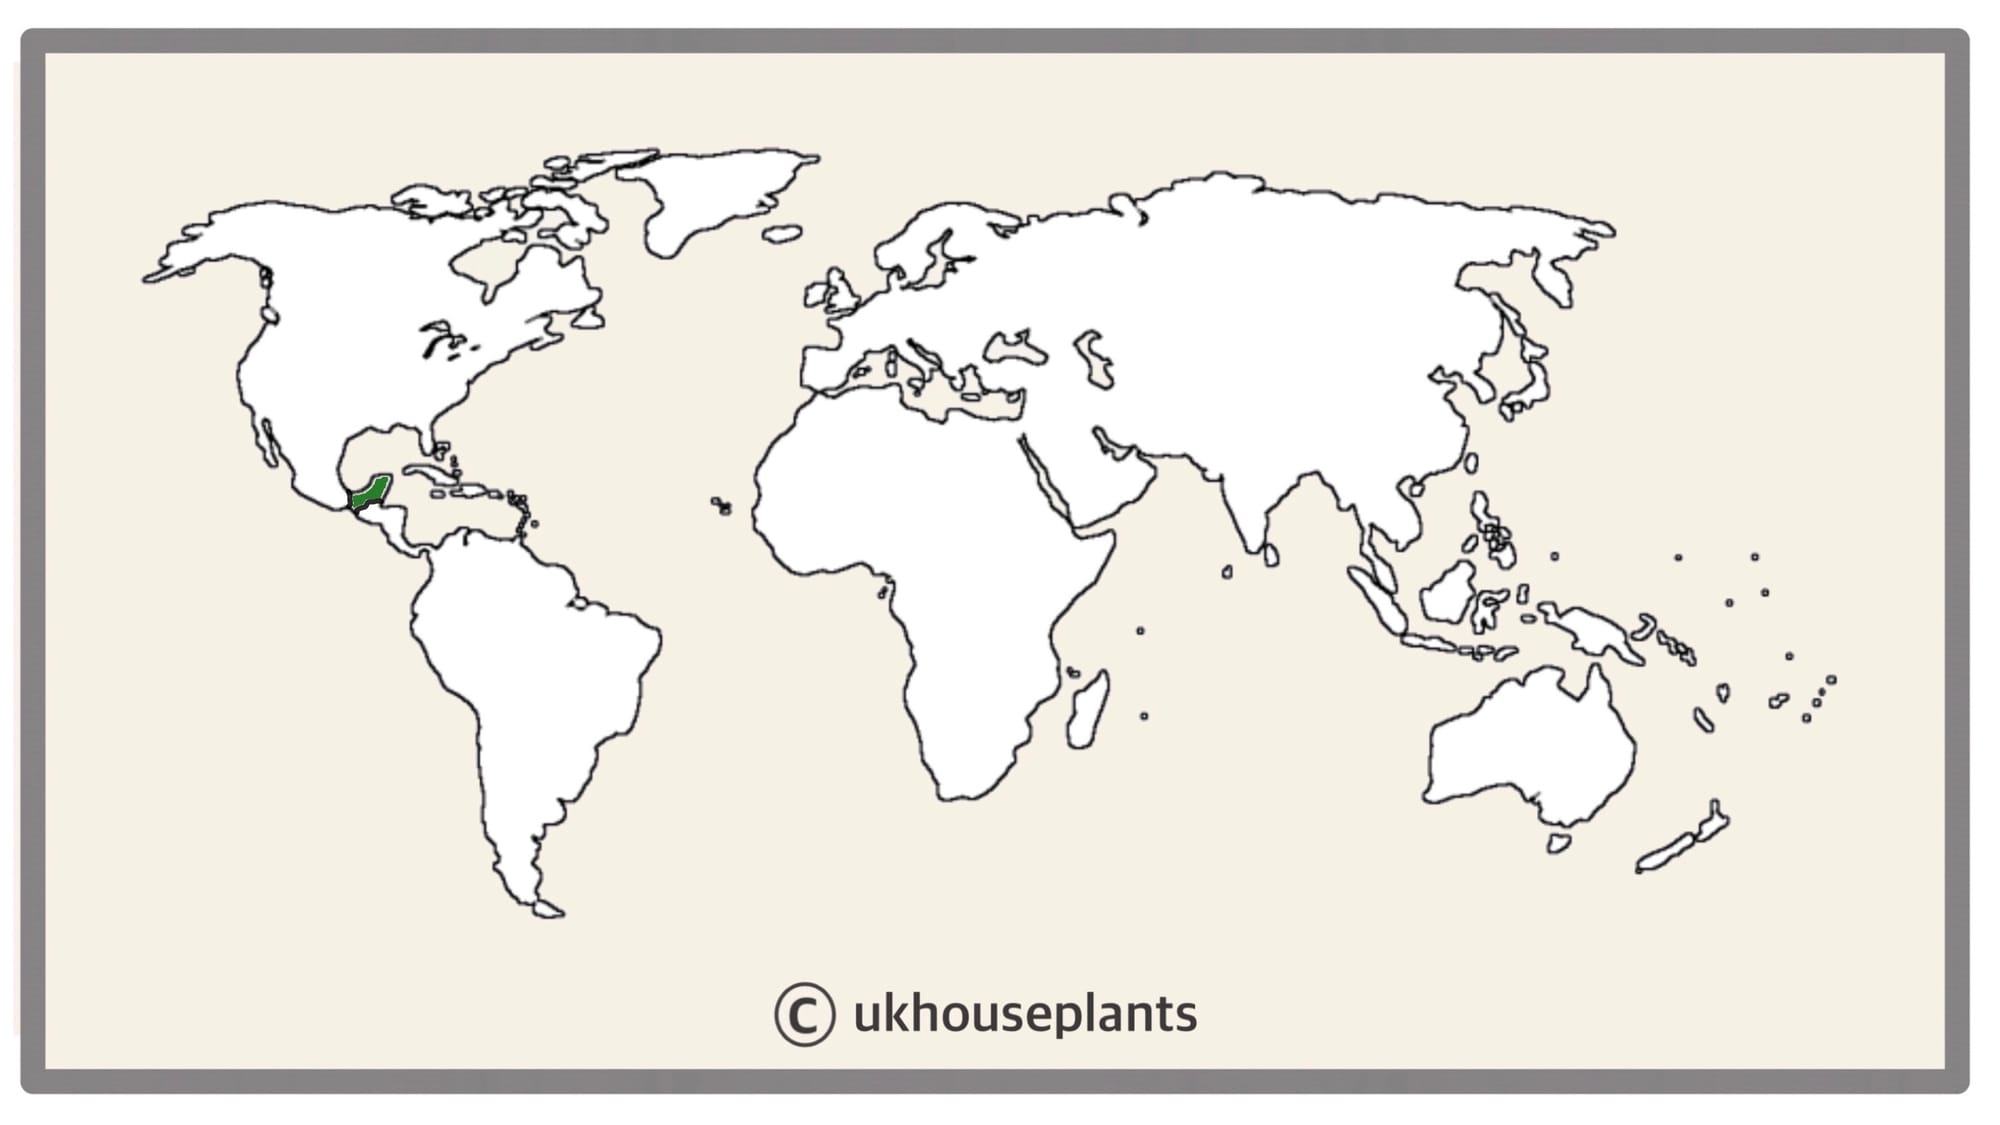 The Distribution of Anthurium clarinervium.
Temperature
15° - 24°C (59° - 75°F)
H1a (Hardiness Zone 13) - Must be grown indoors or under glass all year round. Never allow temperatures to dip below 15℃ or permanent damage may occur in the likes of flower loss, stunted growth and yellowed leaves.
Spread
Up to 0.7m in height and 0.4m in width once they reach maturity of around 5 - 8 years.
Pruning & Maintenance
Remove yellow or dying leaves, and plant debris to encourage better-growing conditions. While pruning, always use clean scissors or shears to reduce the chance of bacterial and fungal diseases. Never cut through yellowed tissue as this may cause further damage in the likes of diseases or bacterial infections. Remember to make clean incisions as too-damaged wounds may shock the plant, causing weakened growth and a decline in health.
Propagation
Via Seed, Offset Division & Stem Cuttings.
Basal Offset Division (Easy) - Your plant will produce several basal offsets that can be separated once they have a sufficient root system, and surpass 10cm in height. If possible, water the soil 24hrs before the main event to reduce the risk of transplant shock, when its dry root systems are over-touched. Take the plant out of its pot and place your fingers close to the nodal junction - soil may have to be removed for better access. Push the chosen offset downwards until you hear a snap. Separate the foliage and its root system away from the mother plant, mentally noting the high risk of damage. Transplant in the appropriate sized pot with a mixed potting mix of 4 Parts 'Houseplant' soil and 1 Part 'Orchid Bark. Maintain evenly moist soil and situate it in a bright, indirect location away from any direct sunlight. After eight weeks, treat it like a normal specimen, following the care tips above!
Stem Cuttings (Moderate) can be taken at the start of spring when there's more than 12cm (4.7 inches) of semi-wooded stem. This will take a while, as the plant will need to reach a certain level of maturity before its base becomes ready. While using clean secateurs, remove the top 12cm of the stem just above a node and gently remove the lower leaves. Set the bottom half into water for root development. After 5cm (2 inches) of root growth, which can take several months, set the rooted portion into moist 'Houseplant' compost. Wrap the plant (& its pot) in a transparent bag to maintain high humidity due to the absence of roots that'll result in rapid moisture loss within the stem. Provide a bright, indirect location with continual soil moisture to quicken the rate of root development. Remove the bag after three weeks of substantial foliar growth and follow the care advice provided at the top of the article.
Flowers
As Anthurium clarinervium is part of the Araceæ family, their flowers aren't particularly showy. Much like a Peace Lily's flower body, their flowers consist of a white-green spathe (the spoon-like shell) with the spadix being the site pollination. Blooms can last up to five days and are usually visible during late spring or early summer around 30cm+ from the soil line.
Repotting
Repot every two years in the spring, using a 'Houseplant' labelled compost and the next sized pot with adequate drainage. Hydrate the plant 24hrs before tinkering with the roots to prevent the risk of transplant shock. For those that are situated in a darker location, add a thin layer of small grit in the pot's base to improve drainage and downplay over-watering. Click here for a detailed step-by-step guide on transplantation, or via this link to learn about repotting with root rot.
Pests & Diseases
Keep an eye out for mealybugs, spider mites, scale & thrips. Typical diseases associated with this genus are leaf-spot disease, rust, botrytis & root rot. Click on this link for further information about how to identify and address any of these issues.
Toxicity
This plant is classified as poisonous due to varying concentrations of calcium oxalate crystals found around the plant's body. If parts of the plants are eaten, vomiting, nausea and a loss of appetite could occur. Consumption of large quantities must be dealt with quickly; acquire medical assistance for further information.
Retail Locations
Blue Diamond & Online Stores.
Book a 1-to-1 Call with THE HOUSEPLANT DOCTOR™
If you need further advice with your houseplants, book an advice call with ukhouseplants' friendly and expert writer today! This can be done via a video or audio call on most apps, including Facebook, FaceTime & Skype. A ten-minute call costs £6.95 (US$8), or £15.95 for thirty minutes. You can ask multiple questions, including queries on plants, pests, terrariums, repotting advice and anything in between. Please consider supporting this service to keep ukhouseplants thriving!
Comments