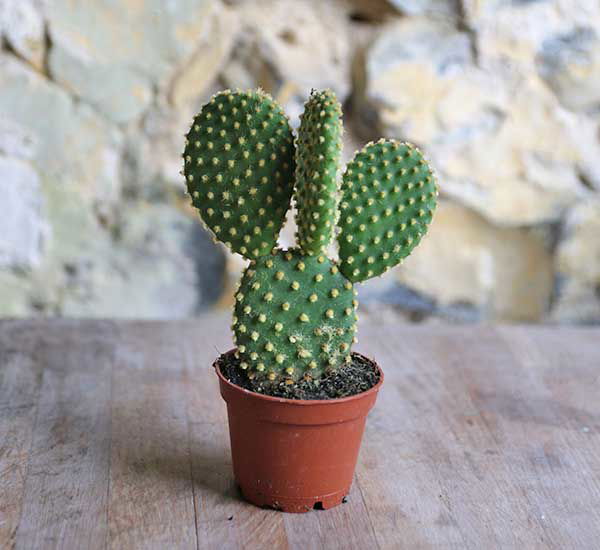
Opuntia microdasys var. pallida
Contents
- Top Tips
- Location, Water, Humidity & Fertilisation
- Common Issues
- Origins, Temperature, Propagation, Repotting & Toxicity.
Need the answer to a specific plant query? Book a 1-to-1 video call with Joe Bagley, the website's friendly author, to overcome and address your niggling problem! Available on iMessage, WhatsApp, Facebook Messenger & more.
Top Tips & Info
- Care Difficulty - Easy
- Provide a bright location with around a few hours of sunlight per day. Recently purchased specimens may need to build up their tolerance and exposure to the sun over the course of the next eight weeks if it's been purchased in the summer. Those bought in winter are okay to be placed in all-day sunlight as the natural rays are weaker during the shorter days.
- Prickly Pears must endure periods of droughts between waters - if you're stuck with when to water it, think of the ukhouseplants' phrase of 'Drenches Between Droughts'.
- Fertilise every two or three months using either a 'Cactus' or 'Houseplant' labelled feed.
- Repot every three to four years during the spring, using a 'Cactus & Succulent' labelled potting mix.
- Keep an eye out for Mealybugs & Scale that'll hide in the plant's cubbyholes.
Location & Light - 🔸🔸🔸
As mentioned above, Prickly Pears are best located in a bright location that boasts high temperatures in the spring and summer. A few hours of off-peak sunlight will be highly beneficial for the plant, as it’ll significantly reduce the risk of over-watering and root rot. Due to the species' intolerance to low light, avoid placing one in areas where a newspaper can’t be read without the use of artificial light.
If you have recently bought your Prickly Pear, it can be trained to tolerate harsher levels of sunlight than most houseplants, by gently increasing the number of hours in the sun over the oncoming month. Each week, increase the amount of light by an hour, starting with just an hour of morning sunlight to gain its momentum. The plant will slowly decease the production of chlorophyll, which in turn will reduce the risk of bleaching and sun-scorch. Remember to keep the specimen well hydrated during this period, and always abort the experiment if it shows signs of sun-scorch. The maximum amount of sunlight for this plant is around four hours a day.
Water - 🔸
The ukhouseplants saying of 'drenches between droughts' strongly applies to Prickly Pears. Not only will continuous soil moisture ruin their root systems, but it'll also increase the risk of 'basal rot' which essentially will destroy the plant from its centre. Allow all of the soil to thoroughly dry out in between waters in the growing period, reducing this even further in the autumn and winter. Under-watering symptoms include shrivelled or leggy leaves, yellowing, little to no growth and dry, crispy patches forming on the leaf edges. These issues are usually caused by too much light/heat or forgetfulness. Remember, the brighter the location, the more watering you'll need to do. Over-watering symptoms include a weakened or rotten stem, no new growth, yellowing lower leaves and eventual plant death. The differences between under and over-watering can be very similar, with a rotten root ball being the obvious difference.
Humidity -
This is not a necessity; however, a quick hose down from time to time will hydrate the leaves and wash away dust or potential pests.
Fertilisation - 🔸
Fertilise every two months during the growing period and every three months in the autumn & winter to replicate its dormancy period. Although a 'Houseplant' fertiliser will still do the job, we'd recommend using a specific 'Cactus' labelled feed as it'll support the vital thirteen nutrients that this species will need to grow.
Common Issues with Prickly Pears
Root rot is a common issue with specimens sat in too moist or waterlogged soil for long periods. Symptoms include rapidly yellowing leaves, stunted growth and a rotten brown base. Take the plant out of the pot and inspect health below the soil line. If the roots sport a yellow tinge, you're good to go, but if they're brown and mushy, action must be taken immediately. More information about addressing root rot can be found on this link.
Leggy new growth is caused by too little light and dehydration. Although this won't hurt the specimen, it's advised to gently increase the amount of sun exposure to help the following leaves become slightly plumper. Upping the frequency of watering will help, too, especially if the rootball has become smaller, causing the plant to be unbalanced.
Curled leaves and dried brown edges are the result of too little water and over-exposure to the sun. Although Prickly Pears can naturally do well in sun-filled locations, those that haven't acclimatised to the harsh rays will show signs of sun-scorch and environmental shock. Prolonged exposure will significantly speed the process of dehydration, so consider transplantation into a bigger pot in the spring to wrap the roots around moister soil.
Directly pinpointing yellow leaves is rather hard due to the many different issues that could be at fault. Problems include watering-related abuse, too much or too little light, and fertilisation issues. If you'd like to speak to ukhouseplants in regards to this issue, don't be afraid to book a 1-to-1 call to help guide you through the step-by-step process!
If the rootball (i.e. the soil) has constricted and become smaller, the plant may become unbalanced and wobbly. This is the direct product of under-watering, whereby the roots have literally squeezed the pot for all remnants of water. Fill the gaps with a fresh batch of 'Cactus' compost and increase your watering slightly.
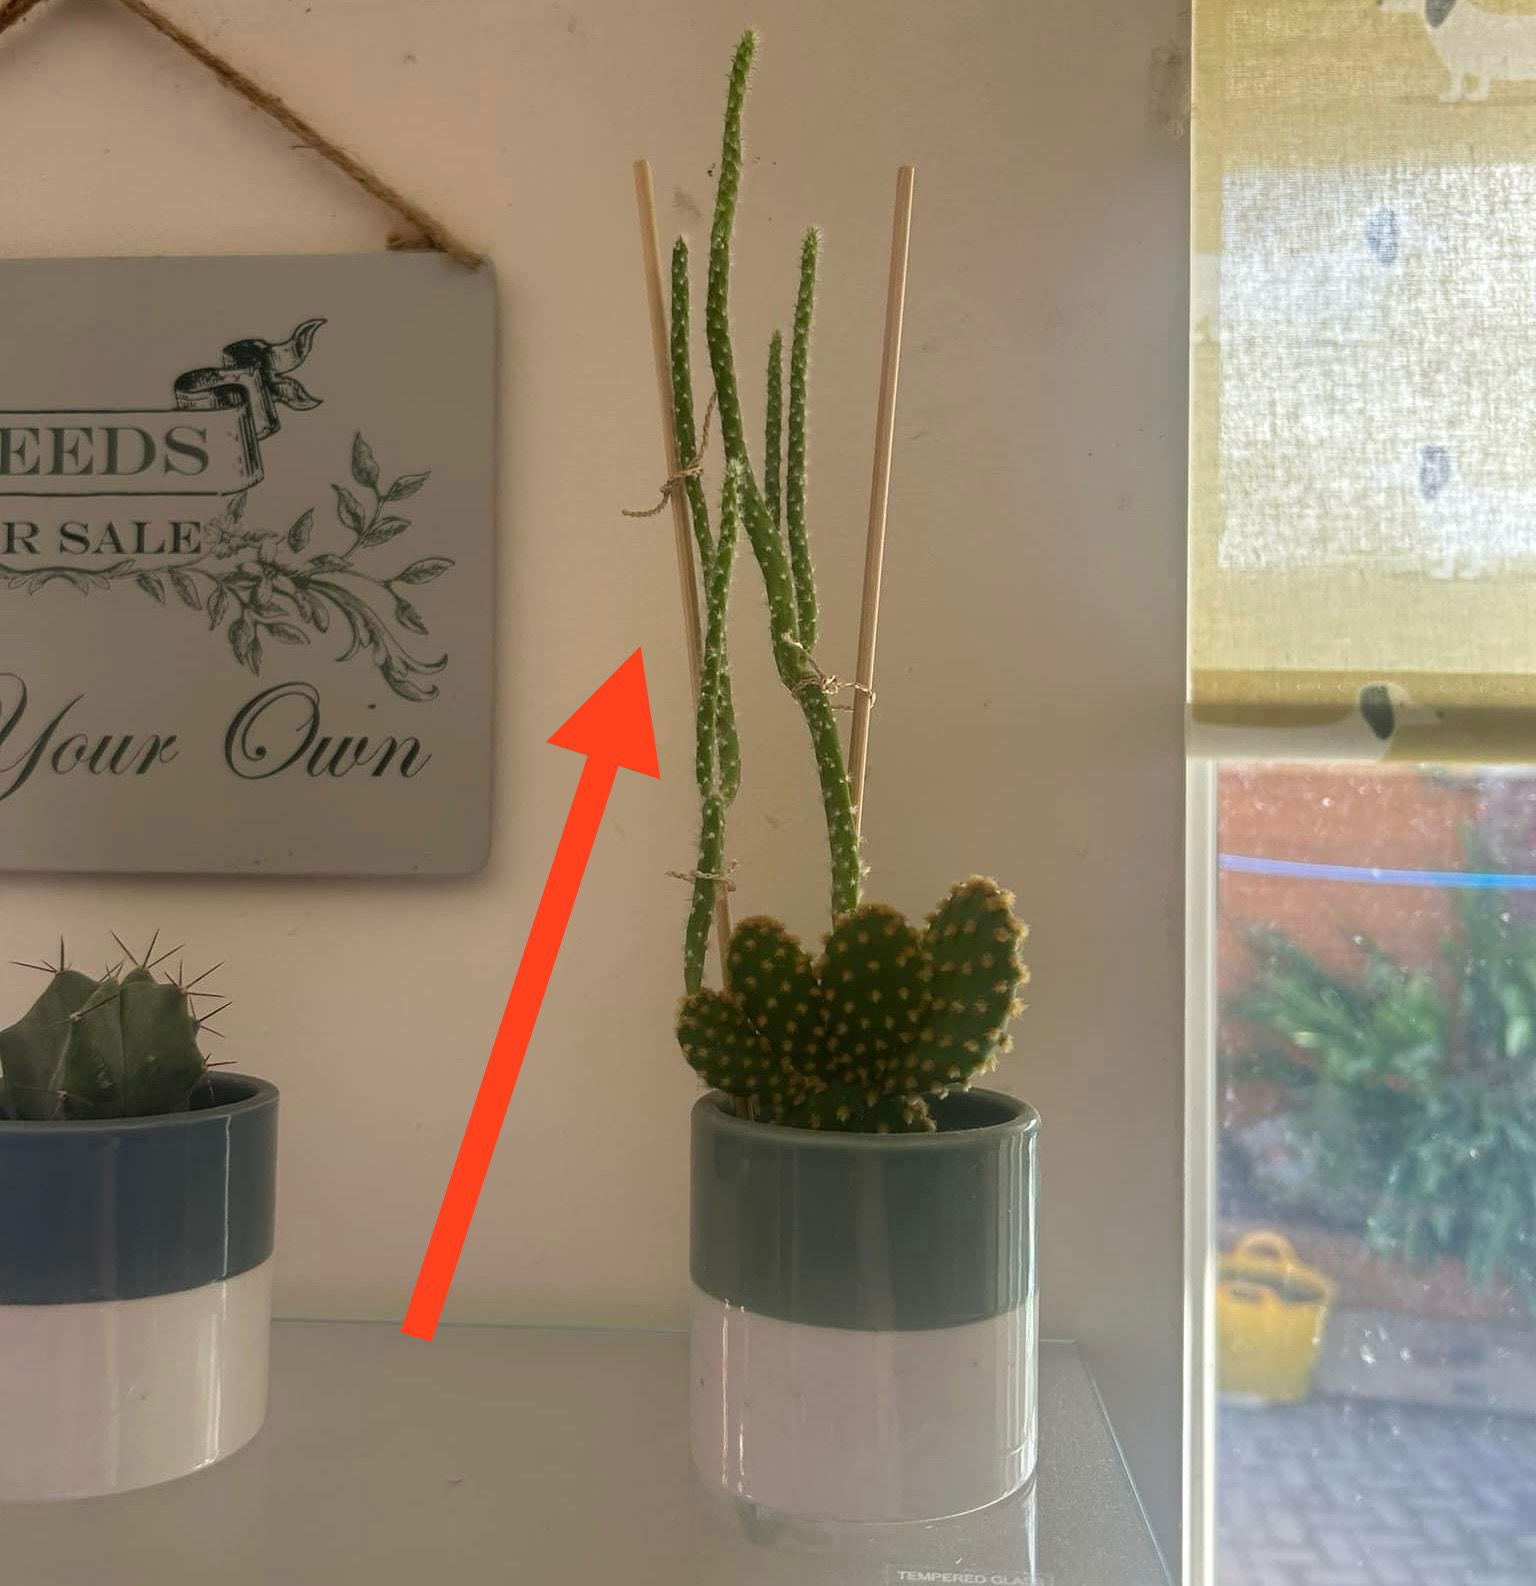 Thin, spindly growth is a common sign of low light. Relocate your Opuntia into a brighter location and prune the leggy growths off - these can be propagated as stem cuttings. Scroll down to 'Propagation' to learn more! Credit: Facebook.
Never allow temperatures to dip below 8ºC (46ºF) as irreversible damage may occur in the likes of yellowed foliage and weakened growth. If this happens, remove the severely affected areas and immediately improve growing conditions - never cut through softened yellow growth, and only around brown, crispy squares. As rehabilitation can take several months because of its slow-growing nature, be sure to provide a stable location with better growing conditions to speed this process.
Mould or mushrooms developing on the soil means two things - too little light and over-watering. Despite the harmlessness, it'll prove unsightly to most gardeners and is therefore removed once known. To remove, replace the top two inches of the soil for a fresh batch of 'Cactus' compost. Either increase the amount of light received (no direct sunlight for the first few weeks to prevent environmental shock) or decrease the frequency of waters slightly. If the mould is accompanied by yellowing lower leaves, you may also have a case of root rot.
A lack of flowers is caused by an insufficient dormancy period, where the temperatures are kept more or less the same over the year. Reduce the warmth by a couple of degrees over the autumn and winter, along with fewer irrigations to ensure a well-spent dormancy. As spring arrives, the natural temperature will begin to increase, with this is being the perfect time to increase waters and fertilisation. Remember, the warmer the summer days are, the more likely a specimen is to reflower.
Origins
Opuntia was first described back in 1754 by Carl Linnaeus, in Species Plantarum. The genus was named in honour of the Ancient Greek city of Opus, where, according to Theophrastus, an edible plant grew and could be propagated by rooting its leaves.
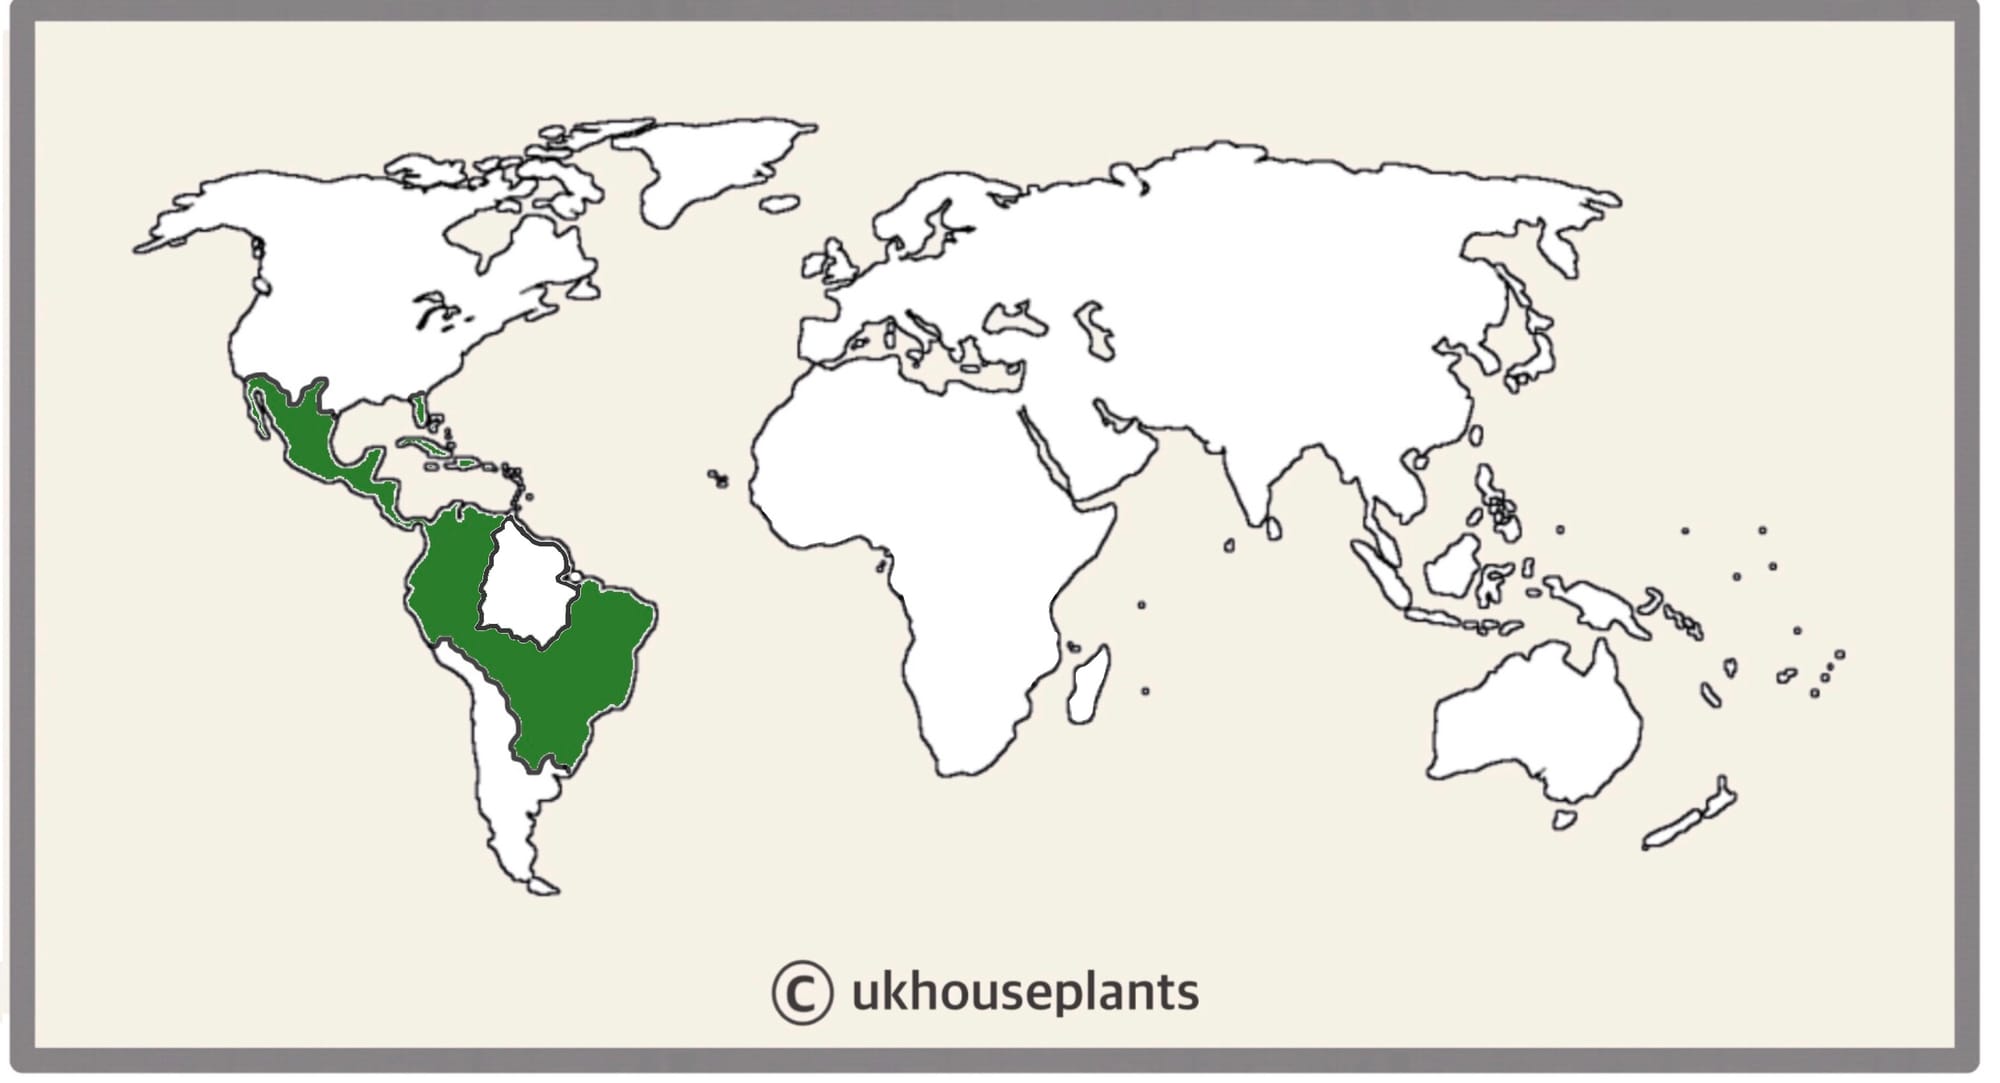 The Distribution of Opuntia.
Temperature
10° - 32℃ (50° - 90℉)
H1b (Hardiness Zone 12) - Can be grown outdoors during the spring and summer in a sheltered location whilst nighttime temperatures are above 10℃ (50℉), but is fine to remain indoors, too. If you decide to bring this plant outdoors, don't allow it to endure more than an hour of direct sunlight a day as it may result in sun-scorch. Regularly keep an eye out for pests, especially when re-introducing it back indoors.
Spread
The overall size of indoor species can reach up to 0.5m in height and 0.4 m in width, with the blades' width reaching around 7cm. The ultimate height will take between 8 - 10 years to achieve when repotted every few years.
Pruning & Maintenance
Remove yellow or dying leaves, and plant debris to encourage better-growing conditions. While pruning, always use clean scissors or shears to reduce the chance of bacterial and fungal diseases. Never cut through yellowed tissue as this may cause further damage in the likes of diseases or bacterial infections. Remember to make clean incisions as too-damaged wounds may shock the plant, causing weakened growth and a decline in health. Deadhead the flowers as they spend to improve the overall bloom time.
Propagation
Via Seed or Leaf Cuttings.
Seeds (Easy to Moderate) - The best soil to use is a 'Cactus & Succulent' labelled potting mix; however, multipurpose compost with added perlite and sand is as good. Set the seeds around 1cm deep (½ inch), resisting the temptation to compact it. Maintain evenly moist soil and allow the excess water to freely drain from the pot's base to prevent water-logged conditions. The ideal location for successful germination is in a bright, indirect setting with temperatures around 25℃ (77℉) with bottom-heat. Keep the pot in a transparent bag with small holes to provide a stable environment, along with longer-lasting soil moisture. Germination may take between two to twelve weeks to occur, so don't discard any unsuccessful seeds until this threshold has been surpassed. Remove the bag once the seedlings produce their first leaf and split them into their own 5cm (2 inches) pots after another six weeks.
Leaf Cuttings (Easy to Moderate) - This method is an easy way to duplicate the original plant, but will require caution due to the small shape thorns. To avoid making a mess of the serrations, use a clean pair of scissors and cut the leaf's base. Allow its base to callus over (harden), before dipping the wound in water and then into rooting hormone to speed rooting rates. Rooting can take in the range of between four to ten weeks, depending on environmental factors and the cutting's quality. We recommend using a 'Cactus & Succulent' labelled potting mix, with a pot that has adequate drainage to avert the risk of blackleg. Provide a bright, warm setting of around 20℃ (66℉) with relatively moist soil, but be sure to allow the top half to dry out in between waters. You'll know if propagation is successful as the leaves will stay green and firm, along with small roots developing from the callous (dried wound). New foliar growth will emerge from the nodes after around twelve weeks, but it may take longer if the conditions aren't optimal. After a month of solid new growth, transplant into a slightly bigger pot and treat it like a mature specimen with the care tips provided above. Always wear gloves or handle the plant with horticultural tongs.
Flowers
Prickly Pears will rarely flower indoors due to the unfavored growing contains and time in which it takes to reach maturity. Specimens grown in the wild will develop flowers across the spring and summer months, hanging proudly above the foliage line. Colours include white, red, orange, yellow, purple and pink.
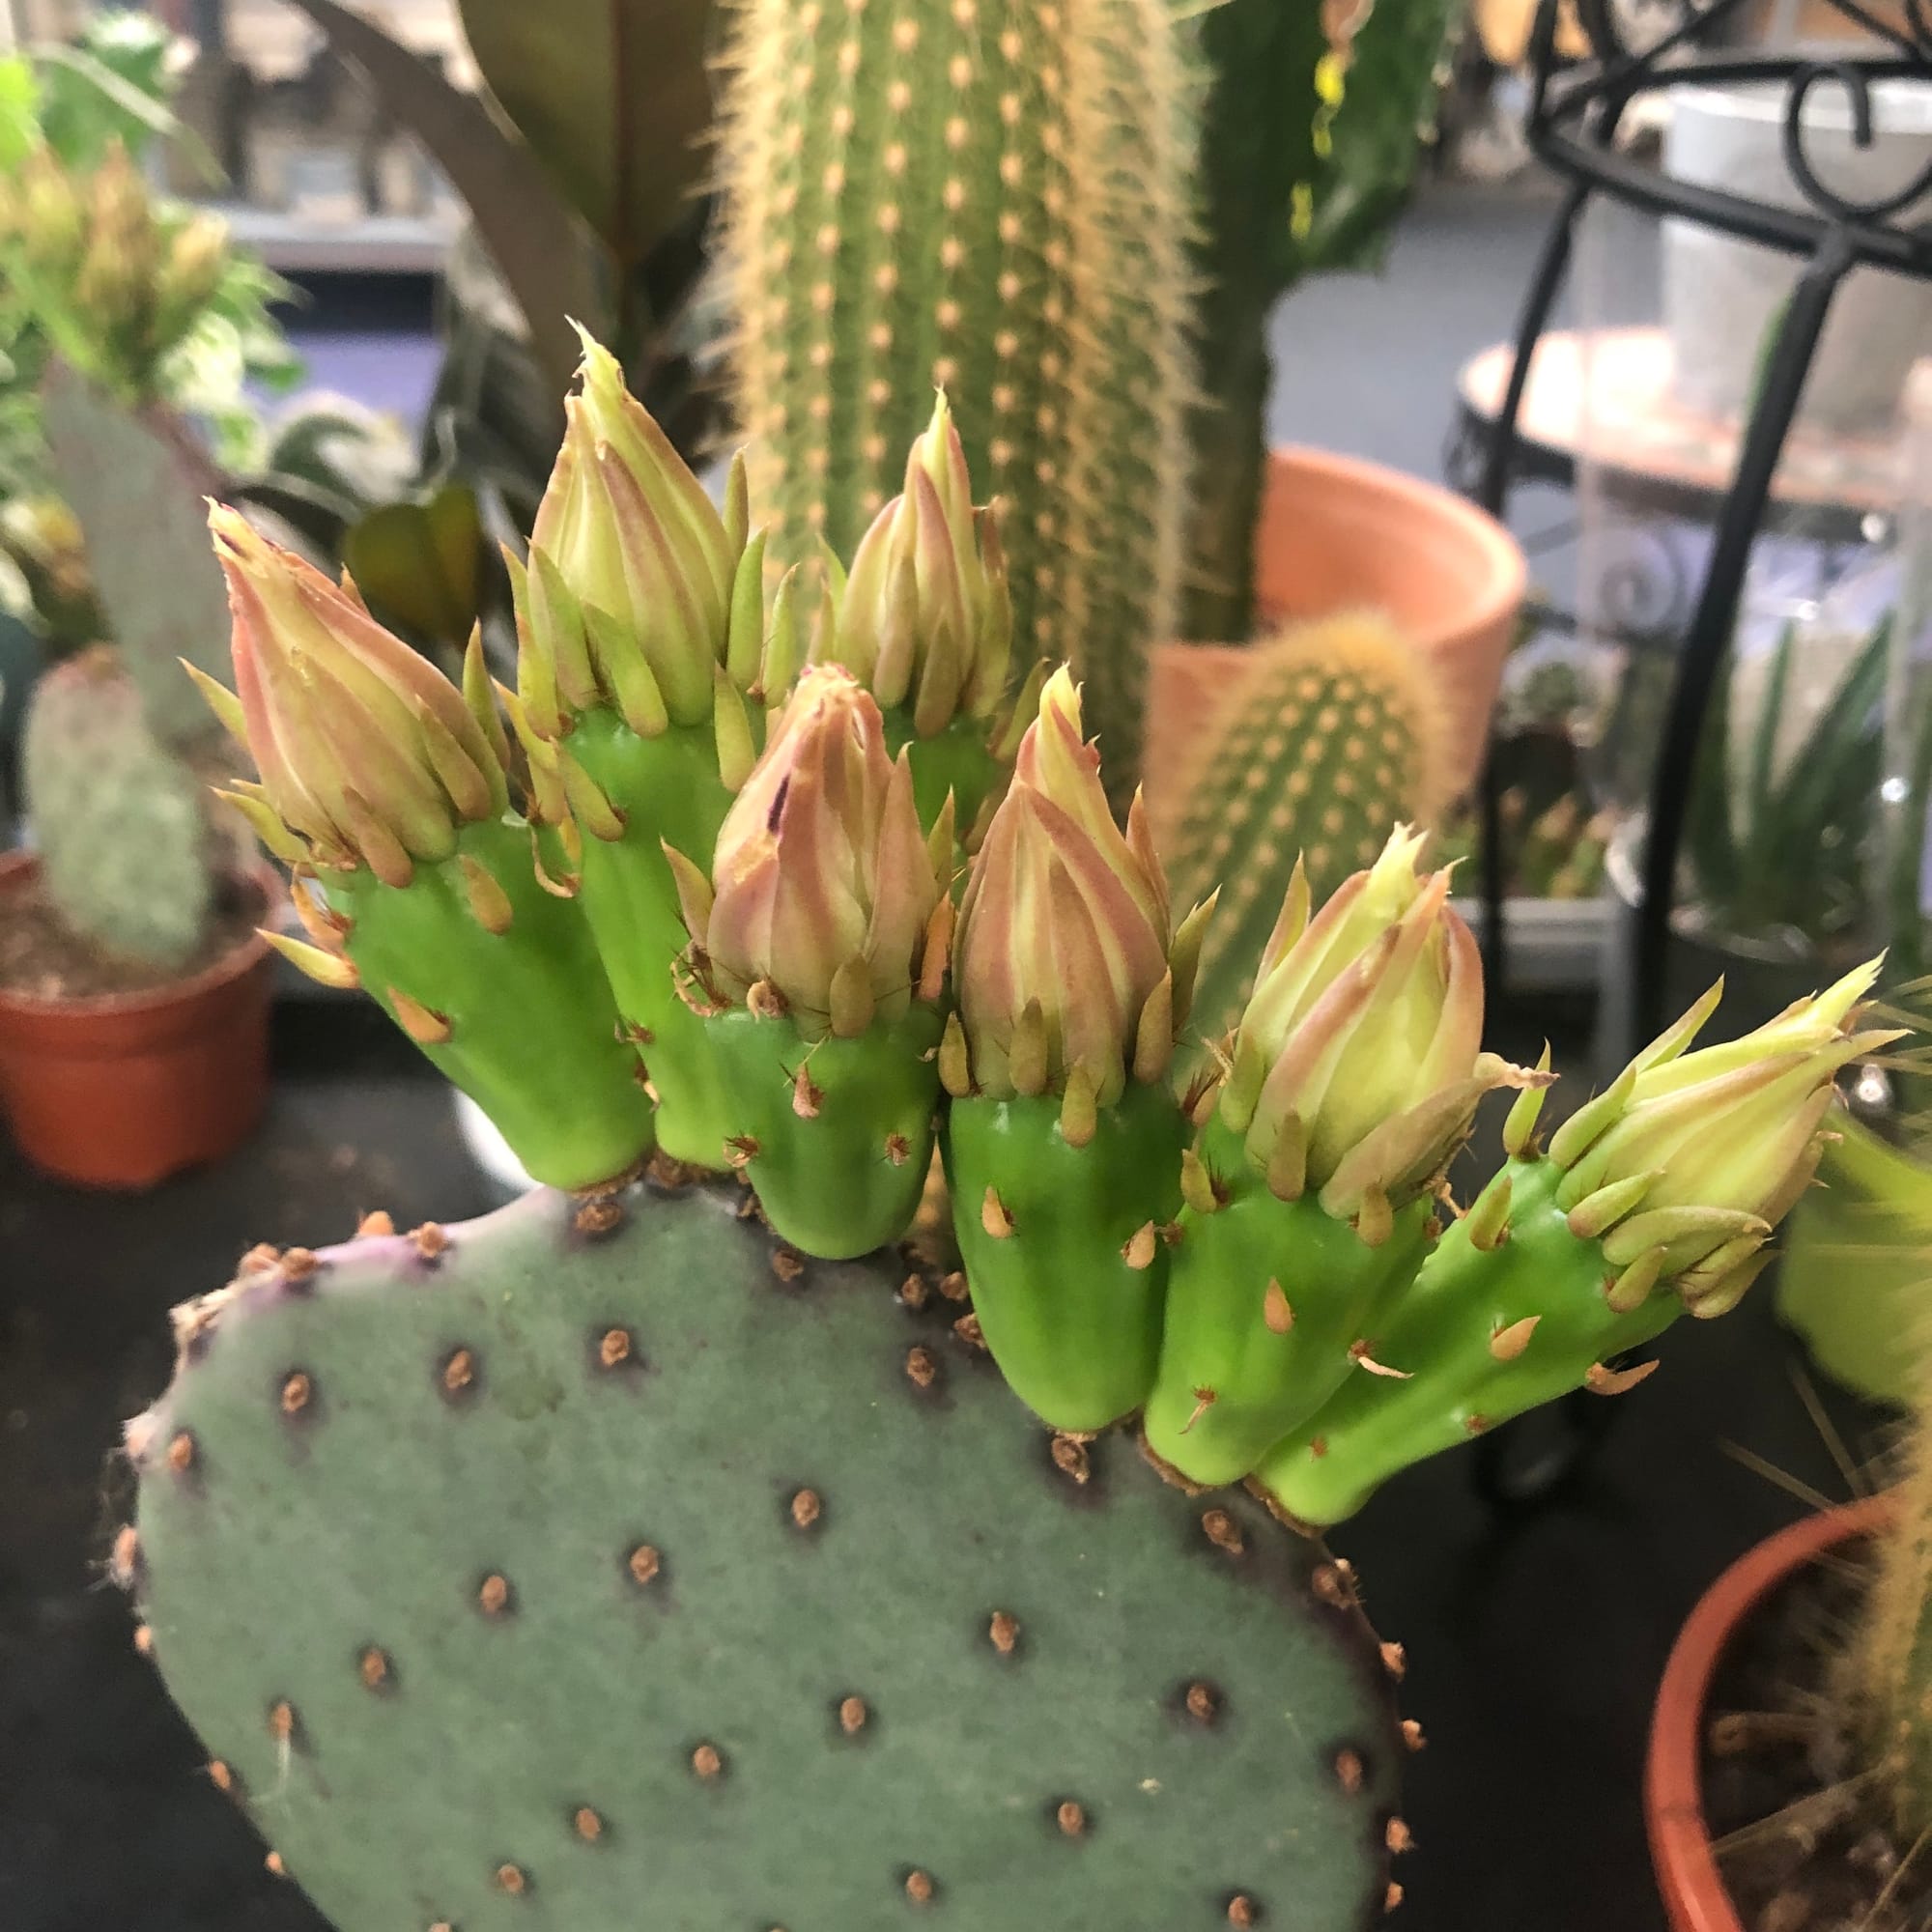 A cluster of developing Prickly Pear flowers that'll open up in the next two weeks.
Repotting
Repot every three years in spring using a 'Cactus & Succulent' labelled potting mix and the next sized pot with adequate drainage. Prickly Pears are far better potbound for several years due to the heightened risk of root rot and repotting-issues (like transplant shock) - so only repot if you feel it's wholly necessary.
Hydrate the plant 24hrs before tinkering with the roots to prevent the risk of transplant shock. For those situated in a darker location, introduce extra amounts of perlite and grit into the lower portion of the new soil to downplay over-watering risks. Click here for a detailed step-by-step guide on transplantation, or via this link to learn about repotting with root rot.
Book a 1-to-1 video call with Joe Bagley if you'd like a personal guide to repotting your houseplant. This will include recommending the right branded-compost and pot size, followed by a live video call whilst you transplant the specimen for step-by-step guidance and answer any further questions!
Pests & Diseases
Keep an eye out for mealybugs, spider mites, scale, thrips, whitefly & root mealybugs that'll locate themselves in the cubbyholes and undersides of the leaves, with the exception of the latter in soil. Common diseases associated with Prickly Pears are root rot, leaf-spot disease, botrytis, rust, powdery mildew & southern blight - click here to learn more about these issues.
Toxicity
Although this plant is classified as non-toxic, be cautious of their sharp spikes that can get stuck in your skin. Always wear latex gloves (or equivalent material) when handing due to the chance of irritability when the spikes are also lodged in fabric-gloves.
Retail Locations
Online Stores.
Book a 1-to-1 Call with Joe Bagley
If you need further advice with your houseplants, book an advice call with ukhouseplants' friendly and expert writer today! This can be done via a video or audio call on most apps, including Facebook, FaceTime & Skype. A ten-minute call costs £5.99 (US$7), or £15.99 for thirty minutes. You can ask multiple questions, including queries on plants, pests, terrariums, repotting advice and anything in between. Please consider supporting this service to keep ukhouseplants thriving!
Comments