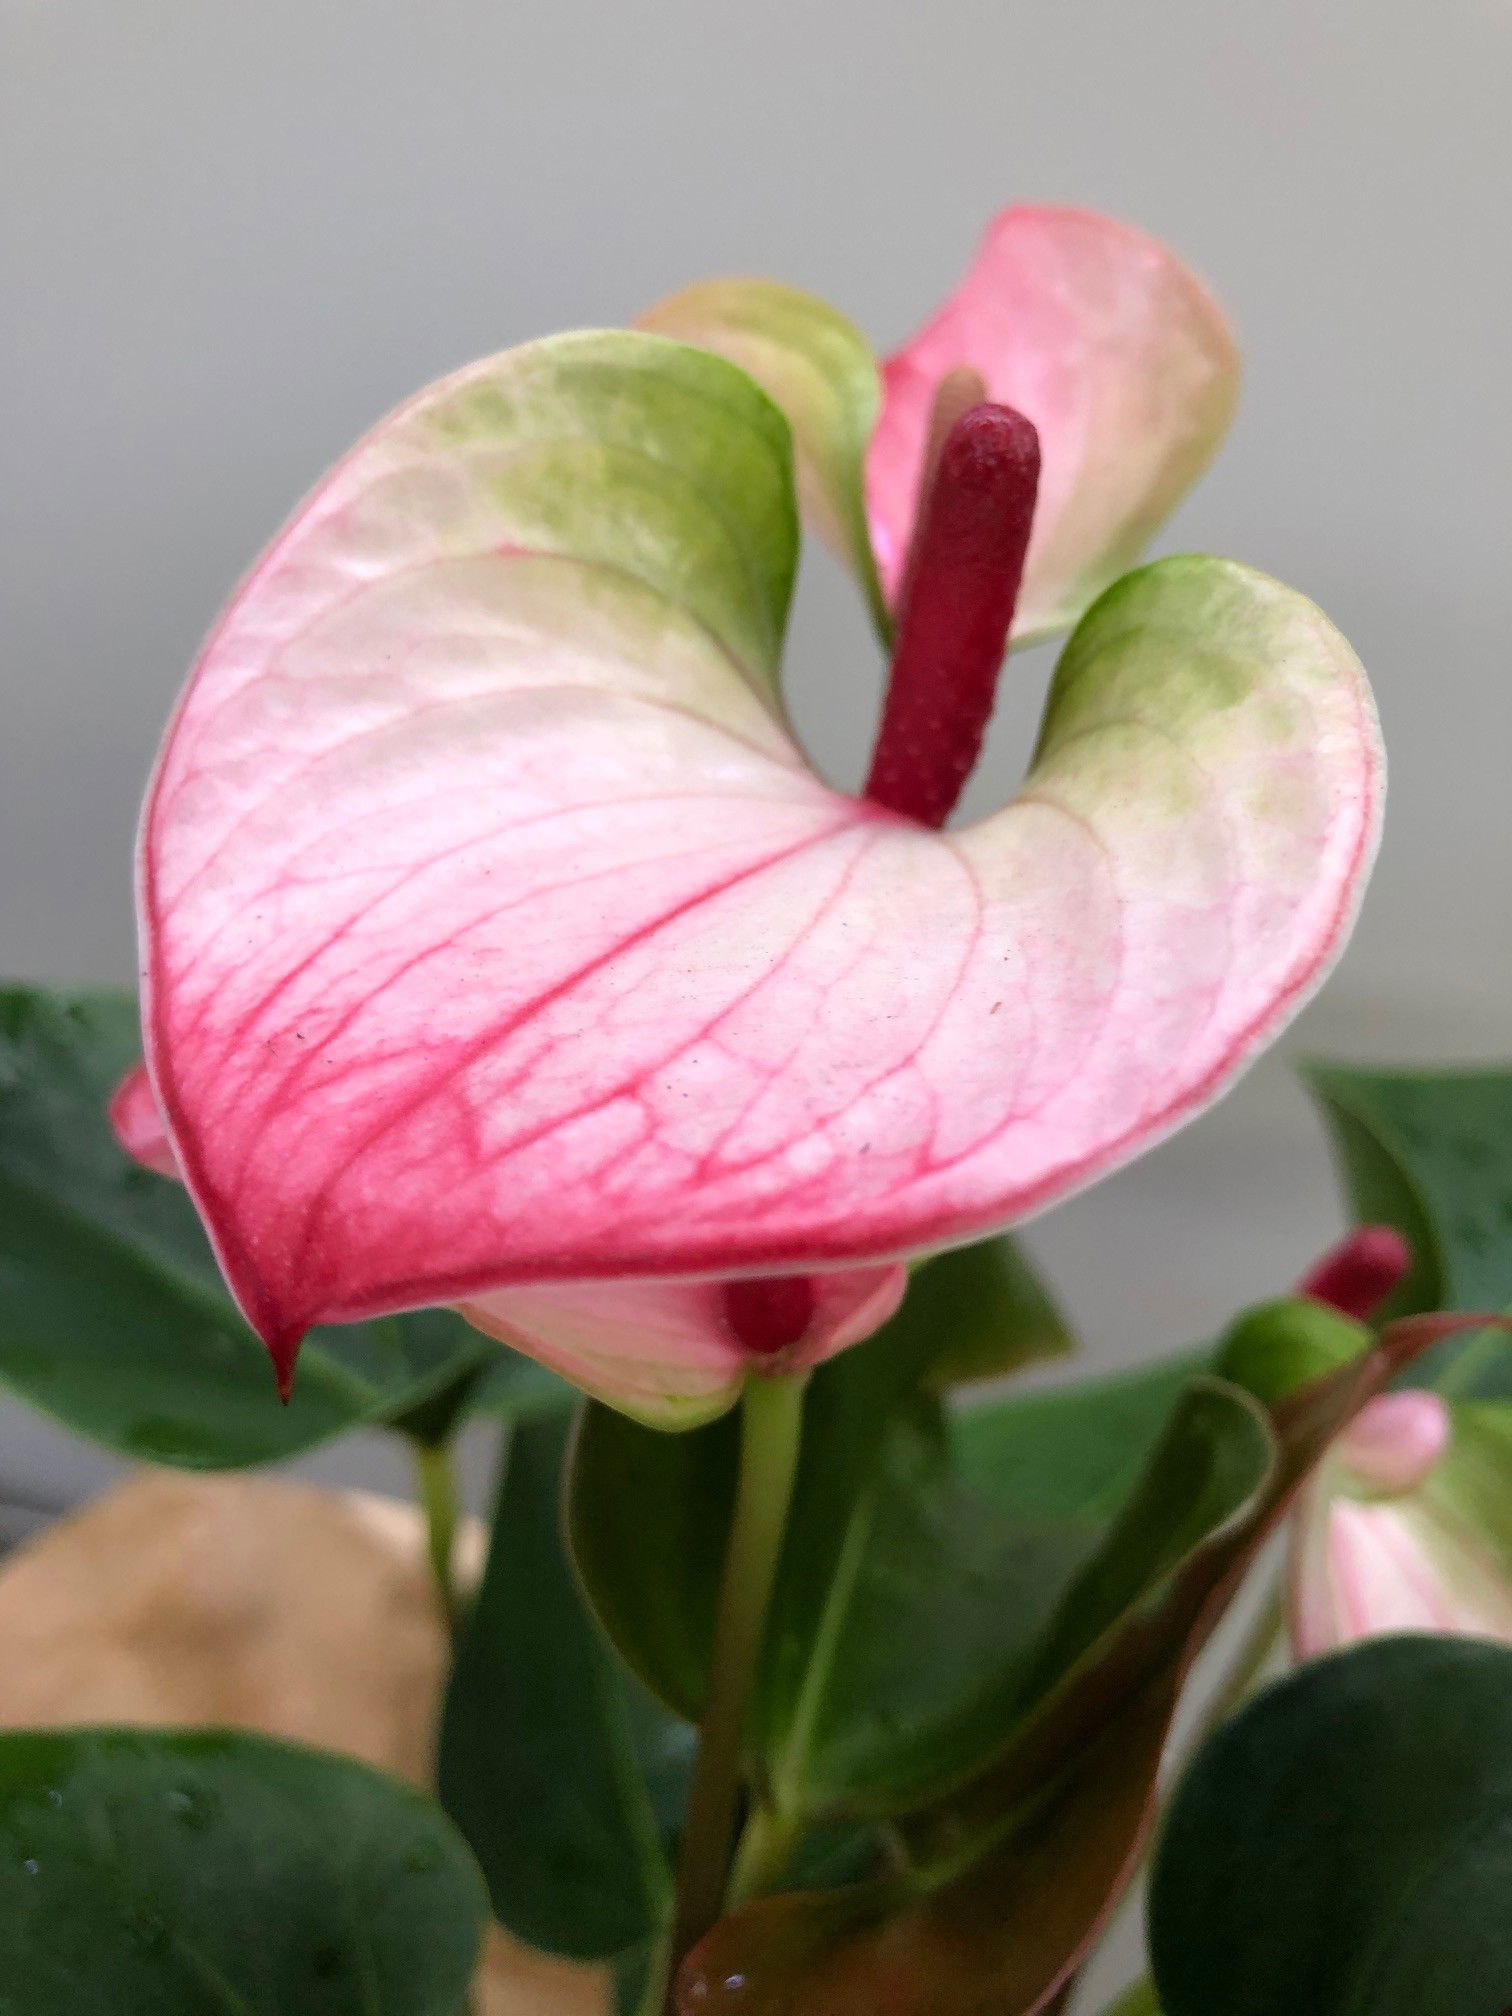
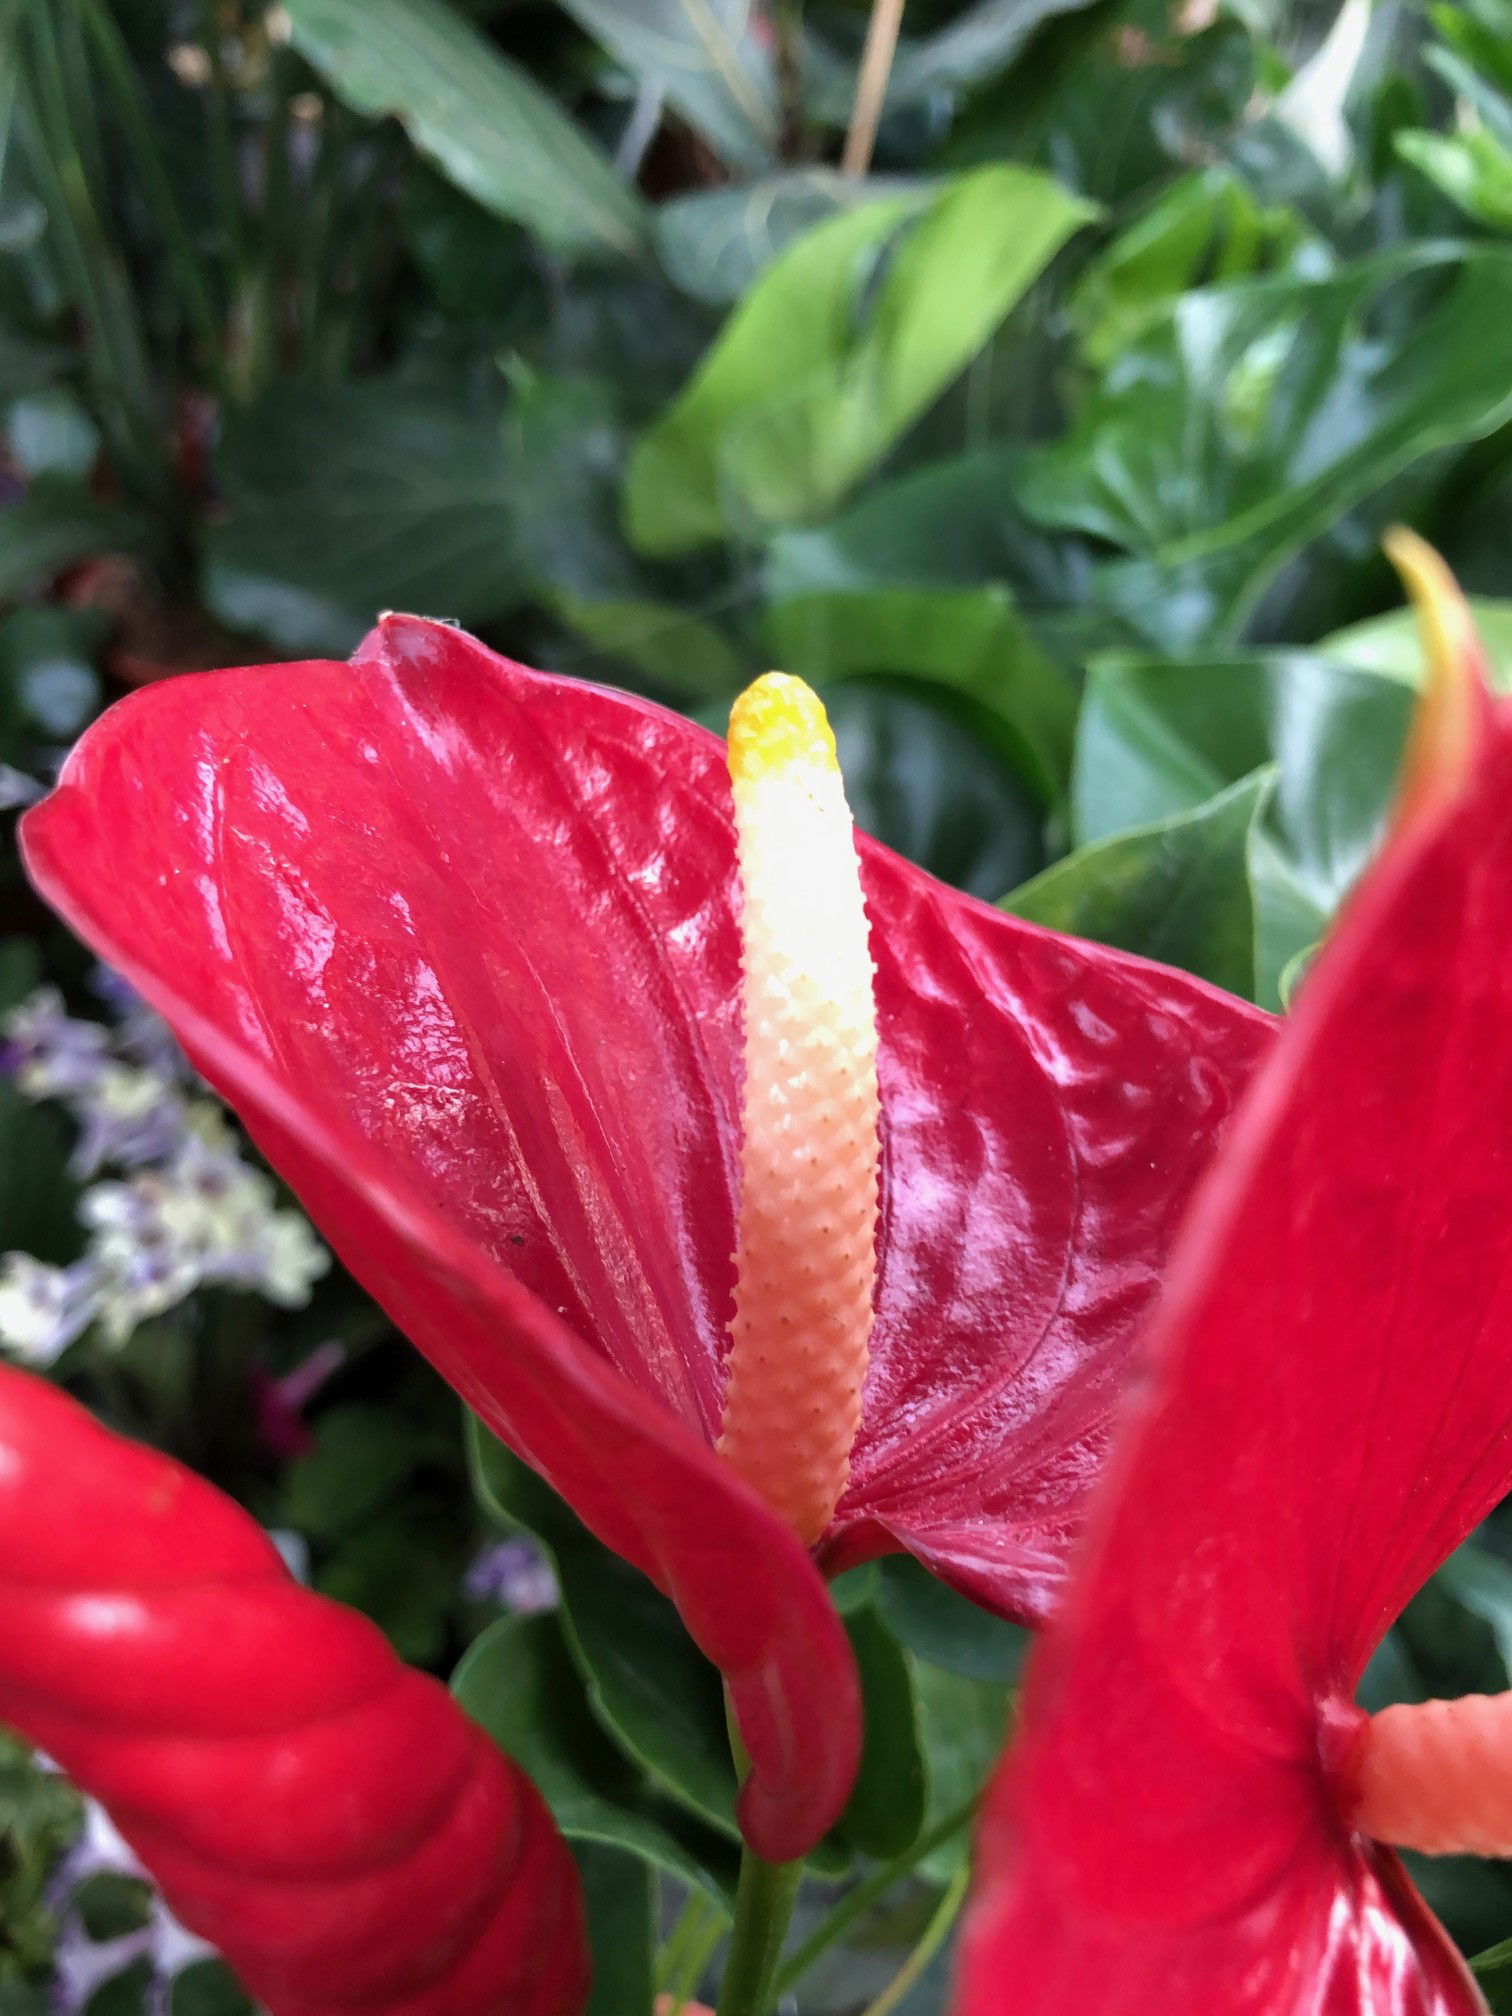
Anthurium andreanum
Contents
- Top Tips
- Location, Water, Humidity & Fertilisation
- Dormancy Care & Annual Flowers
- Growing Anthurium in Water (Hydroponics)
- Common Issues
- Origins, Temperature, Propagation, Repotting & Toxicity.
Need the answer to a specific plant query? Book a 1-to-1 video call with Joe Bagley, the website's friendly author to overcome and address your niggling problem! Available on iMessage, WhatsApp, Facebook Messenger & more.
Top Tips & Info
If yours is grown in water, scroll down to 'Growing Anthurium in Water' for more information on hydroponic growth.
- Care Difficulty - Moderate
- Locate your specimen in a bright area that offers a minimal amount of sunlight. An hour in the morning is perfect for good health, as any longer may result in sun-scorch.
- Allow the top third of the soil to dry out in between waters, reducing this slightly further in the autumn and winter. Remember to avoid over-watering or water-logging as both could entice root rot and plant collapse.
- Introduce a humidity tray to maintain a satisfactory level of humidity around its foliage. Those kept in dry air will have browning leaf tips and lower flowering times.
- Fertilise once every fortnight in the spring and summer, and monthly thereafter using a 'Houseplant' labelled feed.
- Repot your specimen every three years using a 'Houseplant' labelled compost and the next sized pot with drainage. Further, you can even add a part of Orchid Bark per three parts of 'Houseplant' compost to complement its epiphytic nature.
- Scroll down to 'Dormancy Care & Annual Flowers' for more information on achieving yearly blooms.
- If you have issues of browning legions with yellowed halos, be sure to have a read of "Common Issues' for more information.
Location & Light - 🔸🔸
We'd recommend situating your specimen in a bright location that offers up to an hour of morning or evening sunlight. Those kept on a north, north-east or north-west facing window are most likely to develop good health, along with longer-lasting flowers and leaves. Avoid placing yours in a too dark of a location due to the risk of over-watering and lowered stored energy from photosynthesis.
Water - 🔸🔸
Anthurium are epiphytic, meaning that they grow on trees and therefore aren't tolerable to water-logging. During the spring and summer months, allow a third of the soil to dry out in between irrigations, reducing this slightly further in autumn and winter. If it's in bloom, avoid using cold water due to their sensitivity to temperature change that can result in flower loss and slowed growth. Under-watering symptoms include stunted growth, flower loss, wilting, crispy brown patches developing on its leaves, and gradual decline. These issues are usually down to too much sunlight or heat, a much needed repot or forgetfulness. Over-watering symptoms include lower yellowing leaves, stunted growth, wilting or brown spots with yellowed halos on its leaves. These issues are usually familiar with either too little light/heat or overly soggy soil in between waters. Browning legions with yellow halos on its foliage are a common issue among indoor gardeners, predominantly caused by anaerobic soil from over-watering. As you water the potting mix, the oxygen will rise to the surface (much similar to oceanic bubbles) that'll starve the roots until they being to rot. Scroll down to 'Common Issues' for more information.
Humidity - 🔸🔸🔸
Create a humidity tray to provide a moist and stable environment for your plant. If the surrounding saturation is too low or the heat too high, its leaf-tips may start to brown over and curl, especially in direct sunlight. Gently hose the foliage down from time to time to hydrate the leaves and keep the dust levels down.
Fertilisation - 🔸🔸
Fertilise your plant every two weeks in the spring and summer, reducing this to monthly for the colder months of the years. Although we'd recommend using a 'Houseplant' labelled feed throughout the year, you can swap this for a potassium-based product like 'Tomato' food to help the longevity of its flowers.
Avoid directly applying 'ready-to-pour' fertilisers into the soil without a pre-water due to the roots' sensitive nature to harsh chemicals.
 Anthurium andraeanum
Dormancy Care & Annual Flowers
Provide a bright, and cool autumn and winter period around 15℃ (59℉) to reinforce its dormancy. Keep the roots pot-bound to add further stress onto the specimen, which in turn will significantly heighten the chance of flowering. Blooms will generally appear in the summer, during the active growth season.
The following steps should be taken from early autumn until the end of winter.
Sunlight & Location
Be sure to provide a bright location with little to no direct sunlight. Although the winter rays won't necessarily hurt the plant, be careful not to fall in the trap of sun-scorch and severe dehydration. Avoid deep shade and the use of artificial lighting at night or locations that boast temperatures higher than 18℃ (64℉).
Hydration
Reduce waters so that at least half of the soil becomes dry. It's essential to keep them on the drier side to life, as they'll think that hard times are ahead and therefore will need to pass its genes on to the next generation.
Occasional Feeds
During the autumn and winter, fertilisation should be performed at monthly intervals with a 'Houseplant' feed. While the flowers are in development or in bloom, use a Tomato fertiliser to provide fortnightly nourishment of potassium.
Reduce Everything
This is to remind you that everything needs to be reduced - especially the temperature.
Temperature
This is the most significant step; reduce the temperature down by around 5℃ compared to the summertime or place in a room that's between 14º - 17℃ (57º - 62℉). You'll be at a significant disadvantage if the ambient temperature is kept constant throughout the year, as Anthurium will only respond in locations that have daily fluctuations of around 7℃. Never exceed the minimum temperature as it may lead to plant death or yellowed foliage at a bare minimum. If these steps are followed successfully, you could see a show of blooms in the following summer - but remember, dealing with nature may not always provide the results you'd relish.
Growing Anthurium in Water (Hydroponics)
Read the following information if yours is grown hydroponically in water. We wouldn't recommend converting a soil-rooted Anthurium into water due to the risk of plant death (via 'Transplant Shock') being very high. Take basal offset divisions or stem cuttings if you desire a water-borne specimen. (Scroll down to 'Propagation' to learn more).
Growing any houseplant in water will need to be placed in soil at some stage to continue its life. The combination of poor air circulation around the roots and lack of nutrients will eventually weaken the specimen, thus increasing the chance of death. In our opinion, the maximum lifespan for a Flamingo Flower in water is around 2 - 3 years before it requires being transplanted into an 'Orchid' labelled bark and a 10cm pot. Although you can use 'Houseplant' compost, it'll prefer to be kept in an airy potting mix (like Orchid Bark) shortly after being grown in water for a few years to help revitalise the roots.
Location - Its location within the home is a crucial element to consider when growing this plant in water. Remember that those raised in darker areas are much more likely to adopt root rot than others in brighter areas. By no means should they be exposed to direct sunlight, but a place that offers bright, indirect light is best for healthy growth. A north-facing windowsill, or within a metre of a window is somewhere to consider.
Water & Hygiene - Hydroponic specimens are much easier to care for than their soil-borne counterparts as long as you maintain good hygiene. It's essential to keep the water clean by replacing it weekly with tap water that has sat in a non-metal container for around 24hrs. This will not only reduce the heightened levels of chloramine and fluoride, but it'll also downplay the risk of exposing this plant to cold root temperatures.
The plant should stay in the original water until the new water has served its 24hr period. Whilst the plant is momentarily out of the water, rinse the root system with the tap to remove any issues of rot before replacing it back into the original glass container with the new water. If there's a development of algae on the roots or glass, or that the root caps are beginning to rot, this is a clear indication of poor water hygiene that must be addressed immediately. Wipe the glass with water and your fingers, avoiding the use of soap or other chemicals, and rinse the roots under the tap for twenty seconds. Then, replace the water with fresh tap-water (that has stood for 24hrs) and place the specimen in new water to reduce the risk of re-emergence.
Fertilisation - We'd recommend a concentrated product to avert the risk of over-supplementation. Once a month, during a water-change (as mentioned above), add a few fertiliser drops into the new water before allowing it to sit for 24hrs. Mix the solution in well and place the plant back into the water once this resting period is over to administer the feed!
Common Issues with Anthurium
An array of simultaneous cultivation issues will increase the chance of developing yellowed leaf-sections with browned halos. Firstly, the location may be too dark, with its compost staying too saturated in-between waters; if mould is growing across the soil, this is usually a bad sign. Further, you're potentially using too cold water or tap water that hasn't been allowed to sit for 24hrs. This period of rest will not only bunk-up its temperature, but the harsh chemicals used to preserve water hygiene (fluoride & chloride) will begin to evaporate after a few hours. If possible, use fresh bottled water from a shop or supermarket to prevent further chemical burns. The final culprit might be lack of fertilisation, with regular feeds being paramount for long-lasting, healthy leaves. If the specimen hasn't been nourished in over two months, it'll begin to show signs of nutrient deficiencies seen in this article.
If this common problem has occurred with your specimen, remove the affected leaves (not areas) and improve the growing conditions considerably. Fertilise regularly with lukewarm water and be sure to allow the top third to dry out in between hydrations. Its new growth should be problem-free, but if you'd like to speak to ukhouseplants for more advice, don't be afraid to book a 1-to-1 call with us to discuss your issues!
As mentioned above, Flamingo Flowers will only have a certain lifespan in water, so transplanting them into soil is a crucial part of keeping yours alive for years to come. Because of poor air circulation and nutrient deficiencies found in beds of water, prolonged periods of more than two years will eventually see your specimen develop root rot, weak health and yellowed leaves. If this has occurred with yours, be sure to prune away the affected roots and leaves, before transplanting it into an 8cm pot with 'Orchid' labelled compost to see if this helps revitalise its root systems.
Dull, yellowed leaves could be the sign of a nutrient deficiency - most common with water-grown specimens. To rebalance the nutrient value within your plant, ensure to transplant it into an 'Orchid' labelled Bark with an 8cm plastic pot. The nutrients stored in the compost will work for around two months before the specimen will need regular feeds once every four to six waters. The new growth should look fresh and ready for action, with the older leaves eventually dying off through maturity.
There are several reasons why your hydroponically-grown specimens are showing signs of root rot and a general decline of health. Firstly, the environment that they're in could be to blame. Is there enough light to read a newspaper? If not, improve the growing conditions by increasing indirect light, avoiding the threat of excessive direct sunlight. The plant's size will play a big part in its success; smaller specimens (5cm in length or less) won't root appropriately due to the lower amounts of stored energy. Further, the water must also be replaced weekly to ensure nasty bacteria cannot breed and decay on the plants. If the bottom of the individual stem is brown and mushy, discard immediately as the rot will spread onto unaffected stems. Anthurium are always best grown in soil, as its roots will need a balance of oxygen and water. Remember - the further into the water you go, the less accessible oxygen there is for the plant to utilise, thus resulting in root rot. Check the root tips and along the base of the plants for any signs of this. Transplant your Anthurium into Orchid Bark (available at garden centres) and an 8 - 10cm pot to provide a more oxygen-rich environment to limit the spread of root rot.
Root rot is a common issue among specimens sat in too dark environments with prolonged soil moisture. Symptoms include rapidly yellowing leaves, mouldy soil, stunted growth and a rotten brown base. Take the plant out of the pot and inspect health below the compost line. If the roots sport a yellow tinge, you're good to go, but those that are brown and mushy must be addressed immediately. More information about managing root rot can be found on this link.
Yellowing lower leaves is a clear sign of over-watering, a typical product of too little light. Although they can do well in low light, irrigations must be reduced to counteract the chance of root rot. The soil-bourne disease is the breakdown of the root systems that will inhibit the plant's ability to soak up moisture and vital nutrients for growth, resulting in wilting and yellowing leaves. If you'd like to learn more about how to address root rot, please click on this link.
 A decline of health can occur when the specimen is badly treated, usually through it's under or over-watering. The problem may lie sold with your care skills or from the nursery/store you purchased it from. Unfortunately, when an Anthurium looks like this, the outcome is bleak; provide bright light, allow the top third to dry out between waters and give it a gentle feed. Give it time and see if the plant develops new growth.
Curling leaves with crispy brown edges symbolise too little water and possibly too much sunlight. Forgetfulness, too much light or a much needed repot are the usual causes. As Anthurium tend to have extensive root systems, a transplant should be considered; click on this link for more info.
Green flowers that aren't white is a clear sign of too much sunlight. Due to the heightened levels of photosynthesis, the leaves will be doing overtime on the production of converting sunlight into energy, thus leading to the abnormality. Although this may seem worrying at first, this is a natural process that will not hurt the plant, as long as browning leaves don't occur. The final heads-up to mention is that the prolonged direct light may inhibit the number of future flowers during this specific blooming cycle.
Yellowing sections along its leaves could be the product of many issues, ranging from spider mites to chemical burns. Think about its recent cultivation of how frequently you rehydrate its soil, along with a quick scan over the foliage's undersides. The use of 'Leaf Shine' or other chemical-based products may also have a detrimental effect on its health, as Anthurium are particularly sensitive to inorganic substances. When removing the affected leaf or leaves, be sure to avoid puncturing the yellowed/browned tissue as it may lead to further decline. Prune the entire leaf off via the petiole and investigate the rest of the plant for a potential spread of the problem.
Yellowed leaf areas are a clear sign of over-fertilisation. Although a fortnightly feed during the warmer months is very beneficial, avoid going overboard with the supplementation as Anthurium roots can be highly sensitive to sharp chemicals. Give the soil a thorough soaking to wash away the excess nutrients.
Large quantities of aerial roots that cascade over the pot shouldn't cause concern. Once the flowers have fully elapsed, take the plant out of its pot and remove any brown roots when repotting into a bigger pot. If there are a couple still above the soil, either direct them face-down into the compost or allow them to carry on cascading. Be sure to mist the aerial roots while watering the specimen to ensure sufficient hydration. If they begin to split, it's the result of too little water or humidity or sun-scorch. Remove once they've fully yellowed over.
Short-lived flowers could be the product of low humidity and dehydration. Place the Anthurium on a pebble tray, keeping the reservoir topped up with water while the heaters are operating. Increase watering somewhat, too.
A lack of flowers is caused by an insufficient dormancy period, served in the winter months. Locations that offer near-similar temperatures all year round won't allow the plant to go dormant, resulting in poor spring growth. To achieve, situate in a location that dips to around 15°C (59°F) with fewer waters. Allow the majority of the compost to dry out and provide a humidity tray while the radiators are operating.
Origins
Anthurium consists of over one thousand species and hybrids, originating from sub-tropical regions of the Americas. The genus was first described back around 1830, by Heinrich Wilhelm Schott during a visit to South America. The name derives from the Greek words for 'flower' and 'tail', (anthos, oura) referring to the oddly shaped flowers that get put out during early summer. The most popular species, A. andraeanum, was first penned by Jean Linden in the 1830s, honouring French botanist, Édouard André.
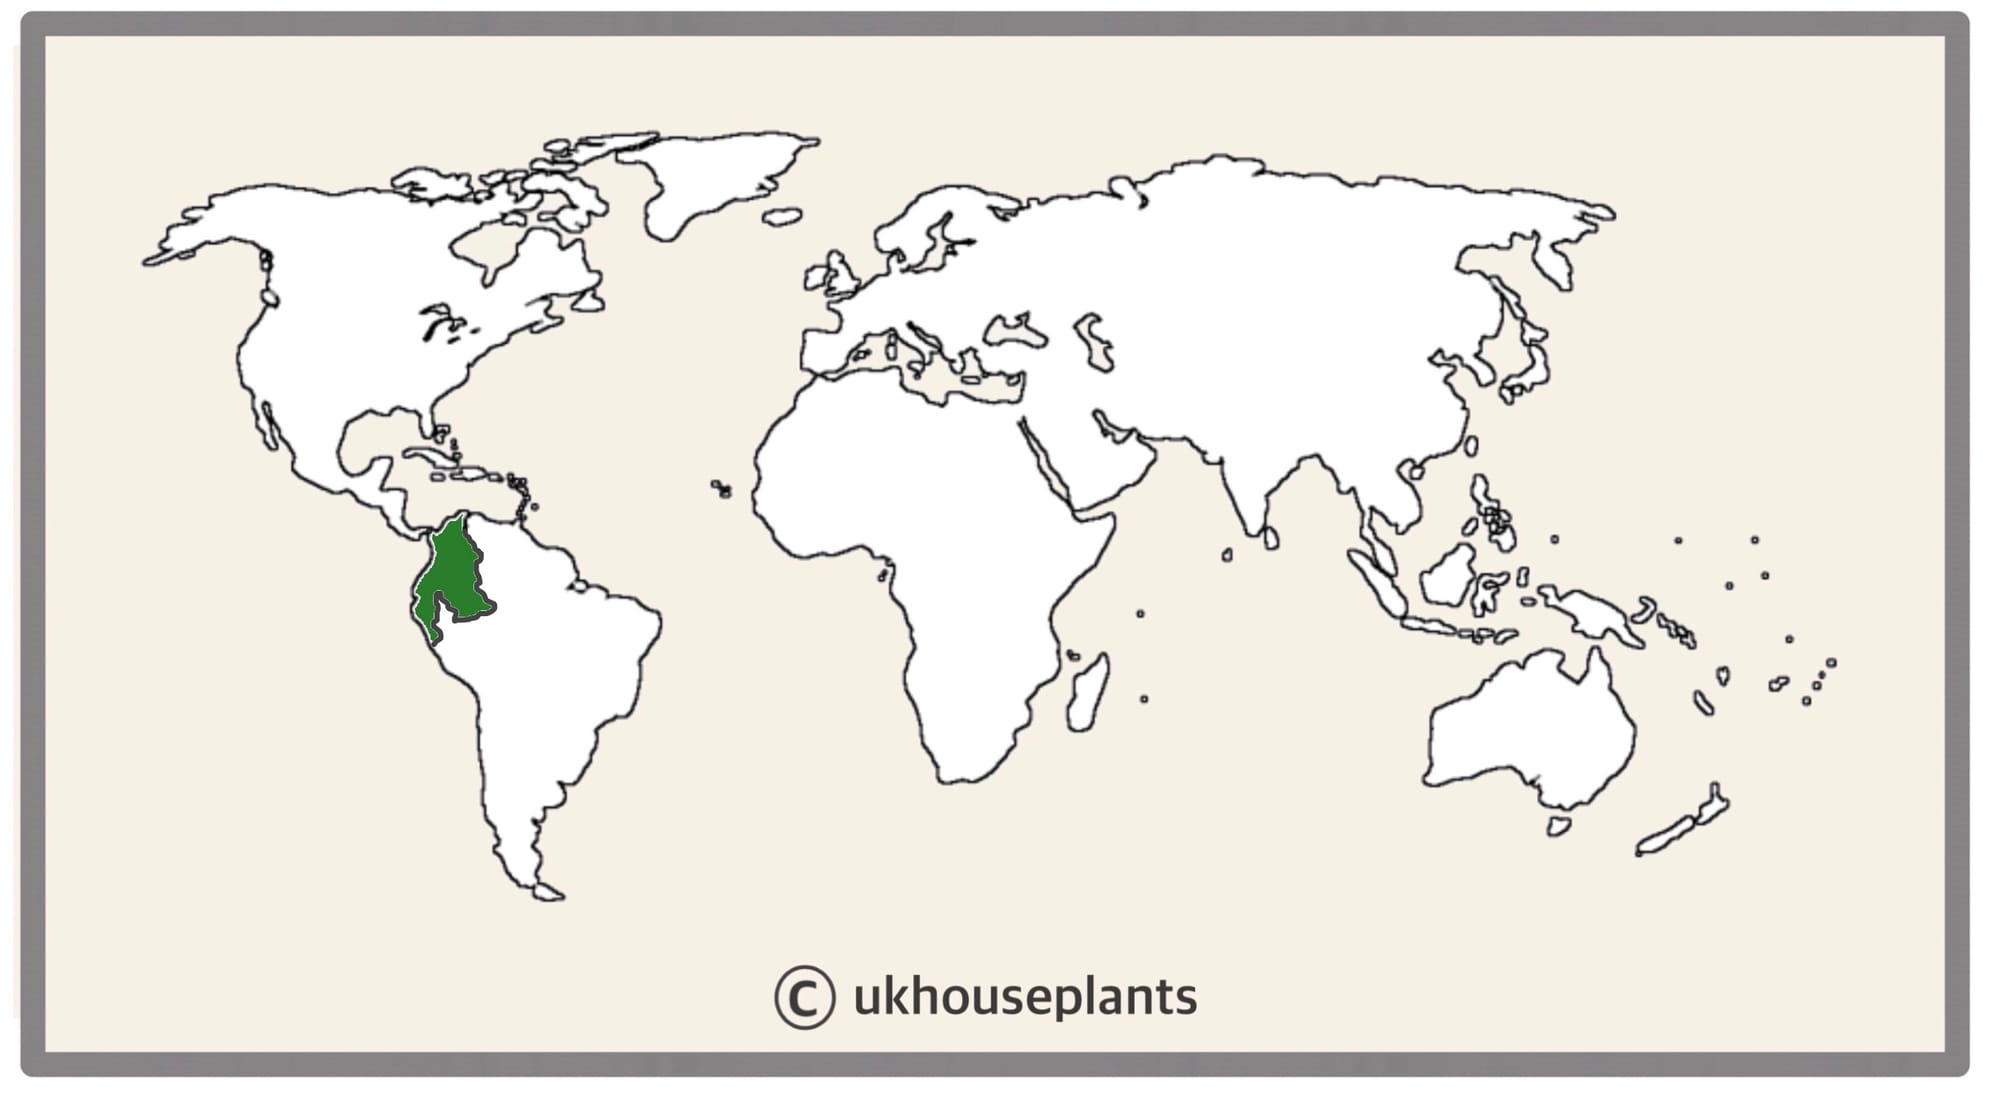 The Distribution of Anthurium andraeanum.
Temperature
12° - 29°C (54°F - 85°F)
H1b (Hardiness Zone 12) - Can be grown outdoors during the summer in a sheltered location with temperatures above 12℃ (54℉), but is fine to remain indoors, too. If you decide to bring this plant outdoors, don't allow it to endure any direct sunlight as it may result in sun-scorch and dehydration. Regularly keep an eye out for pests, especially when re-introducing it back indoors.
Spread
Up to 0.8m in height and 0.5m in width; the ultimate height will take around 5 - 8 years to achieve.
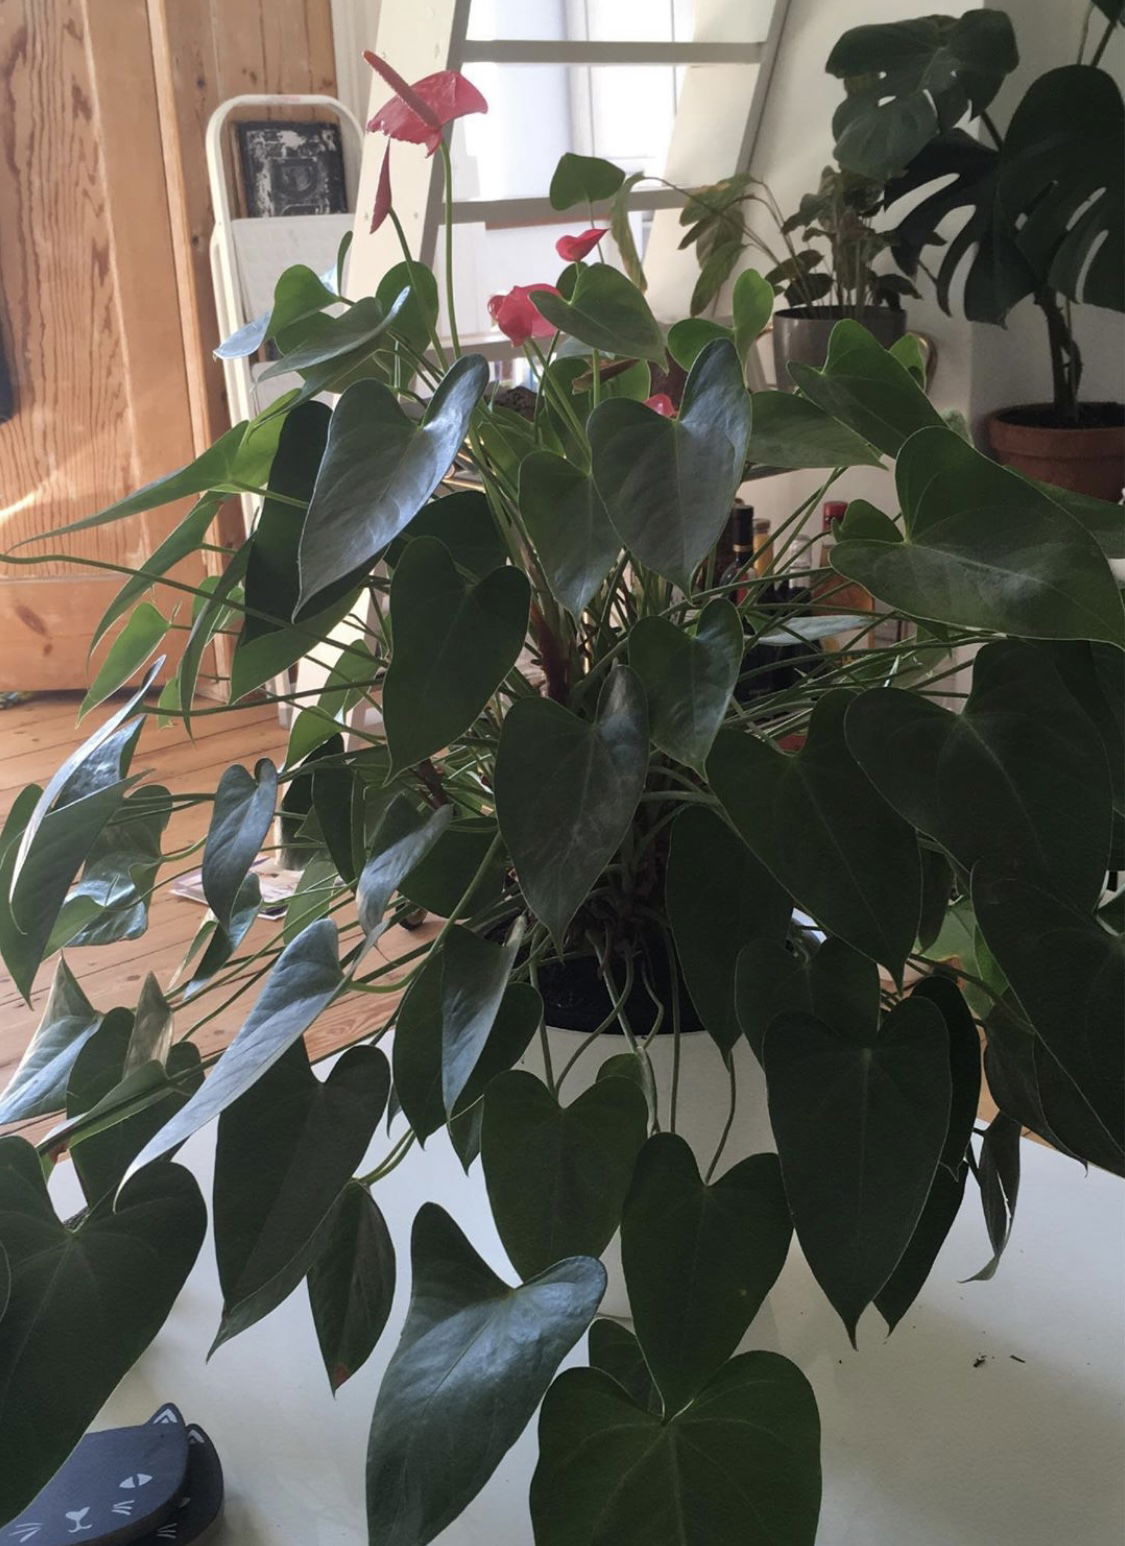 Here's one of our readers' magnificent Anthurium that's around two years old. Their secrets to success is to provide a windowsill with morning or evening sunlight and feed every third water with a 'Houseplant' labelled fertiliser.
Pruning
Remove yellow or dying leaves, and plant debris to encourage better-growing conditions. While pruning, always use clean utensils or shears to reduce the chance of bacterial and fungal diseases. Never cut through yellowed tissue as this may cause further damage in the likes of diseases or bacterial infections. Remember to make clean incisions as too-damaged wounds may shock the plant, causing weakened growth and a decline in health.
Propagation
Via Seed, Stem Cuttings & Basal Offset Division (Pups).
Stem Cuttings (Moderate) - Using a clean pair of scissors, cut a 10cm (4 - 5 inches) section off the stem's terminal. Be sure to use a fresh, damage or pest-free piece as unhealthy divisions are more likely to fail. Remove the older half of the leaves, so that the stem's lower portion is bare, to speed the process of root development. Purchase a 'Houseplant' Compost and vertically push the cutting's base into the soil, avoiding the risk of covering the actual foliage with soil. Situate the cutting in a bright, indirect setting with temperatures above 18°C (64°F). As the roots will develop first, remove the bag and treat it as an adult specimen once there are signs of new foliar development.
Basal Offset Division (Easy) - Your plant will produce several basal offsets that can be separated once they have a sufficient root system, and surpass a quarter of the mother's height. If possible, water the soil 24hrs before the main event to reduce the risk of transplant shock when its dry root systems are over-fingered. Take the plant out of its pot and place your fingers close to the nodal junction - compost may have to be removed for better access. Push the chosen offset downwards until you hear a snap. Separate the foliage and its root system away from the mother plant, mentally noting the high risk of damage. Transplant in the appropriate sized pot with a fresh batch of 'Houseplant' soil. Maintain evenly moist soil and situate it in a bright, indirect location away from any direct sunlight. After eight weeks, treat it like a healthy specimen, following the care tips above!
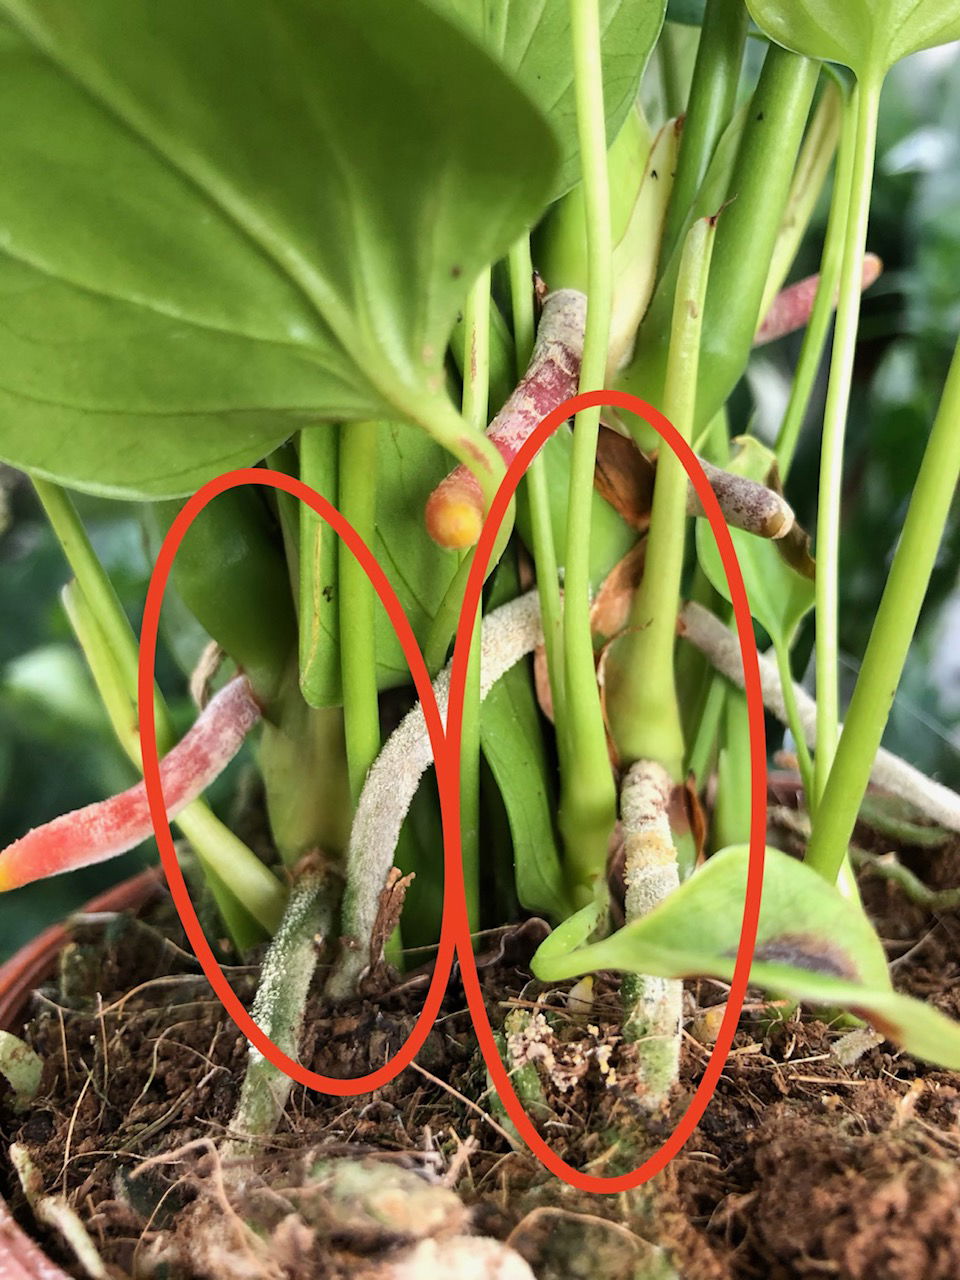 Many Anthurium can be split during the repotting period in spring. Highlighted here is an ideal size due to the maturity and presence of roots on each offset.
Flowers
Blooms can develop in the spring or summer, lasting up to three months. During this time, be sure to use tepid water as the root systems of an Anthurium can be very sensitive to cold temperatures. The cut flowers can last up to five weeks in a flower arrangement, giving both colour and prestige.
Repotting
Repot every three years in spring using a 'Houseplant' labelled potting mix and the next sized pot with adequate drainage. Anthurium are far better potbound for several years due to the heightened risk of root rot and repotting-issues (like transplant shock), so only repot if you feel it's wholly necessary - restricted root growth will also increase the chance of blooms, too. You can always add a portion of Orchid Bark to the Houseplant potting mix, which will complement the specimen's epiphytic nature. One part Bark to three parts Houseplant compost is the ideal blend.
Hydrate the plant 24hrs before the tinkering with the roots to prevent the risk of transplant shock. For those situated in a darker location, introduce an extra amount of perlite and grit into the deeper portion of the pot to downplay over-watering risks. Click on this link for a detailed step-by-step guide on transplantation, or via this link to learn about repotting with root rot.
Book a 1-to-1 video call with Joe Bagley if you'd like a personal guide to repotting your houseplant. This will include recommending the right branded-compost and pot size, followed by a live video call whilst you transplant the specimen for step-by-step guidance and answer any further questions!
Pests & Diseases
Keep an eye out for mealybugs, spider mites, scale, thrips, fungus gnats, whitefly & root mealybugs that'll locate themselves in the cubbyholes and undersides of the leaves, with the exception of the latter in soil. Common diseases associated with Anthurium are root rot, leaf-spot disease, botrytis, rust, powdery mildew & southern blight - click here to learn more about these issues.
Toxicity
This plant is classified as poisonous, so if small sections are eaten, vomiting, nausea, and a loss of appetite may occur. Consumption of large quantities must be dealt with quickly; acquire medical assistance for further information.
Retail Locations
ASDA, Blue Diamond, B&Q, Dobbies, Homebase, IKEA, Tesco, M&S & Online Stores.
Book a 1-to-1 Call with Joe Bagley
If you need further advice with your houseplants, book an advice call with ukhouseplants' friendly and expert writer today! This can be done via a video or audio call on most apps, including Facebook, FaceTime & Skype. A ten-minute call costs £5.99 (US$7), or £15.99 for thirty minutes. You can ask multiple questions, including queries on plants, pests, terrariums, repotting advice and anything in between. Please consider supporting this service to keep ukhouseplants thriving!
Comments