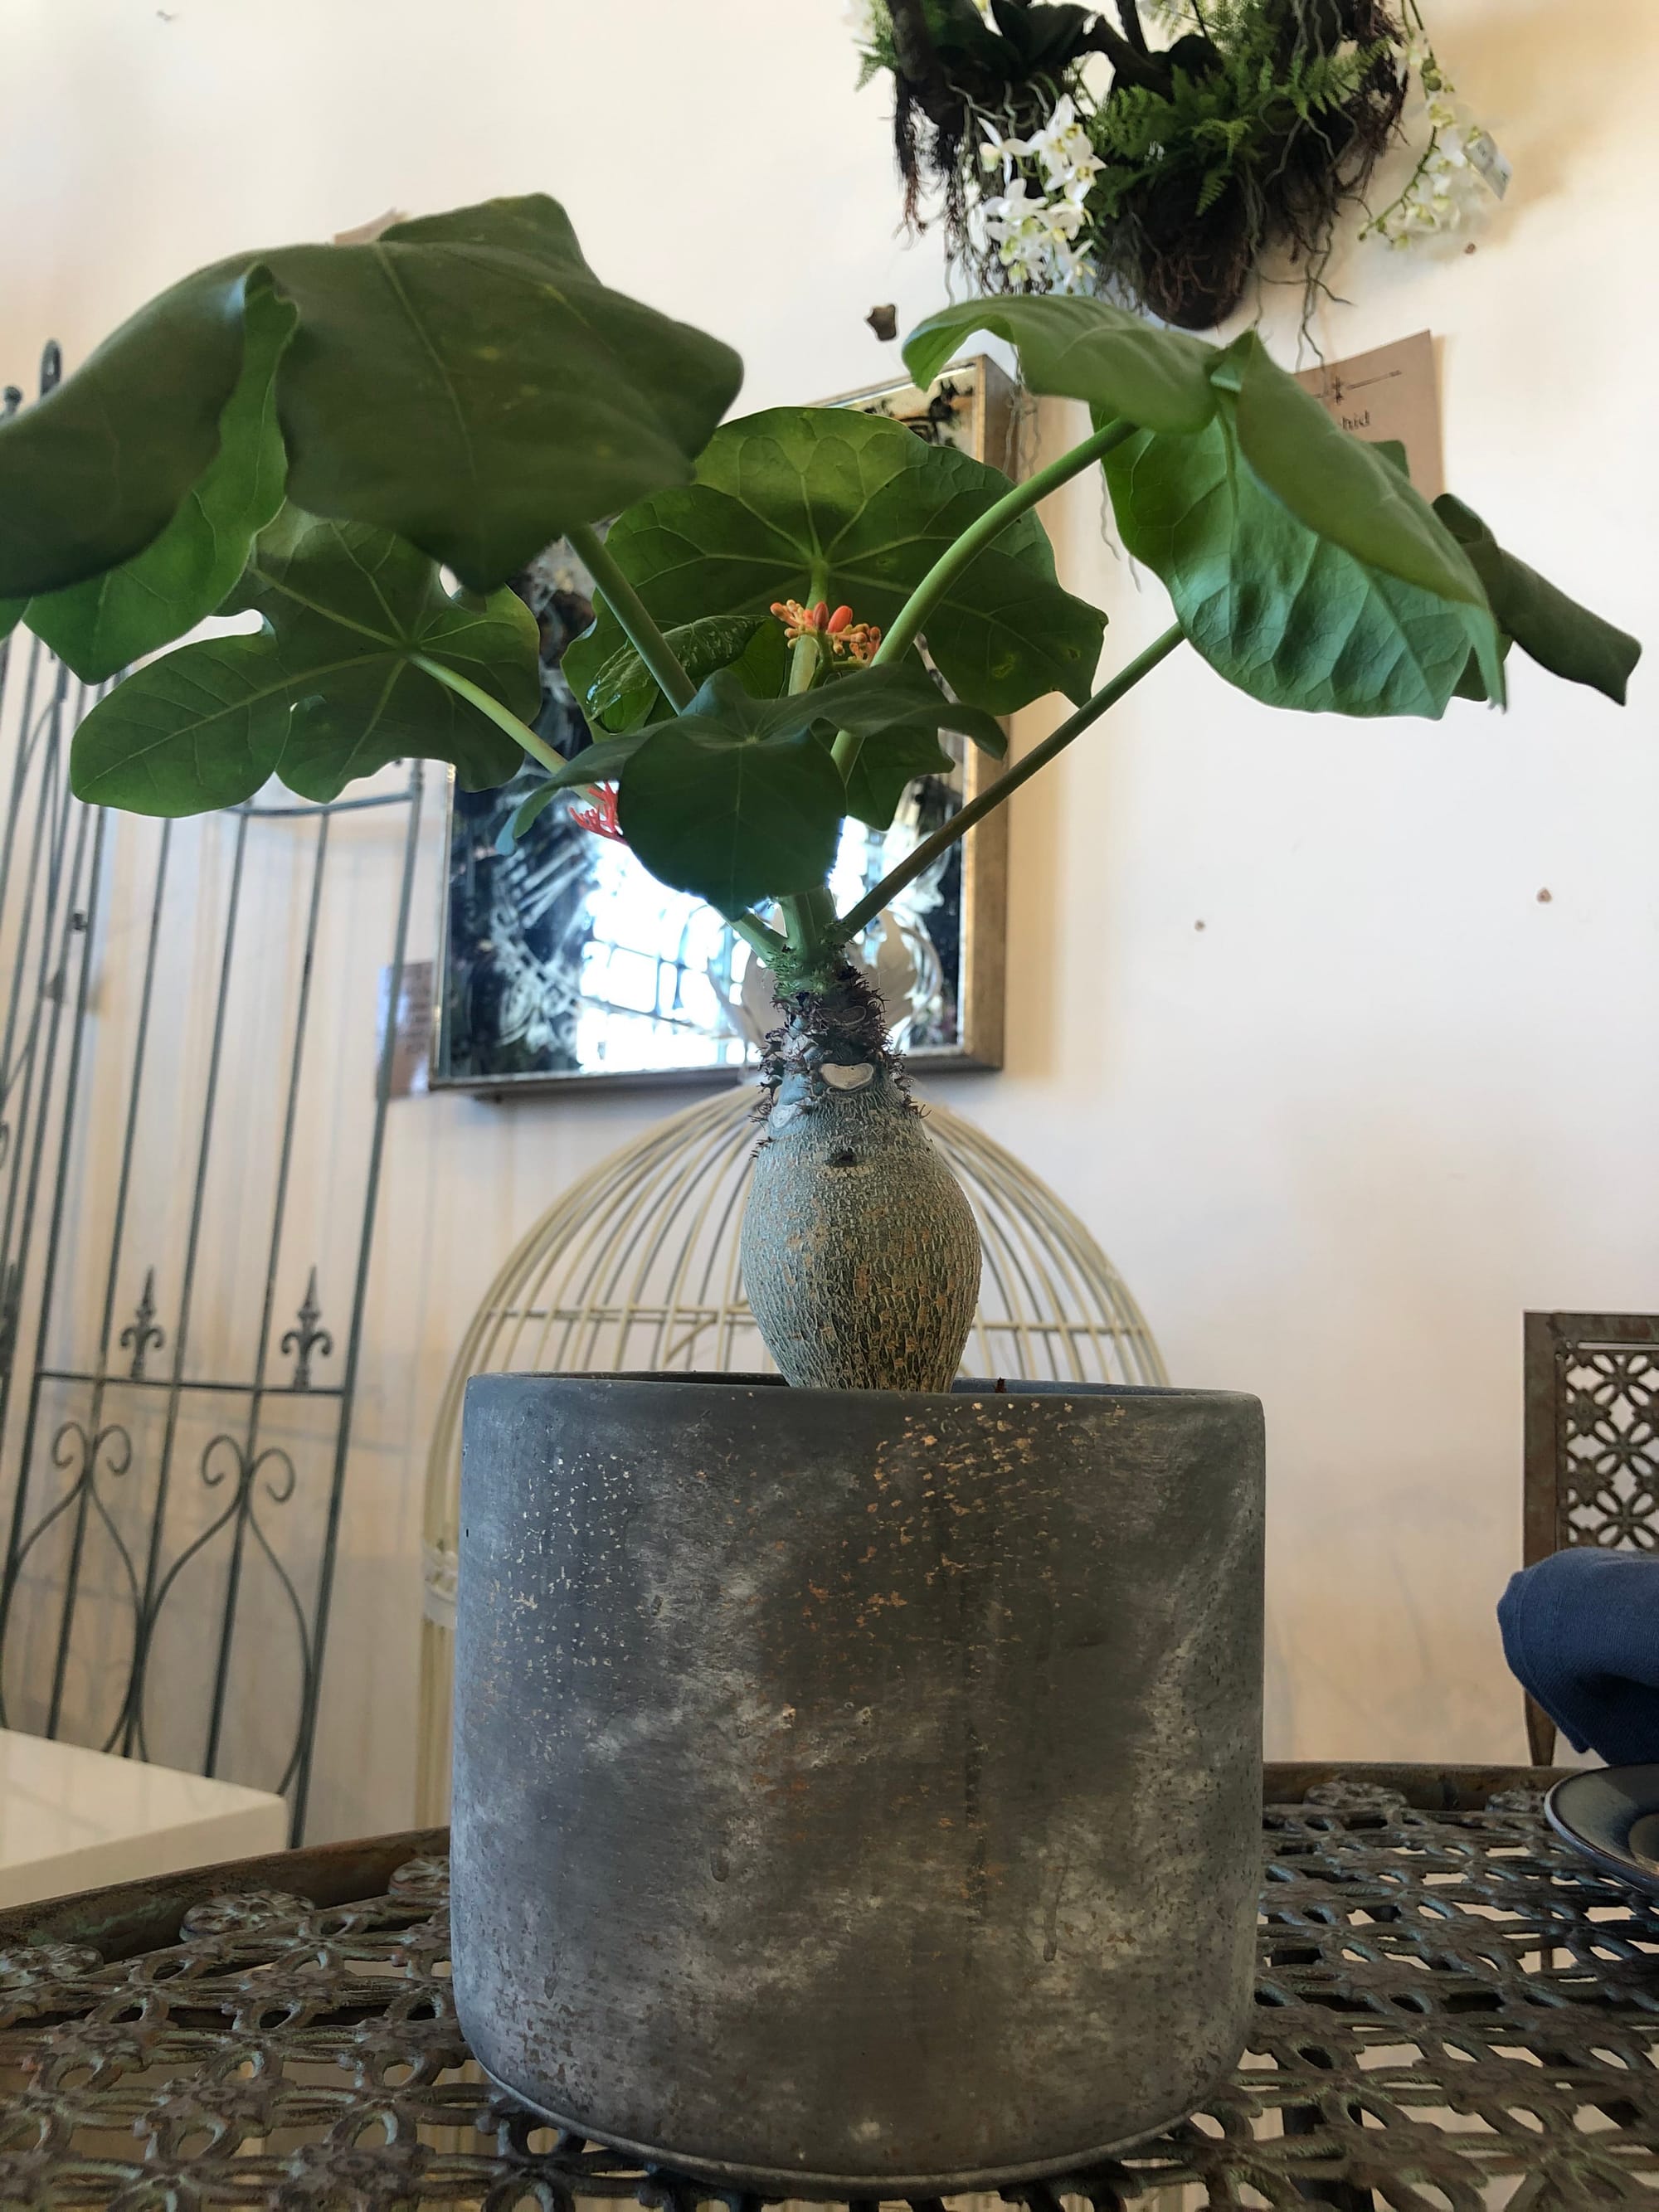
Jatropha podagrica.
Contents
- Top Tips
- Location, Water, Humidity & Fertilisation
- Dormancy Period Care
- Common Issues
- Origins, Temperature, Propagation, Repotting & Toxicity.
Need the answer to a specific plant query? Book a 1-to-1 video call with Joe Bagley, the website's friendly author, to overcome and address your niggling problem! Available on iMessage, WhatsApp, Facebook Messenger & more.
Top Tips & Info
- Care Difficulty - Moderate
- Jatropha like to be kept in a bright location, with the possibility of either morning or evening sun. Avoid deep shade at all costs due to the risk of over-watering and gradual decline.
- Jatropha like to be kept on the drier side to life. Allow the soil's top third to dry out in between waters, reducing irrigations slightly in the autumn and winter to reinforce its dormancy.
- Fertilise using a 'Houseplant' or 'Cactus' labelled feed every four waters in the spring and summer, reducing this to every six in the colder months.
- Repot every three years in the spring, using a 'Houseplant' labelled potting mix and the next sized pot.
- Keep an eye out for Spider Mites & Mealybugs that'll hide in the plant's cubbyholes and underneath the leaves.
- You can only prune a Jatropha within the green section of the stem; never cut into the 'barky' part as it won't be able to produce new buds.
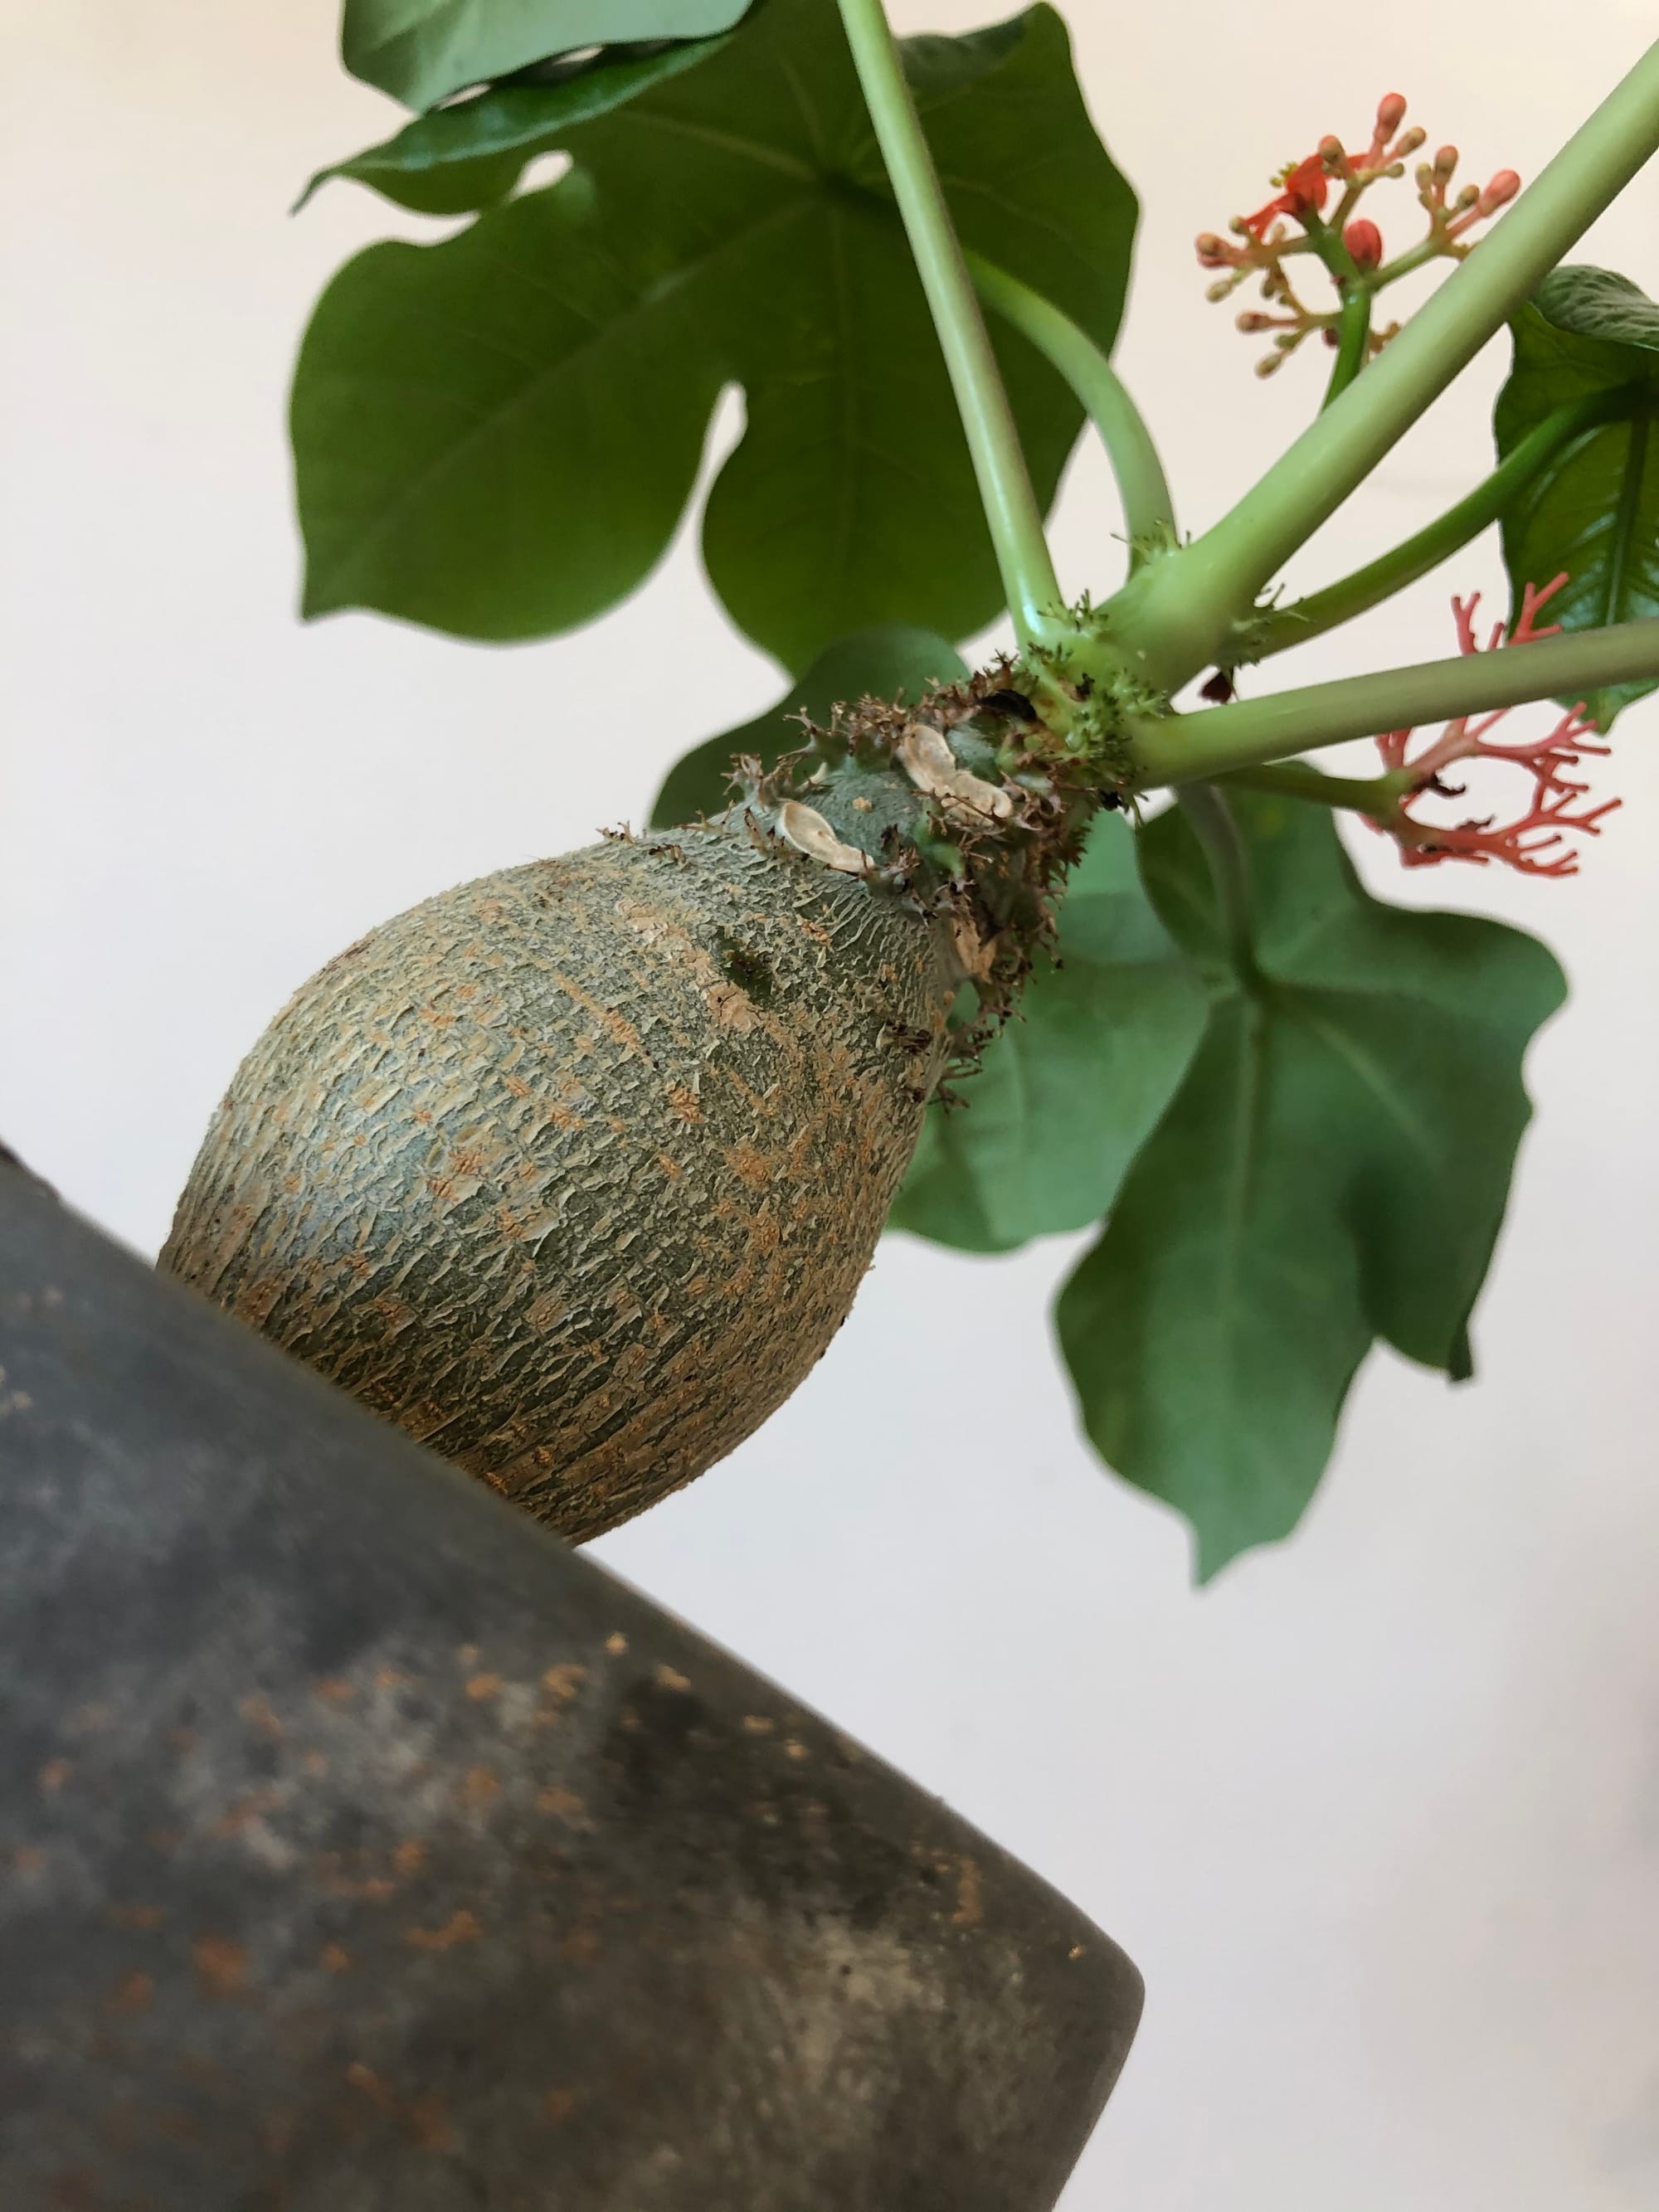
 Wilting leaves (pictured here), is a common issue among gardeners, caused by root suffocation. This could be either under-watering or continuous over-watering that has caused excessive root rot - scroll down to 'Common Issues' for more information on this.
Location & Light - 🔸🔸
We'd recommend situating yours in a bright, indirect location with the possibility of morning or evening sun. A north, east or west-facing window or beneath a light source (like skyline windows or a semi-shaded conservatory) is the optimum setting for a Jatropha. Remember, the brighter the location, the more watering you'll need to do to ensure thorough hydration.
A maximum of two hours of early morning or late evening sunlight is advised in the spring and summer, and up to three hours in the autumn and winter. Do not over-expose your specimen to the sunlight due to the high risk of sun-scorch and dehydration. Avoid deep shade at all costs.
Water - 🔸
Jatropha are best kept on the drier side to life, due to their susceptibility to basal or root rot. With this in mind, allow the soil's top third to dry out in between waters in the growing period, reducing this further in the autumn and winter for its dormancy period. Under-watering symptoms include yellowing or wilting leaves, stunted growth and dry, crispy patches forming on the leaf edges - these issues are usually caused by too much light/heat or forgetfulness. Over-watering symptoms include a weakened or rotten stem, no new growth, yellowing lower leaves and eventual plant death - click here to learn more about root rot and how to address it!
Humidity - 🔸🔸
Average room humidity is enough to satisfy this plant, as long as you don't live in an overly-dry climate. Never situate it within a few metres of an operating radiator due to the enriched chance of browning leaf-tips. If you are indeed worried about dry air, create a humidity tray to provide a moist and stable environment for your plant, which will also have the added benefit of slowing the rates of drying soil!
Fertilisation - 🔸🔸
Fertilise every four waters during the growing period before reducing this to every six in the autumn & winter. Although an 'Houseplant' fertiliser will still do the job, we'd recommend using a specific 'Cactus' labelled feed as it'll support the vital thirteen nutrients that this species will need to grow.
Dormancy Period Care
This plant will need to have a resting period between the months of December to April. During this time, it's natural for some (or all) of its leaves slowly yellow and drop off, leaving you with a near-naked specimen. While the plant is resting, we recommend sitting your plant in a sunless windowsill that offers temperatures above 15℃ (59℉) and away from any nearby operating heaters. Only rehydrate its soil once the top half dries out using lukewarm water as over-watering is common in lower temperatures.
Your Jatropha podagrica will tell you when it's awakening from a dormancy period as it'll produce small leaves at the stem tips. Begin hydrating its potting mix more often and feed every third water with a 'Houseplant' labelled fertiliser to help it ease into faster growth. Follow the care tips mentioned above in 'Location, Watering, Humidity & Fertilisation' until the following dormancy.
 Be patient if your Jatropha is producing small leaves shortly after coming out of its dormancy period. Larger foliage will eventually emerge as spring & summer passes!
Common Issues with Jatropha Podagrica
If you still can't find the answer to your specific houseplant problem, book a 1-to-1 video call with Joe Bagley to point you in the right direction today.
If your Jatropha develops basal collapse, it may spell the end of its life. The base of its stem acts like its lifeline, meaning that any issues of rot will kill it outright. If yours has problems of this, be sure to take the plant out of the pot and inspect its roots. Prune away any rotten areas and check its base for a softened profile. Remove any individual plants that have a rotten bottom and repot the healthy specimens in a fresh batch of 'Houseplant' compost. Provide a brighter location and reduce the number of waters slightly to avoid further rot. Discard the plant if there is no sign of health below the soil line.
Yellowing lower leaves could be a sign of over-watering, but equally is a byproduct of maturity. If the older leaves rapidly become yellow in quick succession, over-watering could be to blame. People don't realise that a plant's root system needs access to oxygen too; when soil is watered, the air will travel upwards and out of the potting mix. A lack of accessible oxygen for the roots will cause them to subsequently breakdown over the oncoming days. Click on this link to learn more about root rot and how to address it.
Curled leaves and brown leaf-edges are the result of too little water and over-exposure to the sun. Jatropha are best located in bright, indirect settings, and those that haven't acclimatised to the harsh rays will show signs of sun-scorch and environmental shock. A splash of winter sunlight is acceptable as long as the soil moisture is regularly observed, with complete avoidance once summer comes along.
Never allow temperatures to dip below 12ºC (54ºF) as irreversible damage may occur in the likes of yellowed foliage and a loss of leaves. If this happens, remove the severely affected areas and immediately improve growing conditions - never cut through softened yellow growth, and only around brown, crispy squares. As rehabilitation can take several months because of its slow-growing nature, be sure to provide a stable location with better growing conditions to speed this process.
Spider Mites are small, near-transparent critters, that'll slowly extract the chlorophyll from of its leaves. Have a check under the leaves, most notably along the midrib, for small webs and gritty yellow bumps. Click here to read our article about the eradicating Spider Mites, along with some extra tips that you may not find elsewhere!
Mould or mushrooms developing on the soil means two things - too little light and over-watering. Despite the harmlessness, it'll prove unsightly to most gardeners and is therefore removed once known. To remove, replace the top two inches of the soil for a fresh batch of 'Houseplant' compost. Either increase the amount of light received (no direct sunlight for the first few weeks to prevent environmental shock) or decrease the frequency of waters slightly. If the mould is accompanied by yellowing lower leaves, you may also have a case of root rot.
A lack of flowers is caused by an insufficient dormancy period, where the temperatures are kept more or less the same over the year. Reduce the warmth by a couple of degrees over the autumn and winter, along with fewer irrigations to ensure a well-spent dormancy. As spring arrives, the natural temperature will begin to increase, with this is being the perfect time to increase waters and fertilisation. Remember, the warmer the summer days are, the more likely a specimen is to reflower.
Origins
Jatropha podagrica was first described by William Jackson Hooker in 1848, placing it in the genus of Jatropha, first penned by Carl Linnaeus ninety years earlier. The name comes from the Greek words iatros, meaning 'physician', and trophe translating to 'nutrition' that refers to the edible stems of a few non-toxic species. The specific epithet, podagrica, translates from Latin to mean 'swollen' 'foot' in reference to the thick wooded stems when mature. The species has natural distributions across the Central Americas, ranging from southern Mexico to Costa Rica.
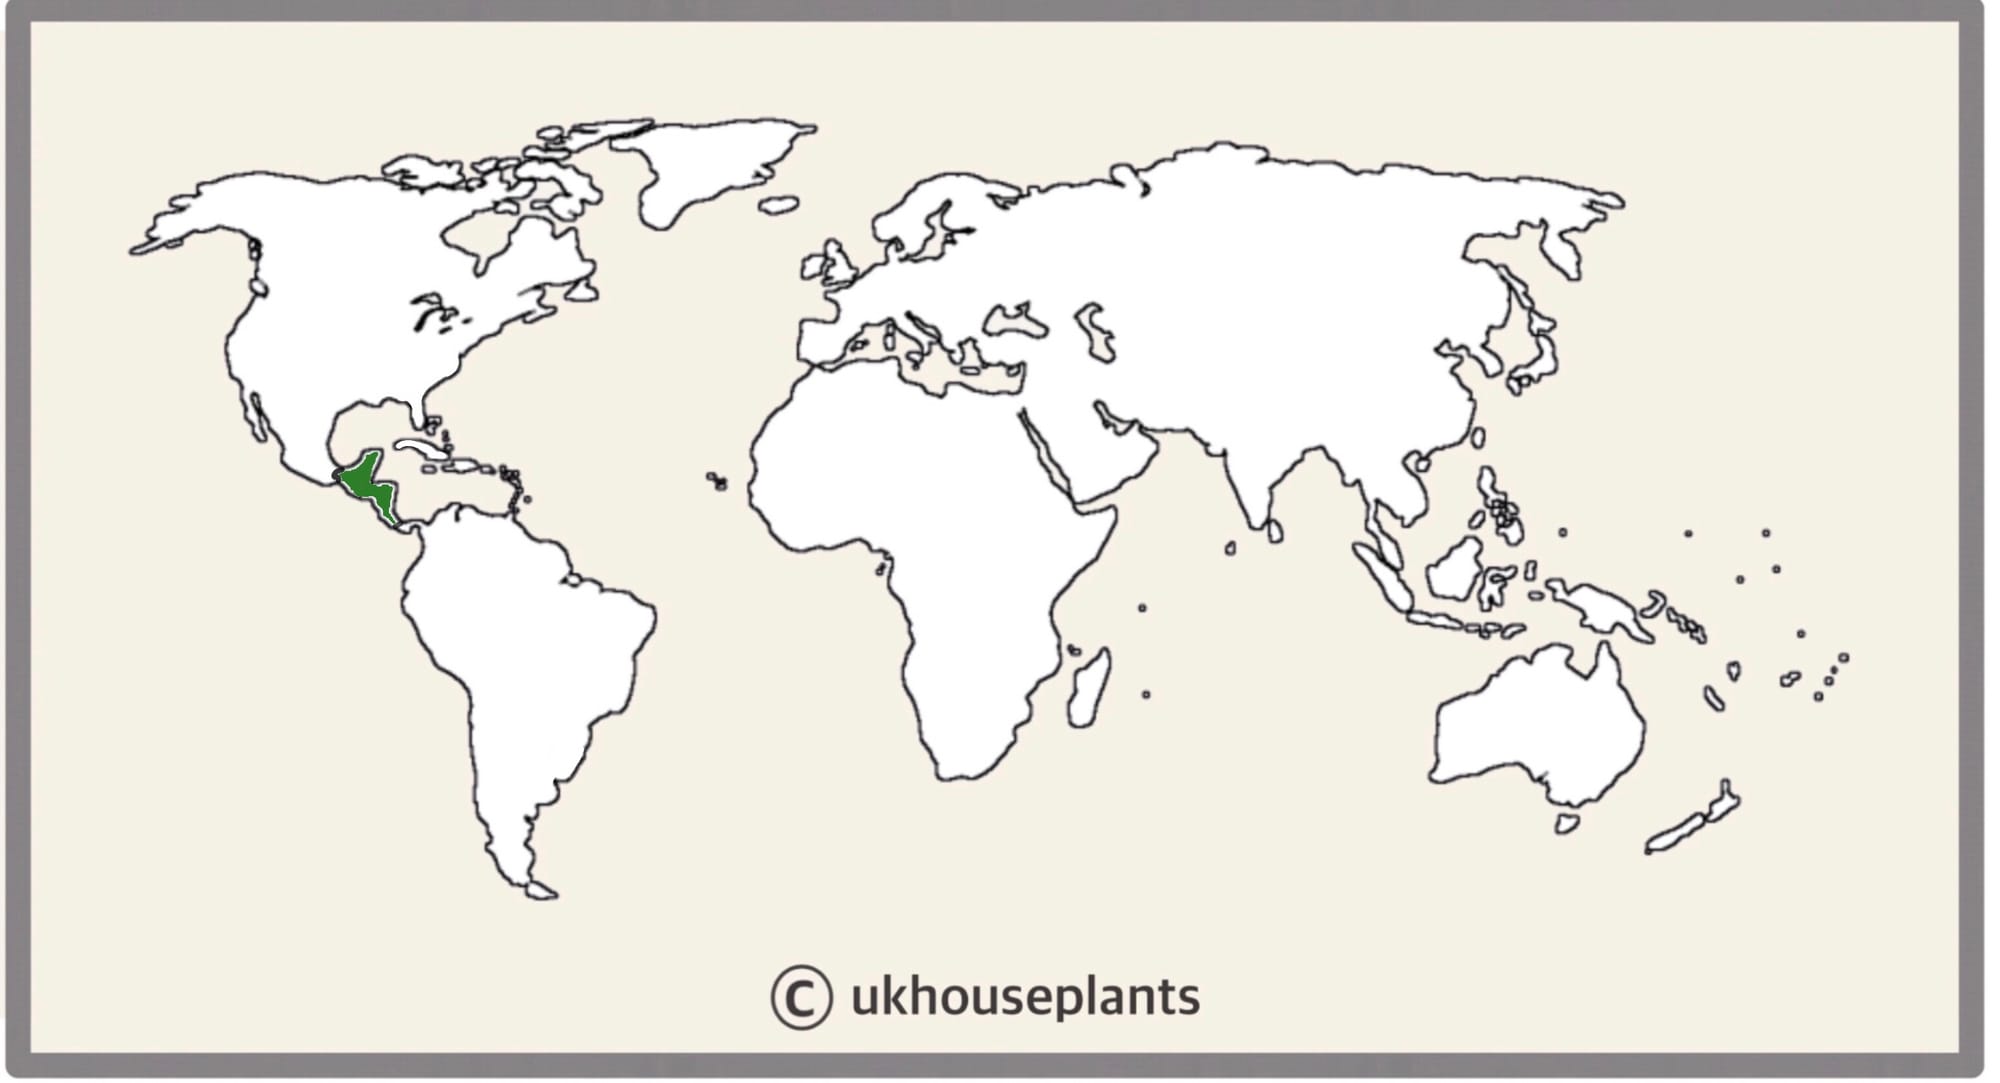 The Distribution of Jatropha podagrica.
Temperature
15° - 27℃ (57° - 80℉)
H1b (Hardiness Zone 12) - Can be grown outdoors during the spring and summer in a sheltered location whilst nighttime temperatures are above 15℃ (59℉), but is fine to remain indoors, too. If you decide to bring this plant outdoors, don't allow it to endure more than an hour of direct sunlight a day as it may result in sun-scorch. Regularly keep an eye out for pests, especially when re-introducing it back indoors.
Spread
The overall size can be up to 0.4m (1.7ft) in height and 0.3m (1ft) in width. The ultimate size will take between 5 - 8 years to achieve when repotted biannually, with several new leaves unfurling per annum.
Pruning & Maintenance
Remove yellow or dying leaves, and plant debris to encourage better-growing conditions and its overall appearance. You can only prune a Jatropha within the green section of its stem; never prune directly into its hardened bark as this will immediately kill the specimen in most cases. This plant can only produce new branches/buds via the green, younger section of its stem.
Propagation
Via Seed or Stem Cuttings.
Seeds (Moderate) - Soak the seeds in lukewarm water for around 24hrs in a dark location, preferably on top of an operating radiator. The best soil to use is a 'Cactus & Succulent' labelled potting mix as it'll provide the necessary drainage needed for good quality root health. Set the seeds around a quarter of an inch deep, resisting the temptation to compact it. Maintain evenly moist soil and allow the excess water to freely drain from the pot's base to prevent water-logged conditions. The ideal location for successful germination is in a bright, indirect setting with temperatures above 18℃ (64℉) with bottom-heat. Keep the pot in a transparent bag to provide a stable level of humidity, along with longer-lasting soil moisture. Germination may take up to three months, so don't discard any unsuccessful seeds until this threshold has been surpassed. Remove the bag once the seedlings produce their second leaf and then split them into their own 7cm (3 inch) pots.
Stem Cuttings (Very Difficult) - Choose the healthiest, most established stems that are wooded and healthy. This propagation method can be taken all year round but is very difficult so we wouldn't recommend it. Cut the stem around six inches from the end, dipping its wound in rooting hormone. Place the cutting into a moist, well-draining potting mix; 'Houseplant' compost is best as it'll include perlite for better air circulation within the soil. Use an 8cm pot (4 inches) that has suitable drainage holes - plastic or terracotta are both acceptable in this instance. Try not to over-pot the cuttings; blackleg occurs when the bottom base becomes infected, typically caused by water-logging or a too-damaged wound. Set the cutting into the compost, keeping the foliage above the soil line. Provide a bright, indirect setting with adequate warmth and the avoidance of direct sunlight or operating radiators. Maintain moist but not soggy compost throughout this process. After a period of two months in soil, remove the bag and follow the care tips provided above!
Flowers
Small flowers are arranged in panicles along orange shafts at the start of spring. Each flower will last up to one week, with the overall show lasting several weeks.
To achieve a Jatropha bloom, you must provide a cool and drier dormancy period. From the end of autumn to early spring, water infrequently to avert the risk of over-watering, along with presenting a location with around two hours of morning sunlight per day. The ideal temperature should gently fluctuate between the day and night around 15 - 18℃ (59 - 64℉) to provide an efficient resting period. From mid-spring onwards, the natural temperature will begin to increase, with more frequent waters and fertilisation taking place. Remember to use a potassium-based fertiliser, for example, tomato food, to maximise the chance of a bloom.
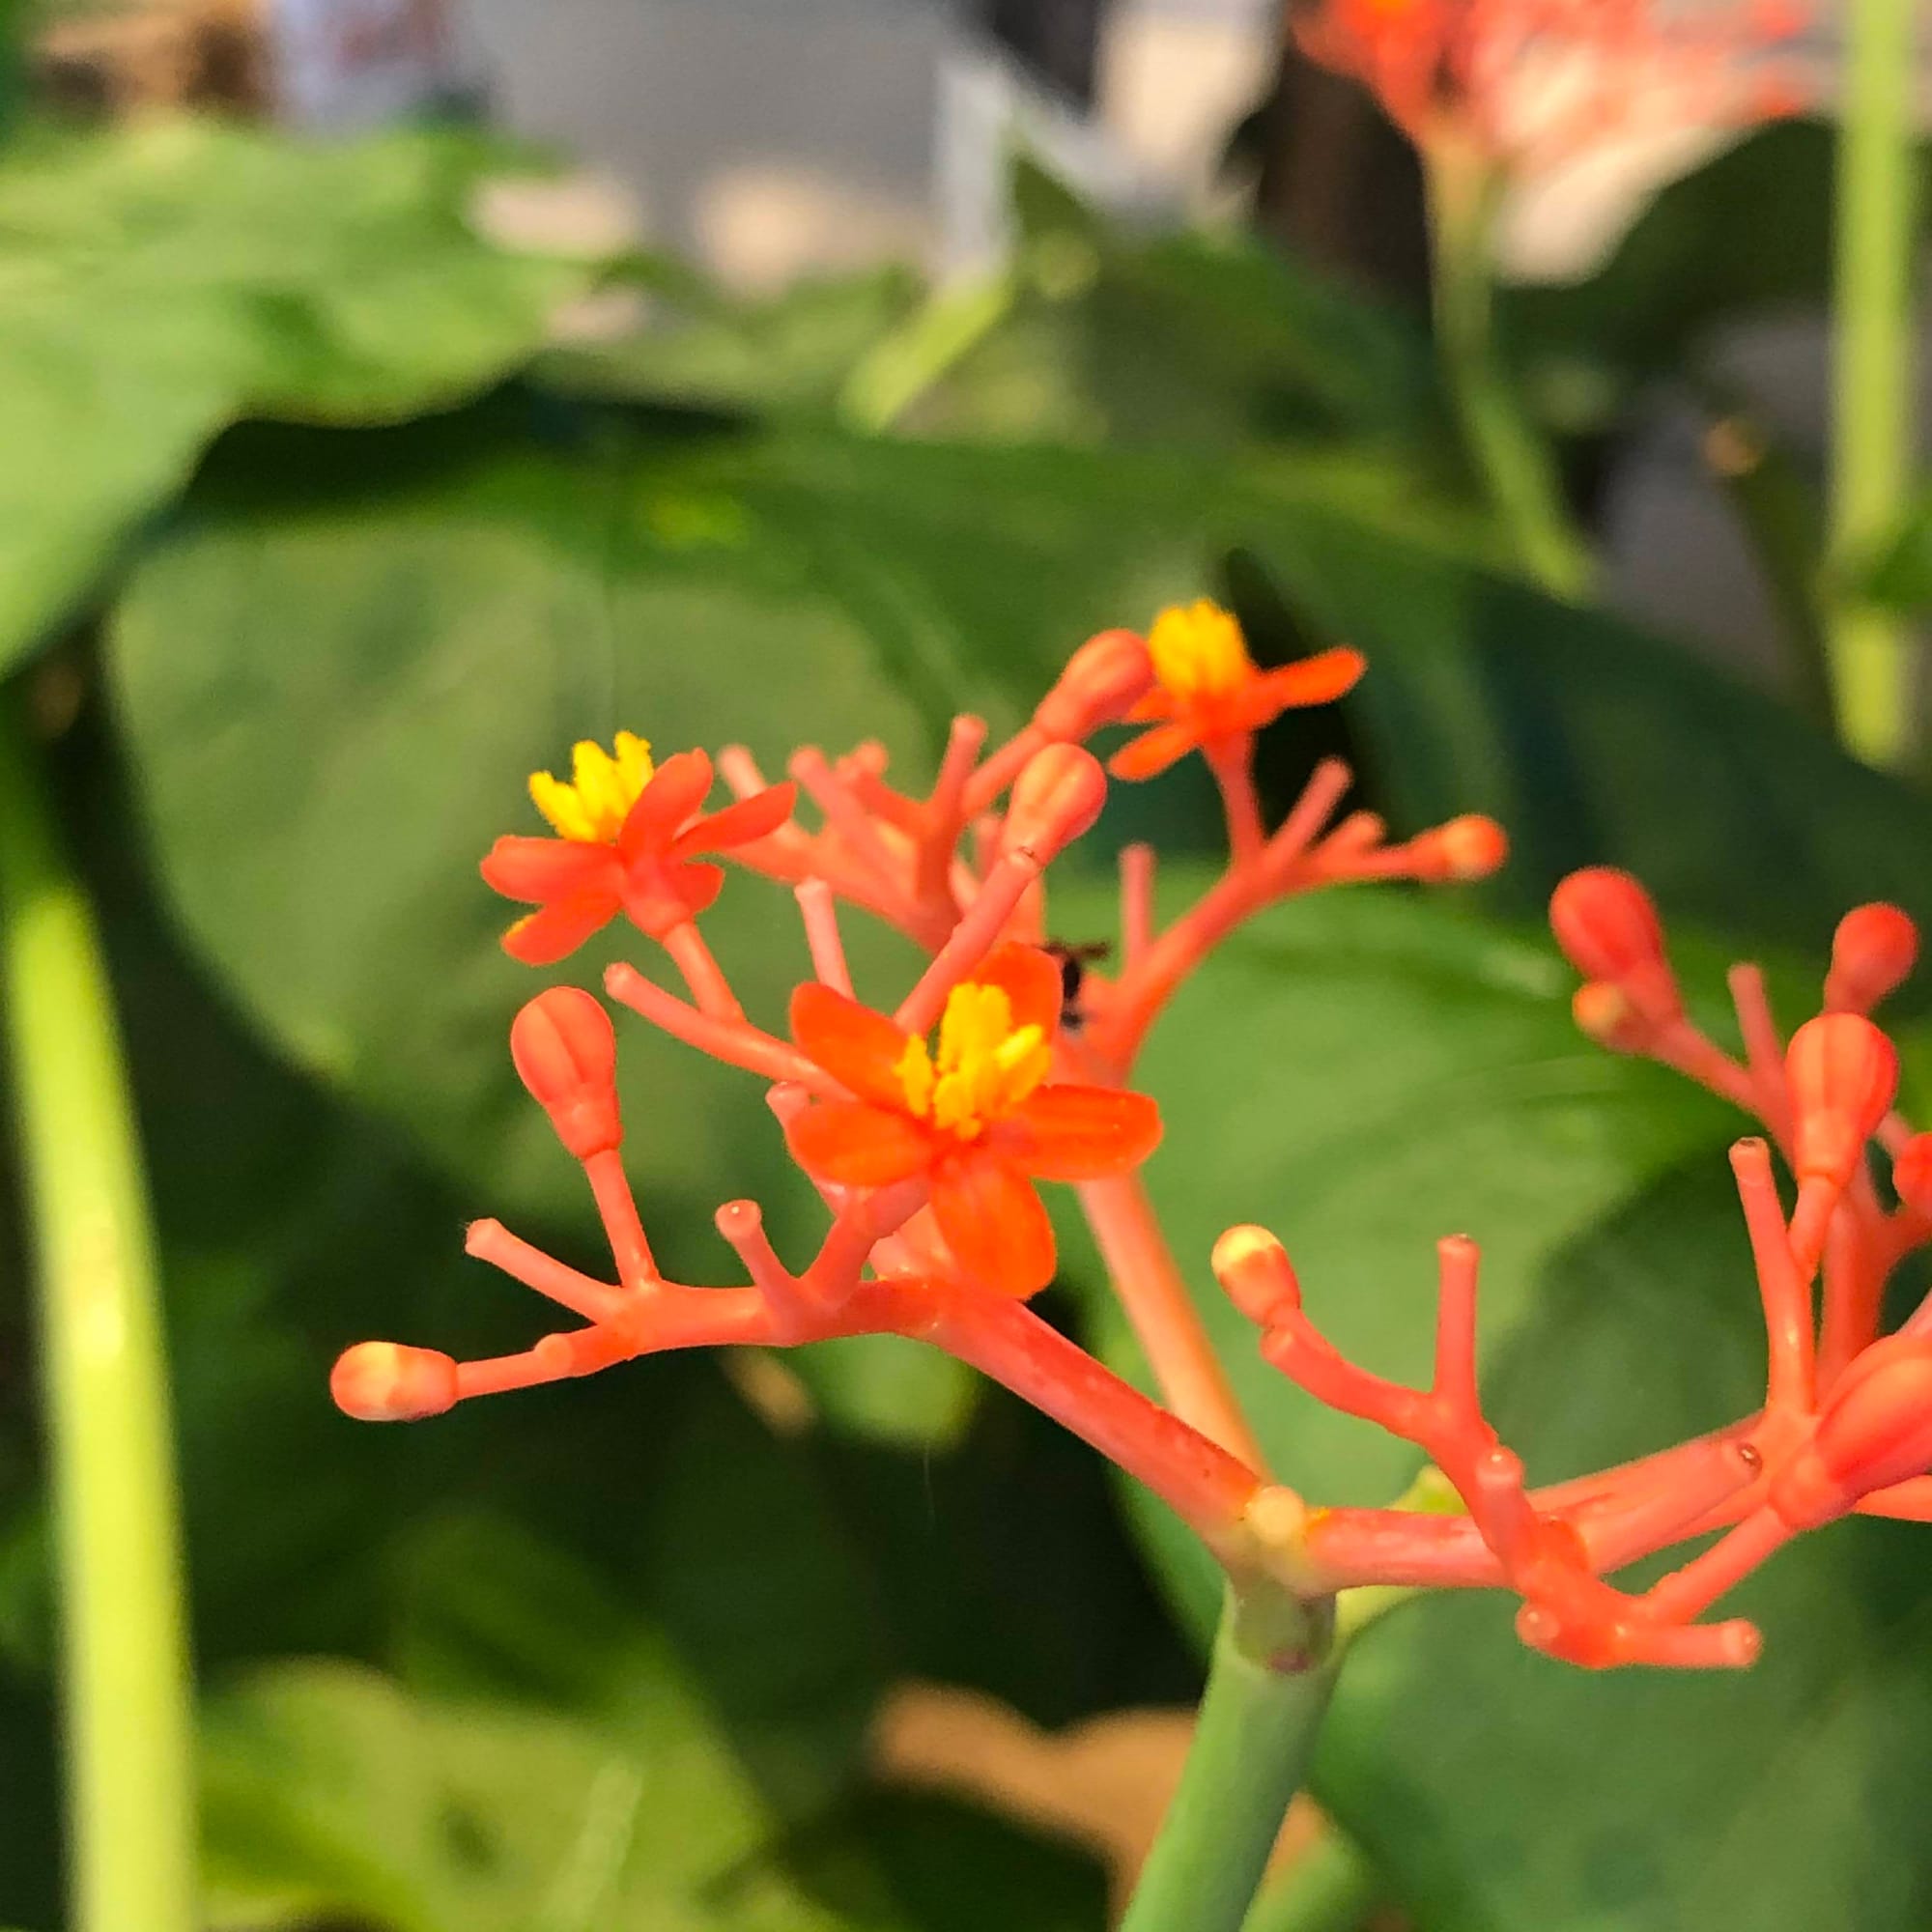 The arrangement of its inflorescences.
Repotting
Repot every three years in the spring, using a 'Houseplant' labelled potting mix and the next sized pot with adequate drainage. Jatropha are far better potbound for several years due to the heightened risk of root rot and repotting-issues (like transplant shock) - so only repot if you feel it's wholly necessary.
Hydrate the plant 24hrs before tinkering with the roots to prevent the risk of transplant shock. For those situated in a darker location, introduce extra amounts of perlite and grit into the lower portion of the new soil to downplay over-watering risks. Click here for a detailed step-by-step guide on transplantation, or via this link to learn about repotting with root rot.
Pests & Diseases
Keep an eye out for mealybugs, aphids, spider mites, scale, thrips & whitefly. Common diseases associated with this species are root rot, red leaf-spot, heart rot, botrytis & southern blight - click here to learn more about these issues.
Toxicity
This plant is classified as poisonous; if parts of the plants are eaten, vomiting, nausea and a loss of appetite could occur. Consumption of large quantities must be dealt with quickly; acquire medical assistance for further information. The sap can also cause dermatitis and skin allergy to sensitive individuals, so be sure to wear gloves when handling.
Retail Locations
Waitrose Garden, Online Stores.
Book a 1-to-1 Call with Joe Bagley
If you need further advice with your houseplants, book an advice call with ukhouseplants' friendly and expert writer today! This can be done via a video or audio call on most apps, including Facebook, FaceTime & Skype. A ten-minute call costs £5.99 (US$7), or £15.99 for thirty minutes. You can ask multiple questions, including queries on plants, pests, terrariums, repotting advice and anything in between. Please consider supporting this service to keep ukhouseplants thriving!
Comments