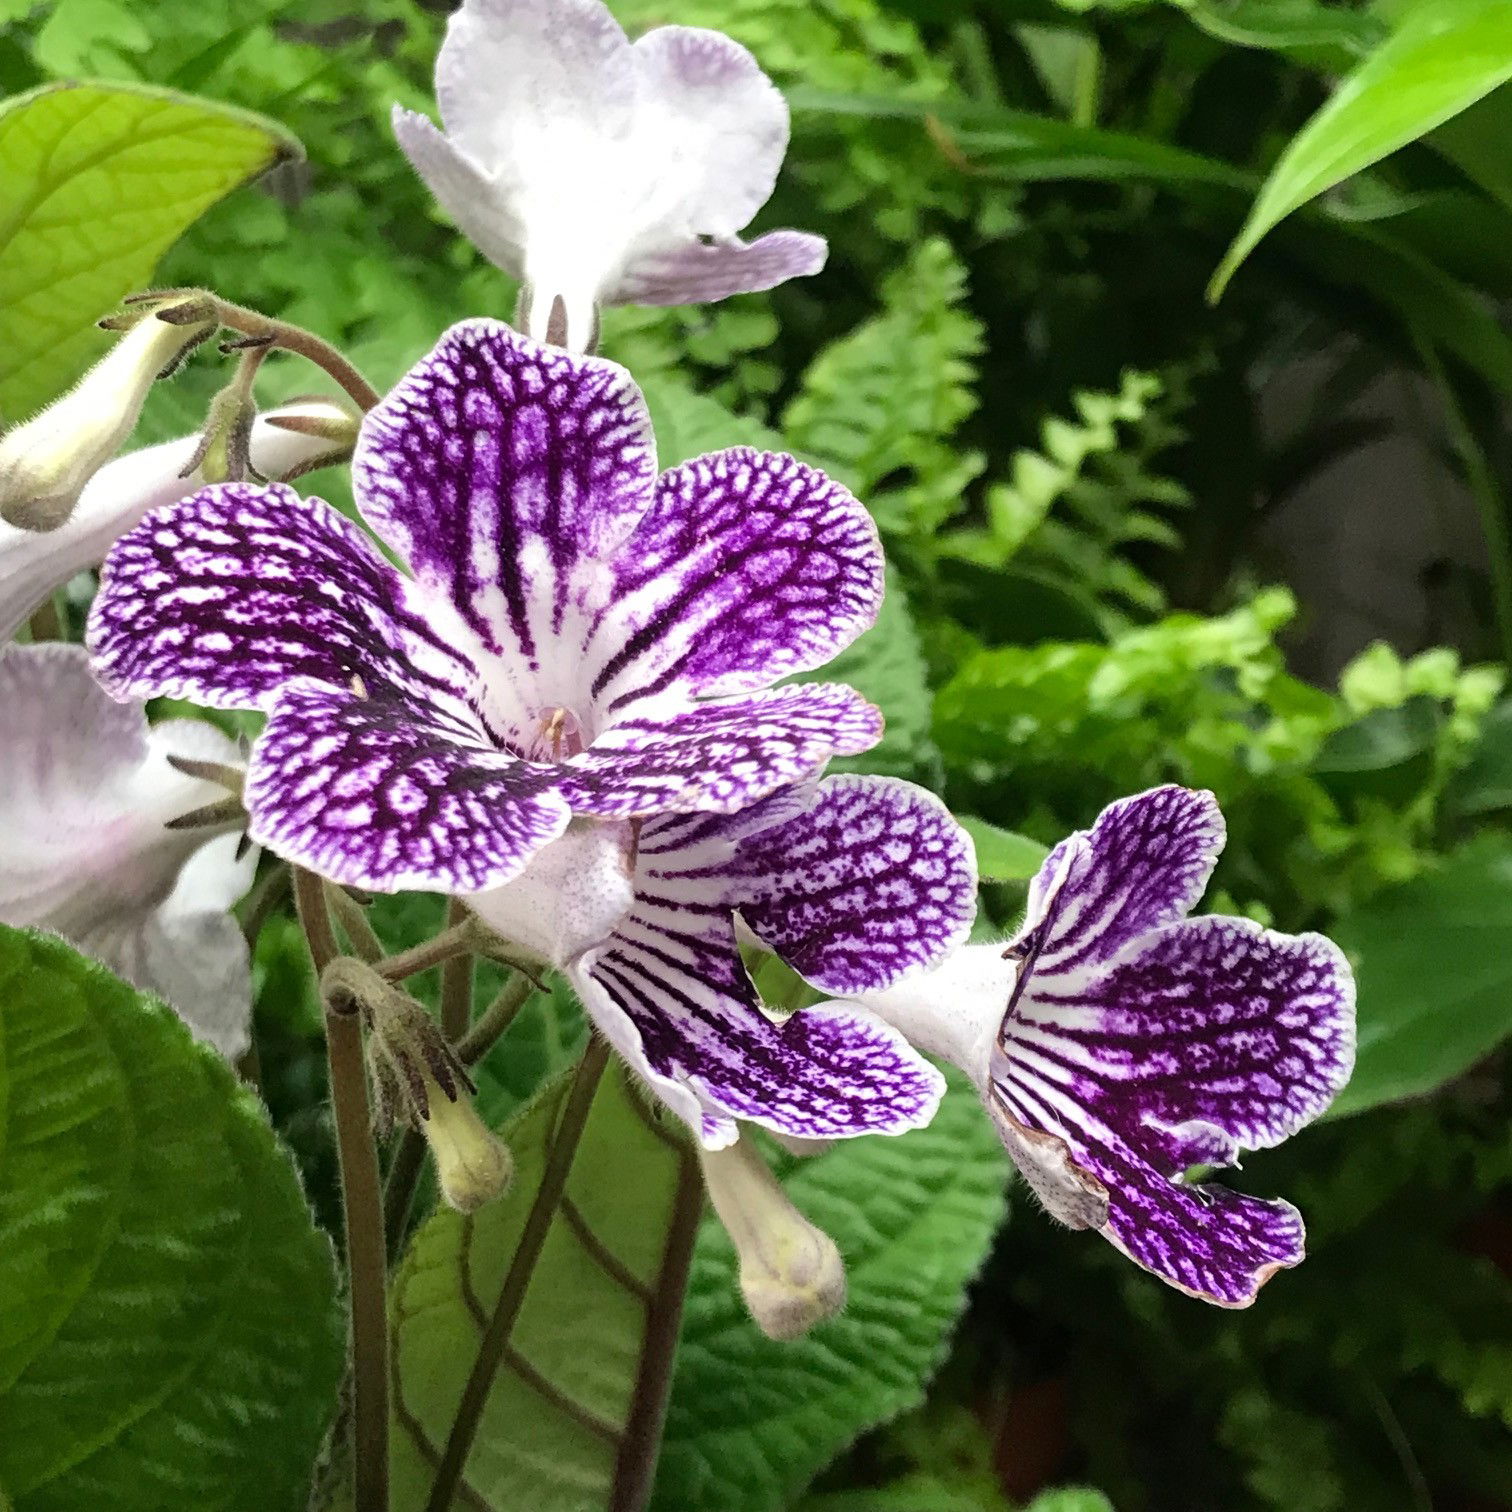
Streptocarpus 'Polka Dot'
Contents
- Top Tips
- Location, Water, Humidity & Fertilisation
- Dormancy Care & Annual Blooms
- Common Issues
- Origins, Temperature, Propagation, Repotting & Toxicity
Need the answer to a specific plant query? Book a 1-to-1 video call with THE HOUSEPLANT DOCTOR™, the website's friendly author, to overcome and address your niggling problem! Available on iMessage, WhatsApp, Facebook Messenger & more.
Top Tips & Info
- Care Difficulty - Moderate
- Bright, indirect light is critical for a healthy Streptocarpus. If you cannot provide a warm windowsill, THE HOUSEPLANT DOCTOR™ recommends using grow-lights (which work incredibly well with better shows of flowers, too).
- Only rehydrate the soil once the leaves start to feel floppy/soft when touched. While the leaves are plump and hard, try not to water its soil!
- Average humidity levels in the home are accepted. If, however, your Streptocarpus is kept in a room where temperatures are over 25℃ (77℉), it's advised to use a 'pebble tray'.
- Feed every third water using either a 'Houseplant' or 'Streptocarpus' labelled fertiliser, all year round. Cuttings and seedlings won't need fertilising for the first three months of their 'lives' though.
- Repot every three years using a 'Houseplant' or 'Streptocarpus' labelled potting mix; be sure to respect the roots as transplant shock is a big issue that could cause wilting, sudden leaf loss or even death. Check the compost for root mealybugs which seem to be a prominent issue among growers at the moment.
- Aphids are the most common pest with Streptocarpus, as the flowers' soft tissue is a perfect breeding ground for a growing population. Click on this link to learn more about how to eradicate the critters with garlic water.
- If possible, reduce the ambient temperature to around 12°C (54°F) over the autumn and winter to provide a proper dormancy. Introduce around two hours of off-peak sunshine thorough this period to avert the heightened chance of root rot and over-watering. This period of rest will allow more efficient foliar growth in the spring and summer, along with the heightened probability of generating blooms in the late spring. If you don't have a bright enough window, THE HOUSEPLANT DOCTOR™ recommends purchasing an LED grow-light to accompany the plant and aid the chances of all-year round blooms.
Location & Light - 🔸🔸
Streptocarpus grow best in bright locations with minimal sunlight. Especially during the summer, the direct sunlight can burn the foliage and cause dehydration-related permanent damage. THE HOUSEPLANT DOCTOR™ recommends placing yours either on a table around 1m from a window, or under an LED grow-light for optimum growth. LED grow-lights also have the added benefit of increasing the likelihood of blooms for several months at a time.
Between the months of November to March, the sunlight's intensity will be at its lowest so it's perfectly fine to place your Streptocarpus in a south-facing window (if you don't have a grow-light. This trick essentially helps the plant get through the darker days without running the risk of not producing enough photosynthesis (common with plants grown more than 90cm from a window in winter). Just remember to move it back from the sun and back onto the table from April onwards to avoid burning its leaves!
Water - 🔸🔸
The best time to water your Streptocarpus is when its leaves start to become floppy/soft. While the leaves are plump and solid, you won't need to water them. They'll prefer a watering regime where the soil becomes almost fully dry in between waters as they can't tolerate waterlogged conditions for very long. A further tip is to only use room temperature water, as colder temperatures within the rootball/soil can cause disease in some cases.
Although rainwater is best, tap water is also acceptable if you allow it to stand in a jar for around 12 hours. This will 'gas off' the chlorine which is known to hurt the soil's microbial balance, often resulting in a weaker plant. Hydrate the soil once this water becomes room temperature.
Under-watering symptoms include wilting leaves, a loss of flowers, stunted growth, and possible death. These issues are commonly due to forgetfulness or too much heat/sunlight. Streptocarpus can easily be pushed too far if persistent droughts occur; continued wilting even after when the compost is still moist is a clear sign of irrigation-abuse. Although this is usually terminal, you may be able to protect the plant by implementing a more Streptocarpus-friendly with adequate light and regular waters. Over-watering symptoms include the yellowing or browning of leaves, mouldy soil, a rotten base and wilting. These issues are commonly due to a location that's too dark with excess moisture suffocating its roots. If you feel that root rot is to blame, be sure to click on this link for more information on this matter.
Humidity - 🔸🔸
In most situations, Streptocarpus will be fine in the average room humidity in the home (40-60%). There are, however, a few conditions that will require a 'pebble tray' to keep the humidity a little higher around the plant;
- Rooms which are 20℃ (68℉) or above.
- If the plant sits on a windowsill near to an operating radiator.
- If the room's humidity is below 39%.
Do not use a pebble tray if the plant is grown more than 2m from a window, and/or the room's temperature is below 19℃ (66℉) due to the increased risk of rot.
Fertilisation - 🔸🔸
To ensure your Streptocarpus is fed-well throughout the year, THE HOUSEPLANT DOCTOR™ recommends to fertilise it once every third water, all year round. There are different products you can use, but the best for both flowers and new foliar growth is a 'Houseplant' labelled feed like Liquid Gold Leaf.
Others, like 'Streptocarpus' or 'Flowering Plant' fertilisers will also work, but they are becoming increasingly difficult to find in garden centres or stores.
Dormancy Care & Annual Blooms
Attempting a spring-bloom isn't the hardest of tasks, as long as a sufficient dormancy period is served in the cooler months of the year. The following steps should be done at the start of autumn until the early spring when the plant's growth begins to slow down. Always think of ukhouseplants' acronym of SHORT when it's time for flowers.
They're better off staying pot bound for several reasons, including the prevention of root rot or transplant shock, and to put momentarily stress on the plant. Although this may sound harsh, a restriction of roots is the best way to obtain flowers, as it'll send out a spike in response to becoming under threat. As long as the plant is subsequently repotted tri-annually in the spring, no harm is done.
Sunlight
Be sure to provide a bright location with little to no direct sunlight. The warmth from the sun will not only nourish the foliage, but it'll also downplay the risk of over-watering, which is a common issue over the depth of winter. For total empathise on the current season, avoid the use of artificial lighting or locations that boast temperatures higher than 18℃ (64℉).
Hydration
Reduce waters so that about half of the soil becomes dry. It's essential to keep them on the drier side to life, as they'll think that hard times are ahead and therefore will need to pass its genes on to the next generation. Do not over-water or present waterlogged conditions during this time.
Occasional Feeds
Reduce fertilisations to monthly intervals to slow the rate of growth, using a houseplant-labelled feed. Once spring is around the corner, swap the product for a fertiliser high in potassium for the potential development of flower spikes. This should be done at fortnightly intervals until the final flower elapses in the summer, before reverting back to the original feed.
Reduce Everything
This one is to remind you that everything except fertilisation needs to be reduced - especially the temperature.
Temperature
This is the most significant step; reduce the temperature by around 5℃ compared to the summertime or place in a room that's around 13℃ (55℉). The lowered temperature should ideally begin to increase again at the start of spring, which in turn will stimulate new growth. You'll be at a significant disadvantage if the ambient temperature is kept constant throughout the year, as Streptocarpus will only respond with flowers in year-long fluctuating environments (13℃ (55℉) in winter & 20℃ (66℉)) in the spring and summer). Never exceed the minimum temperature as it could lead to plant death or yellowed foliage at a bare minimum.
Common Issues with Streptocarpus
Inconsistent soil moisture is highly detrimental due to the plant's slowed ability to react to such extremes. Stunted growth, constant wilting or flower loss are typical signs of under-watering, and if your specimen doesn't quickly bounce back after severe wilting (even if kept in moist soil), this could spell the end of its life. Be sure to avoid locations with excessive heat or direct sunlight, and potentially introduce a pebble tray to prolong the rate of drying soil via more saturated air. Over-doing is also a bad idea, as the roots will begin to breakdown, reducing the level of moisture-intake for the plant. If the plant is displaying signs of wilting when situated in moist soil and has yellowing older leaves, action must be taken immediately to prevent total death. Click here to learn more about repotting with root rot.
Additionally, small flies hovering around your plant or soil is entirely natural and may just indicate you're watering a little too often. Fungus Gnats are a common 'pest' with Streptocarpus due to its dependency to reliable soil moisture, but won't pose any risk to the plant's health. Simply replace the top quarter of the plant's potting mix for a fresh batch of 'Houseplant' labelled compost, typical found at most garden centres. Remember to reduce the frequency of waters to avoid this occurring again!
Leaves that turn grey and mouldy must be removed as this could spread across the plant. Commonly referred to as 'Botrytis' or 'Grey Mould', the disease will be exacerbated when the Streptocarpus is placed in cold, darker areas of the house. Make sure it's kept in the warmest room to avoid this returning.
Impatiens Necrotic Spot Virus can cause the leaves to develop yellow streaks and mottled spots that slowly cause the plant to die. Remove the affected leaves with a sterilised knife to see if the plant's health improves. It's likely that the plant will unfortunately succumb to this virus.
Flower Break Virus is a lesser detrimental disease on a Streptocarpus, but you'll still need to remove the affected flowers as they develop the symptoms (grey or sunken patches on the flower petals). The plant should survive when provided with a bright, indirect windowsill and regular fertilisation (once every third water using a houseplant-labelled feed).
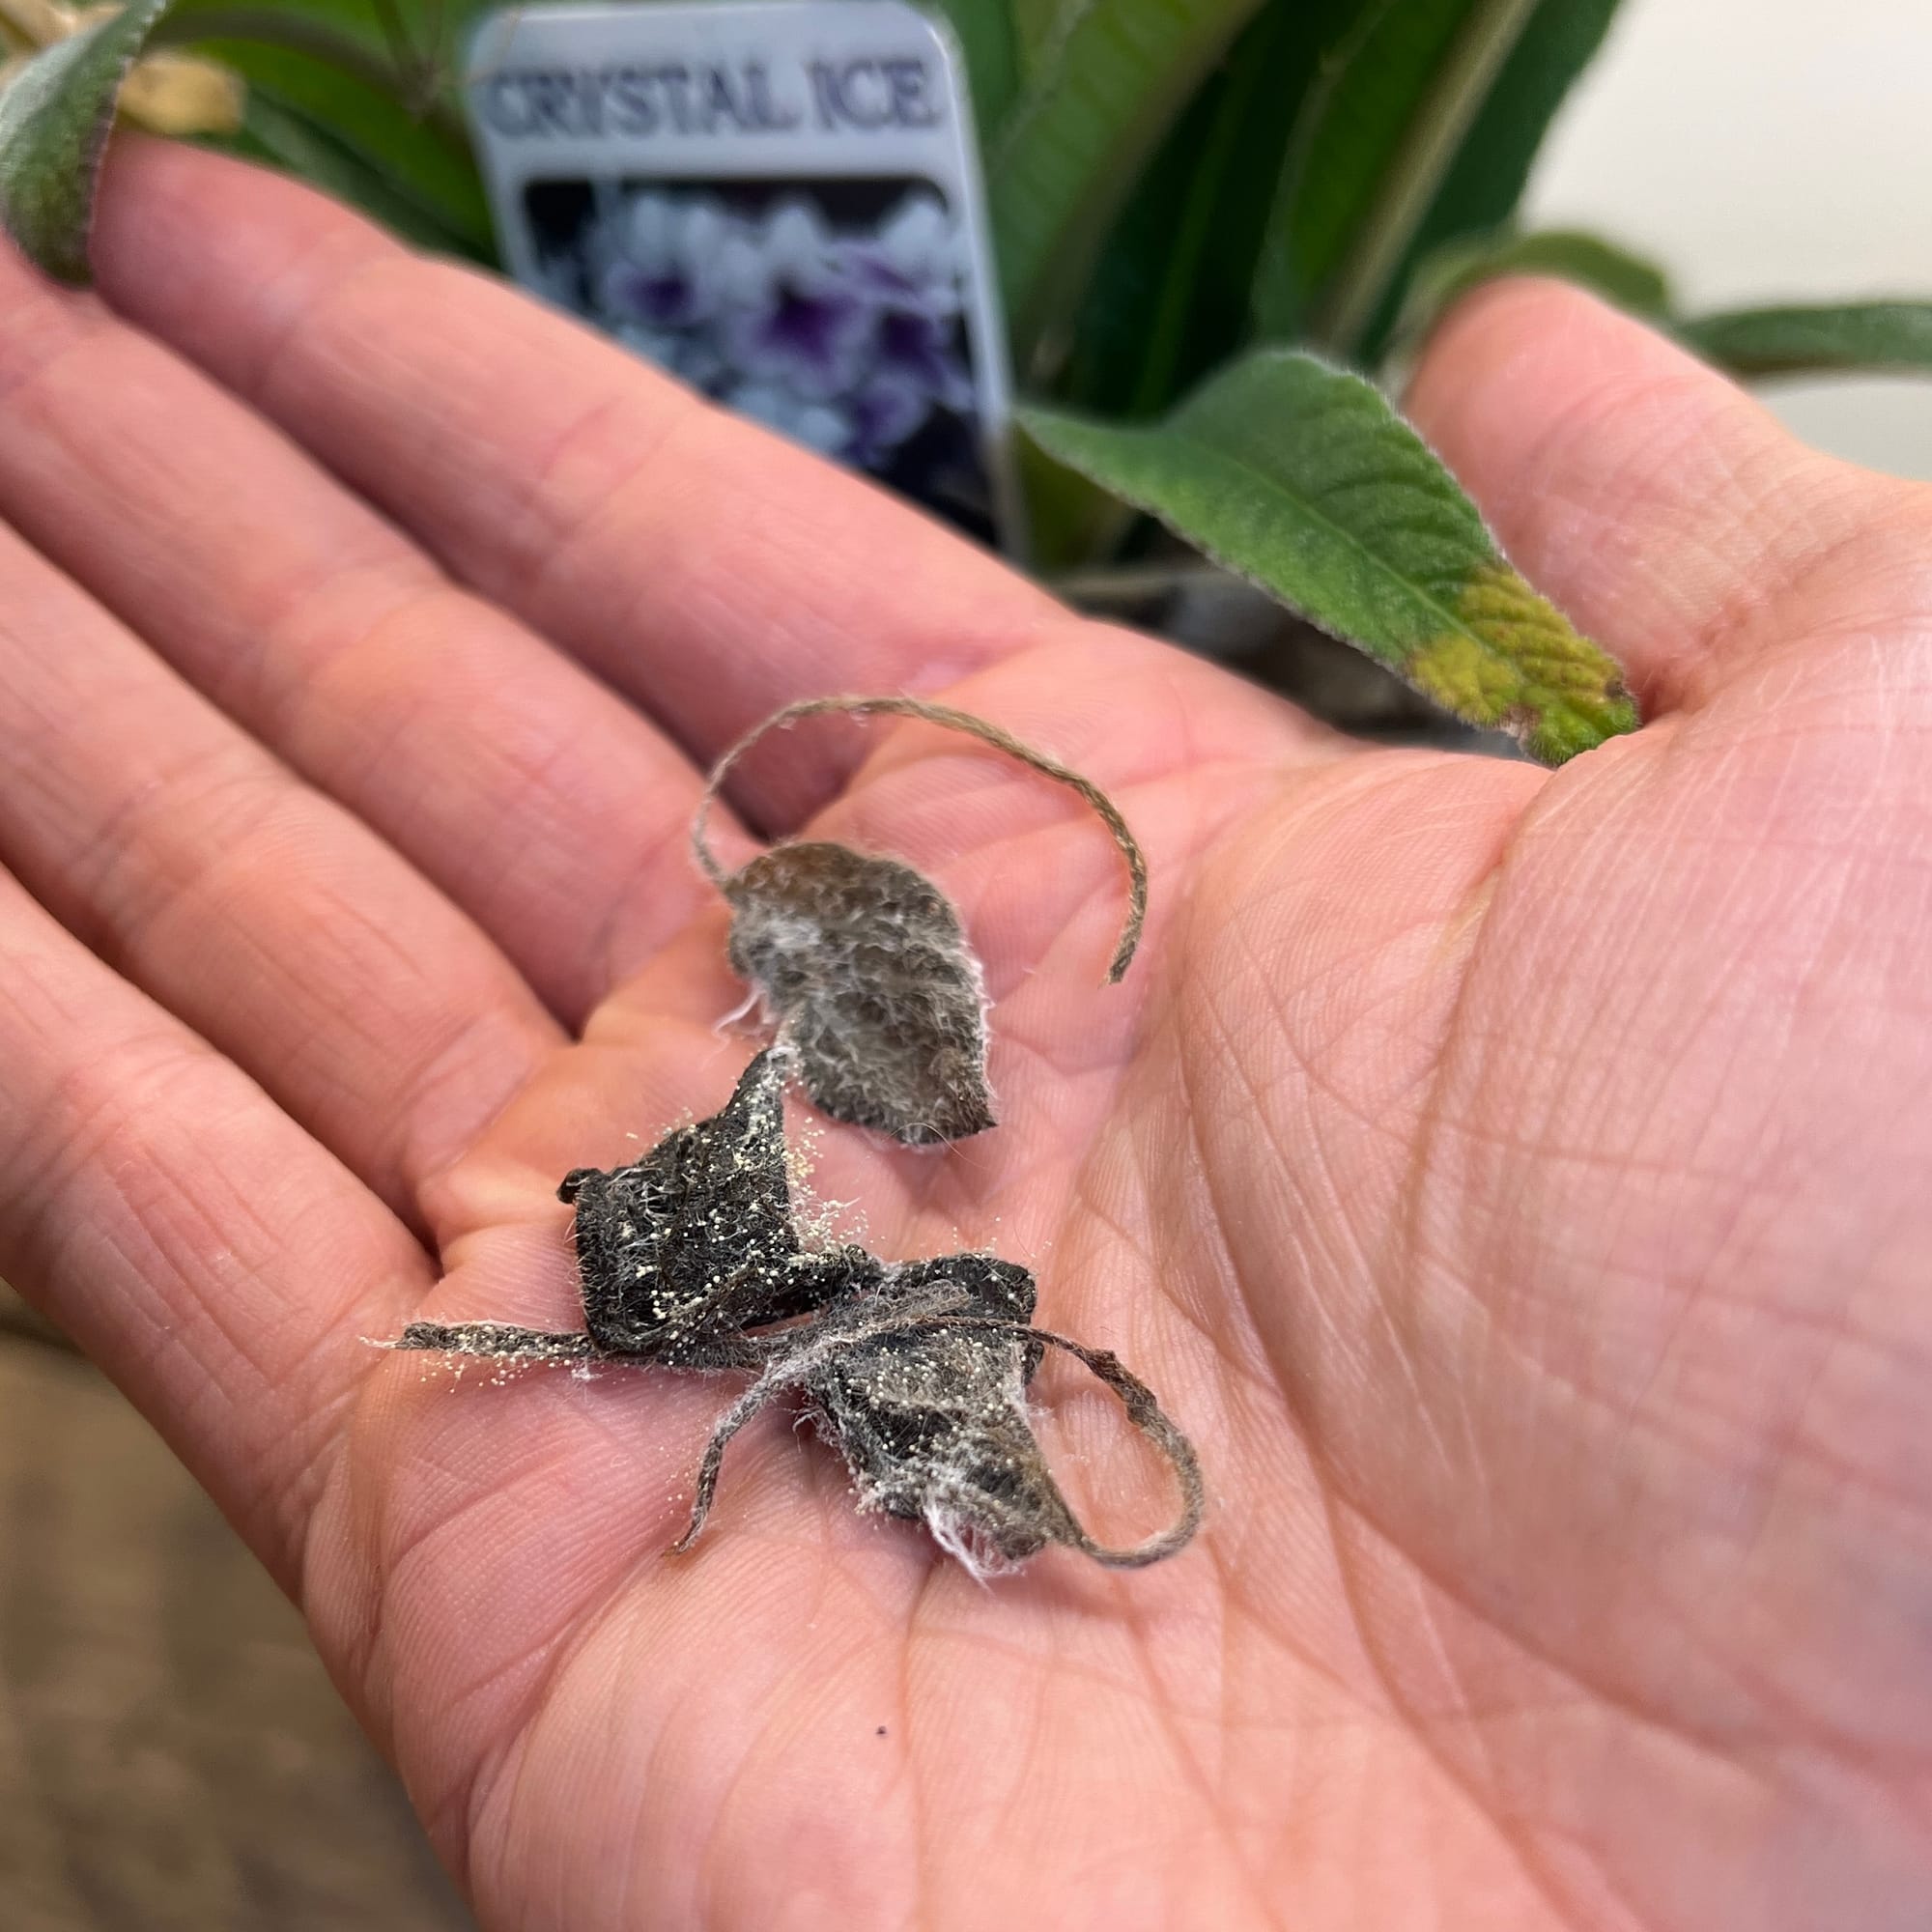
Failed propagated leaf cuttings - There are several reasons why the cuttings haven't rooted well, including: the time of year (spring or summer is best), its size (leaves that are at least 8cm in length are best), poor growing conditions (replace water weekly for water-propagated cuttings, and avoid over-watering for soil-grown plants), and its growing environment (a bright sunless windowsill and warmth is important).
Mould developing on the soil means two things - too little light and over-watering. Despite the harmlessness, it'll prove unsightly to most gardeners and is therefore removed once known. To remove, replace the top two inches of the soil for a fresh batch of 'houseplant' or 'African Violet' compost. Either increase the amount of light received (no direct sunlight to prevent environmental shock) or decrease the frequency of waters slightly. If the mould is accompanied by yellowing lower leaves, you may also have a case of root rot.
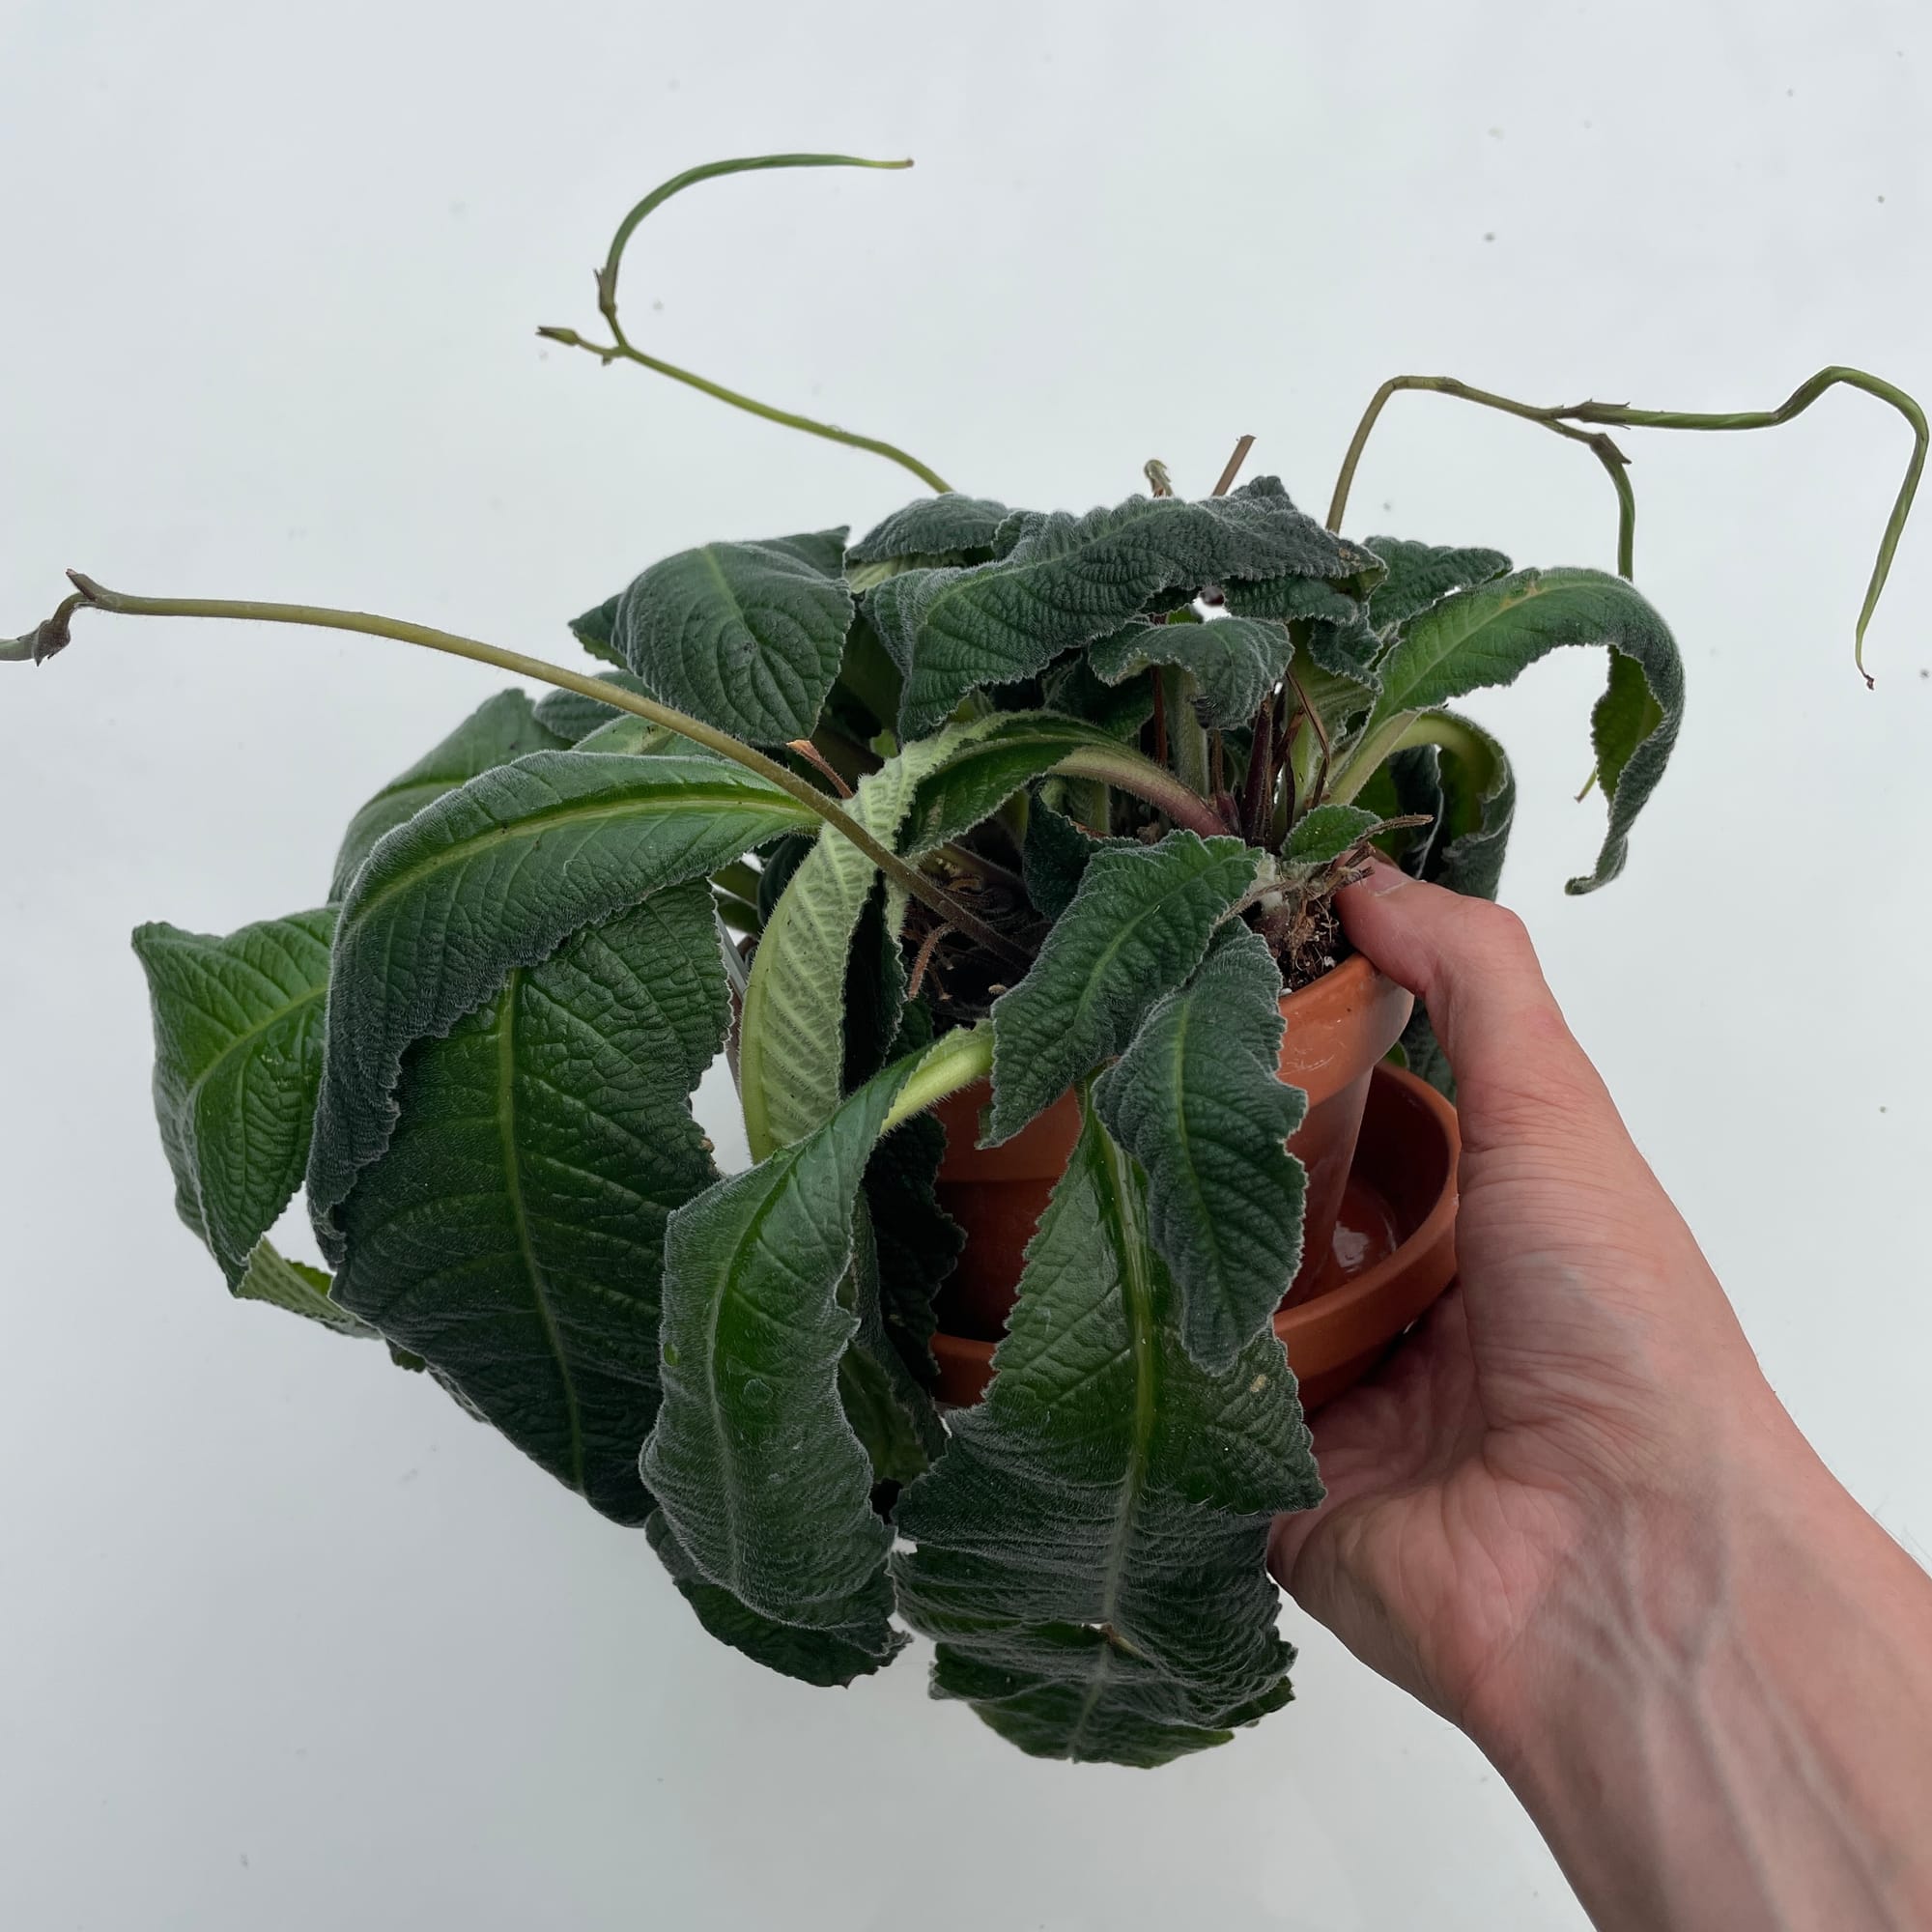 If your Streptocarpus remains wilted for a week or longer, you may have an issue of root rot. In this case, we recommend to cut off a mature leaf from each individual crown offset and submerge in lukewarm water for 24hrs. It should harden up again in order for you to take leaf cuttings (as described in 'Propagation' below). You can also repot the main crown of the plant into a smaller pot with fresh soil for survival attempts.
A lack of flowers is caused by an insufficient dormancy period, where the temperatures are kept more or less the same over the year. Reduce the warmth by a couple of degrees over the autumn and winter months, along with fewer irrigations to ensure a well-spent dormancy. Supplement in the weeks leading up to potential buds (early spring) with a potassium-based fertiliser, for instance, tomato food, to entice the development of flower buds.
A sudden loss of older flowers with a yellowed stalk is a sign of prolonged droughts. Especially during the flowering process, near-continuous moist soil is mandatory for extended blooms; allow the roots to turn a green-greyish colour in between irrigations.
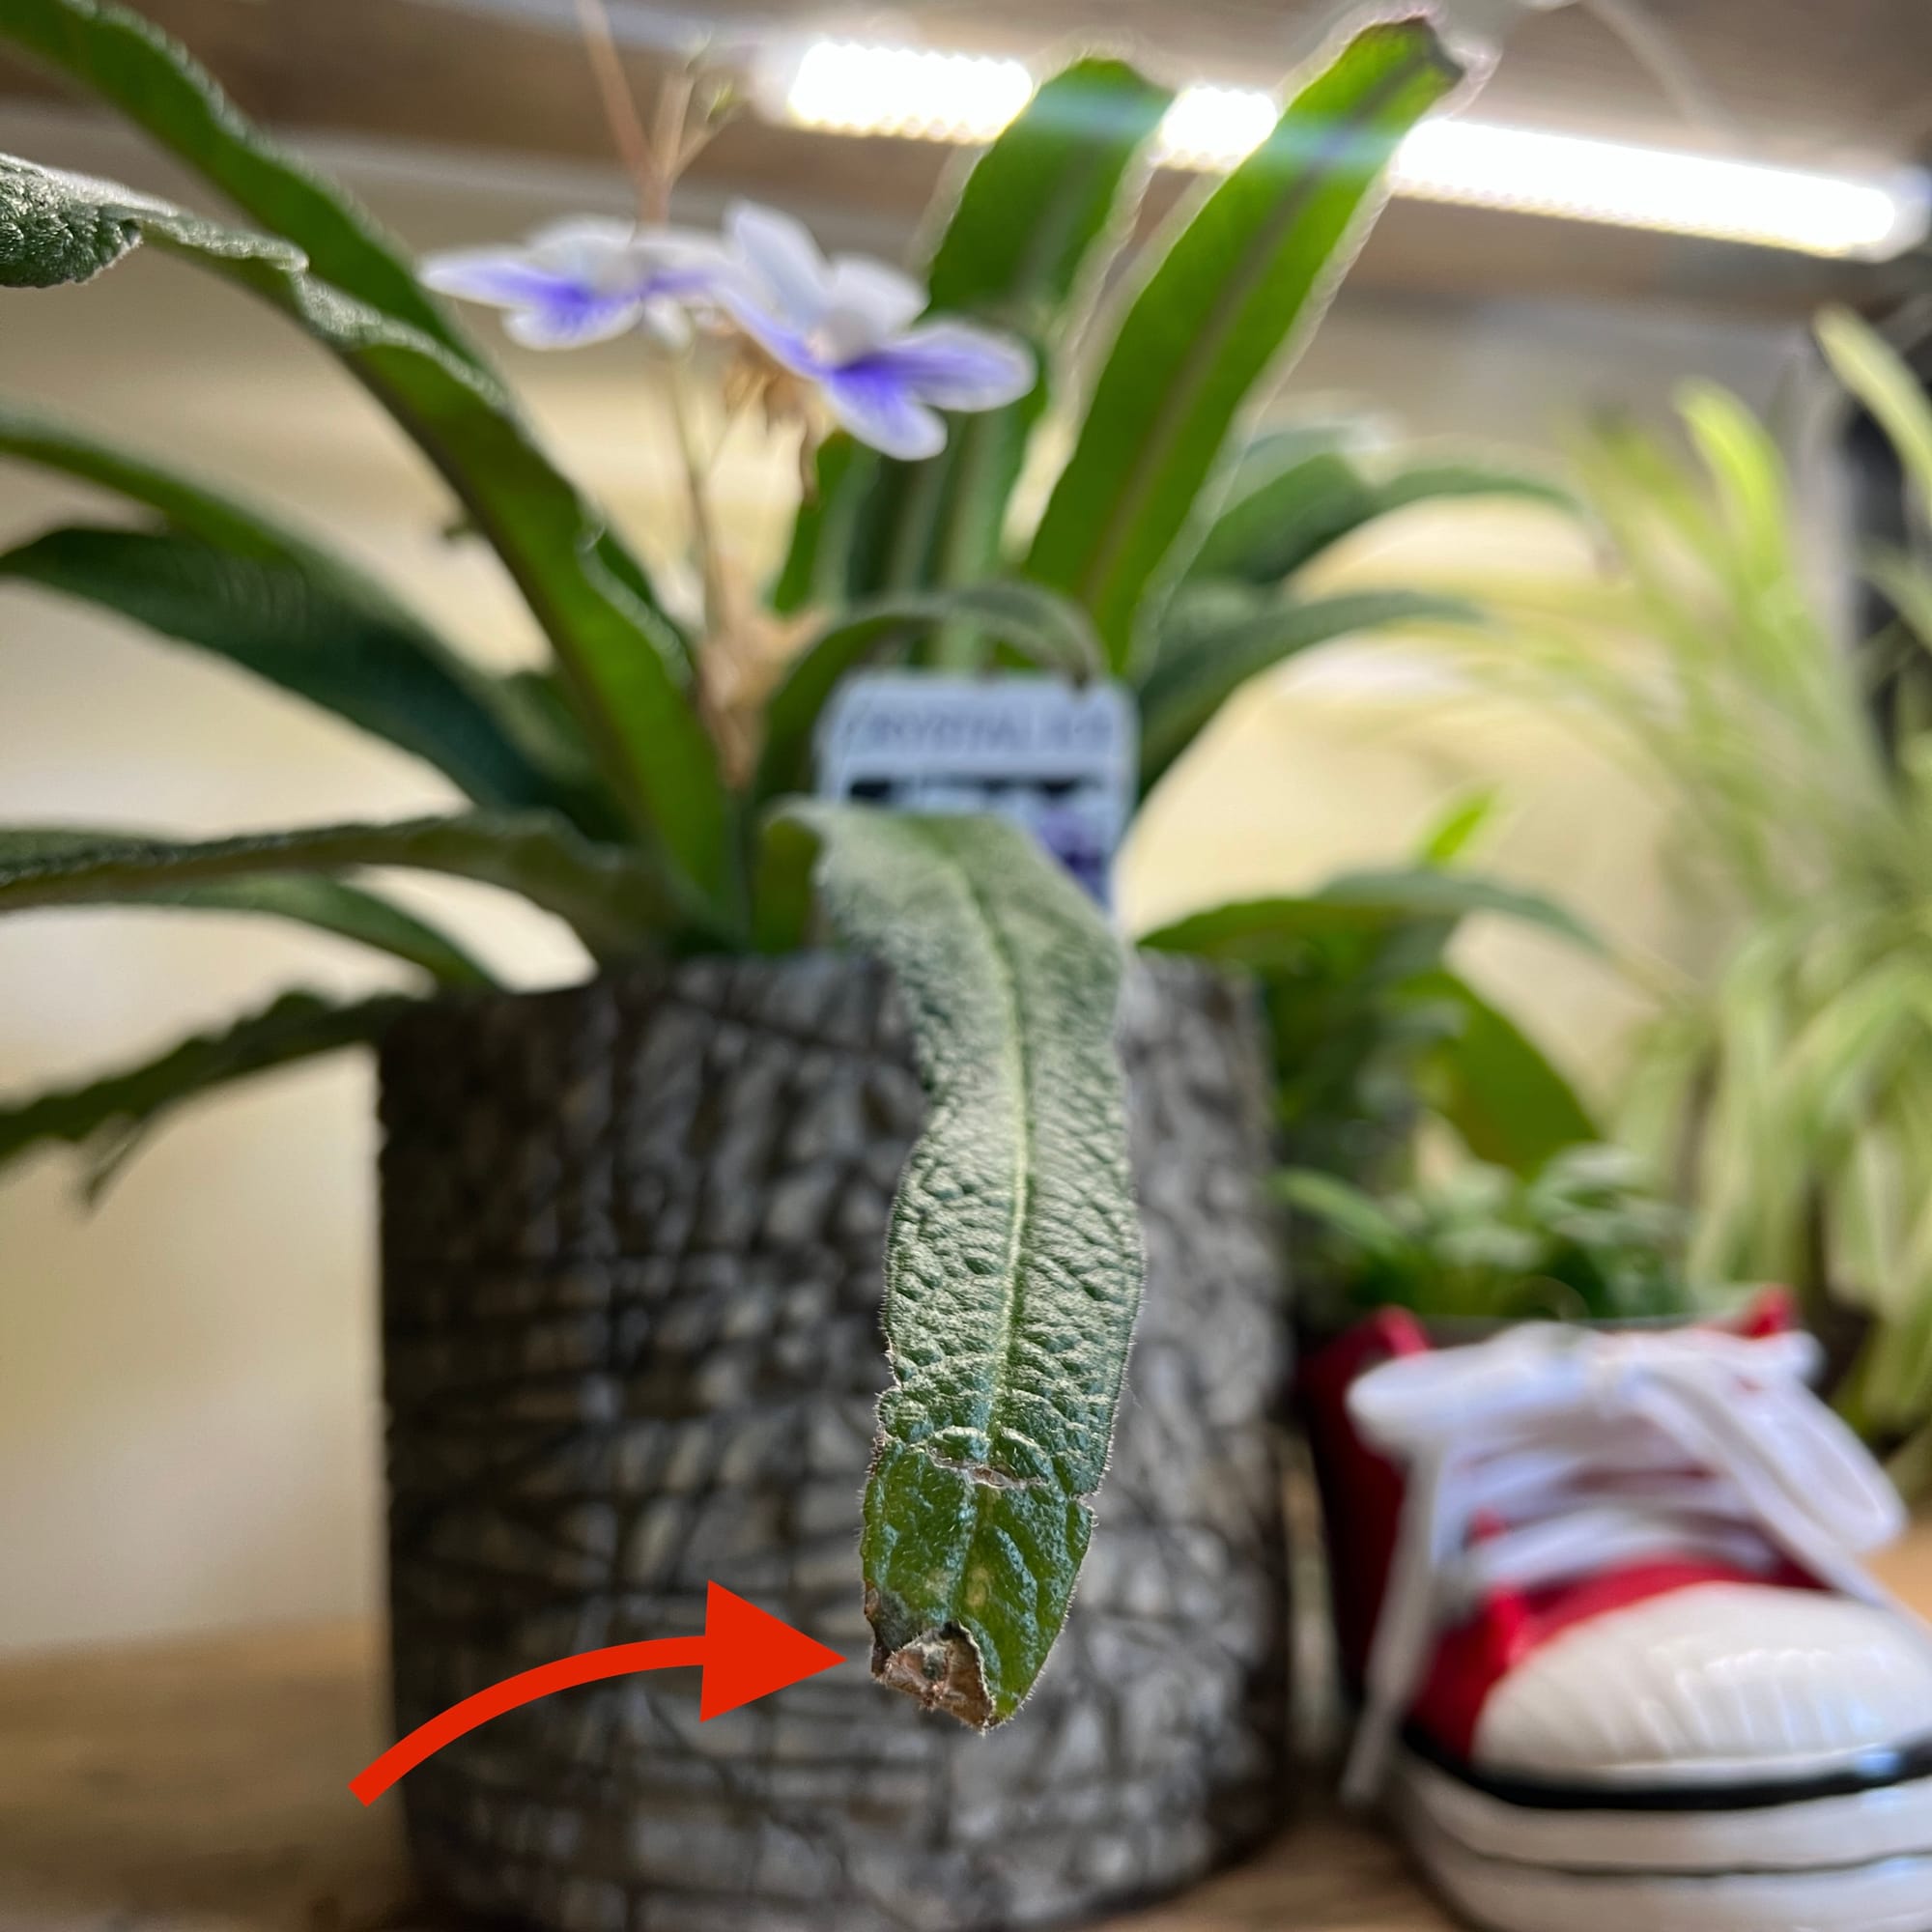 Brown crispy leaf tips usually indicate dehydration and a lack of humidity. THE HOUSEPLANT DOCTOR™recommends to create a pebble tray to increase the humidity around the foliage, which in turn can help with downplaying the risk of dehydration.
Short-lived flowers could be the product of low humidity. Place the Streptocarpus on a humidity/pebble tray, keeping the reservoir topped up with water while the heaters are operating. Never mist the flowers due to the high risk of developing Botrytis.
Total flower loss can be caused by an array of different issues, including a change in location, too little hydration, too hot or cold temperatures or droughts and pests. While the plant is in bloom, keep the soil relatively moist to hydrate the thirsty work of producing flowers. Locations that are outside of the recommended temperature bracket (below), or have drastic fluctuations must also be kept off the cards. Alternatively, a setting that offers similar temperatures all year round can inhibit blooms. They'll respond very well if the autumn and winter months are a couple of degrees cooler than in summer. In essence, this will not only winterise the plant, but it'll also force it into a dormancy period which is a crucial ingredient for successful flowers in the spring. Finally, pests could be an unforeseen issue; although it's highly unlikely that an infestation will cause a sudden change in health, have a quick inspection for Aphids & Greenflies.
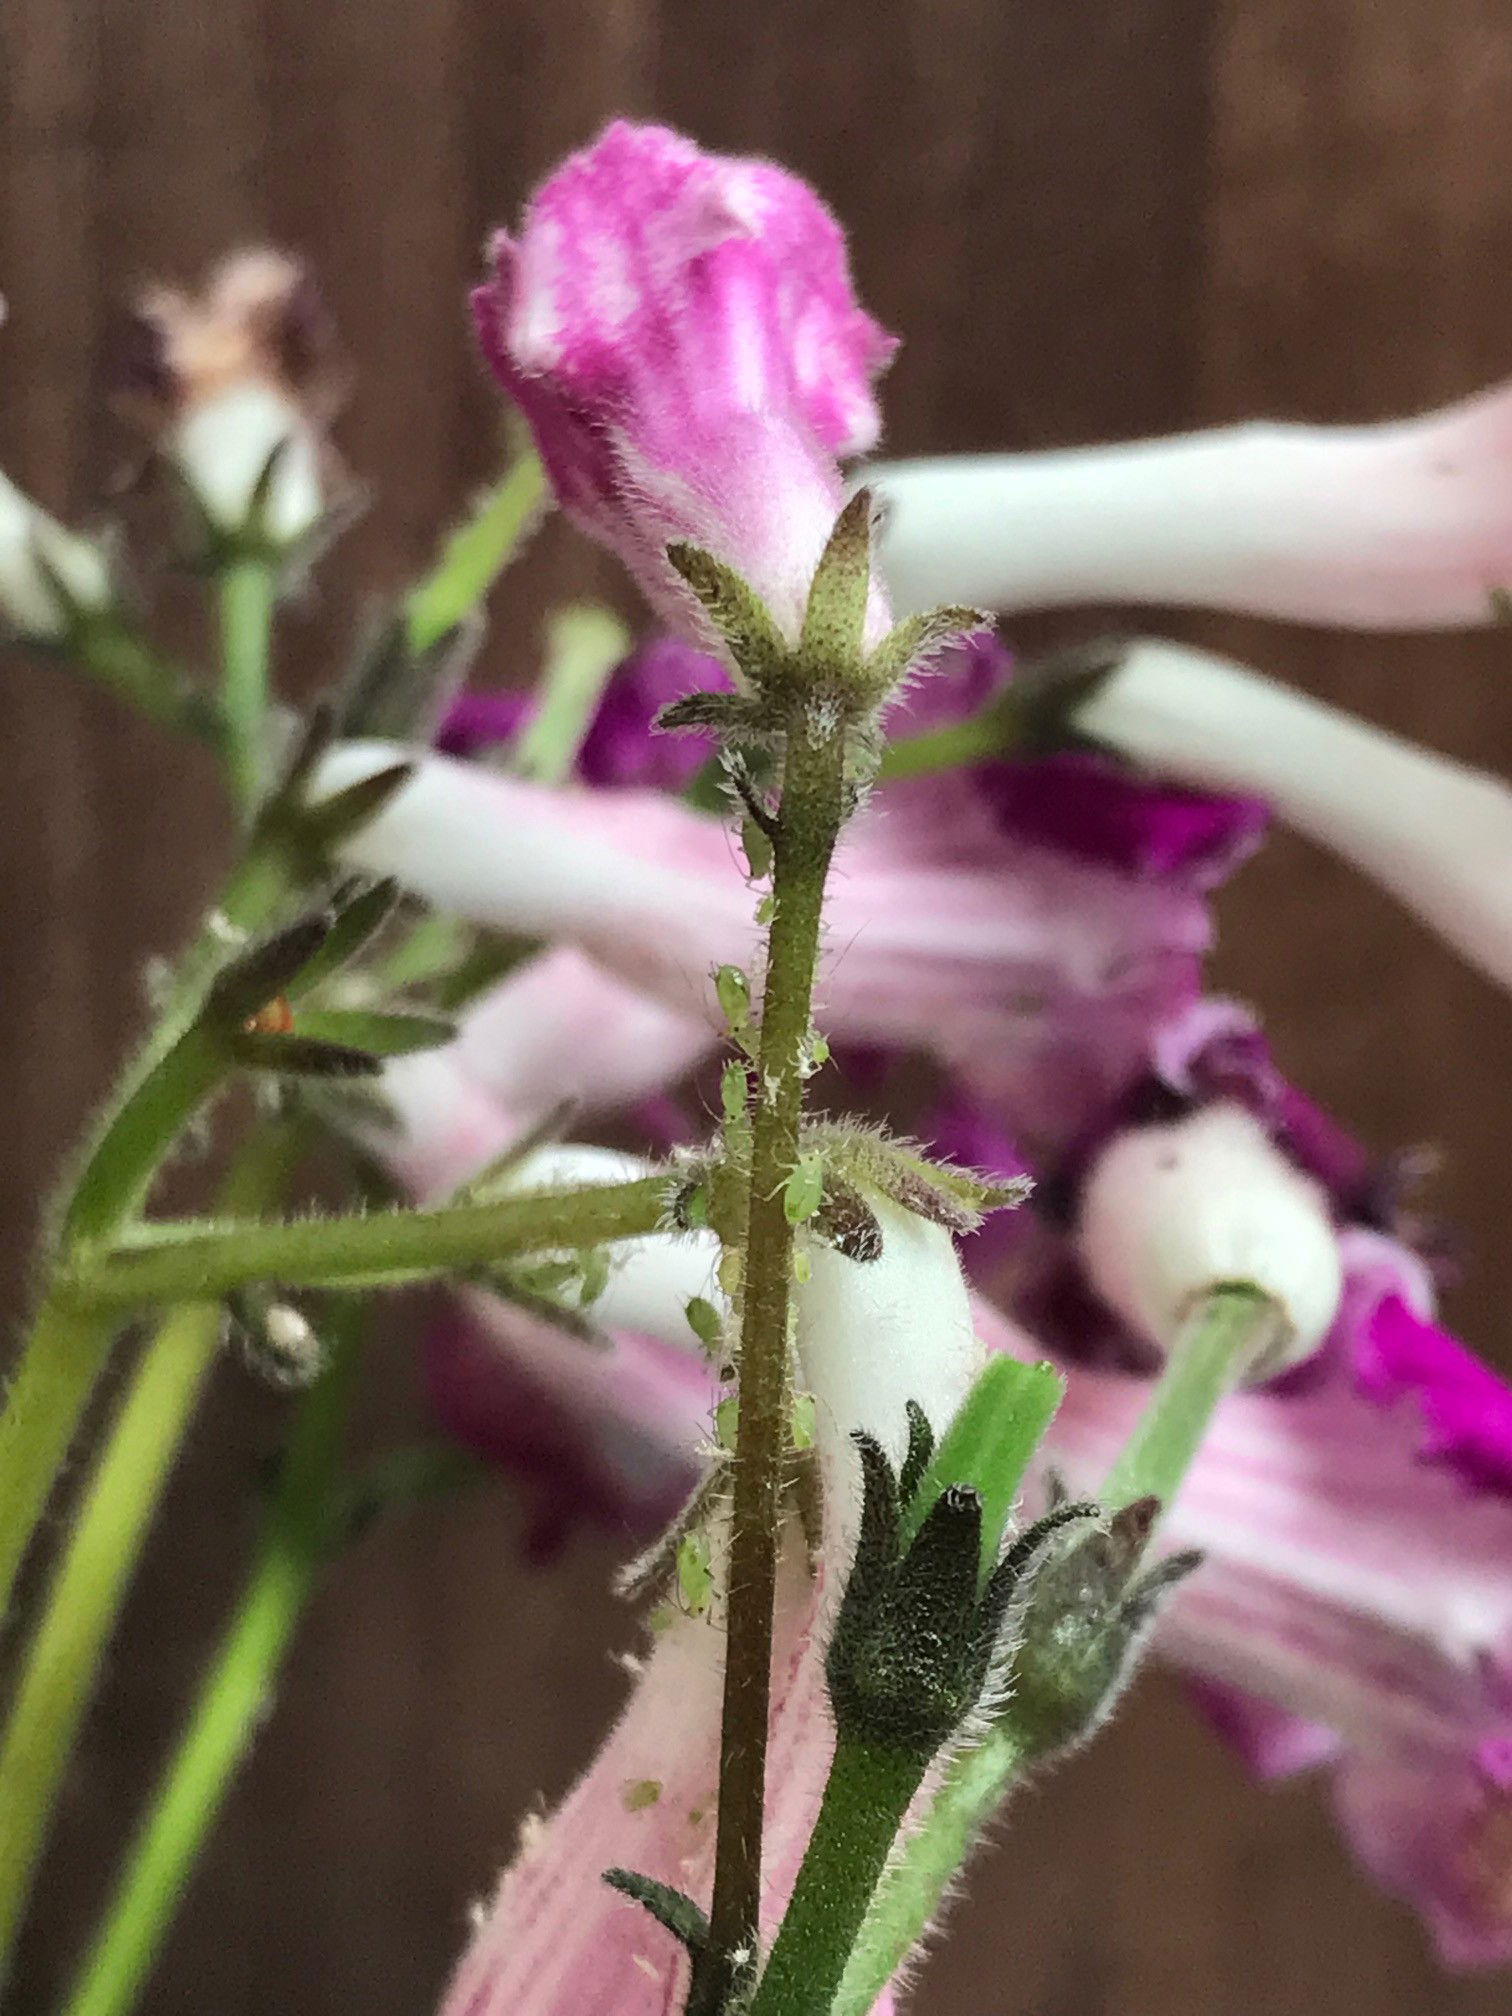 Aphids are a common pest to find on Streptocarpus, especially within its flowers. Can you spot the Aphids in this photo?
Origins
There are over 150 accepted species of Streptocarpus that have natural distributions around the southern reaches of Africa (Afrotropical regions), including Madagascar, Zimbabwe and South Africa. Although many people use the term Streptocarpus, another common name used around the world is the 'Cape Primrose' - a nod to many of the native species native town and similar characteristics to the Primula.
John Lindley first described the genus in 1828, using the Greek words 'streptos' and 'karpos' in reference to the twisted seedpods when fully matured. The first Streptocarpus to reach Britain was an S. rexii, sent from the Cape in South Africa to Kew Gardens four years previously. As the genus can be easily hybridised, many varieties have since been developed across the world. The first human-made cultivar dates back to the late 1830s with the Streptocarpus × greenii - the progeny of S. saundersii and S. rexii, created by Mr Charles Green.
ukhouseplants has also crossed its own hybrid, honouring the writer and founder of this website, Joe Bagley, with the Streptocarpus × bagleyii.
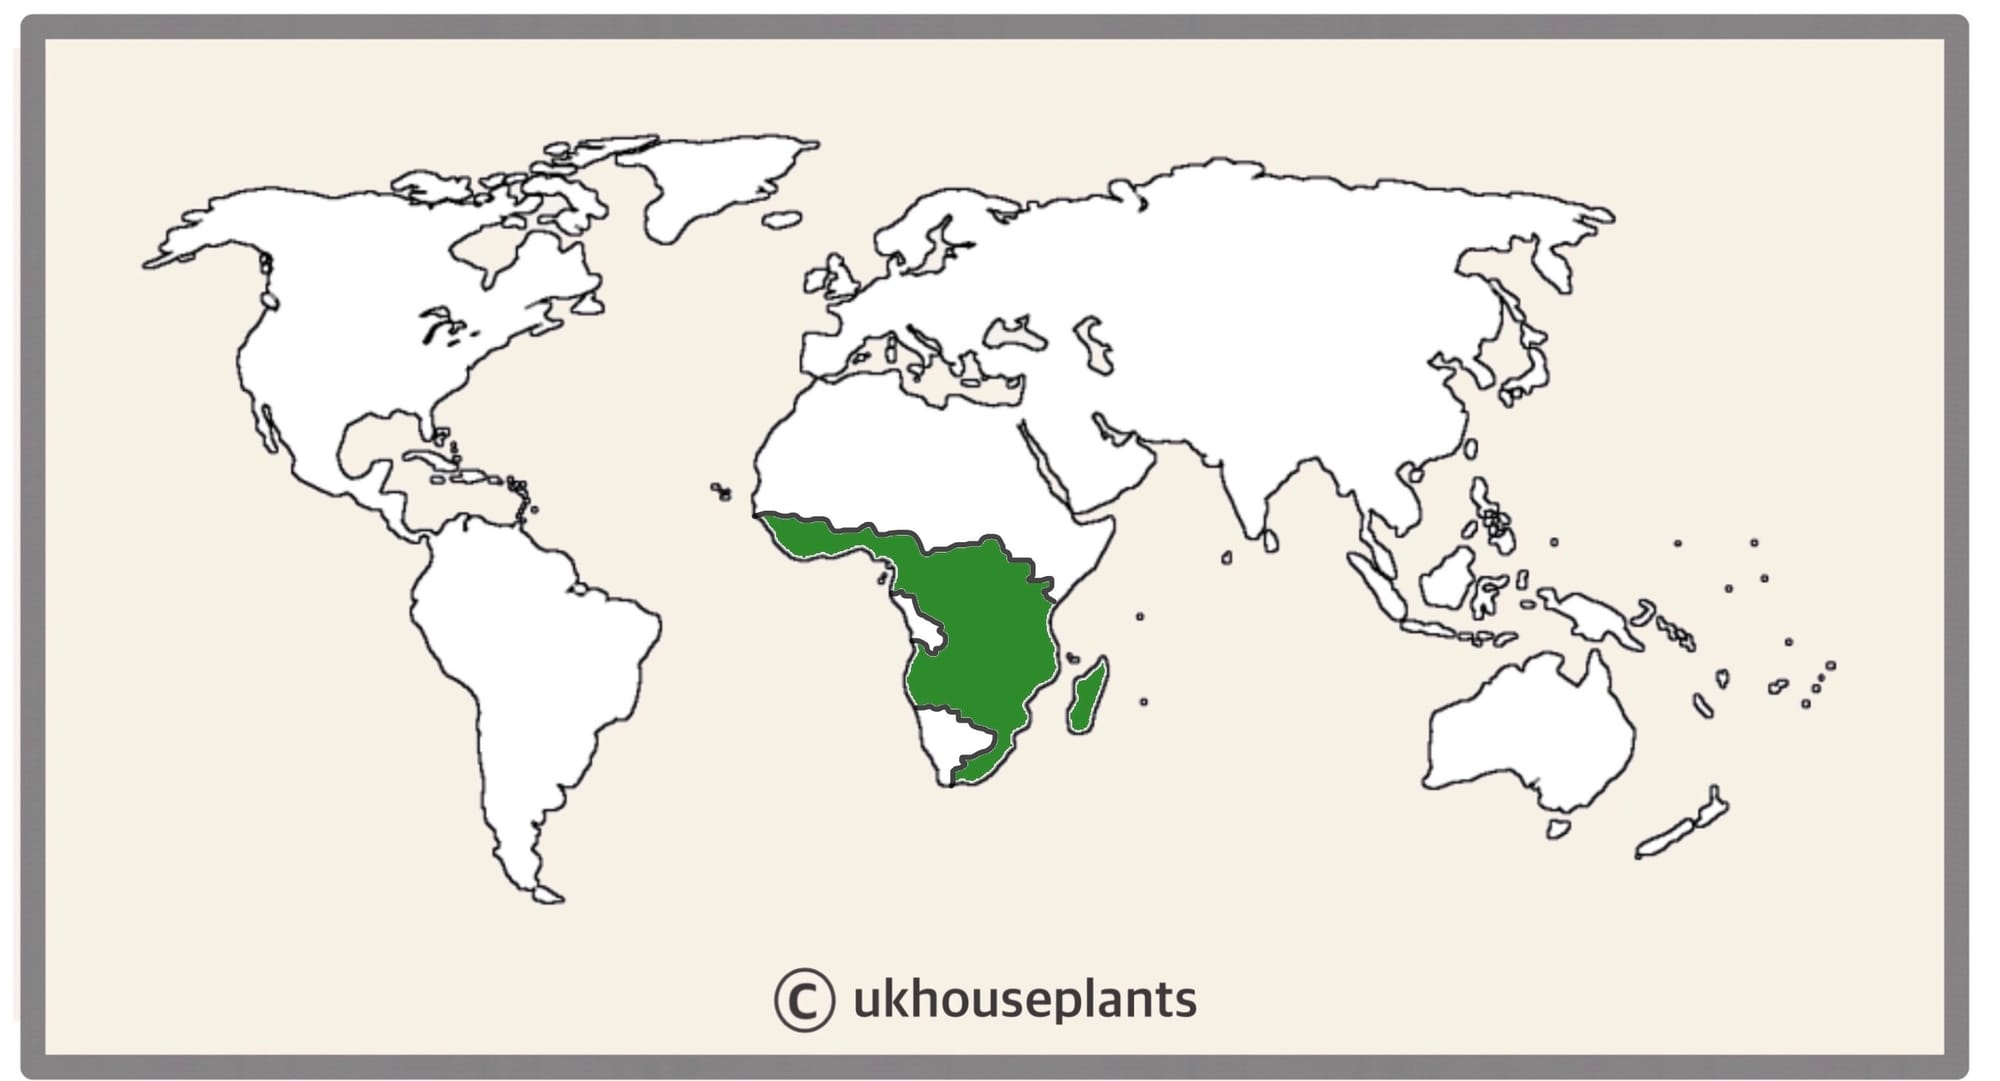 The Distribution of Streptocarpus
Temperature
12° - 21°C (60° - 71°F)
H1b (Hardiness Zone 12) - Can be grown outdoors during the summer in a sheltered location with temperatures above 12℃ (54℉), but is fine to remain indoors, too. If you decide to bring this plant outdoors, don't allow it to endure any direct sunlight as it may result in sun-scorch and dehydration. Regularly keep an eye out for Aphids & Greenflies on the flower's bodies, especially when re-introducing it back indoors.
Spread
Over 30cm in height & 40cm in width, with the ultimate height taking around 5 years to achieve. Species like Streptocarpus 'Matilda' have dark larger leaves, whereas others are around 20cm in length and 10cm in width, for instance, S. 'Chrystal Ice'.
Pruning & Maintenance
Remove yellow or dying leaves, and plant debris to encourage better-growing conditions. While pruning, always use clean utensils or shears to reduce the chance of bacterial and fungal diseases. Never cut through yellowed tissue as this may cause further damage in the likes of diseases or bacterial infections. Remember to make clean incisions as too-damaged wounds may shock the plant, causing weakened growth and a decline in health.
Propagation
Via Seed, Basal Offset Division & Leaf cuttings.
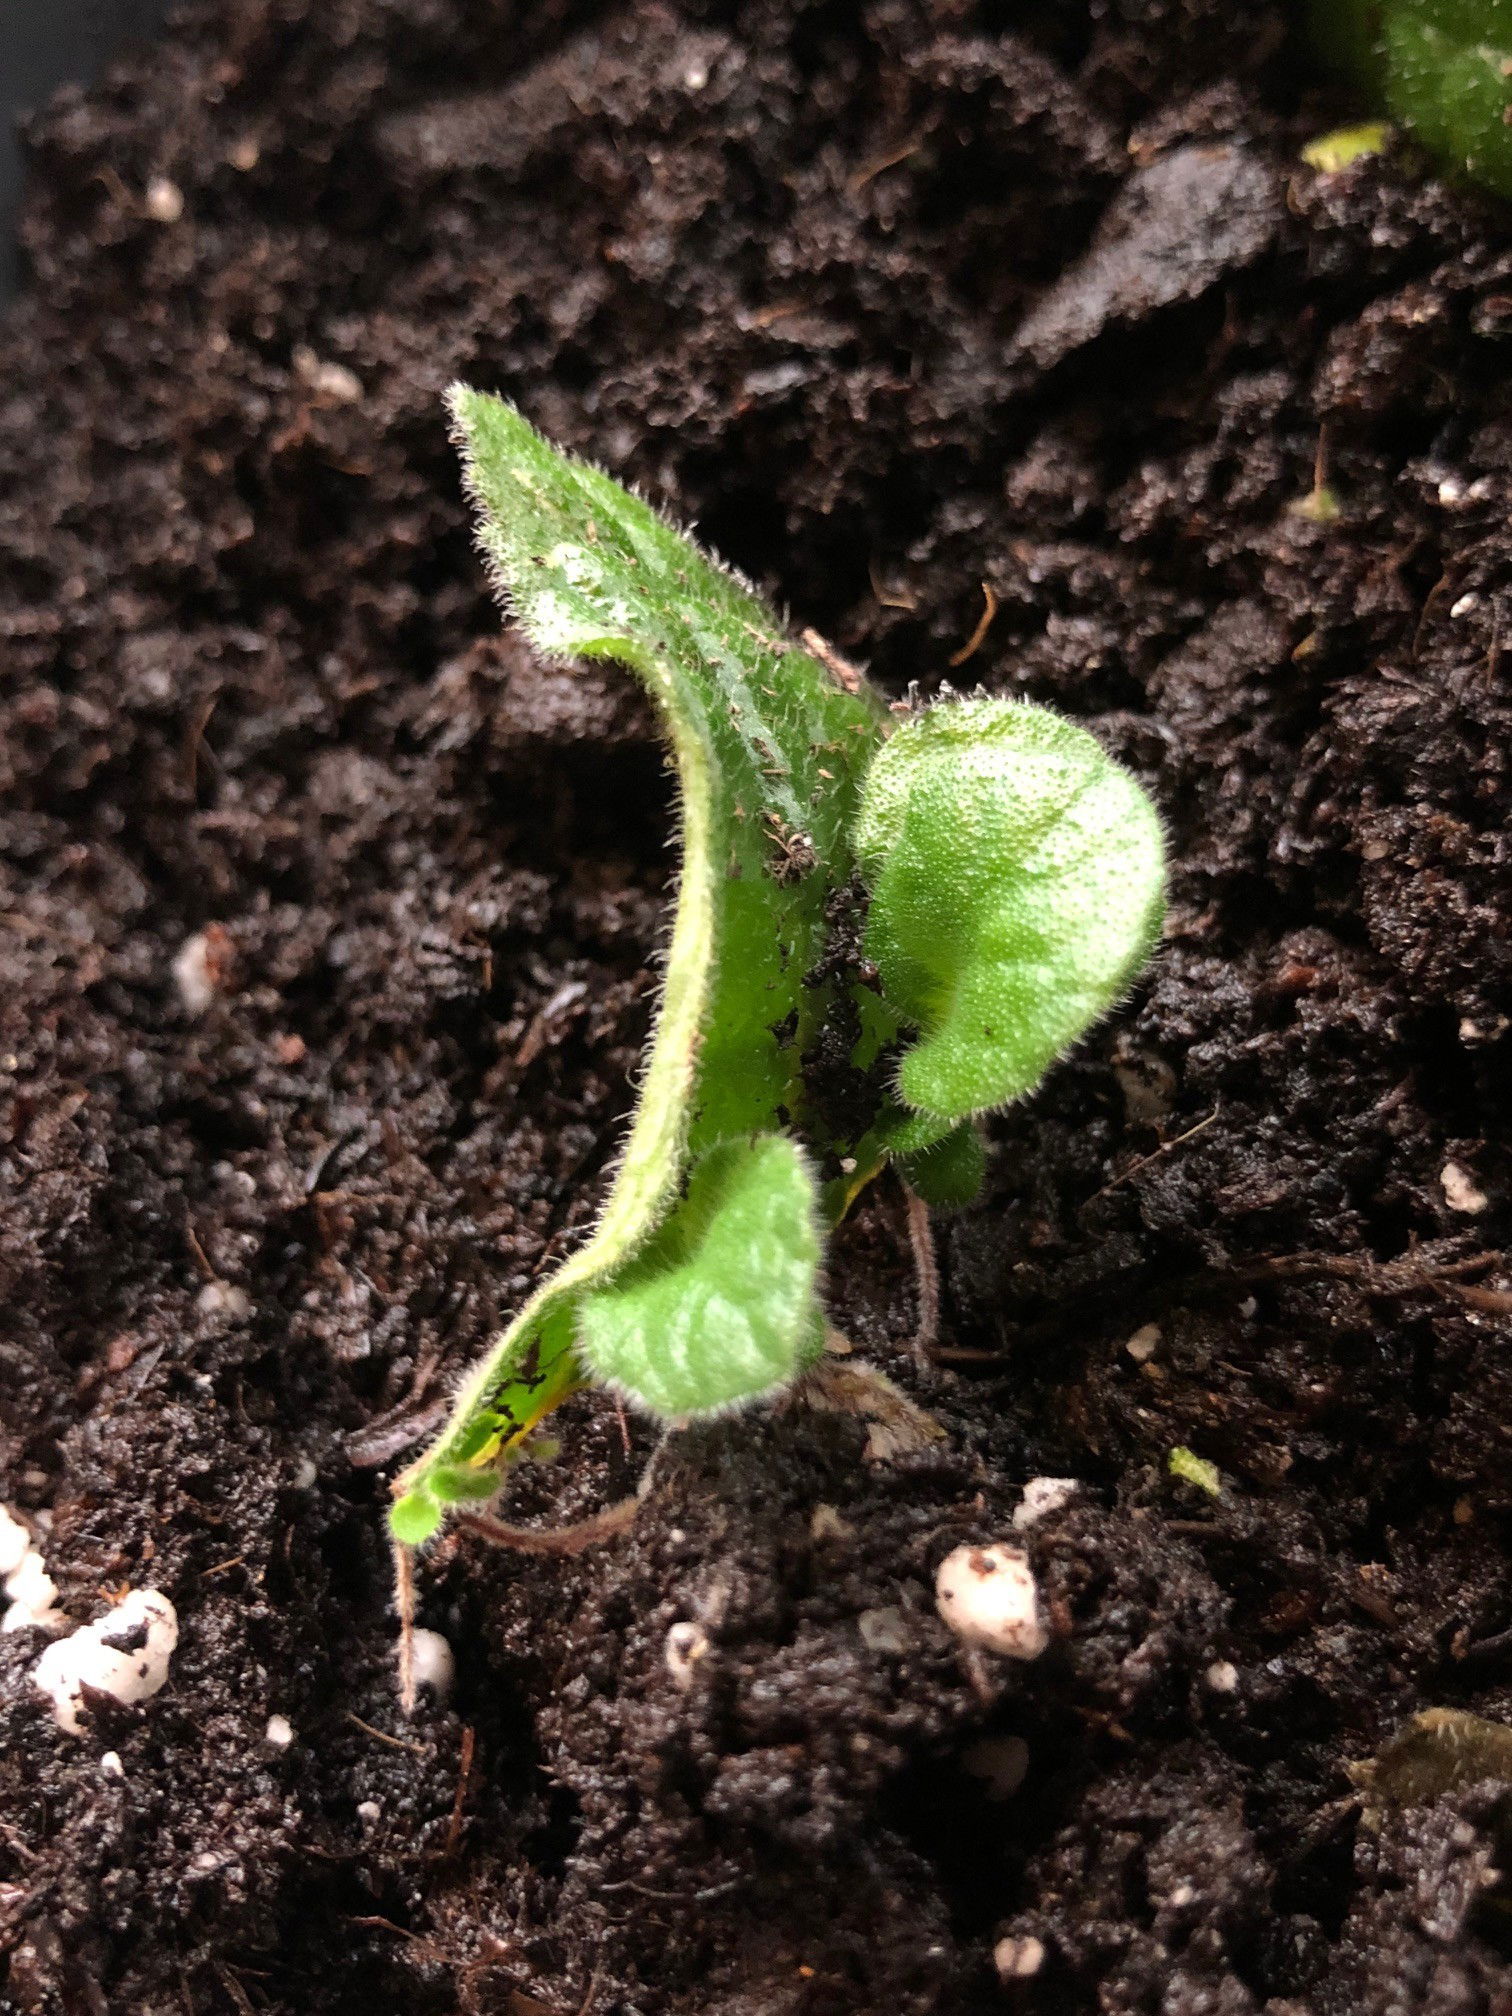
Seeds (Easy) - Whilst using a seed tray or Bonsai dish, set the seeds on top of a 'Houseplant' labelled potting mix and sprinkle a thin layer of vermiculite over the top. Maintain evenly moist soil and allow the excess water to freely drain from the pot's base to prevent water-logged conditions. The ideal location for successful germination is in a bright, indirect setting with temperatures above 18℃ (64℉) with bottom-heat. Keep the pot in a transparent bag to provide a stable level of humidity, along with longer-lasting soil moisture. Germination may take up to eight weeks, so don't discard any unsuccessful seeds until this threshold has been surpassed. Remove the bag once the seedlings produce their third leaf and then split them into their own 7cm (3 inches) pot.
Basal Offset Division (Easy) - Your plant will produce several basal offsets that can be separated once they have a sufficient root system, and surpass half the mother plant's size. If possible, water the soil 24hrs before the main event to reduce the risk of transplant shock, when its dry root systems are over-touched. Take the plant out of its pot and place your fingers close to the nodal junction - compost may have to be removed for better access. Push the chosen offset downwards until you hear a snap. Separate the foliage and its root system away from the mother plant, mentally noting the high risk of damage. Transplant in the appropriate sized pot with a fresh batch of 'houseplant' or 'African Violet' compost. Maintain evenly moist soil and situate it in a bright, indirect location away from any direct sunlight. After eight weeks, treat it like a healthy specimen, following the care tips above!
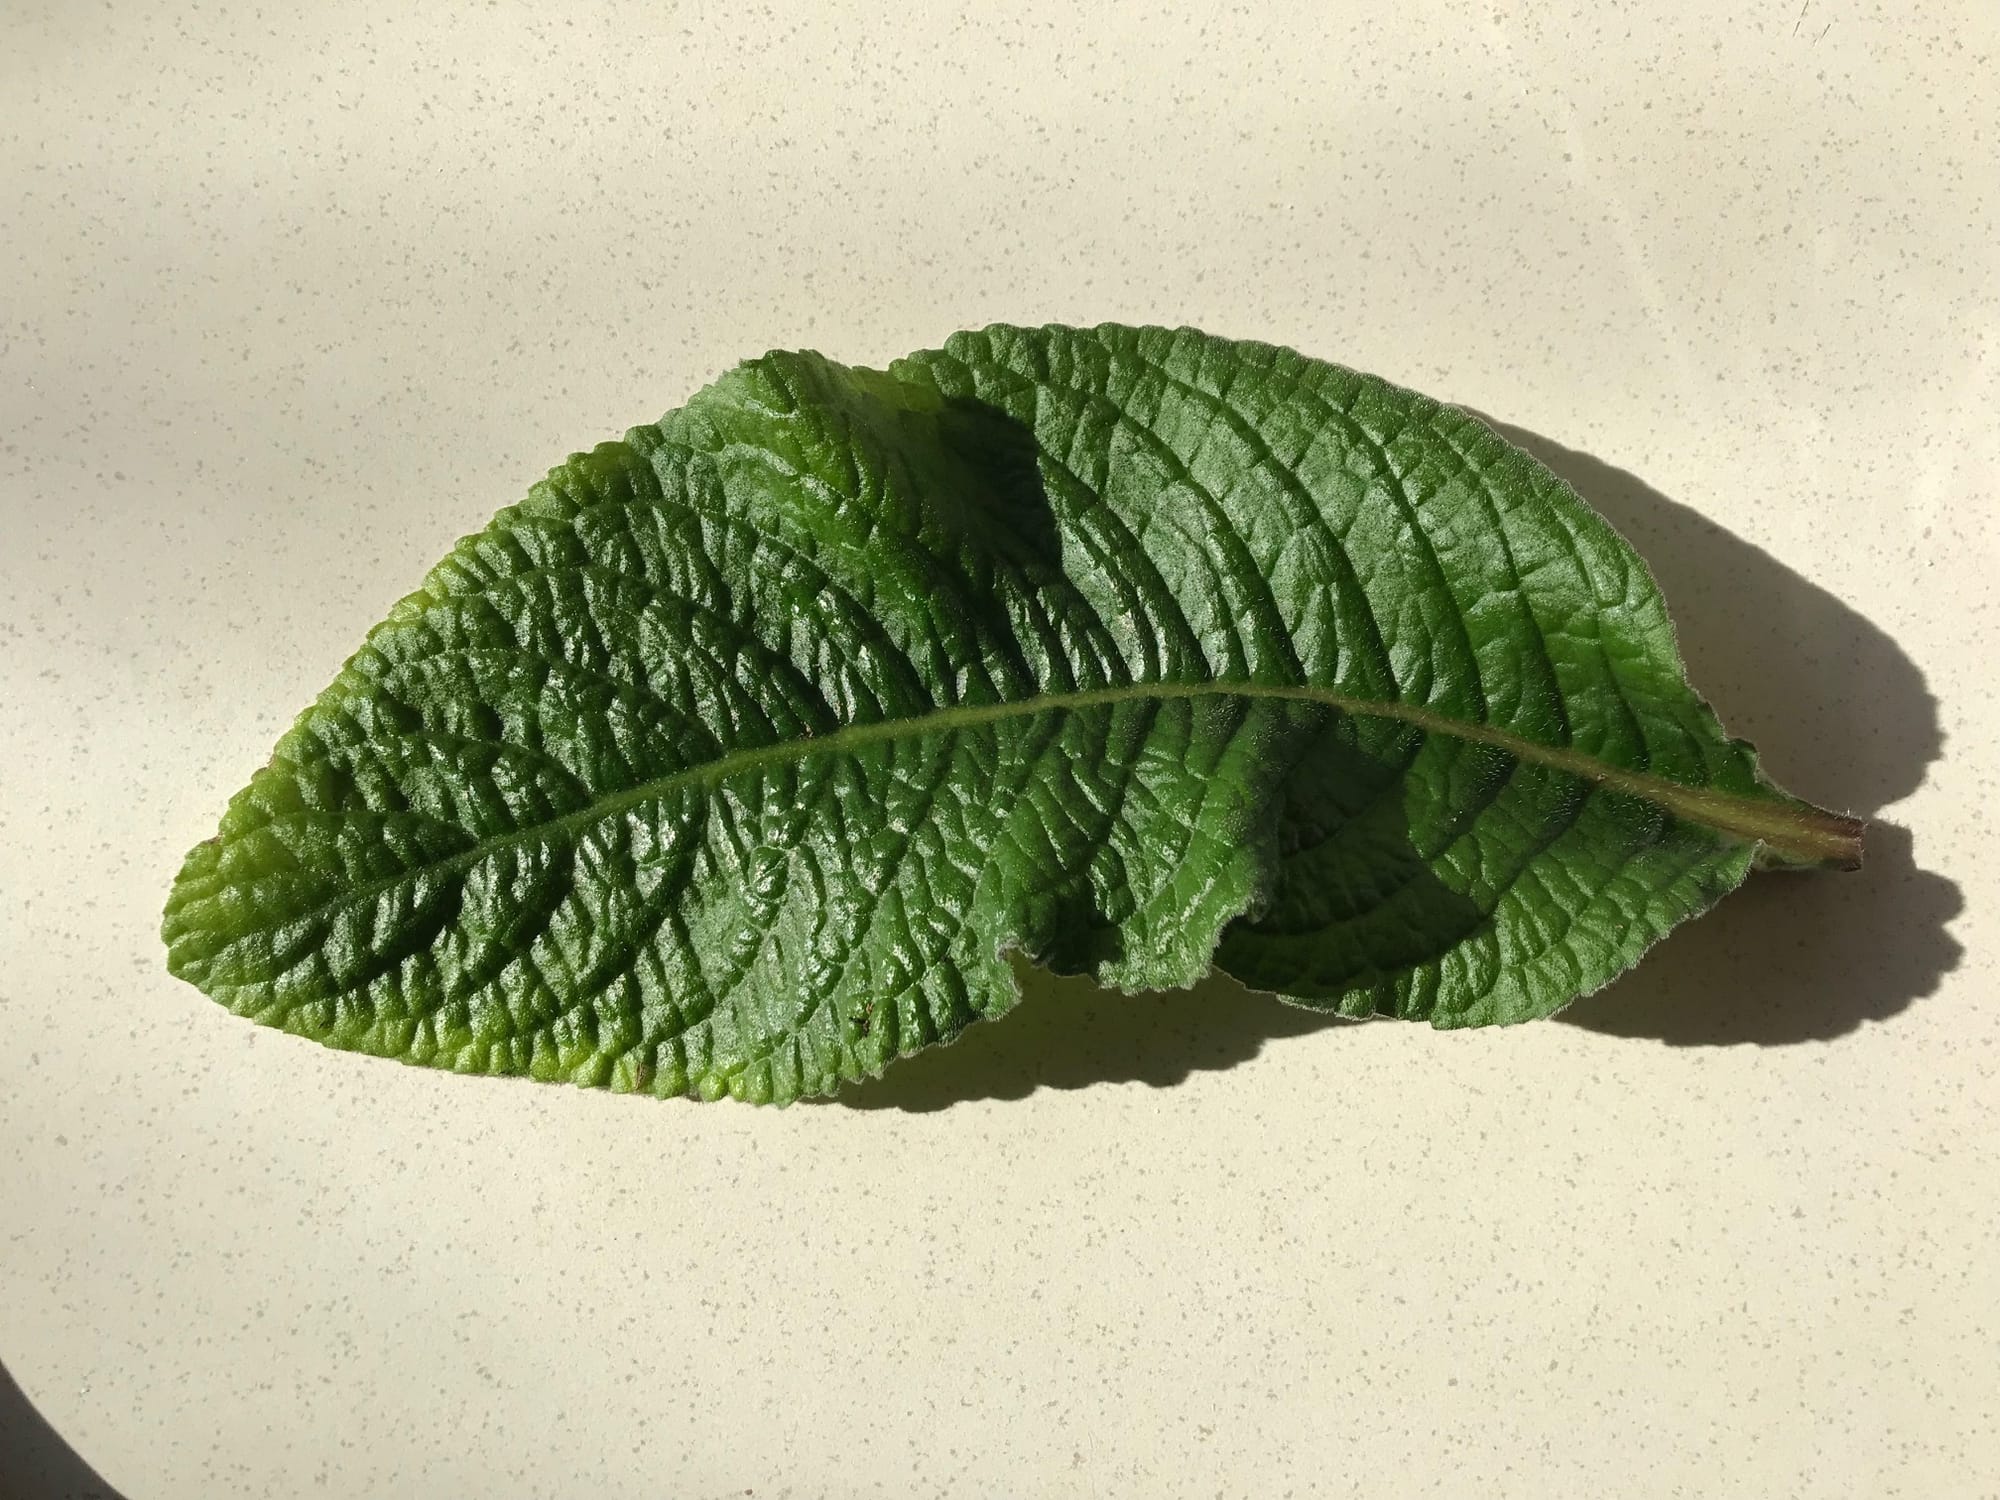
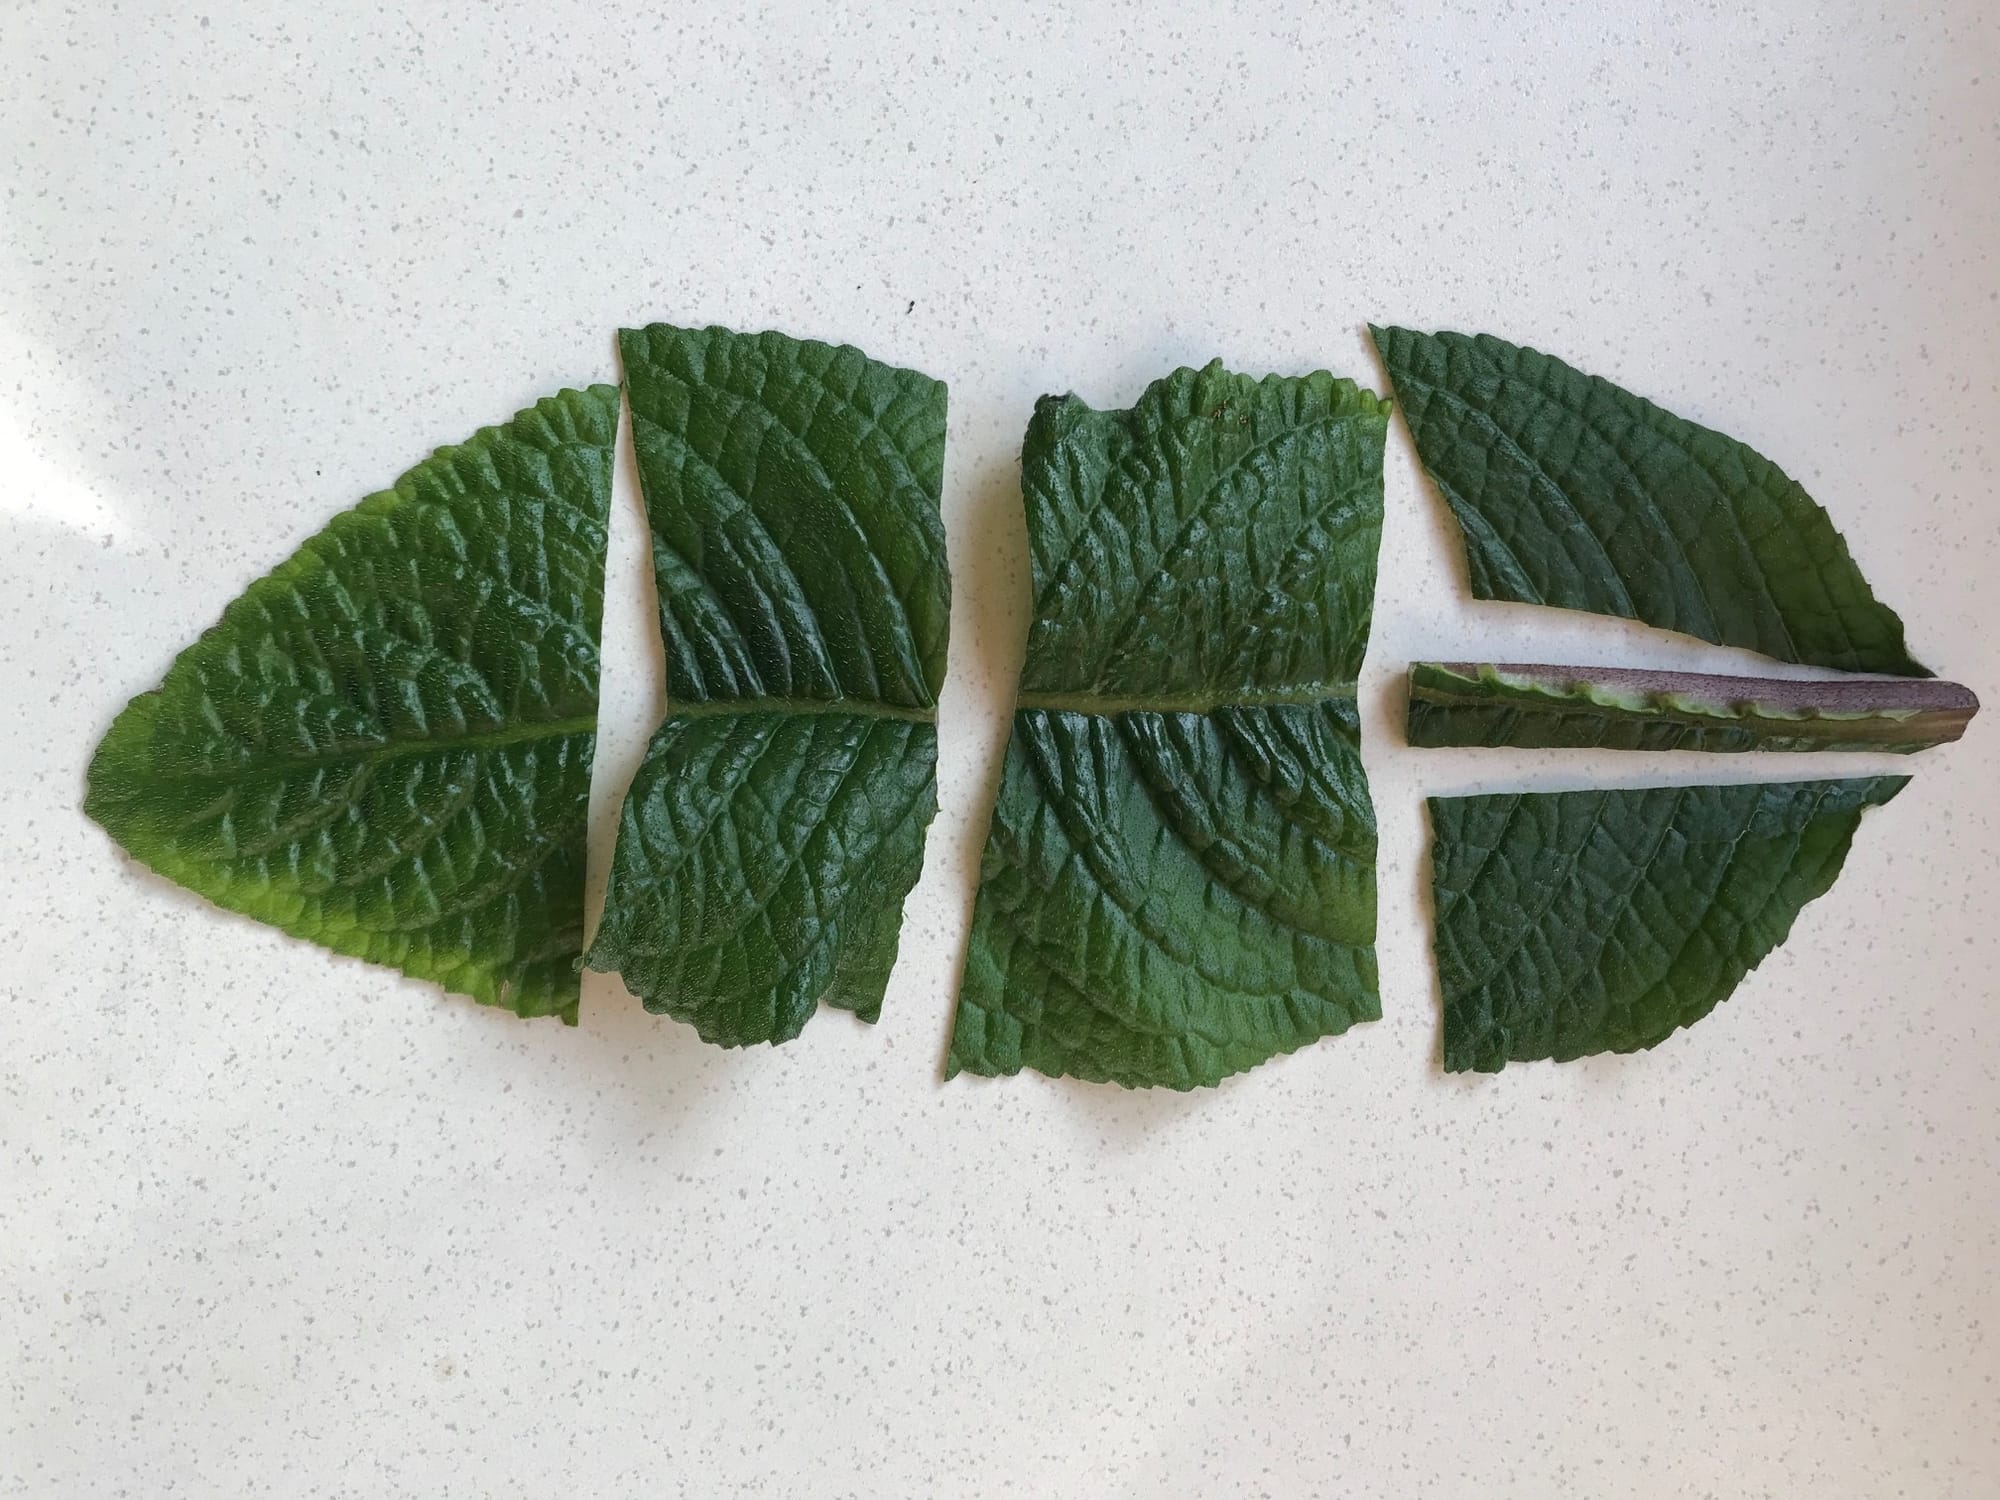
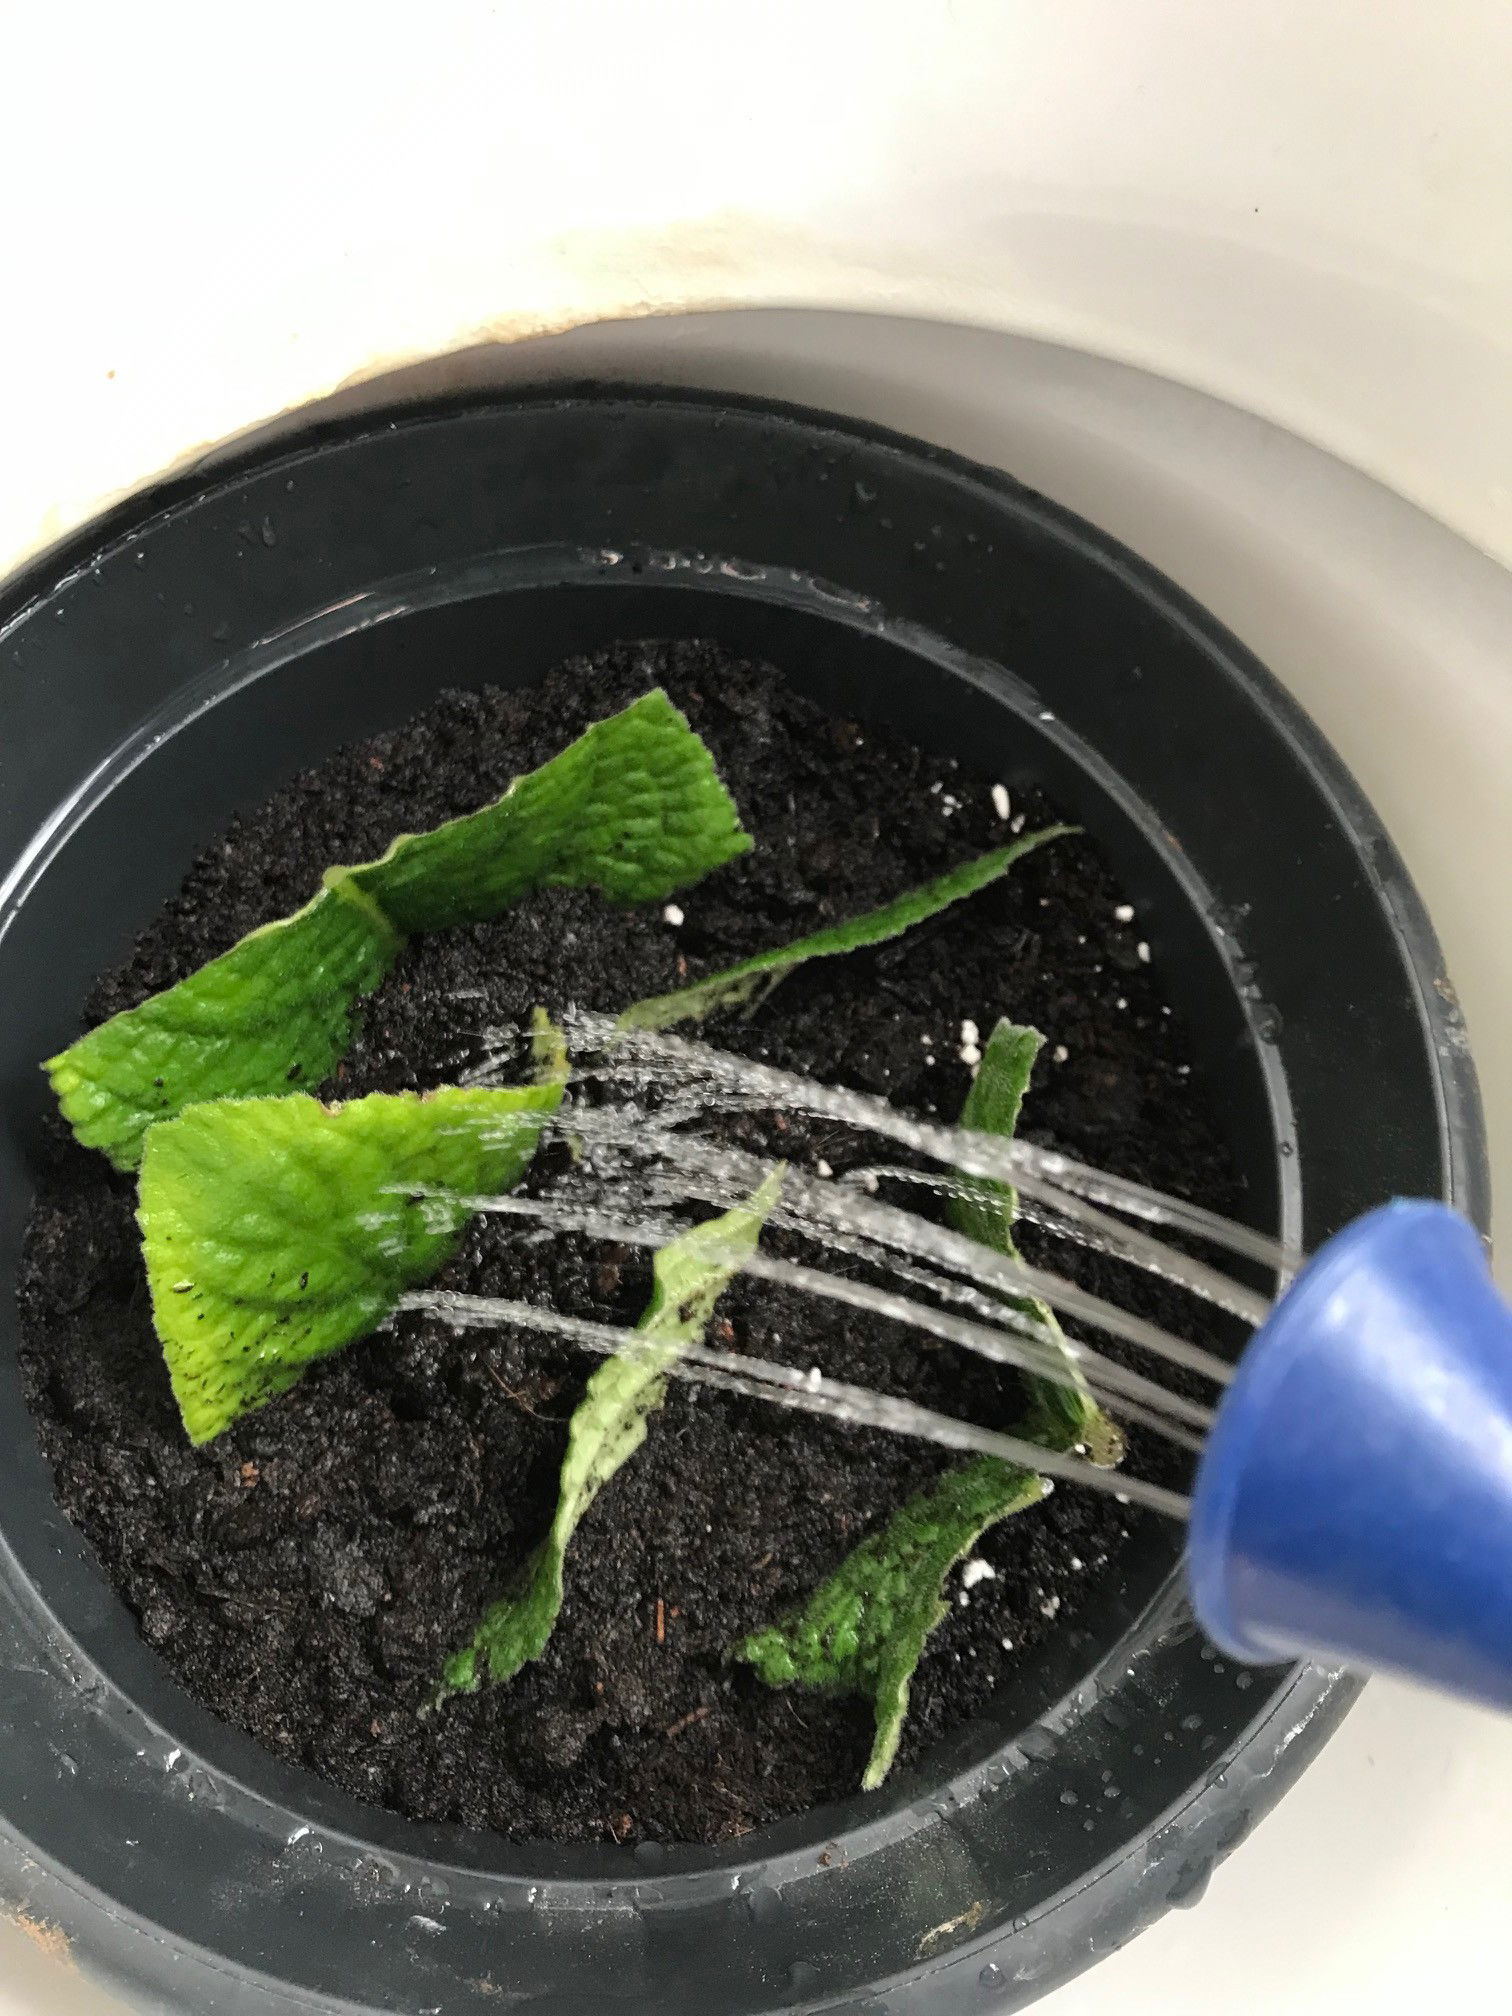
Serrated Leaf Cuttings (Easy to Moderate) - This method of propagation is by far the most enjoyable and the easiest way to identically duplicate the original plant. High levels of 'cytokinin' in its leaves enable it to root and produce new lateral growths along the serrated wounds once in contact with an attachable source, i.e. soil or rotten bark. Leaves that are at least 10cm (4 inches) in length and part of an established plant are most successful - the picture above shows the ideal specimen. Use clean scissors to cautiously remove the leaf via its succulent petiole, empathising the simpleness of the wound. The next step is where it starts to get interesting - the image below illustrates how you can cut the leaf. To avoid making a mess of the serrations, use a sharp, clean knife and slice the sections as shown.
Next, dip the wounds in a water/bleach solution (9 parts water, 1 part household bleach) to promote sterility. (Only use if you're an adult, following safety recommendations of the manufacturer). While using a seed tray or Bonsai dish and 'Houseplant' labelled potting mix, place the leaf sections wound-down in around 1.5cm (0.6 inches) into the soil. Apply slight pressure around the base of the leaf for extra stability with the sounding soil. Provide a bright, indirect setting with temperatures above 18℃ (64℉) and keep the pot in a sealed transparent bag with multiple small holes to maintain high humidity. Open the bag every couple of days to monitor how the cuttings are performing and to allow fresh air to circulate. Remove any rotten or yellowing material as it can spread onto neighbouring leaves. If propagation is successful, you should start to see new shoots surfacing the soil line after six to eight weeks. Keep the growing conditions the same, and once the shoots are big enough to pot on (four leaves on each growth), they can be potted up in 'Houseplant' Compost with 7cm (3 inch) pots. Repot as necessary and care in the same way as adult specimens with the care tips written at the top.
Whole Leaf Cuttings (Easy) - Instead of cutting the leaf into several sections (see image above), you can even keep it whole (like the image above) by placing the wound-end in a small glass of water to root. Once the roots are 2cm in length (1 inch), pot it up into a 7cm plastic pot with 'Houseplant' labelled potting mix. Whilst the leaf is rooting in the soil, be sure to cut the leaf in half horizontally, so that the total length of is reduced by half. Don't cut along the midrib. Keep the potted leaf in a transparent bag with a few holes and provide a indirect location with regular soil moisture. Once the third baby leaf emerges, you can remove the bag and treat as a mature specimen.
This method can be used to 'save' a wilting/rotting Streptocarpus where the root system has died.
 Due to the high levels of cytokinin found in the foliage (especially in the leaf's veins/ridges), cuttings are an excellent way to vegetatively duplicate a true type to the mother plant!
Repotting
Repot every three or four years in spring (& whilst out of bloom) using a 'Houseplant' potting mix and the next sized pot with adequate drainage. Hydrate the plant 24hrs before the tinkering with the roots to prevent the risk of transplant shock. For those that are situated in a darker location, add a thin layer of small grit in the pot's base to improve drainage and downplay over-watering. Click here for a detailed step-by-step guide on transplantation, or via this link to learn about repotting with root rot.
Book a 1-to-1 video call with THE HOUSEPLANT DOCTOR™ if you'd like a personal guide to repotting your houseplant. This will include recommending the right branded-compost and pot size, followed by a live video call whilst you transplant the specimen for step-by-step guidance and answer any further questions!
Flowers
Streptocarpus will develop trumpet-shaped flowers from late spring onwards, sporting many different colours depending on your chosen cultivar. The individual inflorescence will last around two weeks with the overall show lasting two or three months. Scroll up to 'Dormancy Care & Annual Flowers' for more information on achieving yearly blooms.
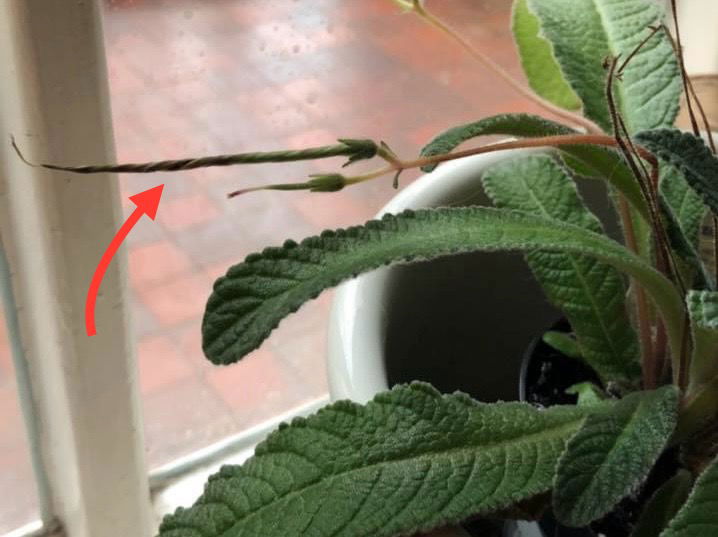 If the flower is pollinated successfully, its petals will drop off before developing into a cigarette-shaped seedpod that'll carry up to thirty seeds.
Pests & Diseases
Keep an eye out for mealybugs, aphids, spider mites, fungus gnats, thrips, Cyclamen mites, blackfly & root mealybugs that'll locate themselves in the cubbyholes and undersides of the leaves, with the exception of the latter in the soil. Common diseases associated with Streptocarpus are root rot, leaf-spot disease, impatiens necrotic spot virus, botrytis petal blight, flower break virus, rust, powdery mildew & southern blight - click here to learn more about these issues.
Toxicity
Not known to be poisonous when consumed by pets and humans. If large quantities are eaten, it may result in vomiting, nausea and a loss of appetite.
Retail Locations
Dobbies, British Garden Centres, Dibley's Online Store, Online Stores.
Book a 1-to-1 Call with THE HOUSEPLANT DOCTOR™
If you need further advice with your houseplants, book an advice call with ukhouseplants' friendly and expert writer today! This can be done via a video or audio call on most apps, including Facebook, FaceTime & Skype. A ten-minute call costs £5.99 (US$7), or £15.99 for thirty minutes. You can ask multiple questions, including queries on plants, pests, terrariums, repotting advice and anything in between. Please consider supporting this service to keep ukhouseplants thriving!
Comments