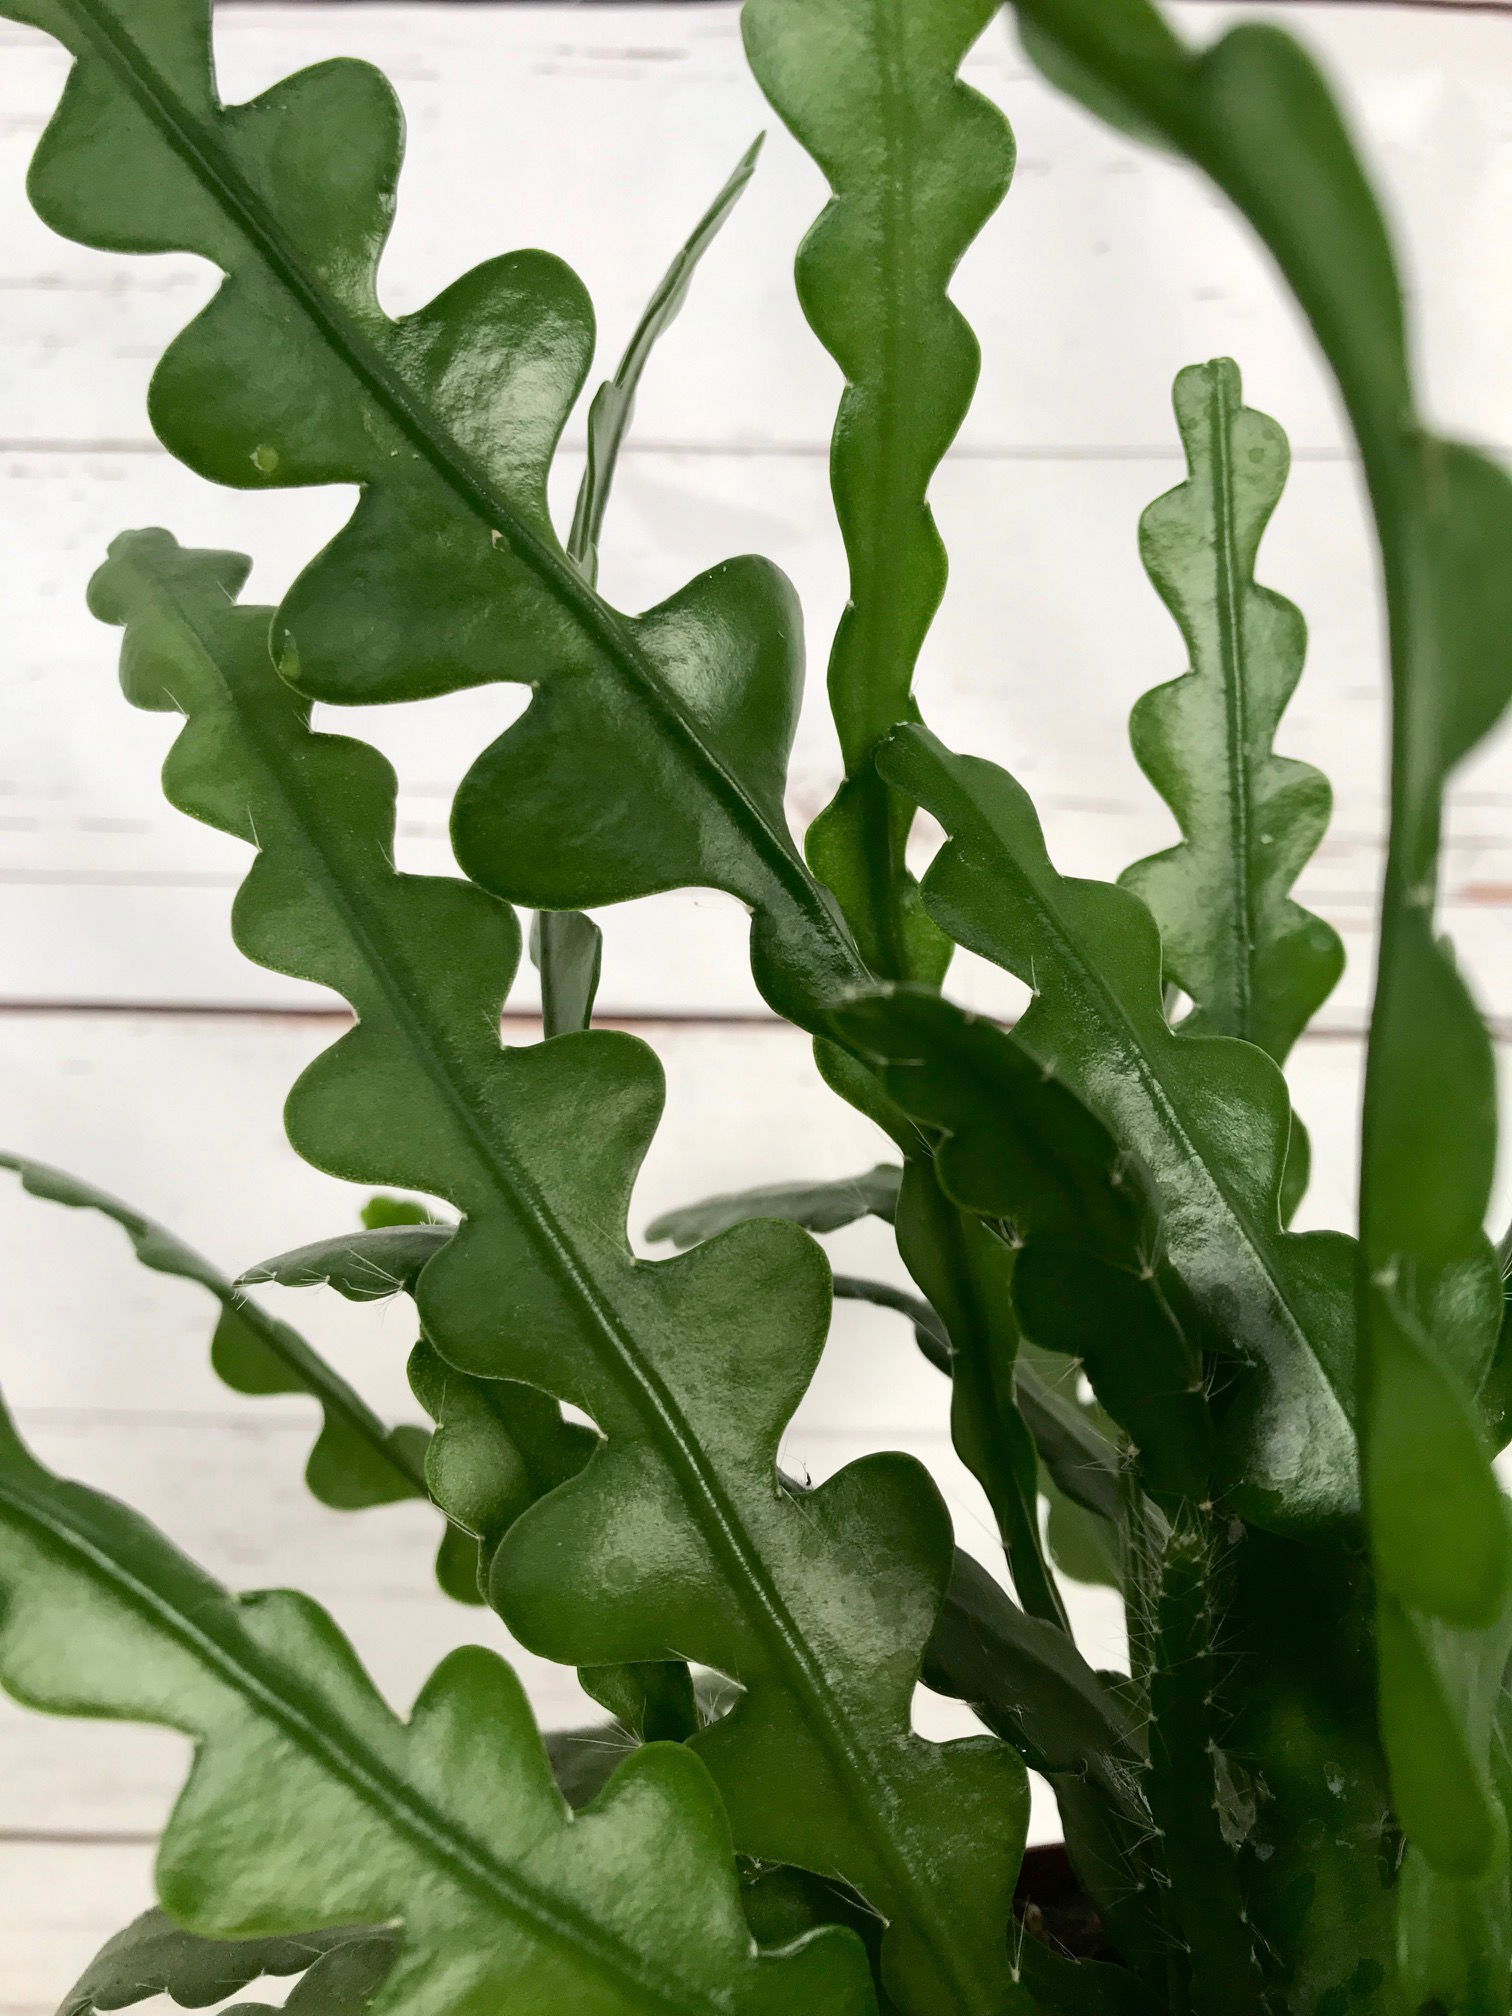
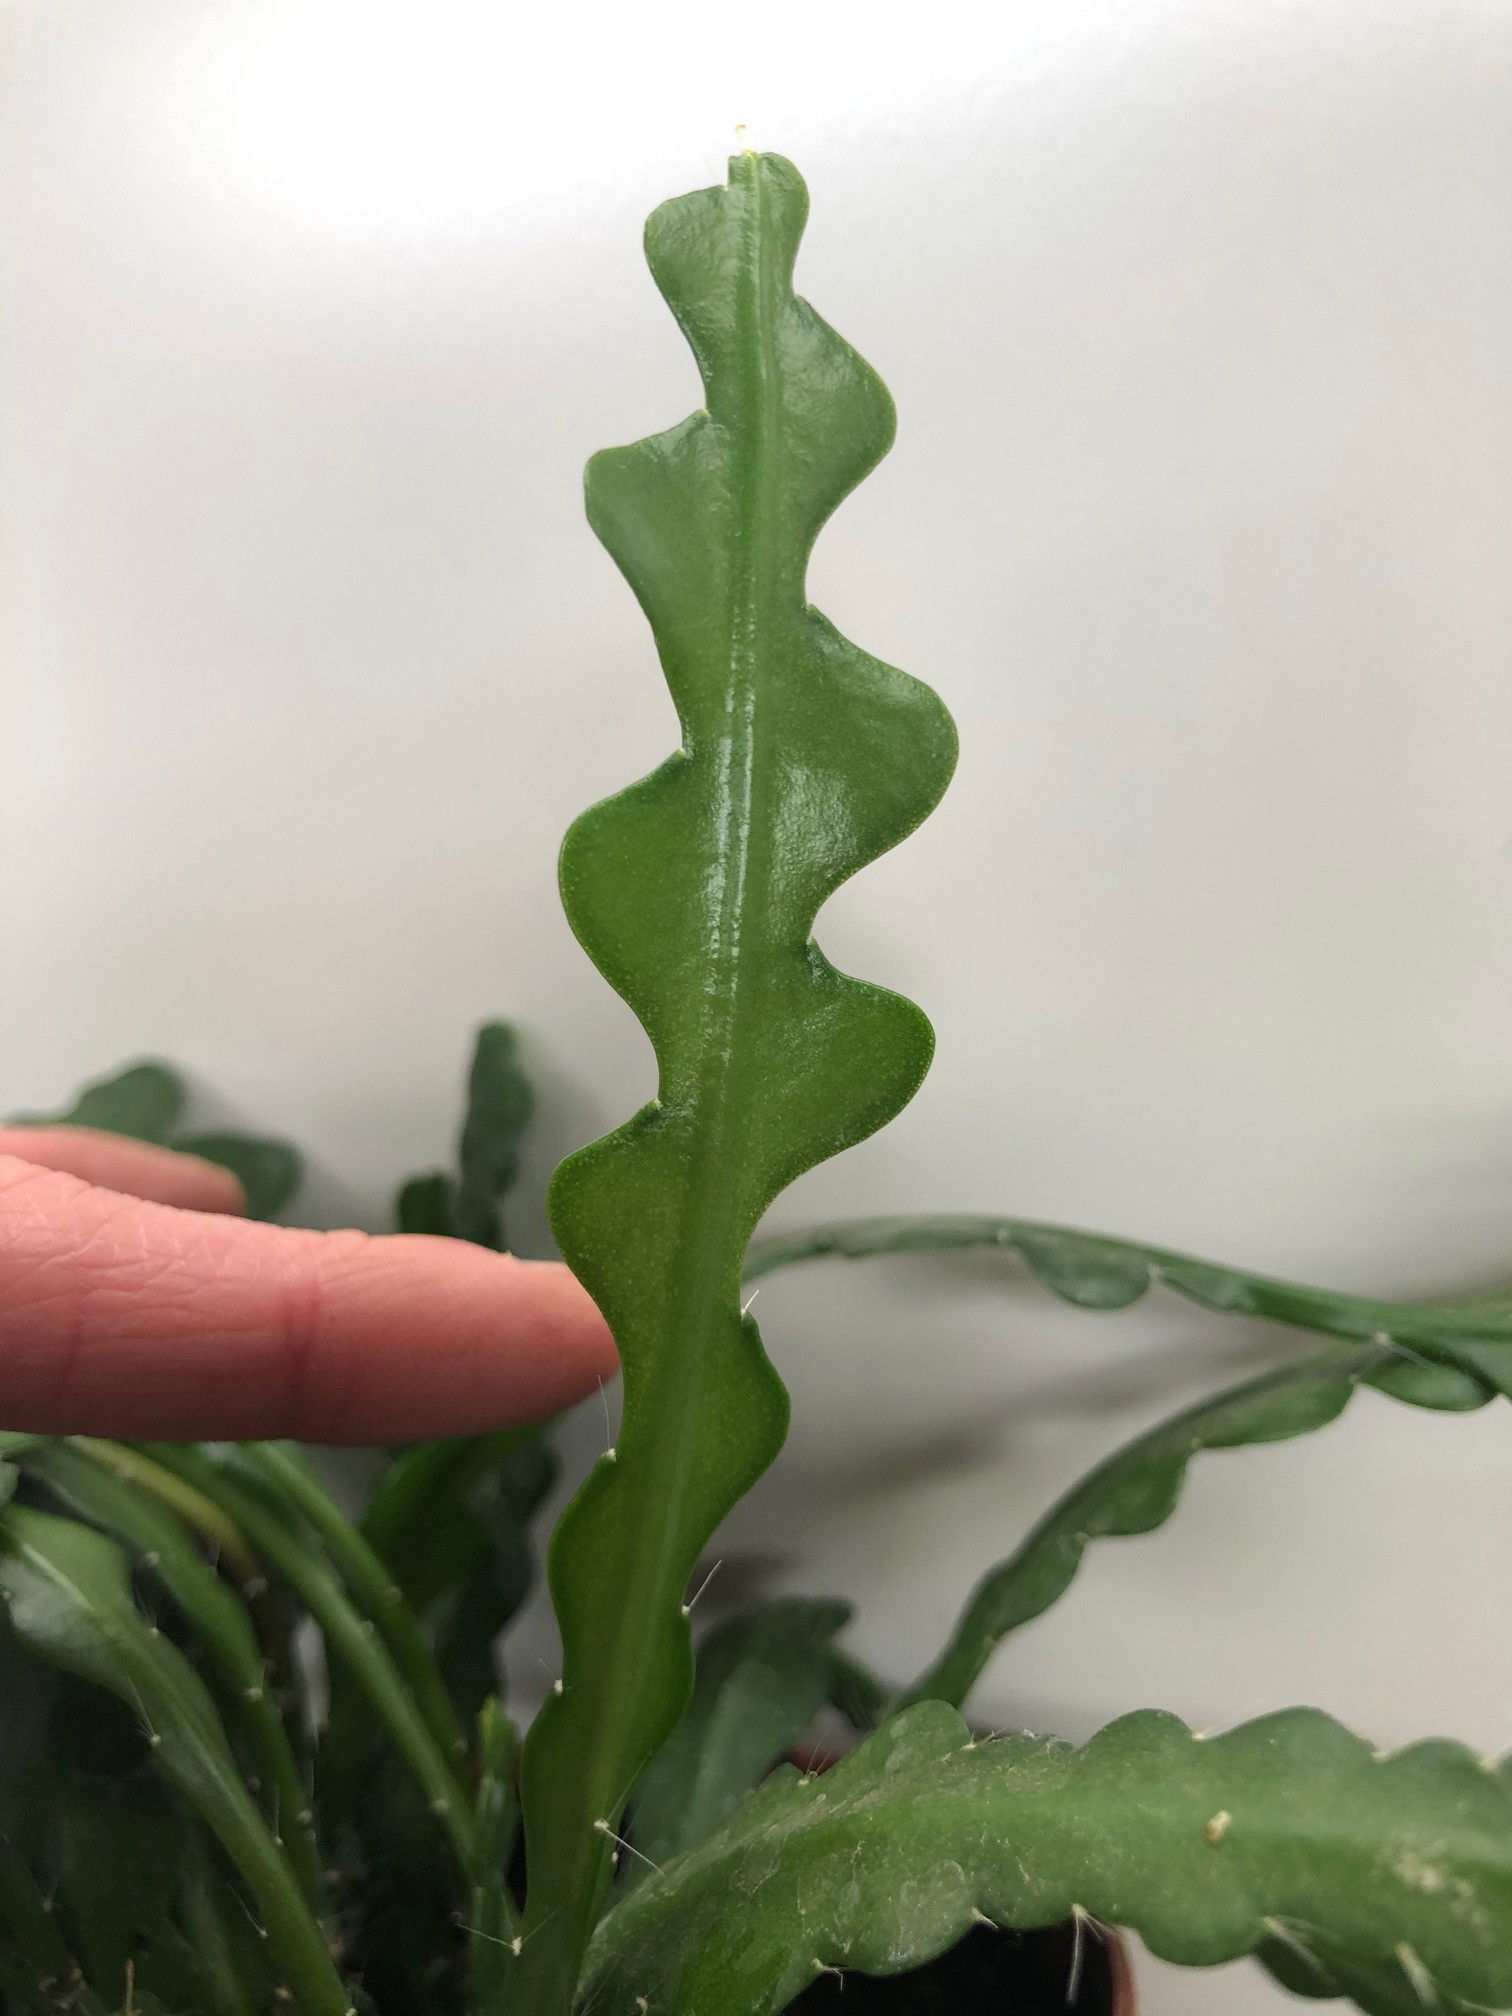
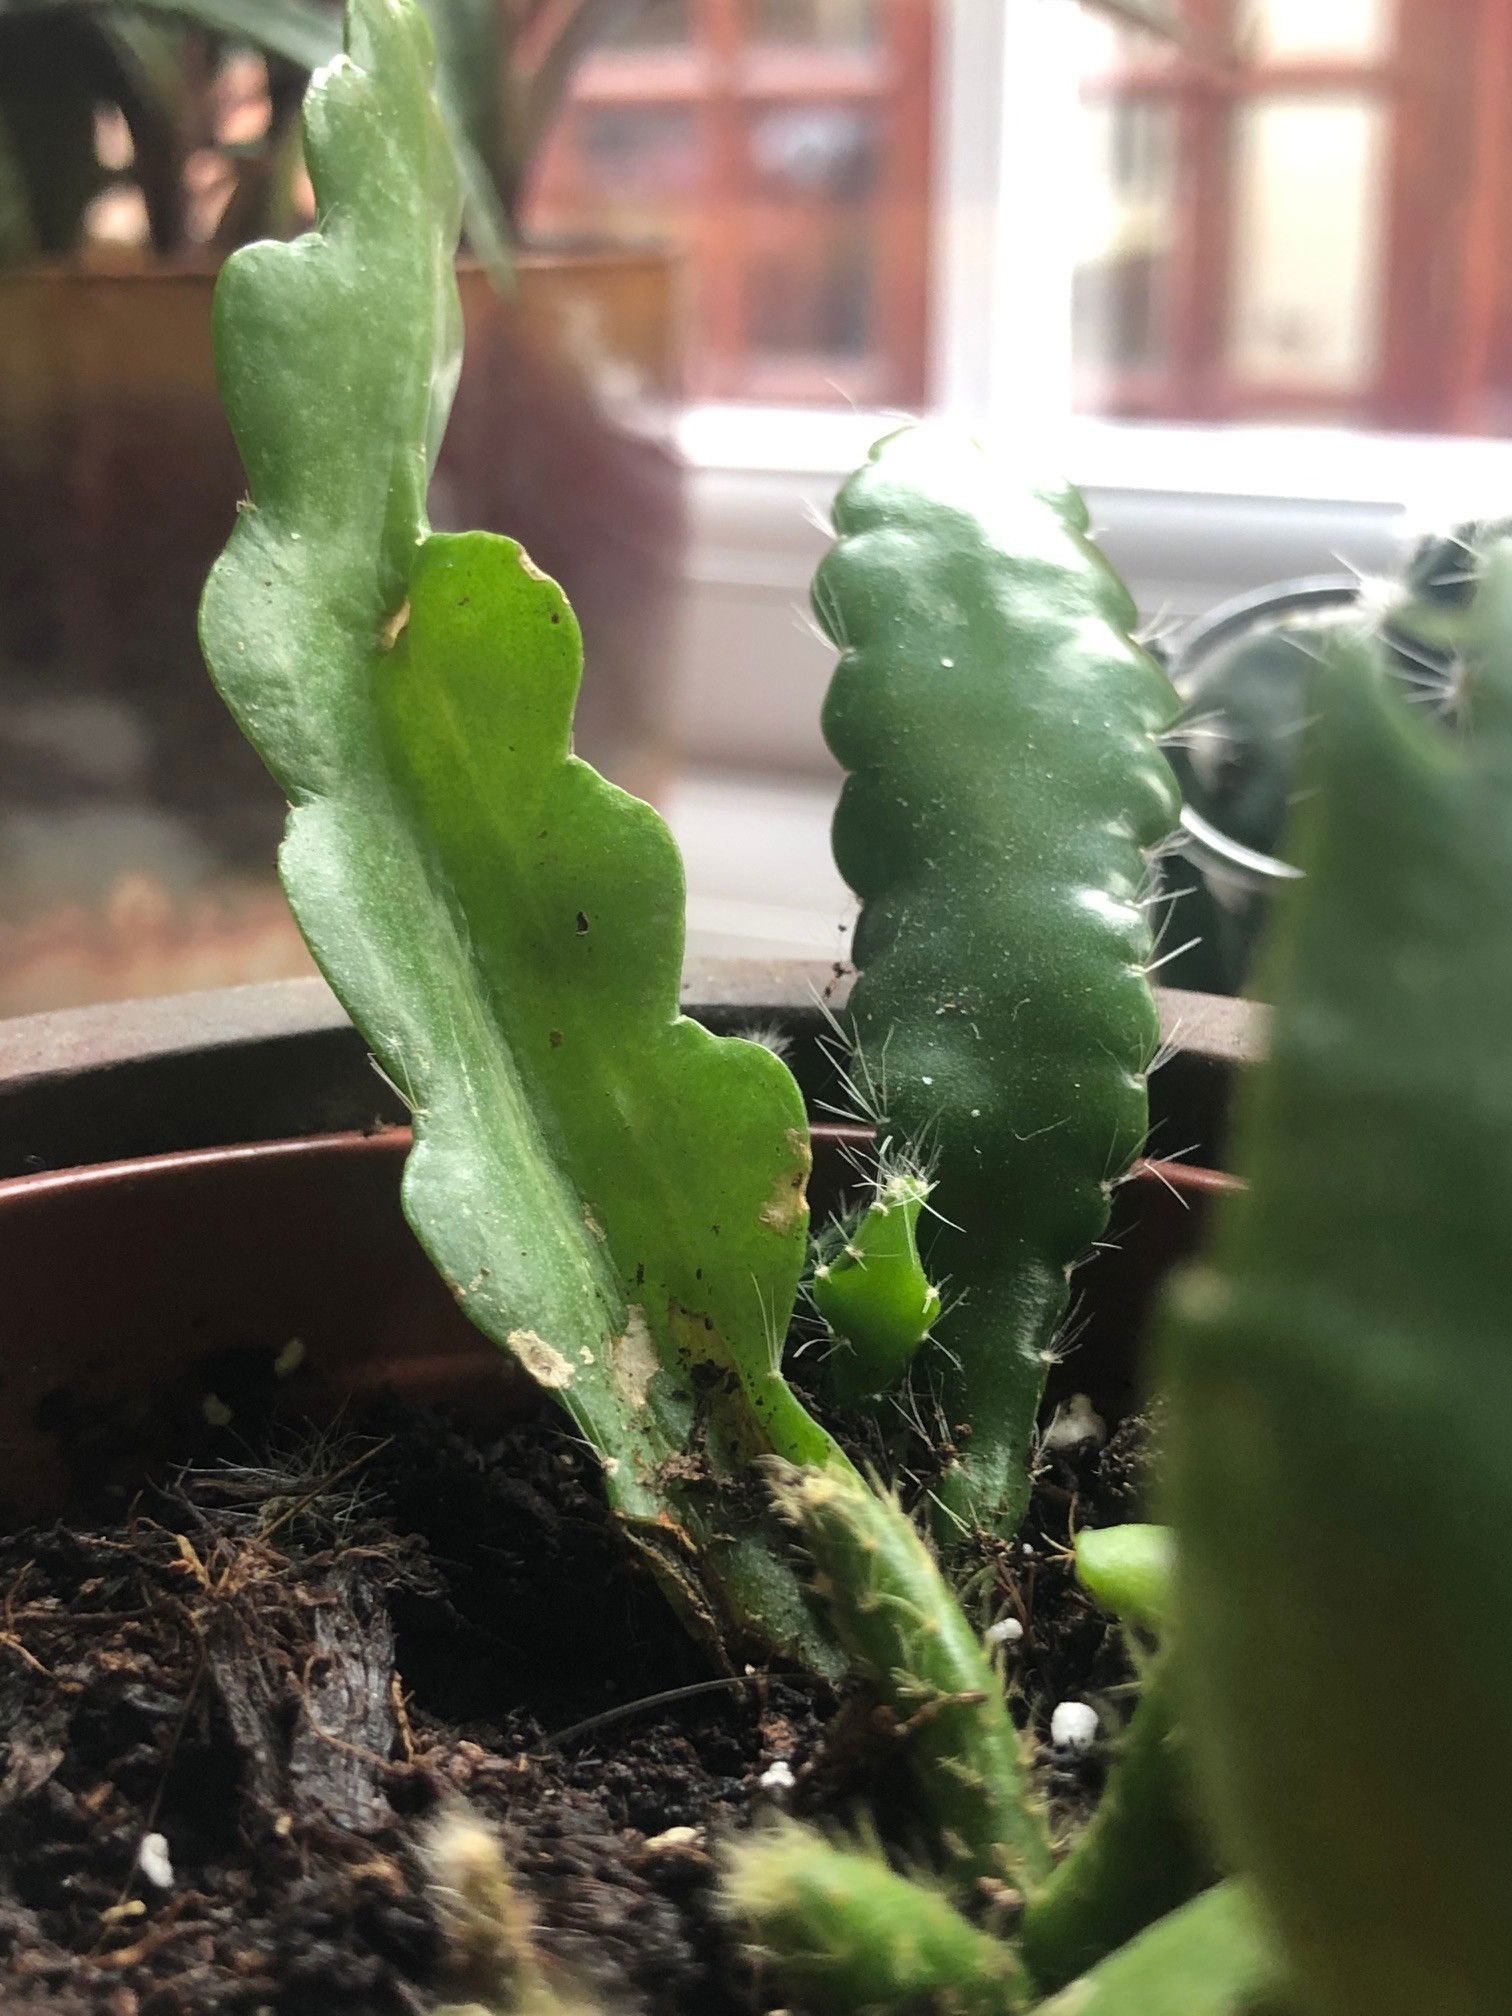
Disocactus anguliger (Formally known as Epiphyllum anguliger)
Contents
- Top Tips
- Location, Water, Humidity & Fertilisation
- Common Issues
- Origins, Temperature, Propagation, Repotting & Toxicity.
Need the answer to a specific plant query? Book a 1-to-1 video call with THE HOUSEPLANT DOCTOR™, the website's friendly author, to overcome and address your niggling problem! Available on iMessage, WhatsApp, Facebook Messenger & more.
Top Tips & Info
- Care Difficulty - Easy
- Locations that offer bright, indirect light are best suited for Fishtail Cacti, as exposure to the sun may result in scorch. This species is also accepted in semi-shaded locations where a newspaper can't be read without artificial light.
- Water once the soil's top half dries out, reducing this further in the autumn and winter. Avoid over-watering if your specimen is kept in a shady location.
- Average room humidity is enough to please this species, but introduce a pebble tray to keep the surrounding moisture high in locations near a heat source (heaters or radiators).
- Fertilise using a 'Houseplant' or 'Cactus' labelled feed every four waters in the spring and summer, reducing this to every six in the colder months.
- Regularly check for pests, most notably Mealybugs and Scale that'll inhabit the cubbyholes of the stem.
- Keep the ambient temperature above 10℃ (50℉) throughout the year, especially if placed outdoors in the summer.
- Repot every three years using a Cactus & Succulent potting mix, in the next sized pot with adequate drainage holes.
Location & Light - 🔸🔸
Bright, indirect light is favourable; however, a darker location won’t do too much harm. A position that offers more than two hours of strong direct light must be kept off the cards, due to their susceptibility to sun-scorch. A location within three metres of a north, east or west-facing window, or below a skylight window is ideal. If yours is seated in a relatively shady area of the house, be sure to dust the foliage regularly and keep the soil on the dry side to counteract root rot.
Water - 🔸
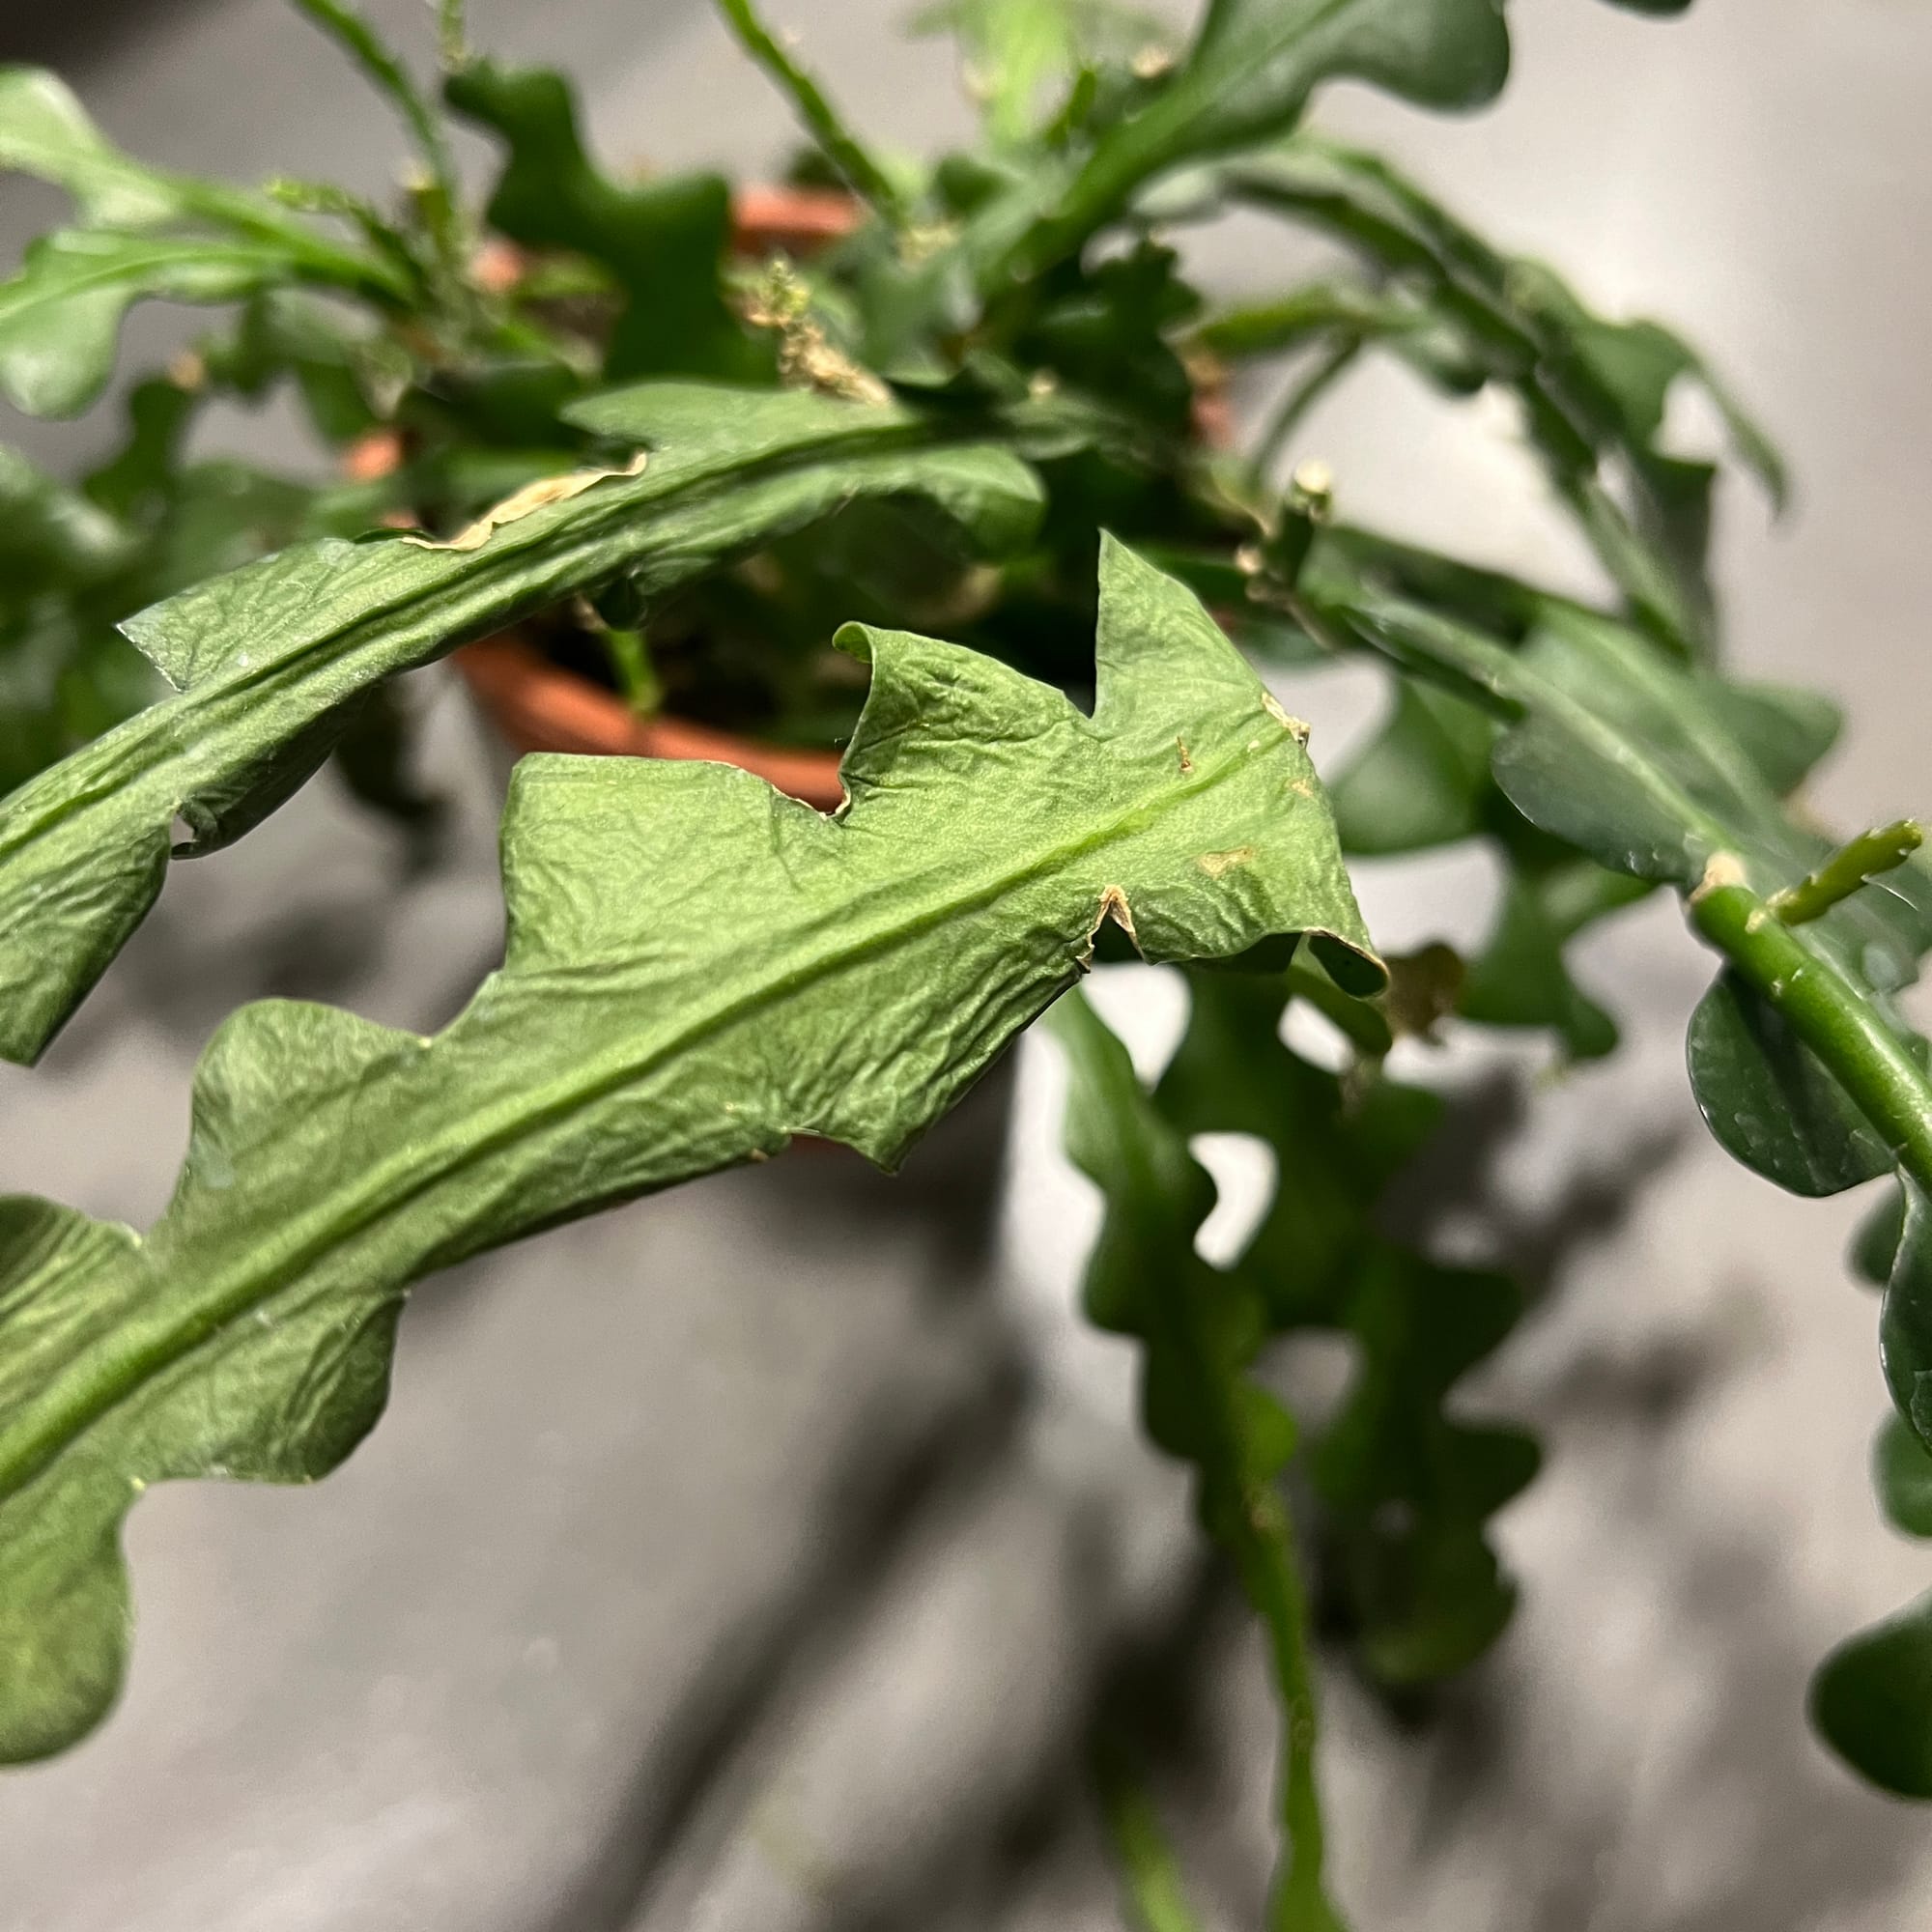
Always allow the top half of the soil dry out in between irrigations, reducing this further in the autumn and winter. Although Fishbone Cacti grow on moist nooks of jungle trees, it's important not to promote too soggy conditions as root or basal rot are always a threat. Over-watering symptoms include yellowing older leaves that soon drop off, mouldy soil, little to no growth and shrivelling foliage. These are common with too much soil moisture, an improper soil medium or too low light -scroll down to 'Common Issues' for more information. Under-watering symptoms, on the other hand, include little to no new growth, a much-needed transplant and drying or shrivelling leaves.
Humidity - 🔸🔸🔸
Average room humidity is enough to occupy Fishtail Cacti; however, as the heaters begin to be switched back on, introduce a pebble tray to counteract the risk of dry air.
Fertilisation - 🔸🔸
Fertilise using a 'Houseplant' or 'Cactus' labelled feed every four waters in the spring and summer, reducing this to every six in the colder months. Although typical salt-based fertilisers are acceptable (BabyBio etc.), why not try an organic-based feed to improve your Fishbone Cactus' health?
Common Issues with Fishbone Cacti
Root rot is a prevalent issue with symptoms including yellow lower leaves, stunted or softened growth and a dehydrated appearance. Take the plant out of the pot and inspect its root systems. Yellow roots translate to good health, however, brown and mushy sections with soggy soil is the result of over-watering. More information about addressing root rot can be found on this link.
A brown, rotten base is also another byproduct of over-watering. If the majority of the trunk has rotted over, stem cuttings must be taken to save the remaining section of the plant. Scroll down to ‘Propagation’ for more information!
 Wilting or dehydrated foliage on a Fishbone Cactus is most likely the product of root rot (if kept in moist soil all the time). This disease is very common with Fishbone Cacti that are grown more than 2m from a windowsill. Take the plant out of its pot and check the roots for any signs of browned, softened root tissue. If the roots have fully rotten over, you can take stem cuttings to keep the plant's 'legacy' alive.
 At this point, the leaves have become very dehydrated and cannot be saved via leaf cuttings. Check the base of the plant (just above the soil) to see if there is new growth emerging. If not, the plant has most likely died.
Failed leaf or stem cuttings are a common issue among amateur gardeners, with damaged wounds or too small vines being the usual culprits. Although propagating all tropical cacti is relatively easy, people still find it hard to ace. Not only will the size of the vine dictate its success, damaging the leaves or vine can also hurt the chances of rooting. For more information about how to take vines, scroll to the 'Propagation' section of this article.
Too much sunlight will cause a red tinge to the foliage. Although Fishtail Cacti are best grown in locations offering just a few hours of sun, prolonged periods on non-acclimated specimens will lead to sun-scorch. If yours is a newly-purchased plant, build its tolerance to the sharp rays by increasing the amount of receivable light per week by an hour.
Blisters appearing on your Fishbone Cactus is most likely due to over-watering. If this has occurred with yours, improve your watering regime by allow ALL of its soil to dry in between drinks. You could also try relocating the plant into a brighter windowsill to dry the soil out quicker, thus reducing the risk the soil becoming wet and stagnant. The blisters should eventually harden over so you don't need to prune it off.
A lack of flowers is caused by immaturity or an insufficient dormancy period served in the winter months. Specimens will only flower once they reach maturity - which can take in the region of three to six years from a leaf cutting. Also, locations that offer near-similar temperatures all year round won't allow the plant to go dormant, resulting in poor spring growth. To achieve bud development, situate in a location that offers nighttime temperatures of around 12°C (54°F) with fewer waters. The combination of both cooler temperatures and dry soil during the colder months will help season the plant, thus leading to a better chance of flowers in the future.
Always use lukewarm water, and if you choose to use tap water, allow it to stand for at least 24hrs before application. Tropical cacti tend to be quite sensitive to temperature change, so pouring cold tap water immediately into the pot will not only ironise your roots but could even cause yellow edges, sudden flower loss and stunted growth.
Origins
Disocactus is an epiphytic genus consisting of nineteen species, endemic to the coastal and tropical regions of Central America. The species' original name, Epiphyllum anguliger, comes from the Greek phrase for 'upon the leaf' which refers to its epiphytic nature, and 'angle bearing', due to the deeply toothed stems. The genus was first described by Adrian Hardy Haworth (related to the genus, Haworthia) in the late 18th century during a visit through the Caribbean. The most popular species, the E. anguliger or Fishbone Cactus, can be dated back to the 1810s when many of the species within Schlumbergera genus were placed within Epiphyllum. Within recent times, the Fishtail Cactus has been reclassified in the Disocactus genus after extensive genetic testing.
Like the Streptocarpus and African Violets, hybridisation can be easily achieved between this and related genera. As of 2010, over seven thousand different hybrids have been officially named within this genus!
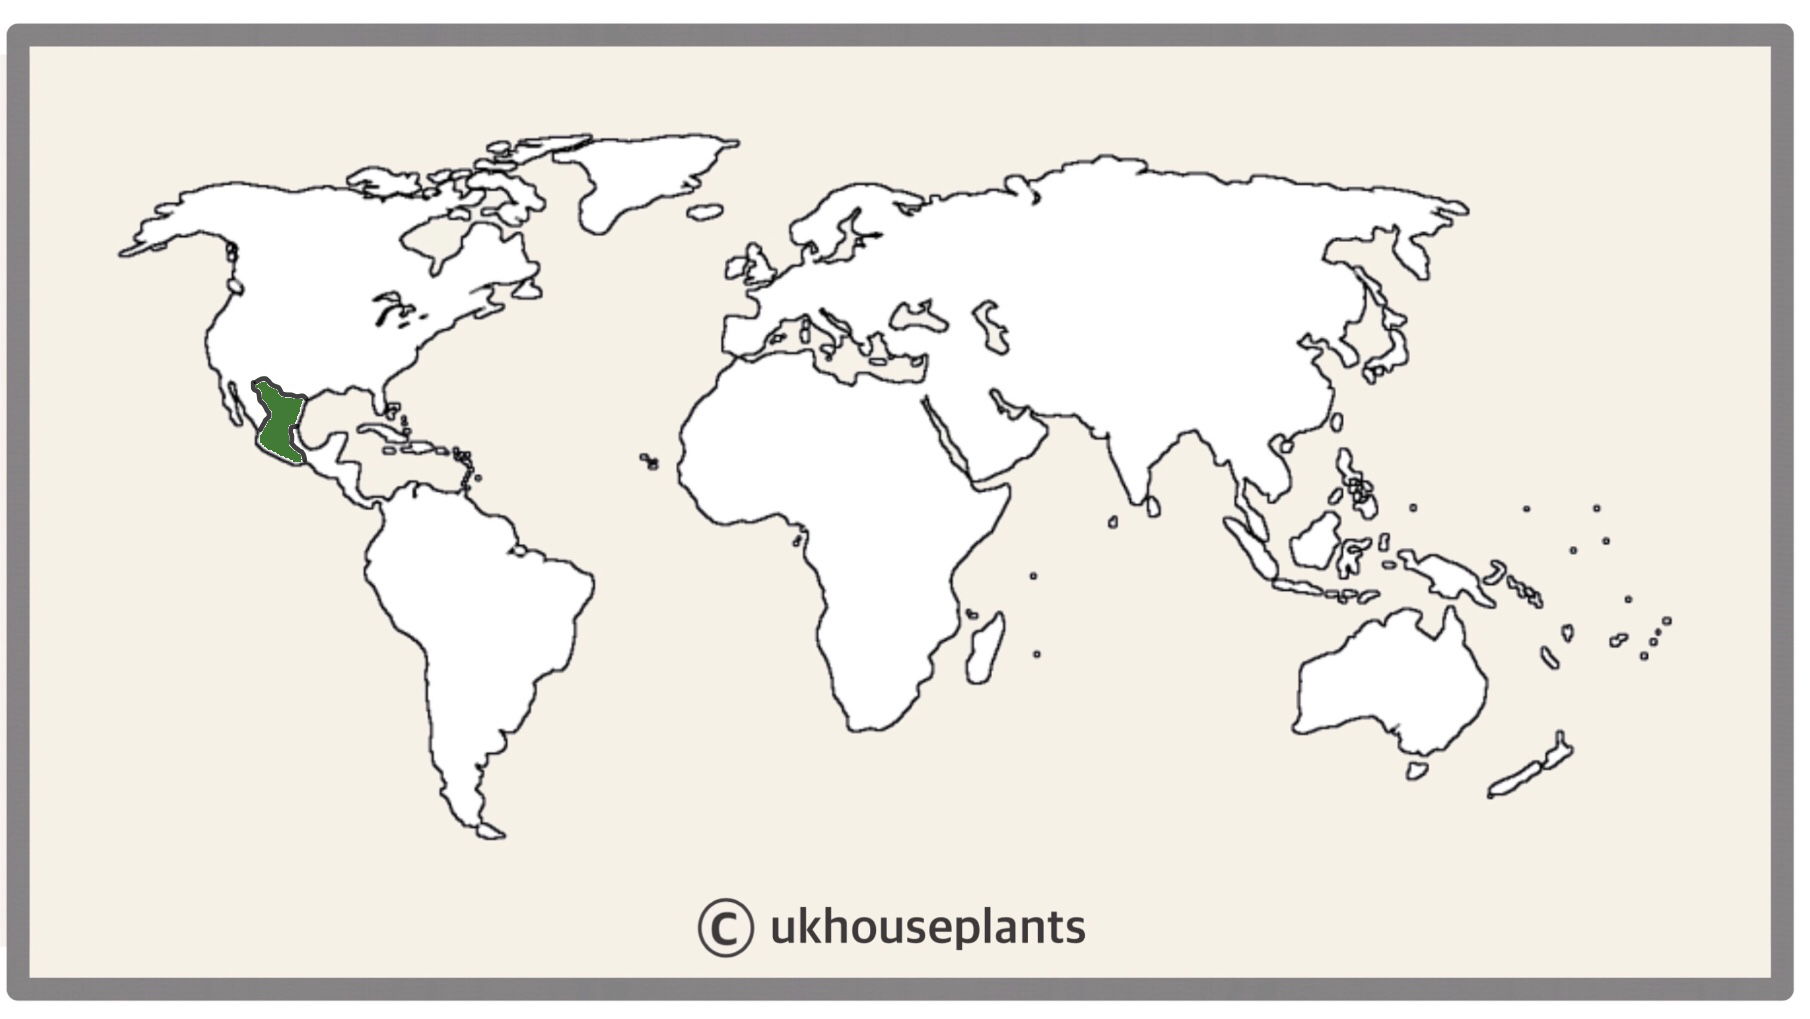 The Distribution of Disocactus anguliger.
Temperature
10° - 26°C (50° - 78°F)
H1b (Hardiness Zone 12) - Can be grown outdoors during the summer in a sheltered location with temperatures above 12℃ (54℉), but is fine to remain indoors, too. If you decide to bring this plant outdoors, don't allow it to endure any direct sunlight as it may result in sun-scorch and dehydration. Regularly keep an eye out for pests, especially when re-introducing it back indoors.
Spread
Up to 1.4m in height and 40cm in width, with maturity taking up to eight years.
Pruning & Maintenance
Remove yellow or dying leaves, and plant debris to encourage better-growing conditions. While pruning, always use clean utensils or shears to reduce the chance of bacterial and fungal diseases. Never cut through yellowed tissue as this may cause further damage in the likes of diseases or bacterial infections. Remember to make clean incisions as too-damaged wounds may shock the plant, causing weakened growth and a decline in health.
 Take cuttings at least five inches from the top. Never propagate with anything smaller due to the lowered chance of success.
Propagation
Via seed or leaf/stem cuttings. To learn about the essentials with sowing seeds, be sure to click on this link - Seed Propagation Tips.
Soil Propagation of Leaf Cuttings
- Choose which leaves to use. The ideal candidates are those that show no sign of damage, pests or diseases, and have small wires roots already-attached. Cuttings that don't have any roots will still root, but it may take a little longer for its propagation.
- Delicately prune the whole leaf off from the plant, and cut it into several sections sideways. If you're stuck on which way to propagate the leaves, look at the image below.
- Prepare the pot and soil. Choosing a free-draining potting mix, for example, Cactus & Succulent Compost, which provides a nice balance of moisture-retention and drainage. Of course, most soils are acceptable (Houseplant or Multi-purpose compost), but try to add some extra ingredients like grit, sand and perlite to help loosen it up. If you've got any shallow and wide pots, for example, a Bonsai pot, this is the time to use it. Propagating tropical cactus cuttings won't require deep soil, so try and avoid pots that are too big. Terracotta and plastic pots are both acceptable in this instance.
- Place the cuttings ON TOP of the moist soil. Allowing both the plant and it's wound to callus over (dry out & harden) will kick-start the rooting process, along with the prevention of rot. Keep the cuttings on top of moist soil for a week, misting the soil and foliage on opposite days.
- Provide a bright, indirect location with temperatures above 18°C (64°F) throughout this period.
- Then, place the cuttings into the soil, submerging the bottom third. Make sure you don't set it too deeply, as this may lead to 'Blackleg' (the rotting of its base).
 When a cutting produces a new leaf, it means that the rooting process has been successful. Roots will always develop before foliar growth.
 - Do NOT pat down the surrounding soil to aid support. The ideal soil conditions need to be fluffy and oxygenated, so compacting the soil will result in the suffocation of roots that'll lead to root rot. Tap the pot's side to consolidate (not compact) the soil. If support is needed, use a small stick or cane, but be sure NOT to condense it.
- Aftercare - Maintain evenly moist soil, allowing the top third to dry out in between waters. The ideal location would be in a warm, humid room within a few metres of a window, but out of direct light. After another month or two of being in the soil, treat it like a normal houseplant.
Flowers
Fishbone Cacti will flower once matured in the summer with rosette-shaped blooms, sporting either red, yellow, pink or white appearances. Each flower will take several weeks to develop, lasting only several days once opened. Most cultivars or species will produce a sweet-smelling fragrance that'll be most prominent at night. Be sure to take photos of your specimen in bloom, as the flowers will only last a few days!
Repotting
Repot every two years in spring using a 'Cactus' labelled potting mix and the next sized pot with adequate drainage. Fishbone Cacti are far better potbound for several years due to the heightened risk of root rot and repotting-issues (like transplant shock), so only repot if you feel it's wholly necessary - restricted root growth will also increase the chance of blooms, too.
Hydrate the plant 24hrs before the tinkering with the roots to prevent the risk of transplant shock. For those situated in a darker location, introduce an extra amount of perlite and grit into the deeper portion of the pot to downplay over-watering risks. Click on this link for a detailed step-by-step guide on transplantation, or via this link to learn about repotting with root rot.
Book a 1-to-1 video call with Joe Bagley if you'd like a personal guide to repotting your houseplant. This will include recommending the right branded-compost and pot size, followed by a live video call whilst you transplant the specimen for step-by-step guidance and answer any further questions!
Pests & Diseases
Keep an eye out for mealybugs, spider mites, whitefly, scale & vine weevils. Typical diseases associated with Fishbone Cacti are root or leaf rot, leaf-spot disease & powdery mildew. For more information on how to address any of these issues, click on this link - Identifying Common Houseplant Diseases
Toxicity
Fishbone Cacti are classified as non-poisonous. If large quantities of the plant are eaten, vomiting, nausea and a loss of appetite could occur.
Retail Locations
Online Stores.
Book a 1-to-1 Call with THE HOUSEPLANT DOCTOR™
If you need further advice with your houseplants, book an advice call with ukhouseplants' friendly and expert writer today! This can be done via a video or audio call on most apps, including Facebook, FaceTime & Skype. A ten-minute call costs £5.99 (US$7), or £15.99 for thirty minutes. You can ask multiple questions, including queries on plants, pests, terrariums, repotting advice and anything in between. Please consider supporting this service to keep ukhouseplants thriving!
Comments