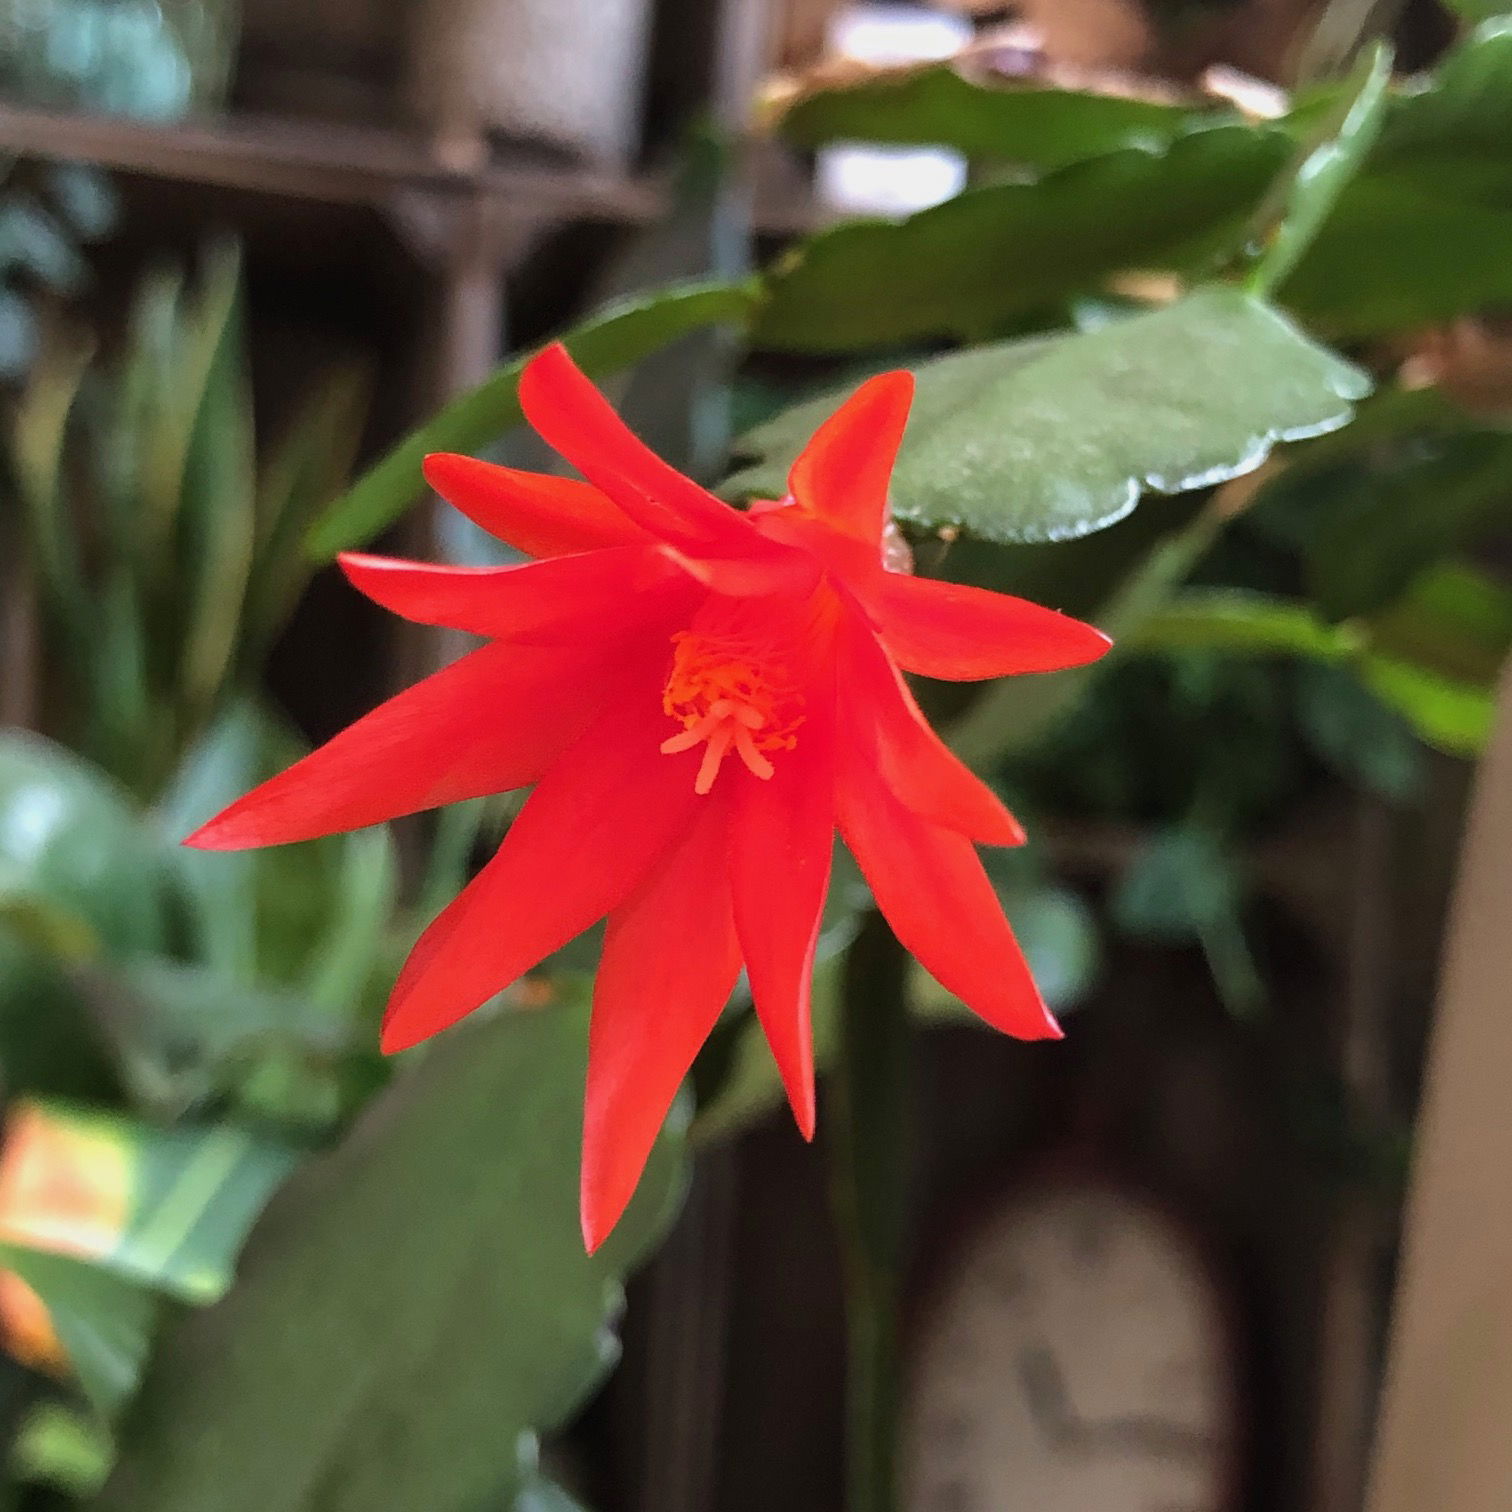
Schlumbergera gaertneri (Formally known as Rhipsalidopsis gaertneri)
Contents
- Top Tips
- Care Requirements (Water, Humidity, Location + Light & Fertilisation)
- Dormancy Care & Annual Flowers
- Common Issues
- Origins, Temperature, Spread, Propagation & More.
Need the answer to a specific plant query? Book a 1-to-1 video call with THE HOUSEPLANT DOCTOR™, the website's friendly author, to overcome and address your niggling problem! Available on iMessage, WhatsApp, Facebook Messenger & more.
Top Tips
- Care Difficulty - Easy
- Easter Cacti will require a bright, indirect location with a good level of air circulation. Those in shadier locations must be under-watered to combat the heightened risk of root rot.
- Allow the soil's top half to dry in between waters, reducing this slightly further in the autumn and winter.
- Average room humidity is acceptable for Easter Cacti; however, it's recommended to introduce a pebble tray while the heaters are operating.
- Whilst in bloom, feed using a potassium-based feed every four waters to prolong flowers. Revert back to a 'Houseplant' labelled fertiliser once the blooms have elapsed, every six waters.
- Scroll down to 'Dormancy Care & Annual Flowers' to learn more about achieving an Easter bloom each year.
Location & Light - 🔸🔸
Easter Cacti prefer to be seated in a bright, indirect location of the home as excess sunlight may result in sun-scorch. We'd recommend situating yours within two metres of a window or a location with overhead lighting; north-facing sills are also acceptable.
If yours is located in a position with low light, you must remember the phrase, 'drenches between droughts' - otherwise you run the high risk of root or basal rot.
Water - 🔸🔸
The rule of thumb is to allow the top half of the soil dry out in between waters, reducing this further during their dormancy period. Whilst in bloom, keep the soil relatively moist to avoid sudden flower loss. Under-watering symptoms include little to no new growth, a much-needed transplant, and shrivelled leaves. These issues are most common with specimens kept in bright light or high temperatures - either increase waters or decrease the received light somewhat. Over-watering symptoms, on the other hand, include yellowing leaves, little to no growth and root or basal rot - click here to learn more about root rot.
Humidity - 🔸🔸🔸
Although average room humidity is more than enough to satisfy this plant, we'd recommend introducing a pebble tray to keep the surrounding moisture high. Never situate it within a few metres of an operating radiator due to the enriched chance of browning leaf-tips.
Fertilisation - 🔸🔸
Use a fertiliser high in potassium to prolong its blooms during the flowering period - an excellent example would be 'Tomato' labelled feed. You can then revert to a standard 'Houseplant' labelled fertiliser at monthly intervals once the final bloom has elapsed. Scroll down to 'Dormancy Care & Annual Blooms' for more information about fertilisation.
Dormancy Care & Annual Flowers
Achieving an Easter bloom isn't the hardest of tasks, with those who have a cooler room without artificial light at night being on the upper-hand. They're better off staying pot bound for several reasons, including the prevention of root rot or transplant shock, and to put momentarily stress on the plant. Although this may sound harsh, a restriction of roots is the best way to obtain flowers, as it'll send out a bud in response to becoming under threat. As long as the plant is subsequently repotted every three or four years in the spring, no harm is done!
N. B. - Please note that the following table is tailored to the Northern Hemisphere, with those living below the equator following the same actions per month, just six months later - i.e. the table's January actions must be taken in July, and so on.
| Period | Actions |
| January & February | Resting/Dormancy Period. Keep irrigations and fertilisation to a low frequency. |
| March | End of Resting/Dormancy Period. Increase waters and feed using a 'Houseplant' labelled fertiliser every four waters. |
| April | Pre-Flowering Period. Use a potassium-based feed every four waters during this period. Only re-hydrate the plant once half of the soil dries out to dry the leaves' nodes, which will help with potential flowers. |
| May & June | Flowering Period. Maintain relatively moist soil and fortnightly potassium-based feeds. |
| July & August | Move outdoors, with around an hour of morning sun. Bring it inside if the night temperatures dip below 10℃ (50℉). |
| September - December | Resting/Dormancy Period. Bring back indoors, reduce irrigations and fertilisation until the spring. |
Extra Tips
The following steps should be done at the start of autumn when the plant's growth starts to slow. Always think of ukhouseplants' acronym of SHORT when it's time for flowers!
Sunlight
Be sure to provide a bright location with little to no direct sun throughout this period. Although the winter sunlight won't necessarily hurt the plant, because of the weakened rays, you may fall in the trap of sun-scorch. Avoid the use of artificial lighting during the night, especially a month before the PRE-FLOWERING PERIOD.
Hydration
Reduce waters so that the soil becomes almost dry during the RESTING/DORMANCY & PRE-FLOWERING PERIOD. This is to dry the leaves' terminals (nodes) that'll help bud formation in the spring.
Occasional Feeds
During the PRE-FLOWERING and FLOWERING PERIOD, supplement the soil using a potassium-based fertiliser - Tomato Food is an excellent choice. Revert back to a 'Houseplant' fertiliser as soon as the last flower elapses, at monthly intervals.
Temperature & The Outdoors
Situating an Easter Cacti outdoors during the summer will benefit the plant in many ways. Not only will they generally perform better when given a vacation outdoors, but it'll also revitalise and provide vital nutrient in the form of fresh air and natural lighting. If you can't place it outside, no need to panic. They can still flower well during the budding season, but its overall health won't be as good as the others. During the PRE-FLOWERING PERIOD, it's best to situate the plant in a location that offers nighttime temperatures of 15℃ (59℉) for the formation of buds.
 Keeping the specimen on the drier side during the dormancy period will callus the wound, enabling a formation of flower buds in the spring.
Common Issues with Easter Cacti
A lack of flowers is caused by an insufficient dormancy period, where the temperatures are kept more or less the same over the year. Reduce the temperature by a couple of degrees over the autumn and winter months, along with fewer irrigations to ensure a well-spent dormancy. As spring arrives, the natural temperature will begin to increase, with this is being the perfect time to increase waters and fertilisation. Scroll up to the previous section to learn more about Dormancy Periods.
Blisters appearing on your Easter Cactus is most likely due to over-watering. If this has occurred with yours, improve your watering regime by allow ALL of its soil to dry in between drinks. You could also try relocating the plant into a brighter windowsill to dry the soil out quicker, thus reducing the risk the soil becoming wet and stagnant. The blisters should eventually harden over so you don't need to prune it off.
Root or basal rot is a common issue among specimens sat in too dark environments with prolonged soil moisture. Symptoms include rapidly yellowing leaves, mouldy soil, stunted growth and a rotten brown base. Take the plant out of the pot and inspect health below the compost line. If the roots sport a yellow tinge, you're good to go, but if they're brown and mushy, action must be taken immediately. More information about addressing root rot can be found on this link.
Failed leaf or stem cuttings is a common issue among amateur gardeners, with too damaged wounds or small pieces being the usual culprits. Although propagating any tropical cacti is relatively easy, people still find it hard to ace. For more information about how to take leaf cuttings, head down to 'Propagation' now!
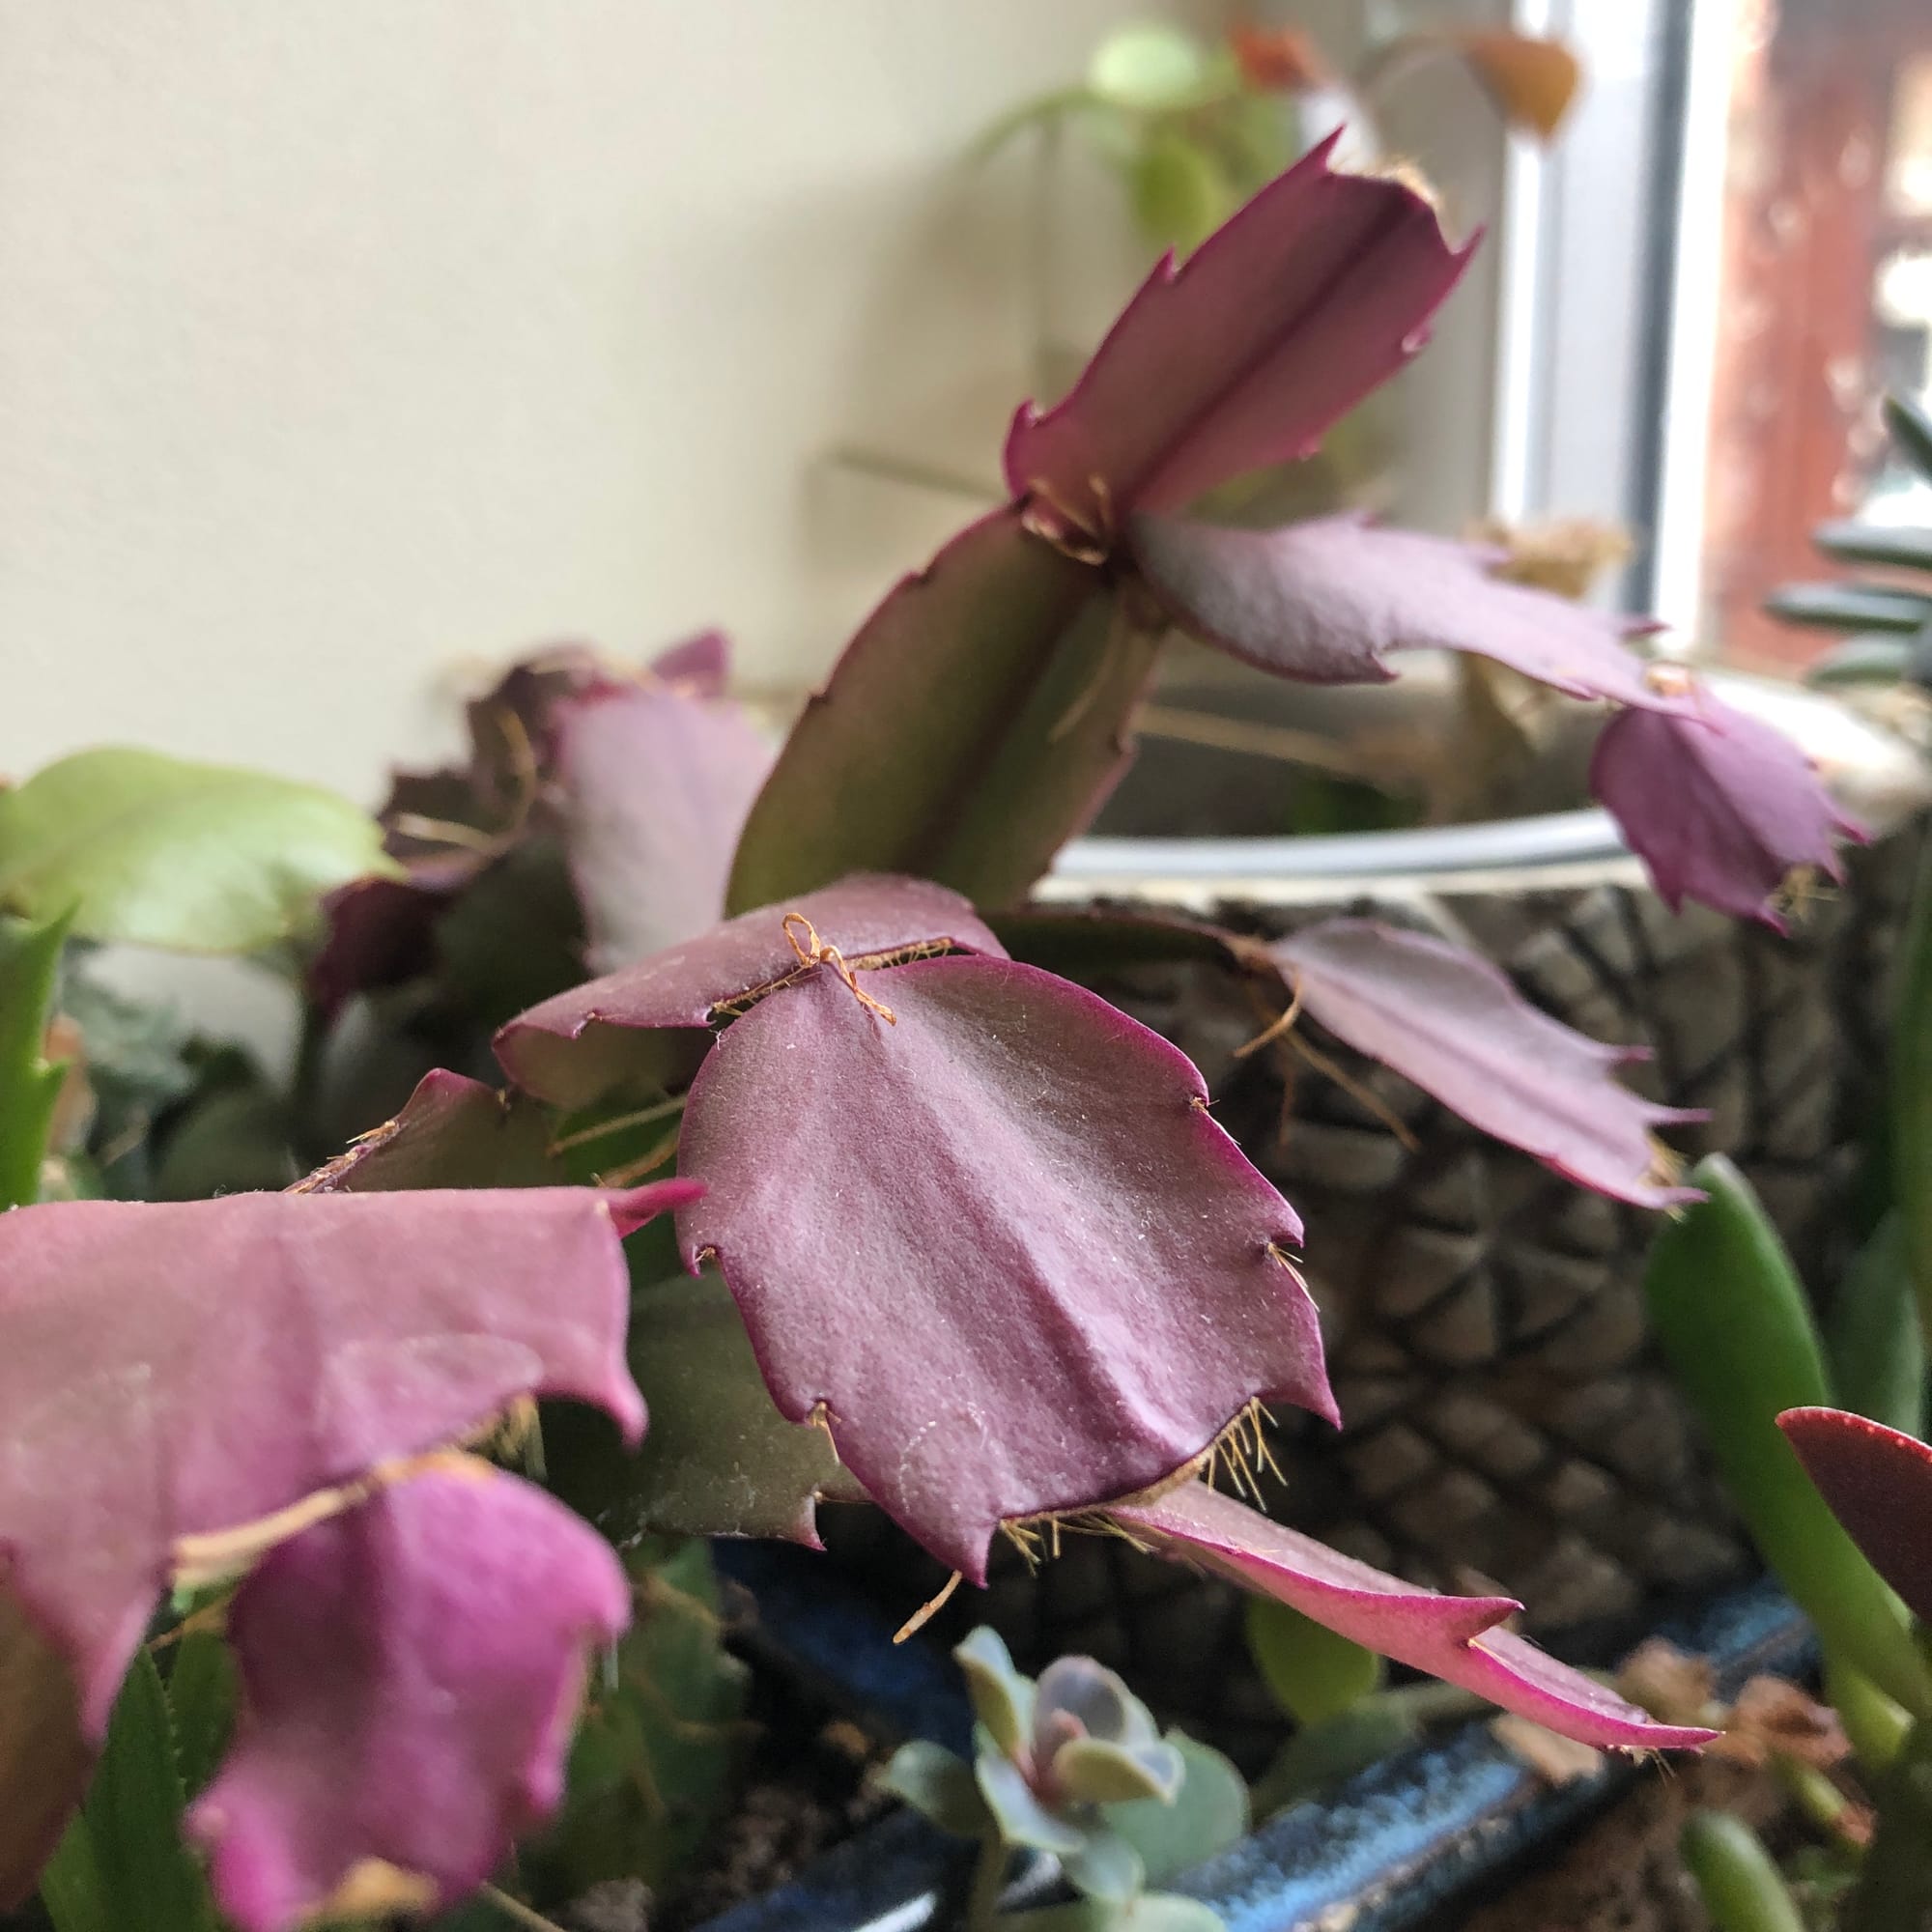
Red or purple leaves are the product of too much sunlight, most common during the summer months. A pigmentation called 'Carotenoids' will alter the appearance of the foliage to counteract the harsh effects of the UV rays, but it won't cause the plant to weaken or die. Either keep the plant hydrated in its usual spot or relocate it to sunless windowsill to recover.
Clean the leaves once every two to three months. Although this isn't too much of an issue, a build-up of dust particles can clog up the plant's pores, causing lowered light capturing-efficiency. Rinse the leaves in a sink with lukewarm water to keep levels down and improve growing conditions.
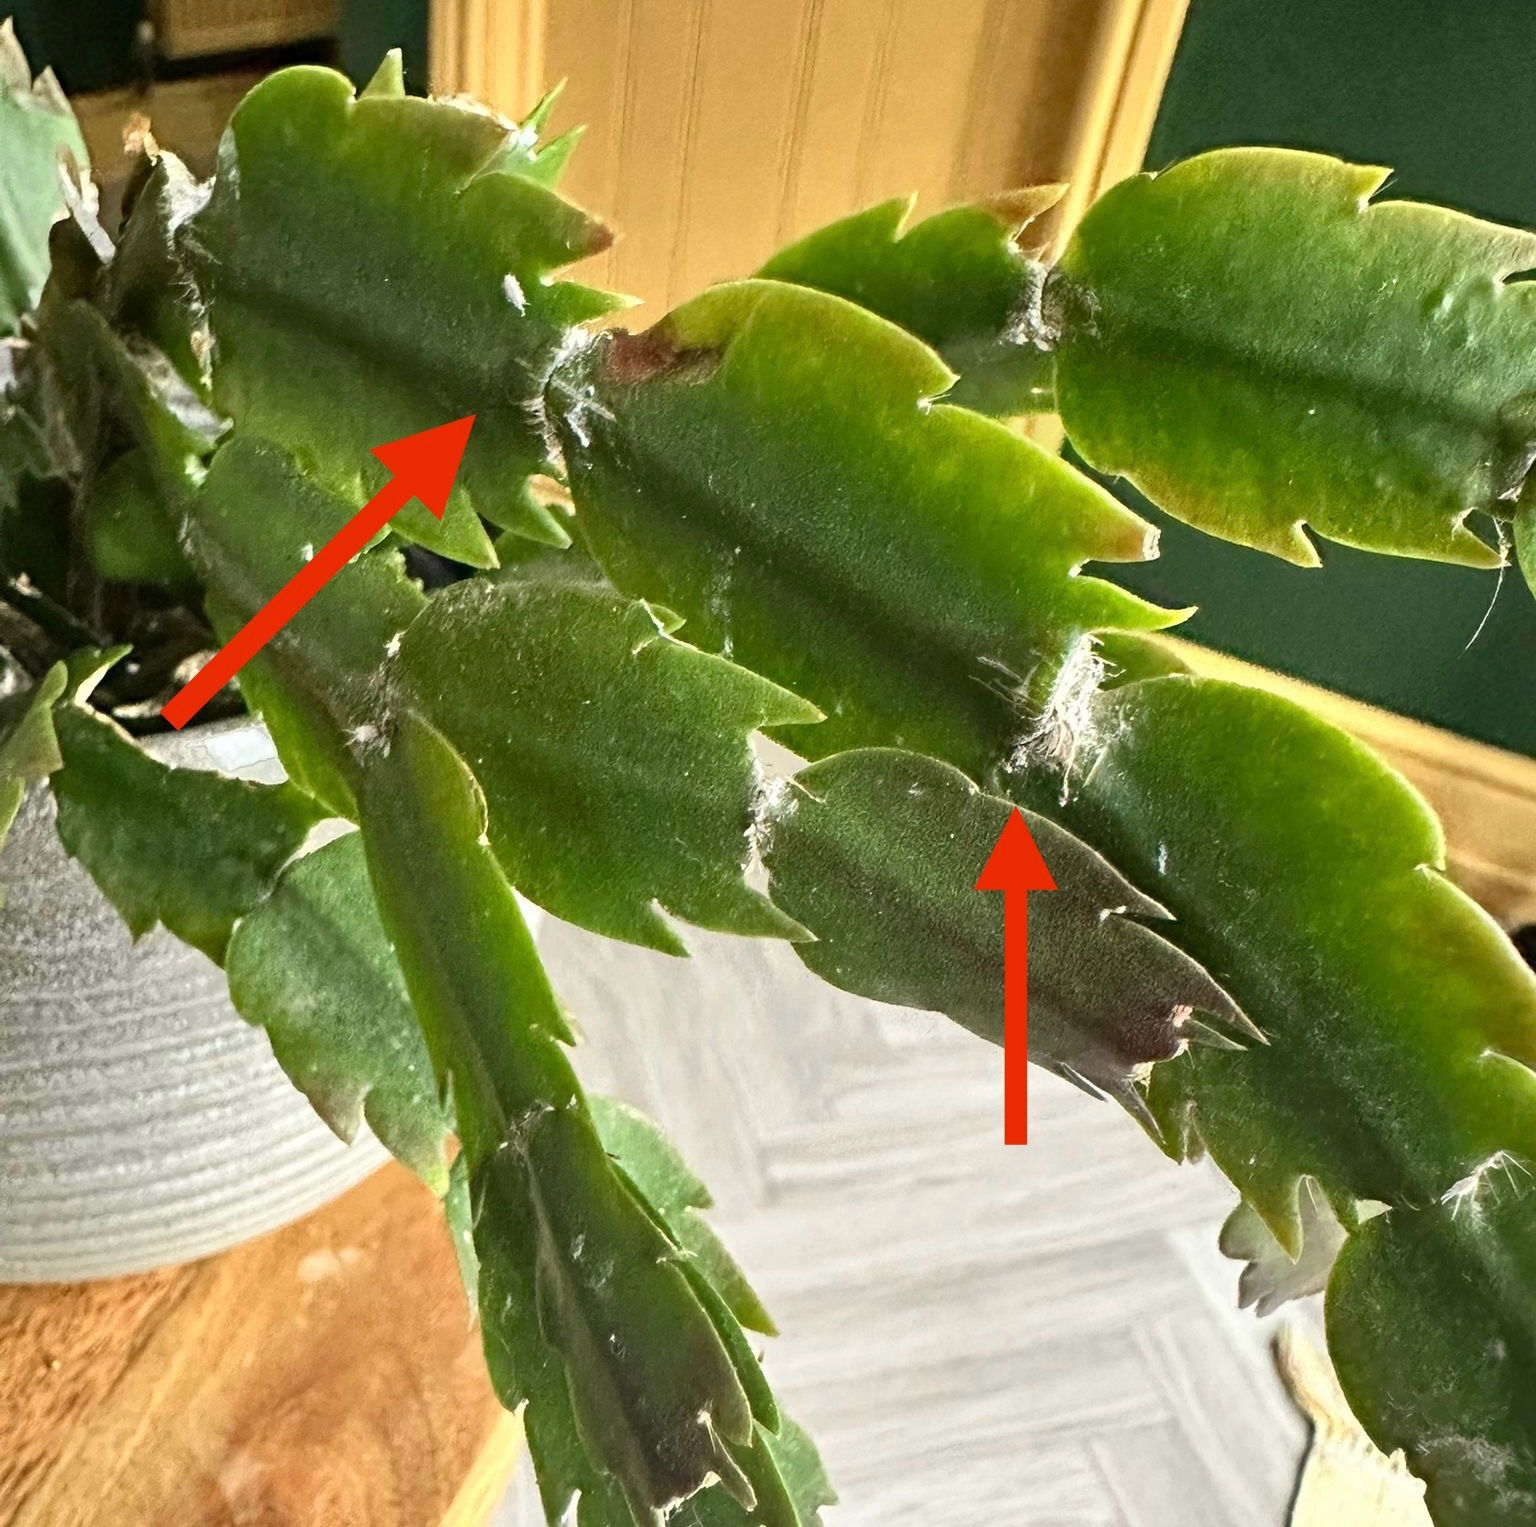
Pests could also be an issue, especially Mealybugs. Especially before purchasing, have a quick scan over the plant's foliage and flowers, inspecting its cubbyholes for white cotton-like fluffs (see image above). If your specimen has fallen foul of pests, click on the link above to learn more about treatment, as well as observing what they look like! (The plant photoed here is a Thanksgiving Cactus, but the symptoms of Mealybugs are identical).
Never allow temperatures to dip below 10ºC (50ºF) as irreversible damage will occur in the likes of yellow foliage and weakened health. When this happens, remove the severely affected areas and immediately improve growing conditions - never cut through softened yellow growth, and only around brown, crispy squares. As rehabilitation can take several months because of its slow-growing nature, be sure to provide a stable location with better growing conditions to speed this process.
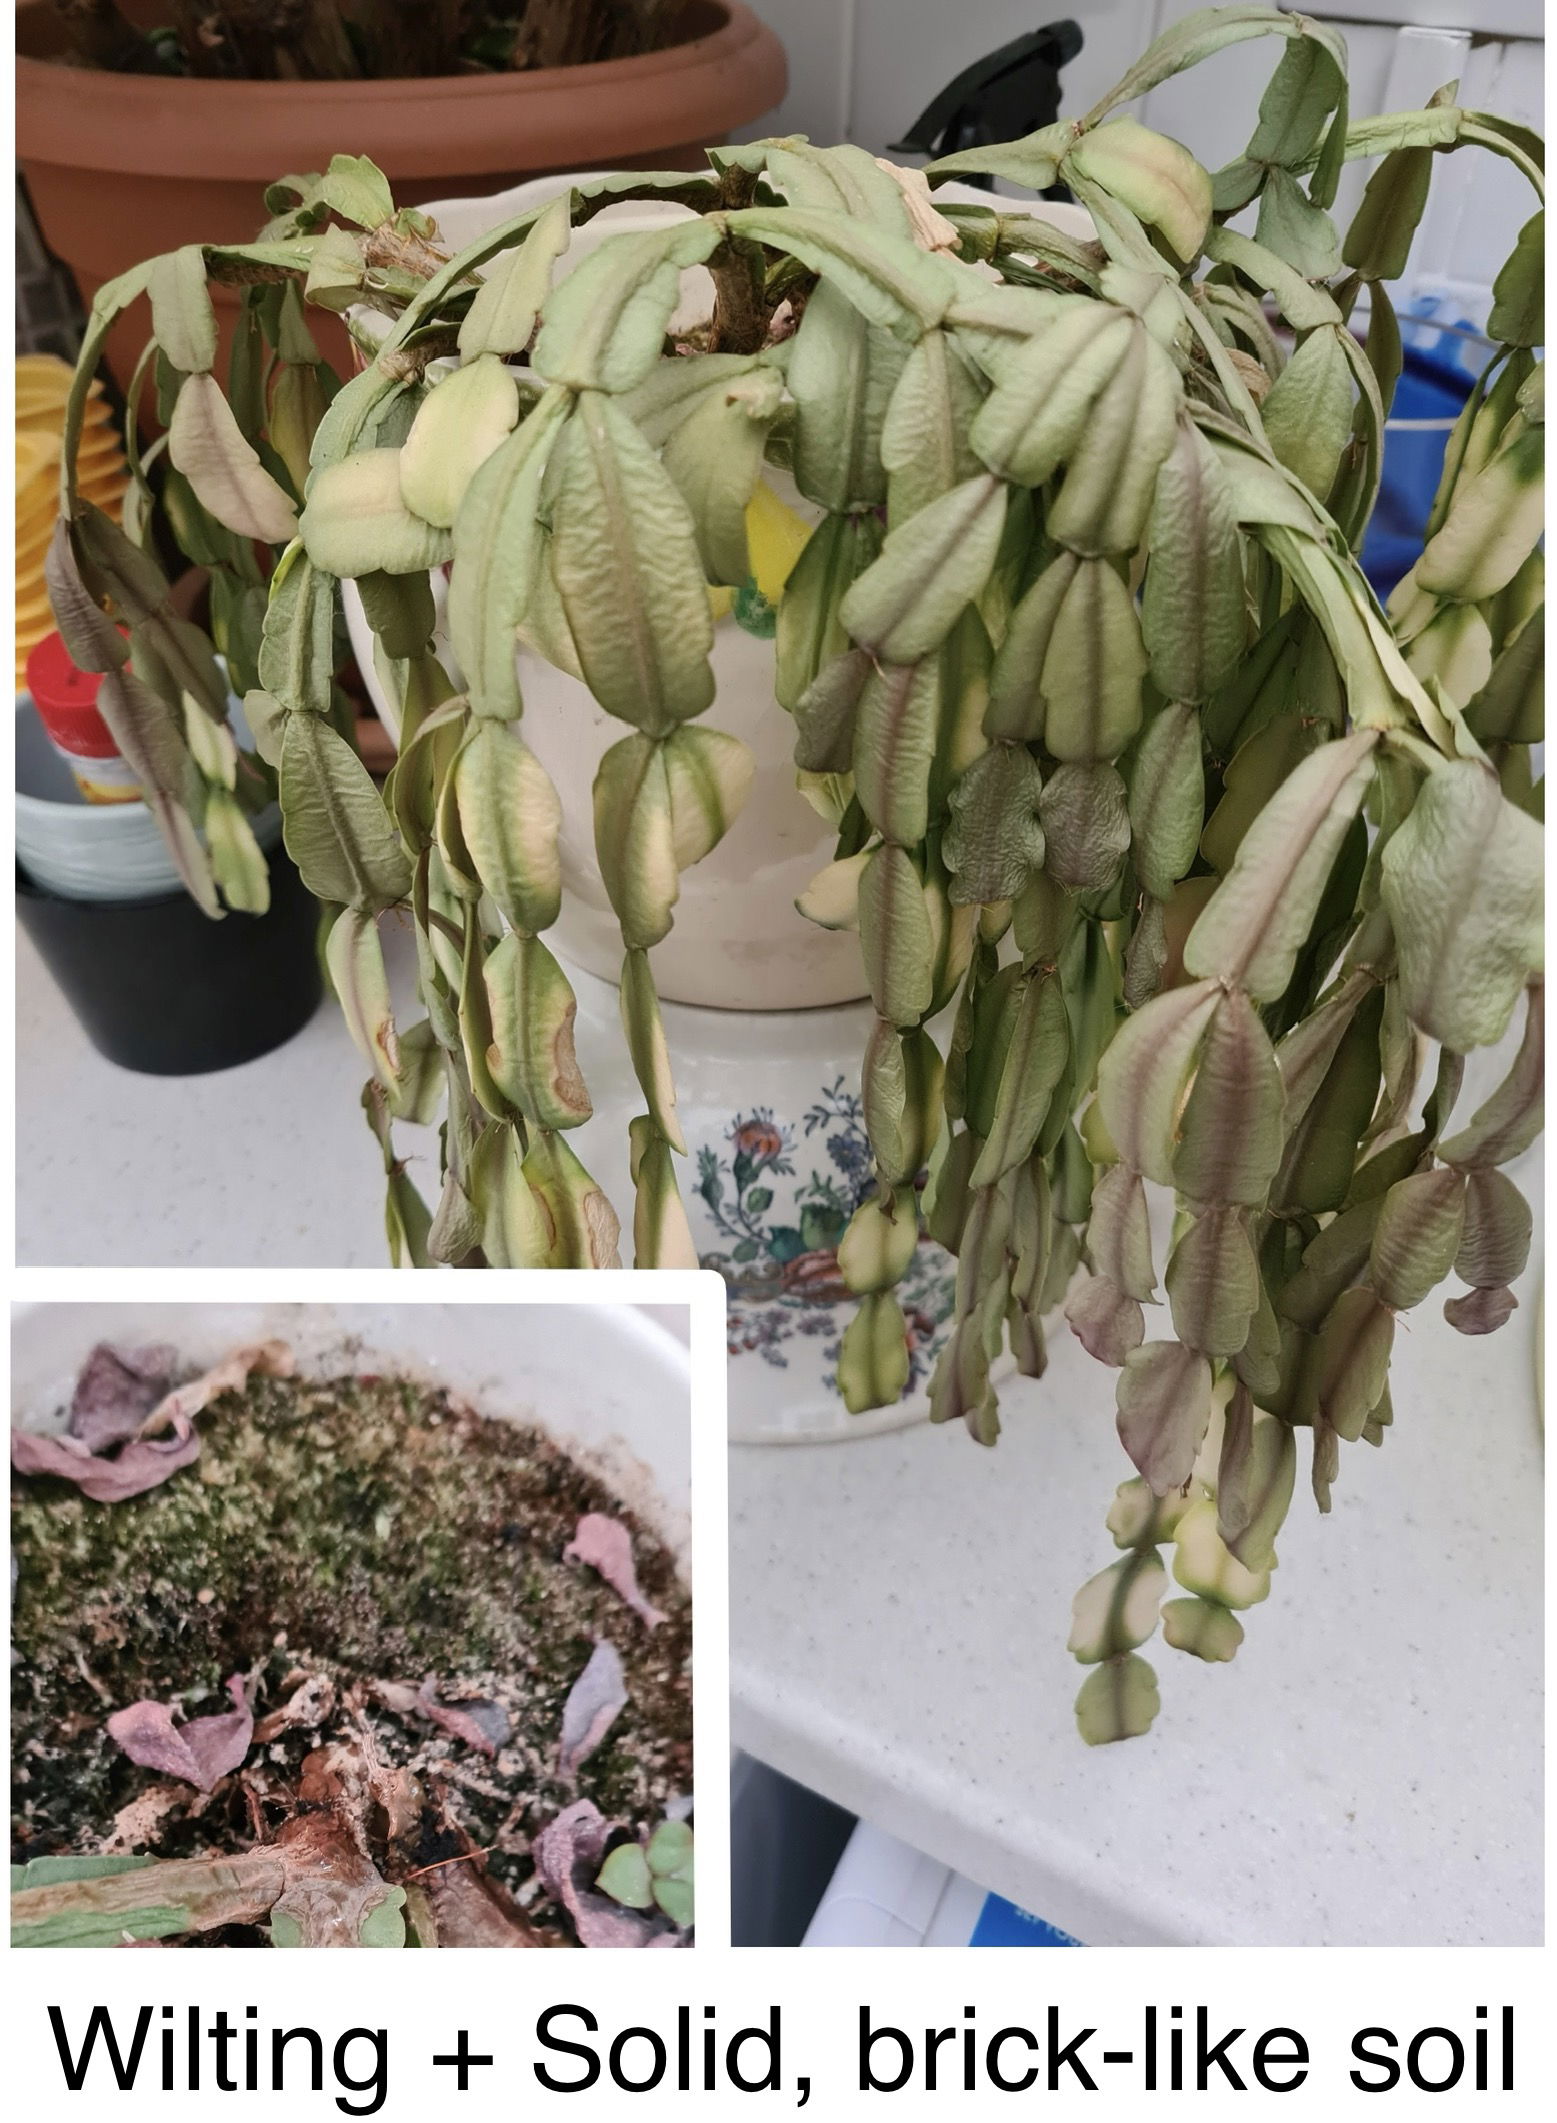 If your tropical cactus leaves have wrinkled, it may caused by hydrophobic soil. This phenomenon happens when the soil hasn't been changed in a few years (so it naturally compacts) or when the plant is severely dehydrated. We recommend vertically puncturing the soil to its base using a metal kebab skewer, before repotting it into the next sized pot with Cactus & Succulent potting mix.
Mould or mushrooms developing on the soil means two things - too little light and over-watering. Despite the harmlessness, it'll prove unsightly to most gardeners and is therefore removed once known. To remove, replace the top two inches of the soil for a fresh batch of 'Cactus & Succulent' compost. Either increase the amount of light received (no direct sunlight for the first few weeks to prevent environmental shock) or decrease the frequency of waters slightly. If the mould is accompanied by yellowing lower leaves, you may also have a case of root rot.
Dried aerial roots shouldn't cause concern as this is a natural part of maturity. In some cases, if there is an excess of dried roots or leaf-tips, dehydration or low humidity may be to blame. Revisit Section 1 to learn more about watering and humidity requirements.
Origins
Schlumbergera is an epiphytic genus consisting of six to nine species, endemic to the coastal regions of southeast Brazil. Many of the species are, in fact, cultivars, and therefore don't occur naturally in the wild. Although the genus' name was first penned back in 1858 by Charles Lémaire, to honour Frenchman Frédéric Schlumberger, cultivation and taxonomy can be dated long before this. The S. truncata (then called Epiphyllum truncatum) was first documented in 1818 and the S. russelliana in 1839. An Englishman, named W. Buckley, purposely hybridised the two species to create the 'S. × buckleyi' (the well-known Easter Cactus). Higher classifications (tribes) have caused significant confusion over the last few centuries, with many of the species jumping between genera. Most species and cultivars within Schlumbergera belonged to now-defunct genera (Epiphyllanthus and Zygocactus) or were originally part of another genus (Hatiora, Cereus and Epiphyllum), for example.
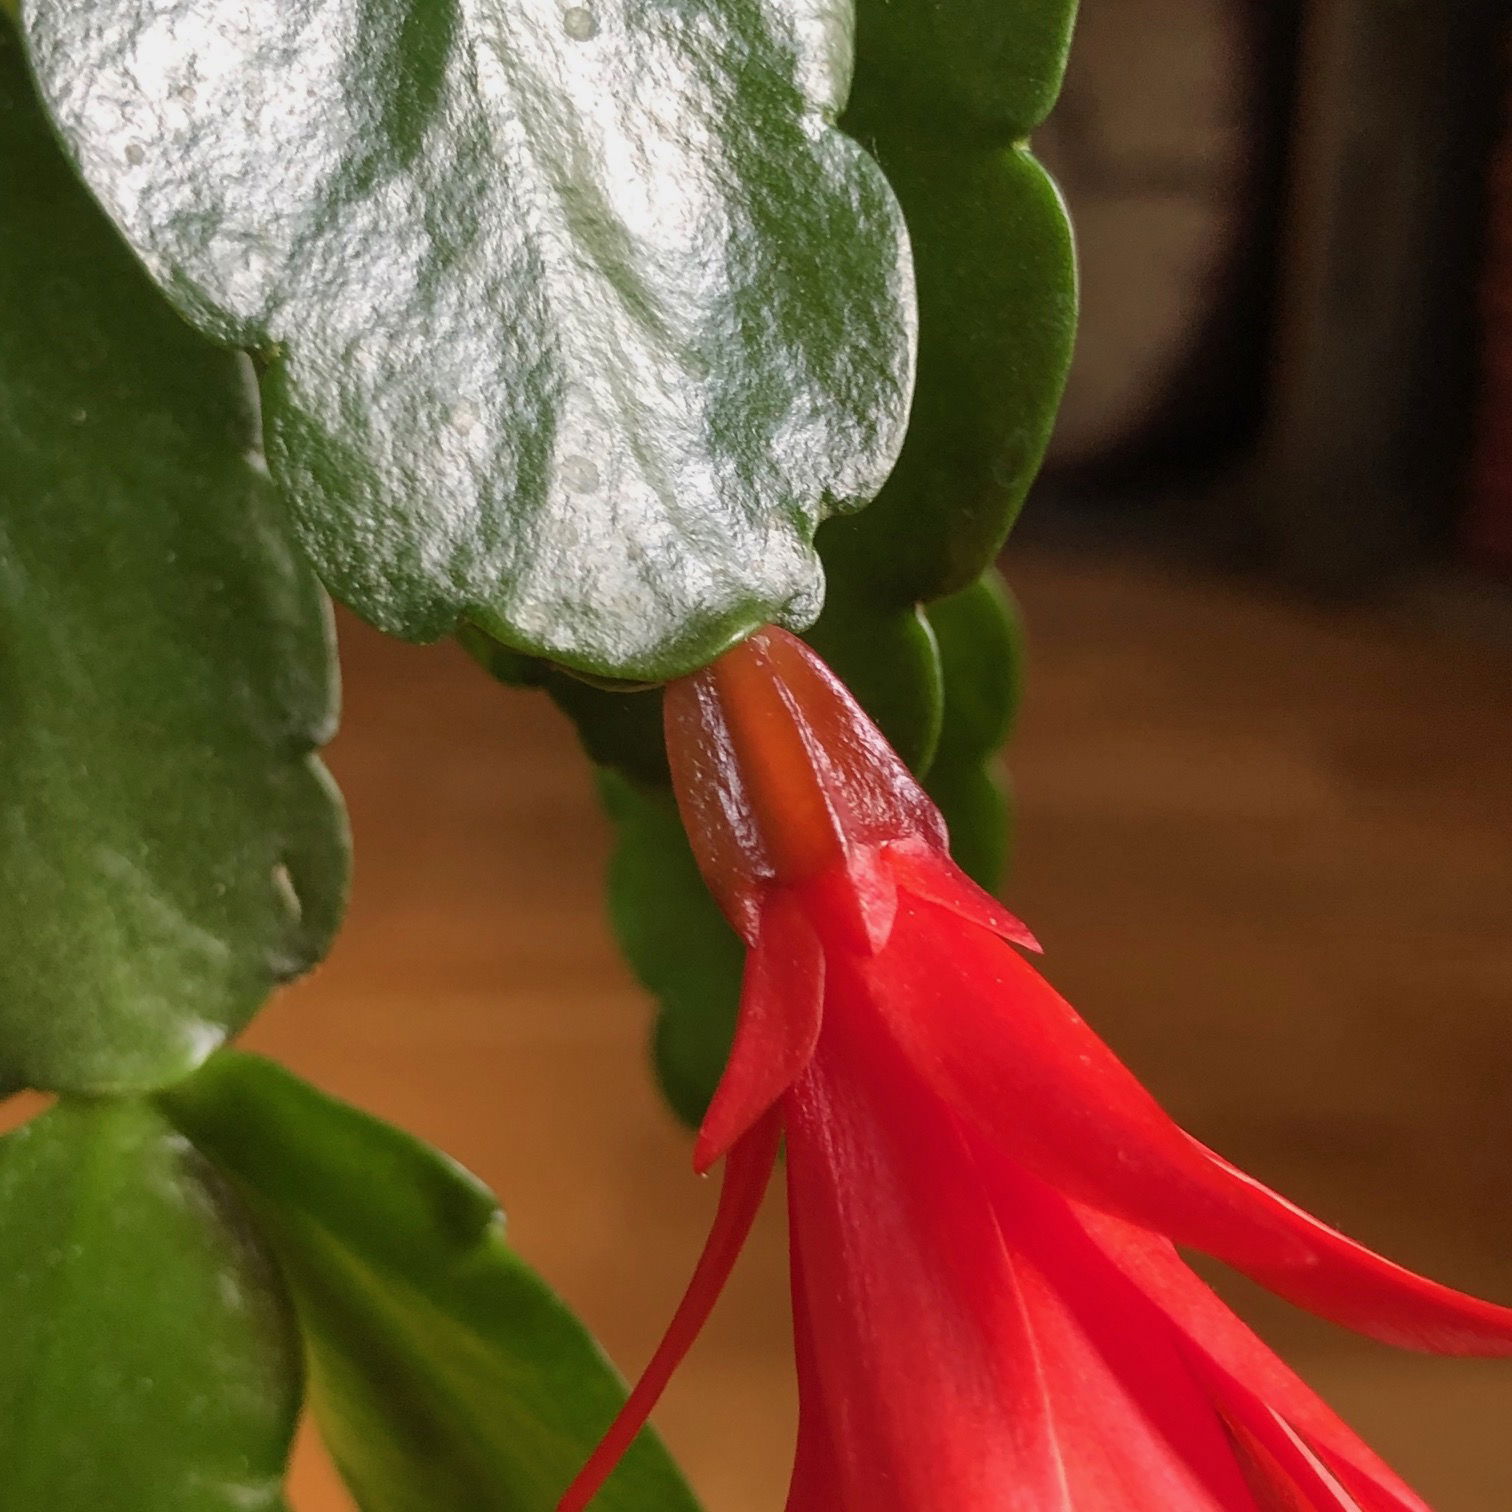
Schlumbergera can be divided into two main divisions by their leaf and flower structures; the Buckleyi group (Easter Cacti) and the Truncata Group (Christmas and Thanksgiving Cacti). The Buckleyi division sport blunted edges to the leaf segments, with actinomorphic flowers that are almost symmetrical, The latter has serrated leaf edges with the flowers developing in a zygomorphic manner.
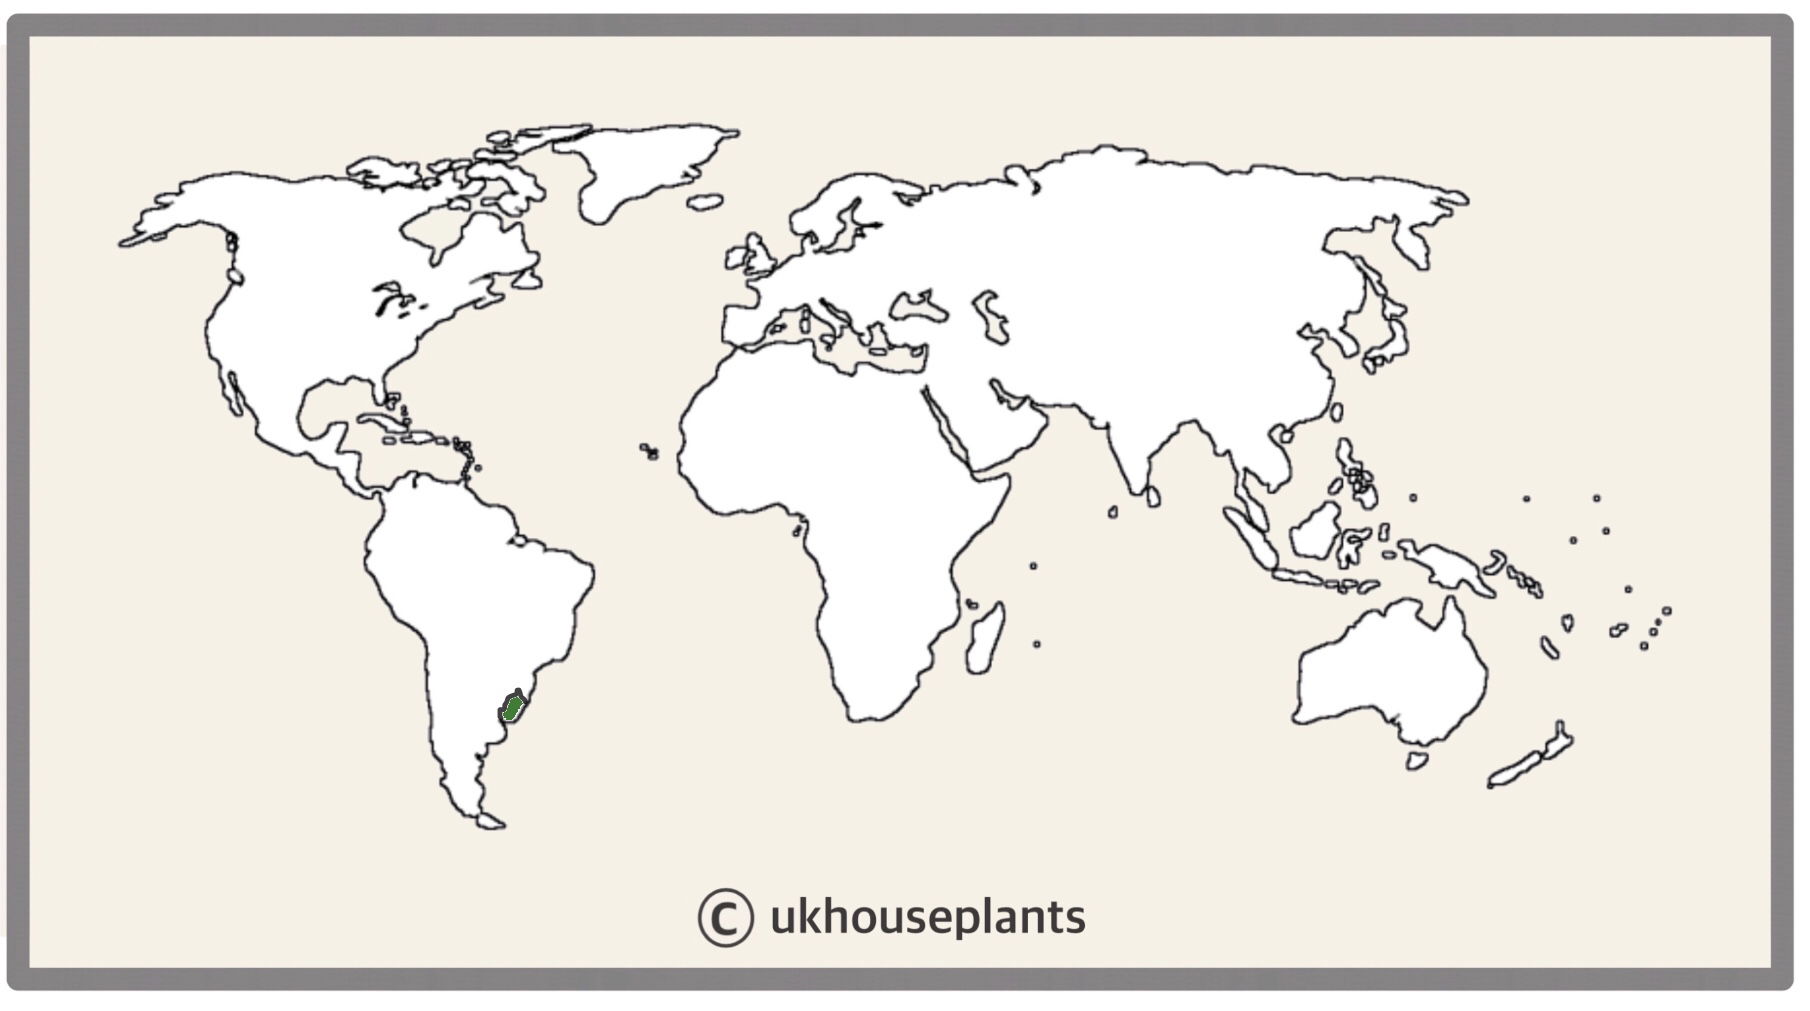 The Distribution of Schlumbergera gaertneri.
Temperature
10° - 26°C (50° - 78°F)
H1b (Hardiness Zone 12) - Can be grown outdoors during the summer in a sheltered location with temperatures above 9℃ (48℉), but is fine to remain indoors, too. If you decide to bring this plant outdoors, don't allow it to endure any direct sunlight as it may result in sun-scorch and dehydration. Regularly keep an eye out for pests, especially when re-introducing it back indoors.
Spread
Up to 0.6m in height and width. Each leaf segment can reach up to 7cm in length with maturity being reached in 5 years.
Pruning & Maintenance
Remove yellow or dying leaves, and plant debris to encourage better-growing conditions. While pruning, always use clean utensils or shears to reduce the chance of bacterial and fungal diseases. Never cut through yellowed tissue as this may cause further damage in the likes of diseases or bacterial infections. Remember to make clean incisions as too-damaged wounds may shock the plant, causing weakened growth and a decline in health.
Be careful not to cut into the actual leaf when removing yellow leaves - wait until it has naturally fallen off to prevent damaging the node.
Propagation
Via Seed or Leaf/Stem Cuttings.
Cuttings can be taken during the spring, during active growth. You can either root them in water or soil, with the latter being the better option. Whenever taking any tropical cacti cuttings, humidity has to be at the forefront of the operation, as they'll immediately begin to lose stored moisture over-time. Providing a moist environment will help slow the rate of transpiration (water loss in the leaf), along with aiding the process of root development.
Water Propagation
- Choose which leaves to use. The ideal candidates are those that show no sign of damage, pests or diseases, and have small wires roots already-attached. Cuttings that don't sport any roots will still root, but it may take a little longer for its propagation. Each cutting must have two nodes - both for rooting, and for one that remains above the soil or water line.
- Delicately cut the end two leaves off from the vine, just above the second node (intersecting the third leaf that is still attached to the main plant). It's important not to cut directly across the nodes as this could prevent the development of new growth.
- Place the cuttings onto a moist paper towel, away from direct light or an operating radiator. Never submerge the newly-cut leaves immediately into water, as it'll allow bacteria to engulf the wounds and help the spread of disease. Allowing the leaf's cut to callus over (dry-out) will kick start the rotting process, along with keeping out unwanted pathogens.
- Place the bottom half into lukewarm water, keeping at least one of the nodes in fresh air. Situate the cuttings into a bright, indirect location that offers temperatures above 18°C (64°F).
- Replace the water every few days and remove any rotting matter. Maintaining a hygienic setting is mandatory for water-propagation due to the high chance of harbouring bacteria.
- Roots will begin to develop after a few weeks. In some cases, it'll take longer when the temperature or lighting isn't optimal. As long as you maintain good growing conditions, success should be achieved!
- Once an inch of roots has developed, it's now time to pot them up! Choosing a free-draining potting mix, for example, 'Cactus & Succulent' compost, provides a nice balance of moisture-retention and drainage. Of course, most soils are acceptable (Houseplant or Multi-purpose compost), but try to add some extra ingredients like grit, sand and perlite to help loosen it. If you've got any shallow and wide pots, for example, a Bonsai pot, this is the time to use it. Propagating tropical cactus cuttings won't require deep soil, so try and avoid pots that are too big. Terracotta and plastic pots are both acceptable in this instance.
- Do NOT pat down the surrounding soil to aid support. The ideal soil conditions need to be fluffy and oxygenated, so compacting the soil will result in the suffocation of roots that'll lead to root rot. If support is needed, use a small stick or cane, but be sure NOT to compact it.
- Aftercare - Maintain evenly moist soil, allowing the top third to dry out in between waters. The ideal location would be in a warm, humid room - do not allow the cuttings to endure dry air or direct sunlight. After another month of being in the soil, treat it like a normal houseplant.
Soil Propagation (Recommended)
- Choose which leaves to use. The ideal candidates are those that show no sign of damage, pests or diseases, and have small wires roots already-attached. Cuttings that don't sport any roots will still root, but it may take a little longer for its propagation. Each cutting must have two nodes - both for rooting and for one that remains above the soil or water line.
- Delicately cut the end two leaves off from the vine, just above the second node (intersecting the third leaf that is still attached to the main plant). It's important not to cut directly across the nodes as this could prevent the development of new growth.
- Prepare the pot and soil. Choosing a free-draining potting mix, for example, 'Cactus & Succulent' compost, provides a nice balance of moisture-retention and drainage. If you've got any shallow and wide pots, for example, a Bonsai pot, this is the time to use it. Propagating tropical cactus cuttings won't require deep soil, so try and avoid pots that are too big. Terracotta and plastic pots are both acceptable in this instance.
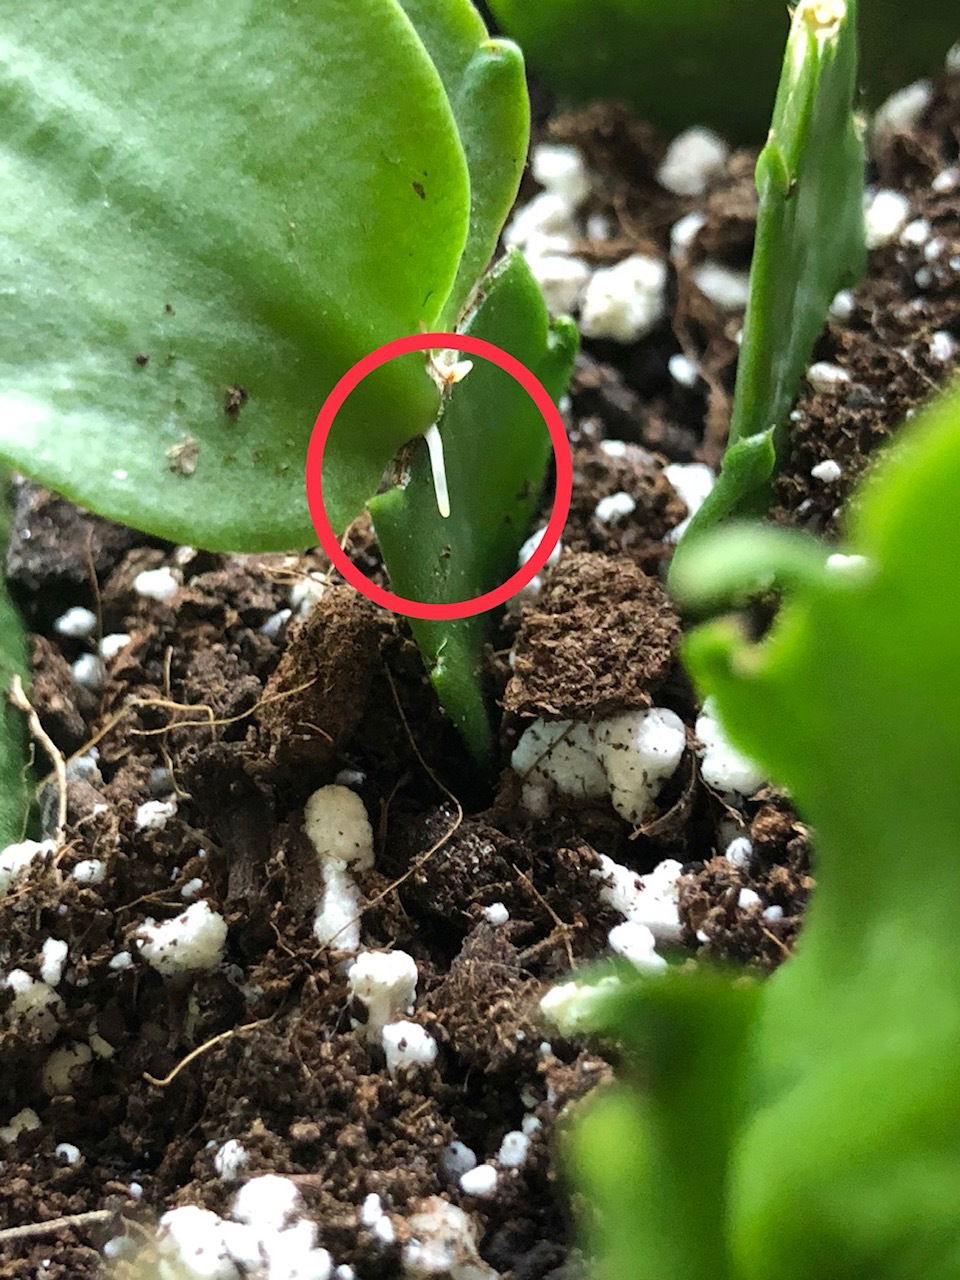
- Place the cuttings ON TOP of the moist soil. Allowing both the plant and it's wound to callous over (dry up) will kick-start the rooting process, along with the prevention of rot. Keep the cuttings on top of moist soil for a week, misting the soil and foliage on opposite days. Have a look at the image below to see what the new roots look like!
- Provide a bright, indirect location with temperatures above 18°C (64°C) throughout this period.
- Once the roots begin to develop along the nodes, place it into the soil, submerging the bottom half. Make sure you don't set the cutting too far into the soil, as this may lead to blackleg (the rotting of its base).
- Do NOT pat down the surrounding soil to aid support. Tap the pot's side to consolidate (not compact) the potting medium. The ideal soil conditions need to be fluffy and oxygenated, so compacting the soil will result in the suffocation of roots that'll lead to root rot. If support is needed, use a small stick or cane, but be sure NOT to compact it.
- Aftercare - Maintain evenly moist soil, allowing the top third to dry out in between waters. The ideal location would be in a warm, humid room. Do not allow the cuttings to endure dry air or direct sunlight. After another month or two of being in the soil, treat it like a normal houseplant.
Flowers
Schlumbergera can be divided into two main divisions by their leaf and flower structures - Buckleyi (Easter and Christmas Cacti) & Truncata (Thanksgiving Cacti). The former division sport blunted edges to the leaf segments, with actinomorphic flowers that are almost symmetrical. The latter, however, has serrated leaf edges that develop in zygomorphic blooms. The latter will 'lean' over, whereas the Buckleyi group radiates with an equal angle of petals. Interestingly, the buds will only develop on the leaf terminals that face towards the light, meaning that brighter locations will result in more blooms.
 If pollination is successful, you'll see small there-sided seedpods developing where the flowers once were; collect the seeds once the pod becomes brown and crispy.
Repotting
Repot every three or four years in spring, using 'Cactus & Succulent' compost and a larger pot. This is an excellent time to check the roots' condition, as well as division. As all tropical cacti are prone to root rot, have a look around the bottom half of the root ball for any brown or broken down roots. If this is the case, remove the affected areas with clean utensils and ease off with the irritations. Click on this link to learn about how to perform the perfect transplant.
Book a 1-to-1 video call with Joe Bagley if you'd like a personal guide to repotting your houseplant. This will include recommending the right branded-compost and pot size, followed by a live video call whilst you transplant the specimen for step-by-step guidance and answer any further questions!
Pests & Diseases
Keep an eye out for mealybugs, spider mites, scale & vine weevils. Typical diseases associated with Easter Cacti are root or leaf rot, leaf-spot disease & powdery mildew. For more information on how to address any of these issues, click on this link - Identifying Common Houseplant Diseases.
Toxicity
Easter Cacti are classified as non-poisonous, however, if large quantities of the plant are eaten, vomiting, nausea and a loss of appetite may occur.
Retail Locations
Blue Diamond, B&Q, Dobbies & Online Stores. Specimens are commonly sold from late March until early May for Easter Cacti.
Book a 1-to-1 Call with THE HOUSEPLANT DOCTOR™
If you need further advice with your houseplants, book an advice call with ukhouseplants' friendly and expert writer today! This can be done via a video or audio call on most apps, including Facebook, FaceTime & Skype. A ten-minute call costs £6.59 (US$8), or £15.95 for thirty minutes. You can ask multiple questions, including queries on plants, pests, terrariums, repotting advice and anything in between. Please consider supporting this service to keep ukhouseplants thriving!
Comments