
Dracaena fragrans 'Massangeana'
Contents
- Top Tips
- Location, Water, Humidity & Fertilisation
- Common Issues
- Origins, Temperature, Propagation, Repotting & Toxicity.
Need the answer to a specific plant query? Book a 1-to-1 video call with THE HOUSEPLANT DOCTOR™, the website's friendly author, to overcome and address your niggling problem! Available on iMessage, WhatsApp, Facebook Messenger & more.
Top Tips & Info
- Care Difficulty - Moderate
- Present a bright, indirect location, avoiding prolonged exposure to the sun and excessively dark places.
- Corn Plants prefer to be on the drier side to life, so it's crucial to allow half of the soil to dry out in between irrigations. Over-watering & root rot are persistent issues during the autumn & winter.
- Fertilise using a 'Houseplant' labelled feed every four waters in the spring and summer, reducing this to every six in the colder months.
- Repot every three years with a 'Houseplant' labelled compost & the next sized pot. Introduce some grit or broken terracotta at the base to promote better drainage & texture for the roots.
- Mealybugs & Spider Mites are common pests will all types of Dracaena; check in the cubbyholes of the stems & beneath the leaf arches for possible outbreaks.
- Why not buy our top-selling Dracaena Soil Mix here? We have sold over 800 batches in the last year alone, so click here to find out more...
Location & Light - 🔸🔸
Perfecting the amount of light a Corn Plant receives is crucial for a long-lasting specimen. During the spring and summer, be sure to provide a brightly lit spot away from any direct light. Excessive exposure during this time will negatively affect the plant in the likes of sun-scorch and dehydration. Once the autumn kicks in, be sure to include an hour or two of direct light per day to get it through the dormancy period.
Water - 🔸🔸
During the spring and summer, allow the half of the soil to dry out in between irrigations, reducing this further in the colder months. Those situated in darker locations must be watered far less than those located in brighter ones for the prevention of root rot. Under-watering symptoms include stunted growth, dry spots appearing on the leaves and yellowing older leaves; these issues are either down to an over-crowded pot, too little light, or forgetfulness. Over-watering symptoms include yellowing lower leaves, brown mushy patches developing in the stems and mouldy soil. For cases of root rot, take the plant out of its pot and investigate the health below the soil line. If there are visible signs of decay, click on this link to learn about the recommended steps to eradicate this problem. It's always better to under-water Corn Plants rather than over-do it, purely based on their impressive ability to endure periods of droughts.
Humidity - 🔸🔸
Create a humidity tray to provide a moist and stable environment for your plant. If the surrounding saturation is too low or the heat too high, its foliage may start to brown over and curl, especially in direct sunlight. Hose the foliage down from time to time to hydrate the leaves and keep the dust levels down.
Fertilisation - 🔸
Feed every four waters during the growing period and every six in the autumn and winter, using a 'Houseplant' labelled fertiliser. Never apply a 'Ready to Use’ product into the soil without a pre-water first, as it may burn the roots and lead to yellowed leaves.
Common Issues with Dracaena massangeana (Corn Plants)
Yellowing lower leaves are a clear sign of over-watering, usually caused by too little light (see image below). Although Corn Plants can do well in darker locations, the frequency of irrigations must be reduced to counteract the chance of root rot. People don't realise that a plant's root system needs access to oxygen too; when soil is watered, the air will travel upwards and out of the potting mix. A lack of accessible oxygen for the roots will cause them to subsequently breakdown over the oncoming days. Click on this link to learn more about root rot and how to address it.
 Yellow or browned leaves and slowed new growth are common symptoms of root rot. For severe cases where the plant's basal trunk has rotted, take stem cuttings to restart the root system. Scroll down to 'Propagation' to learn more!
When arranged in a 'trio' of different sizes, the death of the smaller trunk is a common issue among indoor gardeners. The obvious cause could be over-watering. If the soil has been rather heavy for a long time, consider relocating it to a drier, brighter environment with an inspection for root rot. In some cases, it may be to do with too little light and not enough water. As Dracaena tend to have smaller root systems (similar to the Yucca), their root systems won't penetrate the soil enough, thus leading to dehydration and death. If this has happened to you, be sure to remove the trunk once it fully dies off, as leaving it may cause a spread of disease over time. Fill the hole with a fresh batch of 'Houseplant' compost or gently resurface the soil to improve its appearance. Book a 1-to-1 Call with THE HOUSEPLANT DOCTOR™ if you're stuck with what to do next!
 Although this is a Yucca, the principle of the smaller trunk dying is identical. Scroll up to the previous paragraph to learn more about this phenomenon.
Spider Mites are small, near-transparent critters, that'll slowly extract the chlorophyll from of its leaves. Have a check under the leaves, most notably along the midrib, for small webs and gritty yellow bumps. Click here to read our article about the eradicating Spider Mites, along with some extra tips that you may not find elsewhere!
A further pest to look out for is Whitefly. Although these small airborne critters shouldn't produce too much damage, an infestation must be destroyed quickly to reduce the chance of them spreading. Click on this link to learn more about addressing these issues.
Too low humidity can cause browning tips with yellow halos on juvenile leaves. Although this won't kill your specimen, you may want to increase the local moisture to prevent the new growth from adopting these symptoms. Mist or rinse the foliage from time to time and create a humidity tray while the heaters are active to create a stable environment. The browning of leaf-tips on older leaves is wholly natural and is the product of extensive photosynthesis during its life.
Yellowing leaf-tips are the product of cold water or too much fluoride in the soil. This issue is caused by using tap water which hasn’t sat for 24hrs to alleviate the chemicals via evaporation. We’d recommend switching it for collected rainwater or fresh bottled water to improve its health, along with the reduction of its fluoride-count. The older leaves will always bear the scars of the past, but the new foliage should be as good as new within the next month.
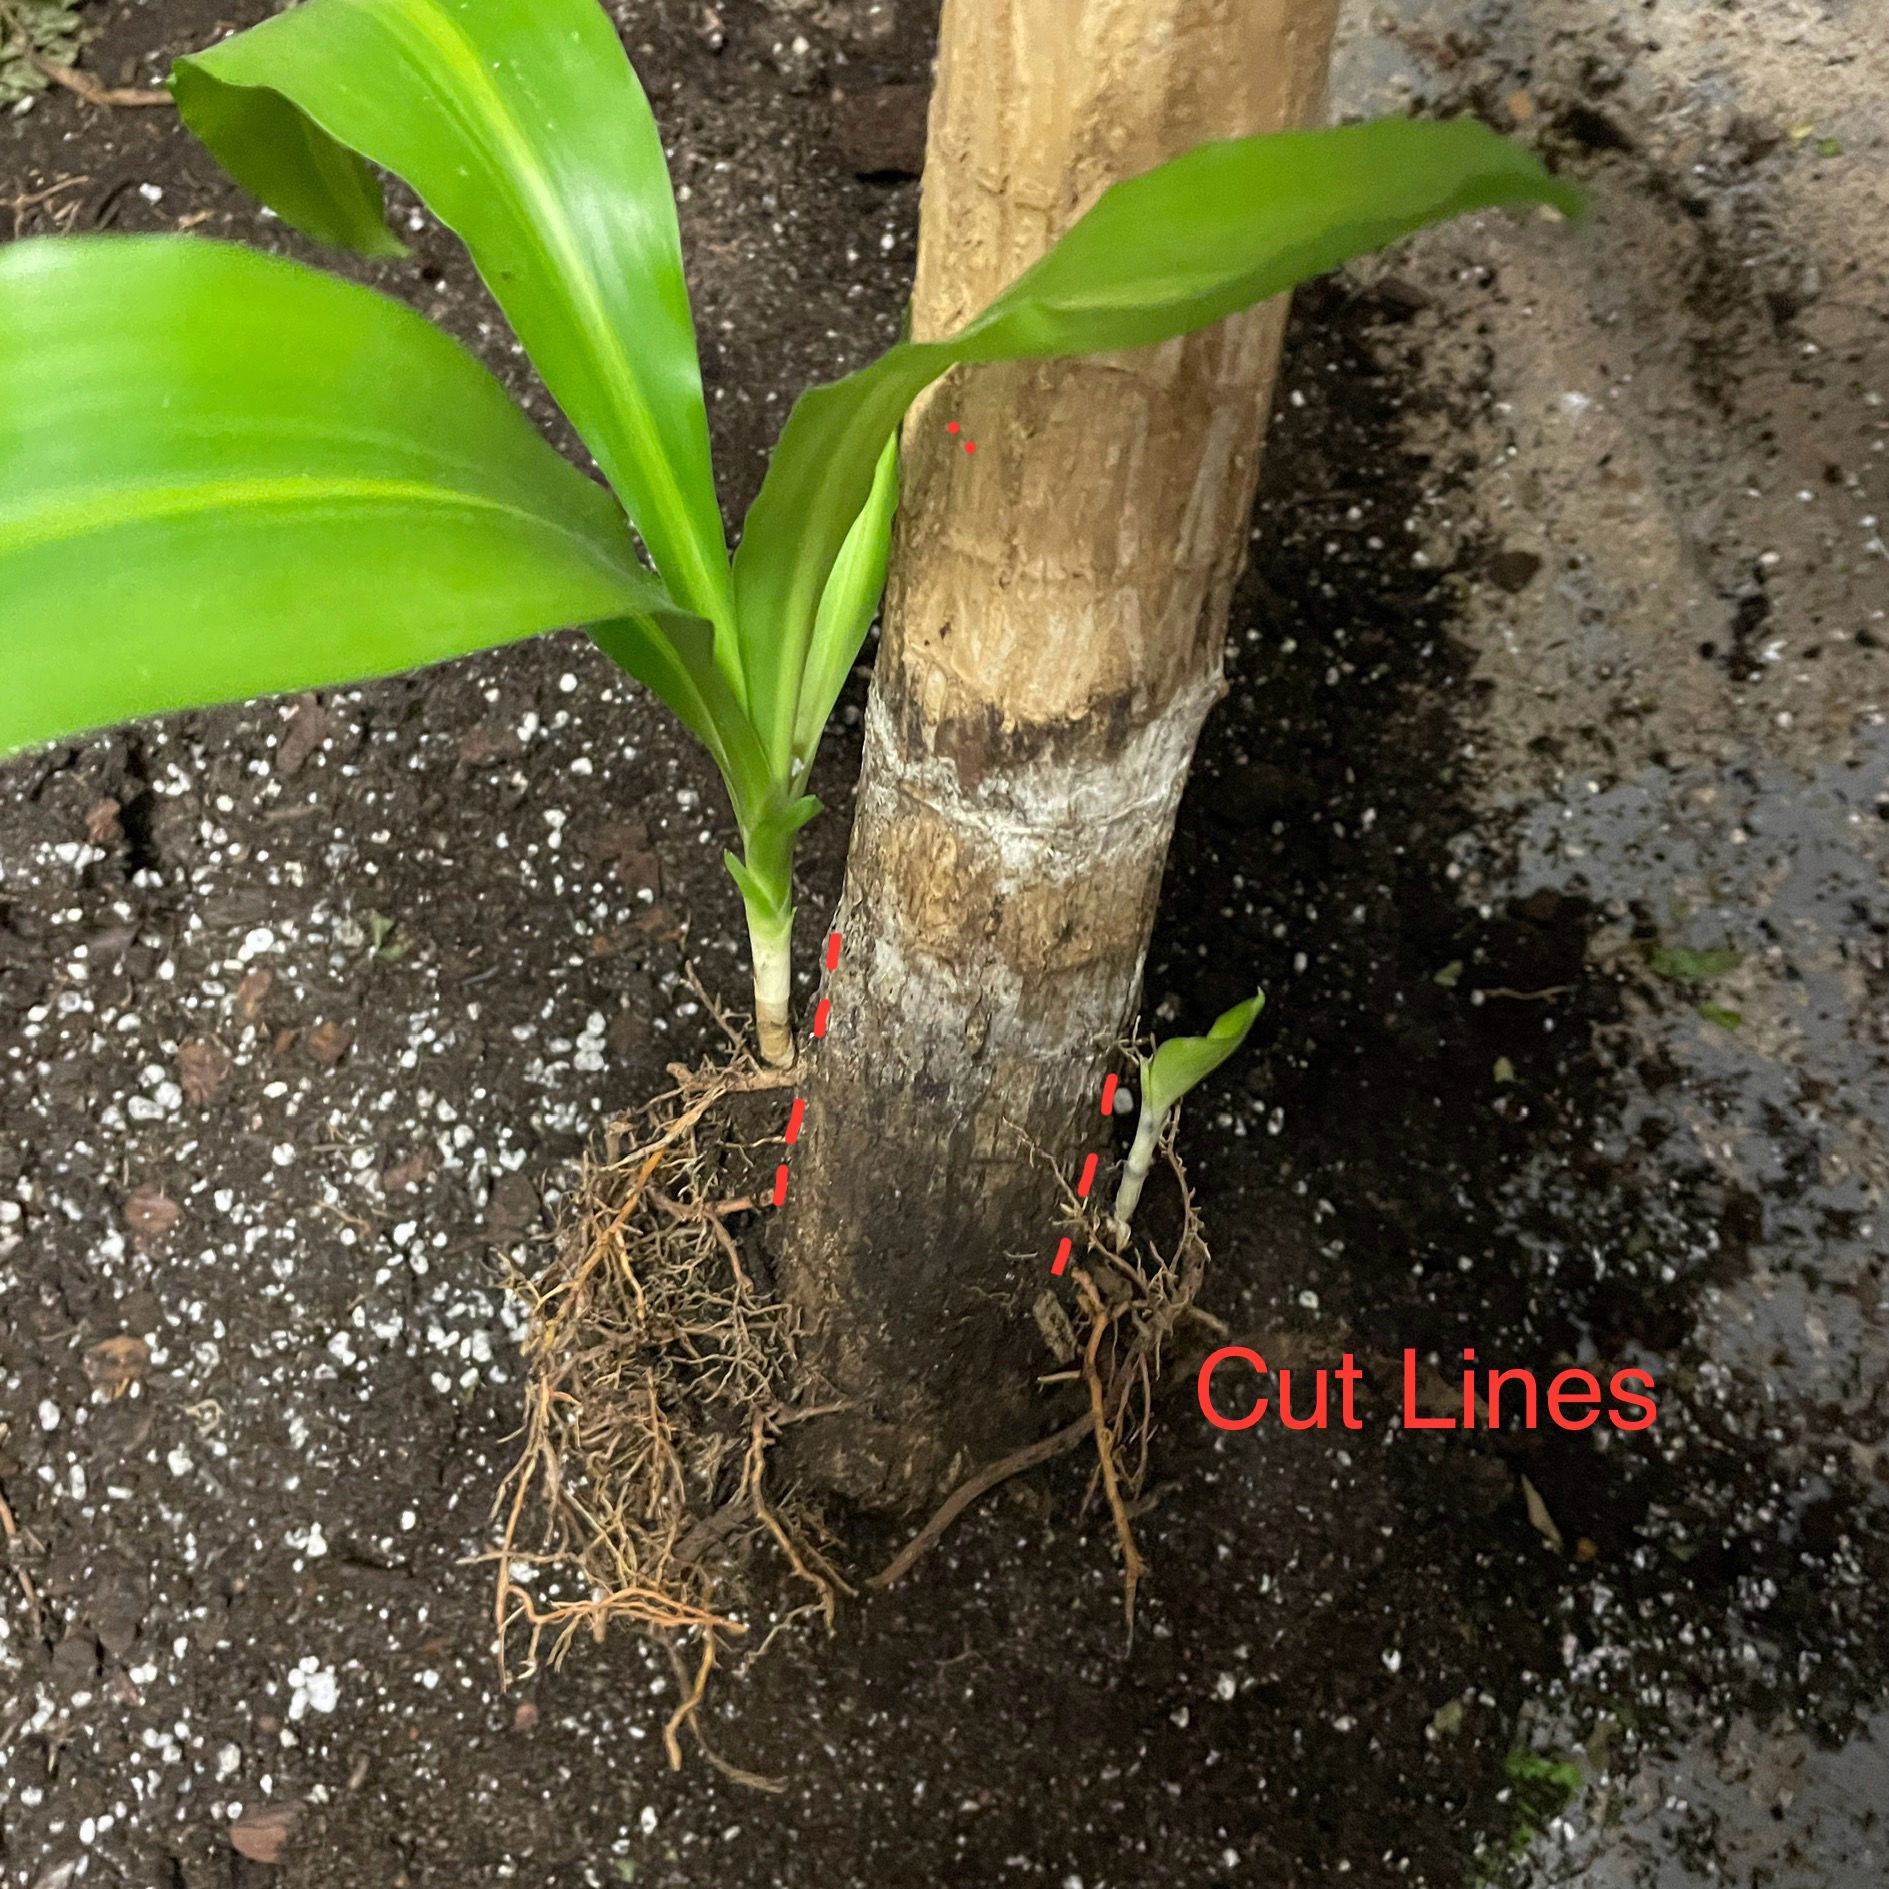 If your Cane Plant has began producing offshoots at its base, you can either leave them (to make your plant more bushier) or propagate them by removing them from the mother plant. Follow our Stem Cuttings tips via 'Propagation' to learn more. (Scroll down).
Small, brown spots are typical traits of under-watering. Only allow half of the soil to dry out in summer, and liberally in winter - commonly caused by positions that are too bright or hot. If, however, the spots are deeper with yellow halos, it could be leaf-spot disease - often accompanied by a dark location and yellowing lower leaves. This disease is commonly caused by over-watering and could even kill the specimen over time. Click on this link to learn about how to address these issues.
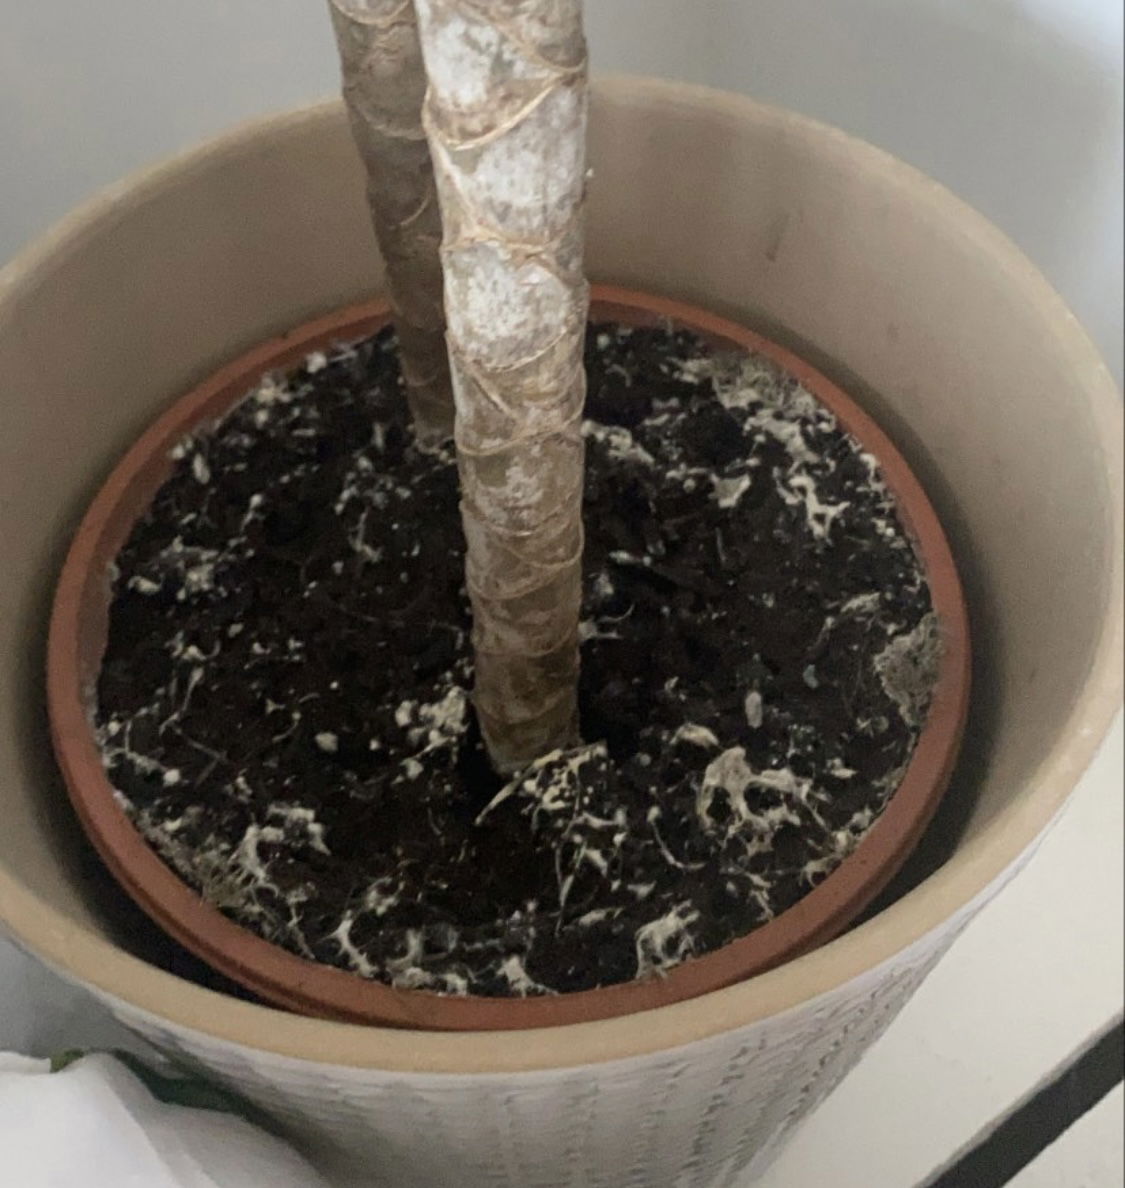 Although it won't hurt your Corn Plant, mould growing on the soil indicates you're watering too often. Replace the top two inches of soil with a fresh batch of 'Houseplant' labelled potting mix and remember allow it to slightly dry out in between irrigations.
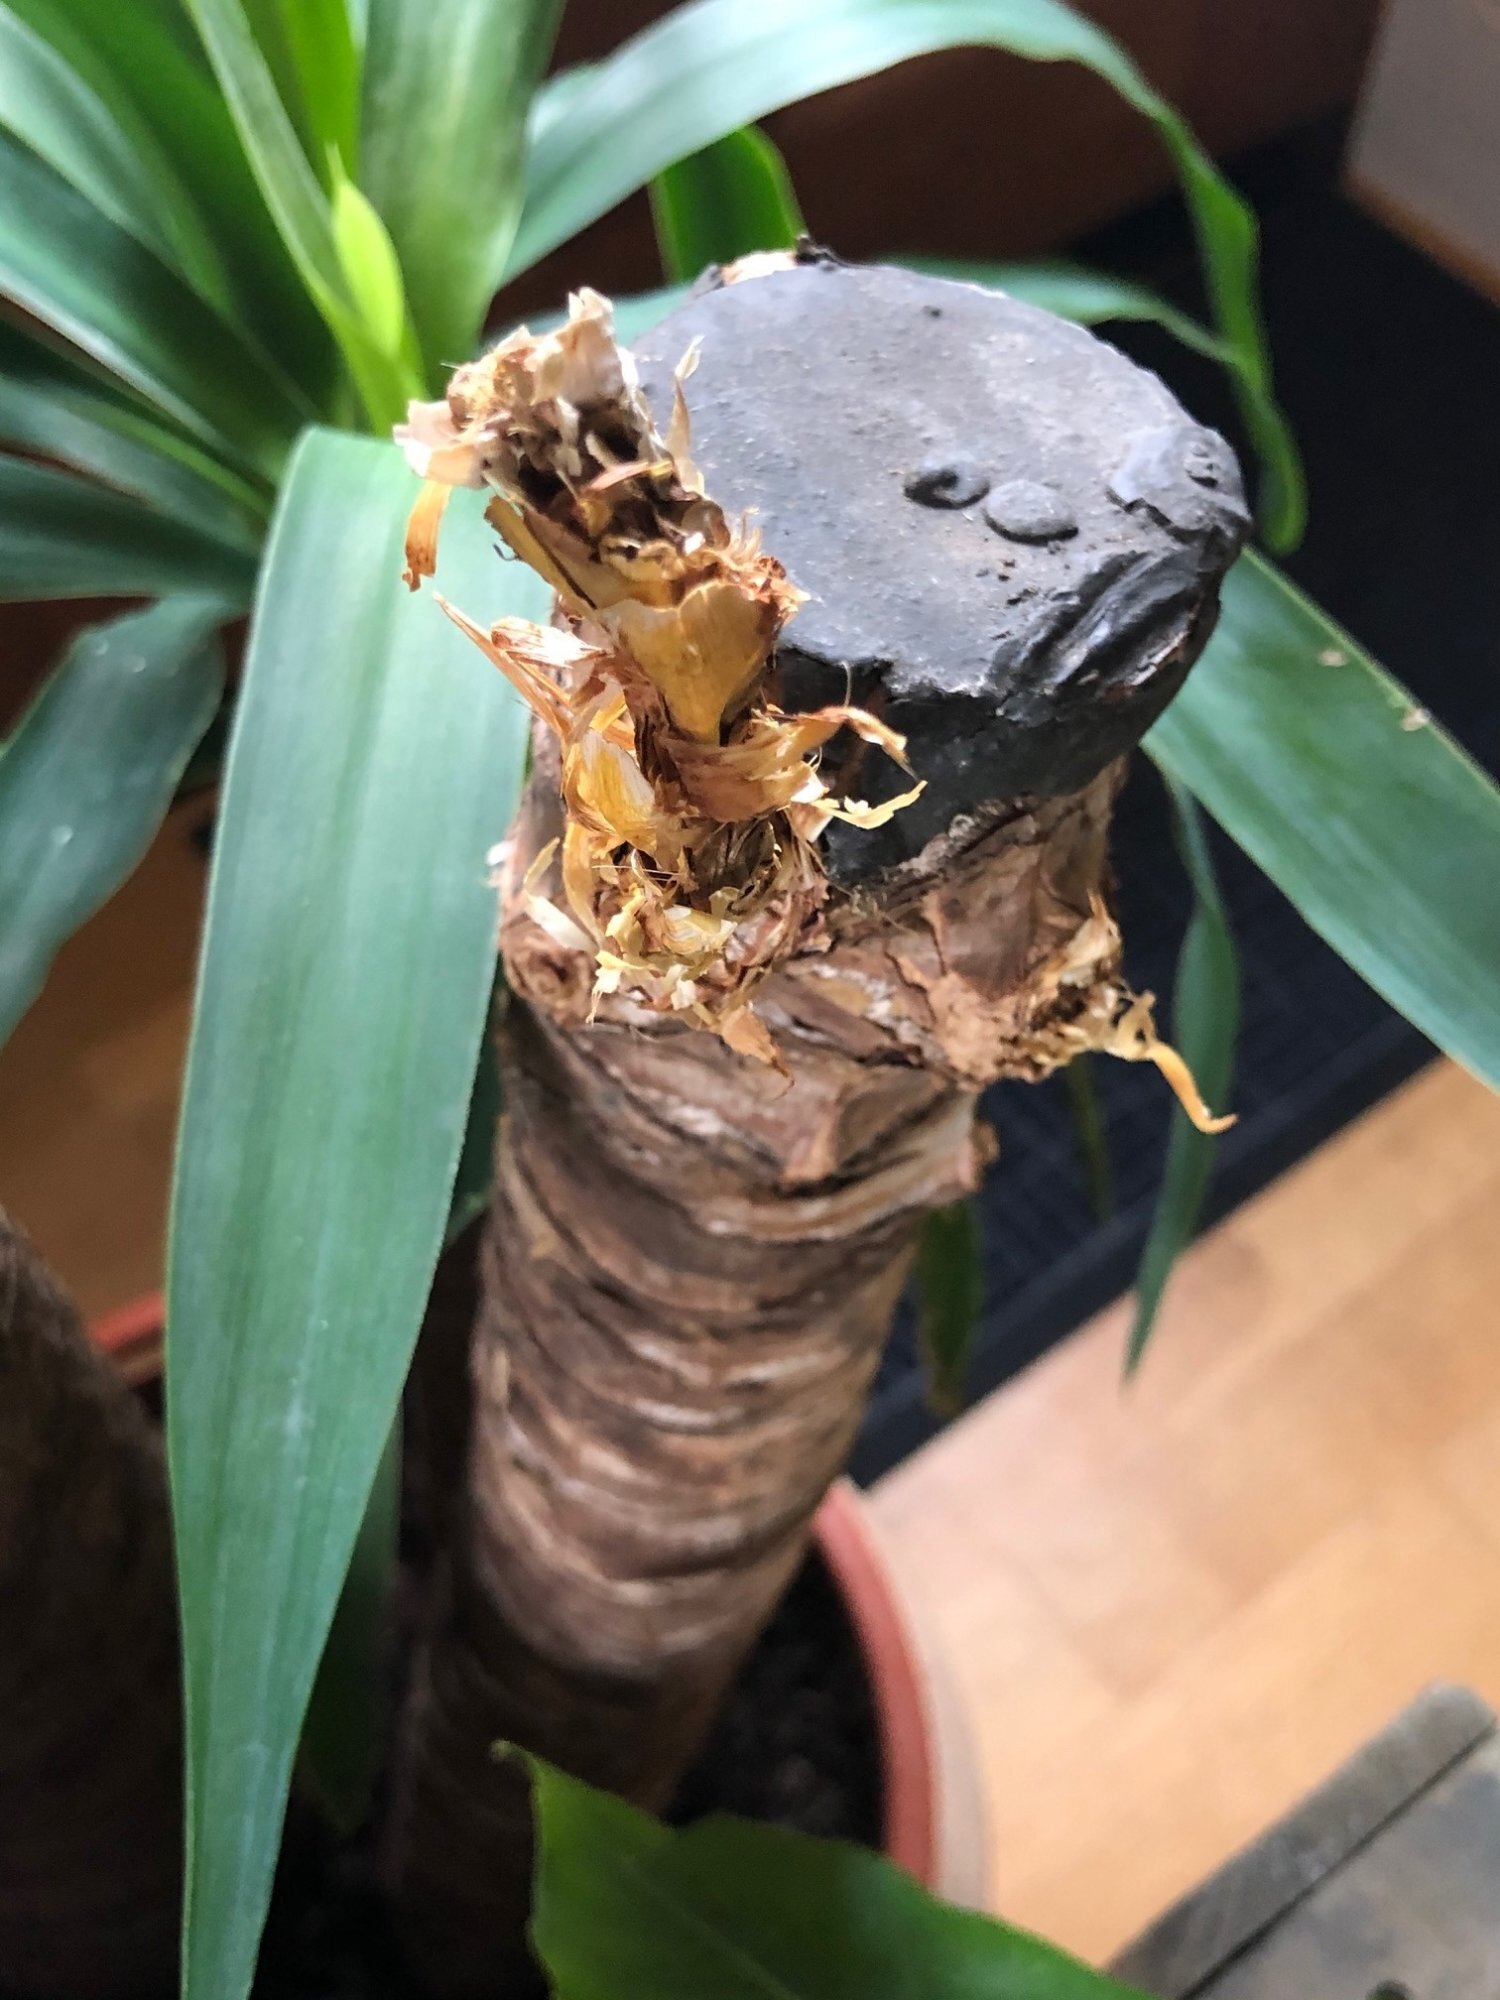
If the bark feels 'loose' or can be easily pulled from the stem, this may be an issue of root rot where the disease has travelled up the stem. Although there's nothing that can be done to save the mother plant, you'll still be able to take stem cuttings to keep the plant's 'legacy' alive. Scroll down to 'Propagation' below to learn more.
Finally, failed propagated stem cuttings - There are several reasons why the cuttings haven't rooted well, including: the time of year (spring or summer is best), its size (Dracaena stem cuttings should be at least 12cm (5 inches) in length), poor growing conditions (replace water weekly for water-propagated cuttings, and avoid over-watering for soil-grown plants), and its growing environment (a bright sunless windowsill and warmth is important).
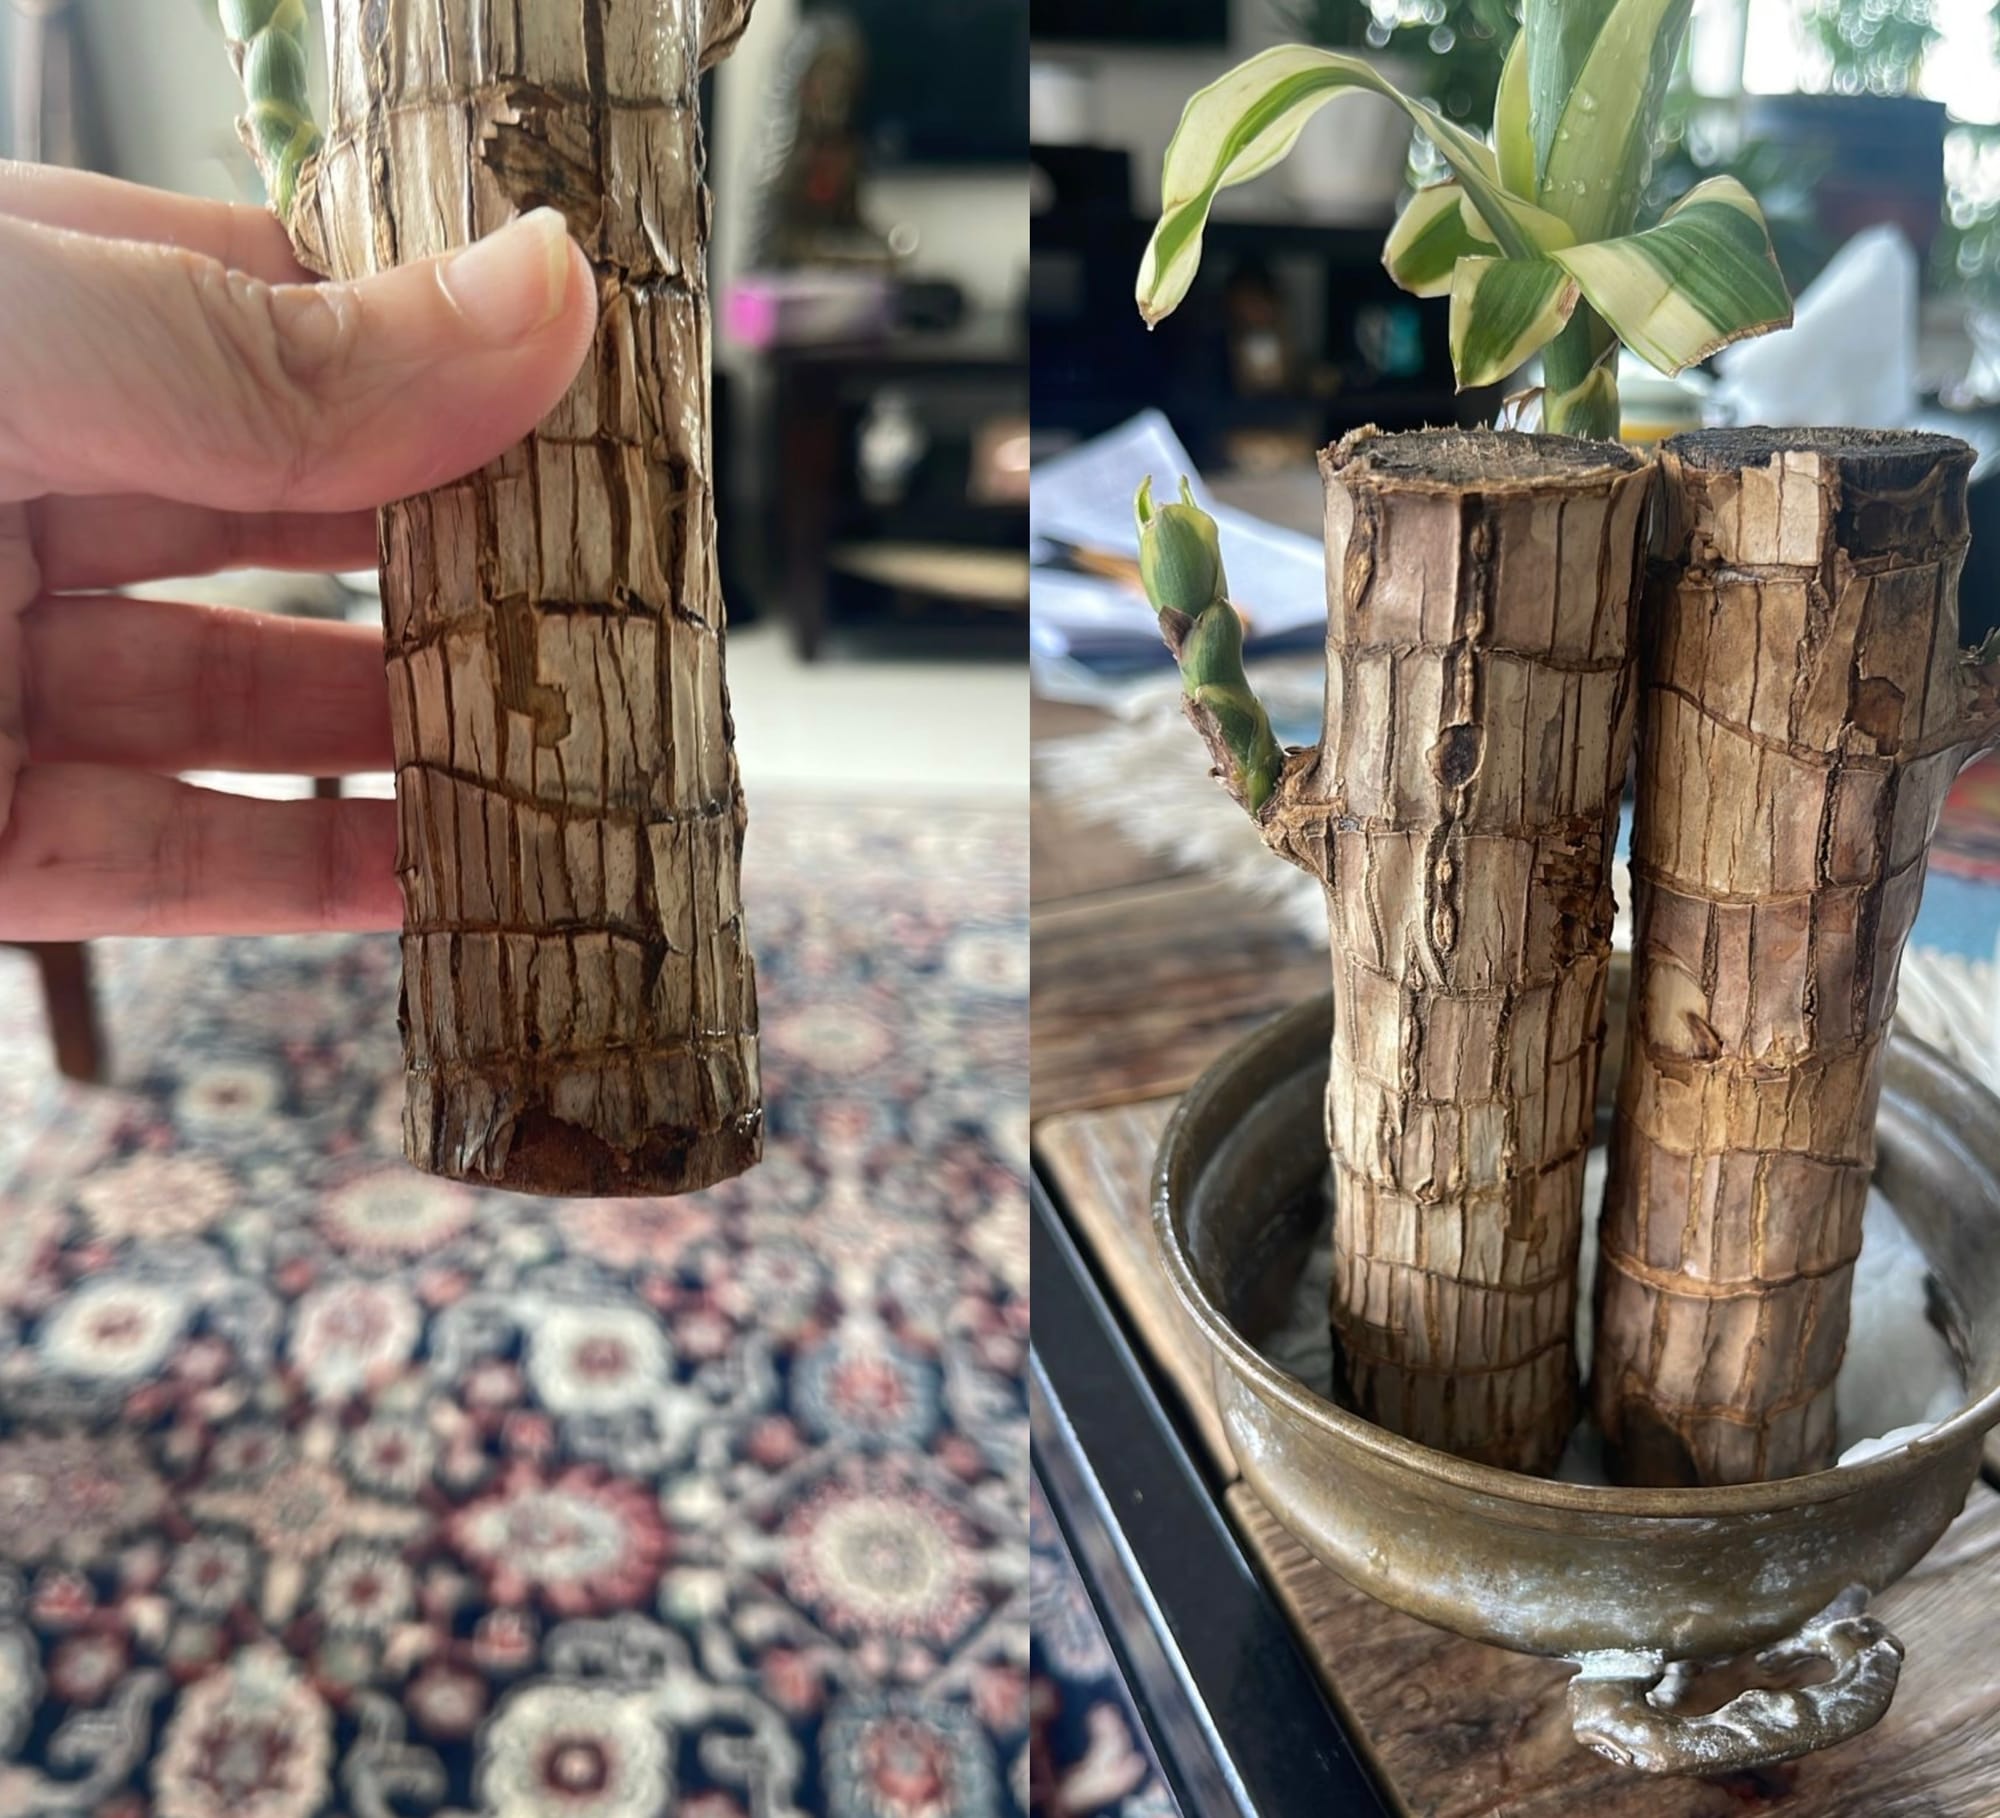 If you have purchased a 'Brazilian Lucky Wood' without roots like the image above, you can either keep it in a bowl of water (submerging only the stem's bottom 20%), or via planting it in soil. THE HOUSEPLANT DOCTOR™ recommends to apply a thin layer of rooting gel to the plant's bottom wound, before placing it in a 10cm plastic pot of 'houseplant' labelled soil. Ensure you only submerge the bottom 25% of the stem in the soil & maintain soil moisture. Warm temperatures and good lighting are important, too, so try placing it in a warm windowsill for optimal rooting times. (North, east or west-facing windows are best). Finally, you can also mist the foliage once every week using a 'houseplant foliar feed' which will force nutrients into the plants via its leaves. This will help the plant to root, which in turn will keep it healthy and alive as it'll only have a limited life when grown just in water with no fertilisation or soil.
Origins
Dracaena fragrans is a flowering species native to tropical Africa, in regions such as South Sudan, Mozambique and Tanzania. The genus, Dracaena, belongs to the Asparagaceæ family that holds specimens such as Hyacinths, Asparagus Ferns, Chlorophytum (Spider Plants), Sansevieria and Yuccas. The name derives from the Greek word for a female dragon 'Drakaina' that refers to its red sap and green foliage. The species' epithet, 'fragrans', refers to the fragrant blooms that was first coined by John Bellenden Ker Gawler. It was initially placed in the Aloe genus, before being transferred into Pleomele, Sansevieria, Cordyline, Draco, before finding its resting placed in Dracaena in 1808.
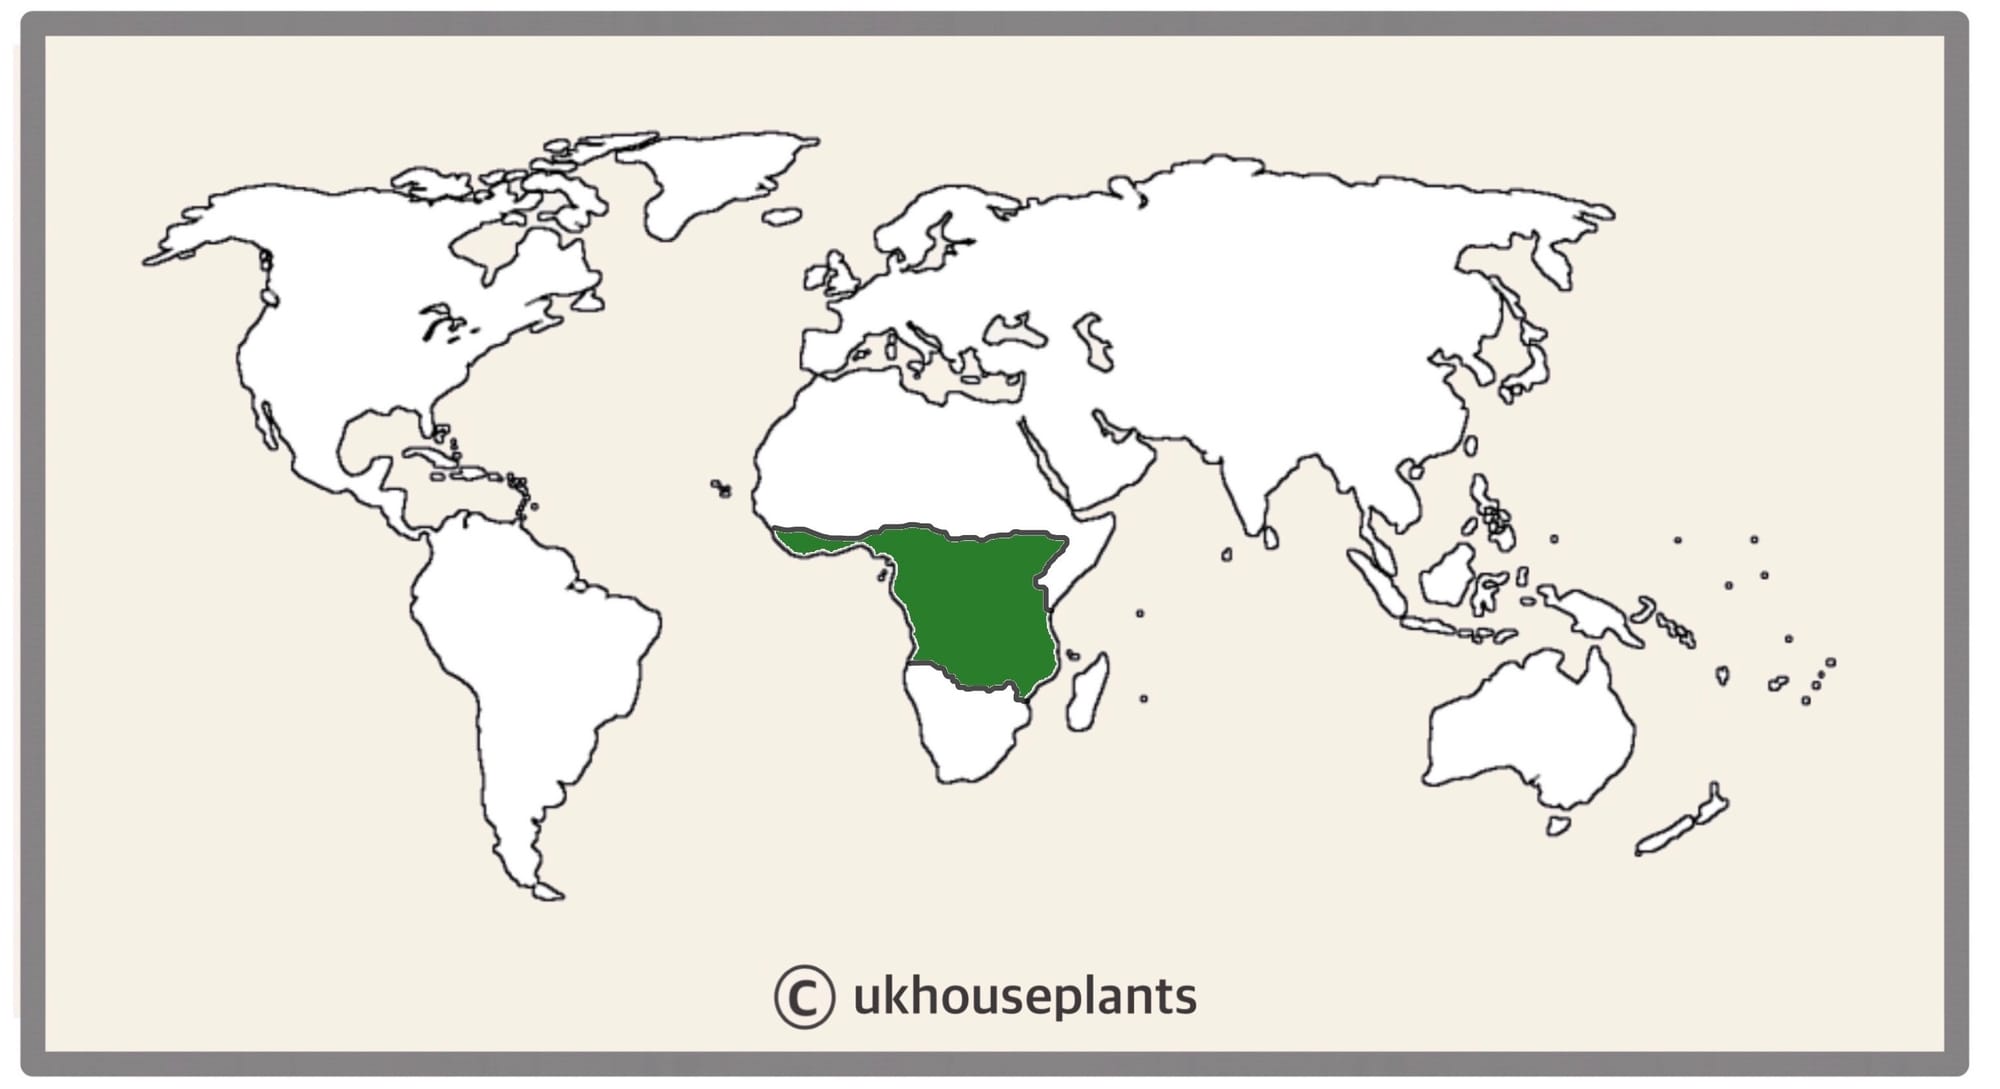 The Distribution of Dracaena fragrans 'Massangeana'
Temperature
12° - 32°C (54° - 90°F)
H1b (Hardiness Zone 12) - Can be grown outdoors during the summer in a sheltered location with temperatures above 12℃ (54℉), but is fine to remain indoors, too. If you decide to bring this plant outdoors, don't allow it to endure any direct sunlight as it may result in sun-scorch and dehydration. Regularly keep an eye out for pests, especially when re-introducing it back indoors.
Spread
The ultimate height is around 2.5m in height & 0.5m in width that can take up to 10 years.
Pruning & Maintenance
Remove yellow or dying leaves, and plant debris to encourage better-growing conditions. While pruning, always use clean scissors or shears to reduce the chance of bacterial and fungal diseases. Never cut through yellowed tissue as this may cause further damage in the likes of diseases or bacterial infections. Remember to make clean incisions as too-damaged wounds may shock the plant, causing weakened growth and a decline in health.
Propagation
Via Seed & Stem Cuttings.
Stem Cuttings (Easy)
- Hygiene is the most crucial element of successful propagation. The secateurs must be dirt-free with a fresh (or well stored) batch of compost. As you'll be cutting through vulnerable tissue, using uncleanly equipment will introduce harmful pathogens to the cutting and its mother plant.
- For stem cuttings, the best specimens are those located at the leading growths. You should aim for a semi-wooded base that's pencil-thick and still juvenile to slightly bend. Never use diseased or weakened growth, as this will likely fail to root. If, however, the cutting is littered in Pests - fear not. Remove all of the affected areas using your fingers, including the eggs, 'HQ' and any webs. Wholly submerge the cutting for at least two days to drown and kill the pests. Check the cubbyholes before placing it in soil; it's far easier to address a pest attack while the plant is mobile than it would be in the soil. If the pests don't die after five days of full submersion, use an organic pesticide to help the eradication process, maintaining full water-submersion until the infestation is deemed destroyed. For more information about an outbreak and how it can be addressed, click here.
- Make the best incision possible to prevent the development of disease and remove the bottom half of the leaves.
- Decide on rooting the cutting via water or soil. The first option tends to have better success, especially if you're a new-time propagator. For the prior method, remove any rotten debris and replace the water every week with lukewarm tap water to prevent shocking the plant. Although collected rainwater is acceptable, the risk of harboured diseases is too high, especially with an open wound. Once the roots surpass 3cm, you can safely pot it up.
- For both options, (water & soil) use an aerated soil that has a fluffy texture with some perlite, too. Never use a poorly stored bag of compost as it'll promote larvae or perennial seeds to arise. We would recommend using 'Houseplant Compost' as it has a great balance between being water-retentive, but still 'airy' enough to promote root growth. Use a 7cm pot that has adequate drainage holes.
- Place a 2cm layer of soil at the bottom of the pot, and then rest the cutting vertically in the middle. You may have the cutting for support.
- Fill the soil around its base, making sure that its bottom half is submerged and NOT the leaves.
- Never press or compact the soil; condensing it to support the cutting will push the oxygen above the soil line, suffocating the roots until they rot. If it needs support, introduce a cane or something that won't condense the compost when inserted!
- Place the potted cutting in a transparent bag or box. Because of the lack of roots, it'll start to lose stored water very quickly. A confided environment will lock-in the humidity and reduce the rate of respiration and transpiration considerably.
- You'll rarely have to water the soil due to the high humidity. If the soil compacts itself after the first irrigation, level it out by adding more compost.
- Open the bag every few days for fresh air. Be sure to keep the potting mix evenly moist, but NOT soggy - if it looks saturated, leaves it. The surrounding humidity in the container will do its job by hydrating the leaves.
- Situate in a bright, indirect location away from any heat sources (i.e. radiators). Keep the temperature around 18℃ (64℉) as this is the optimum temperature for root development - you can even use a bottom-heat pad to speed-up the process. The roots will develop BEFORE the foliage, so bear that in mind if you're an impatient gardener. Safely remove the bag or box once new leaves emerge, as, at this point, there'll be a sufficient root system. Introduce a Pebble Tray to maintain a good level of atmospheric saturation and to reduce the severity of environmental shock
- Keep the soil moist and maintain a bright, indirect location away from direct sunlight and other heat sources. After around four months, transplant into a slightly bigger pot, keeping in mind transplant shock (where the root hairs are damaged or over-touched) and follow the care-tips provided above.
Flowers
Small, globular white or pink flowers are arranged along a thick flower shaft that'll appear horizontally towards the top half of the stem, lasting several weeks. It's rather unlikely that a domestically grown specimen will bloom indoors due to the unfavored growing conditions of too low humidity and consistent temperature levels throughout the year.
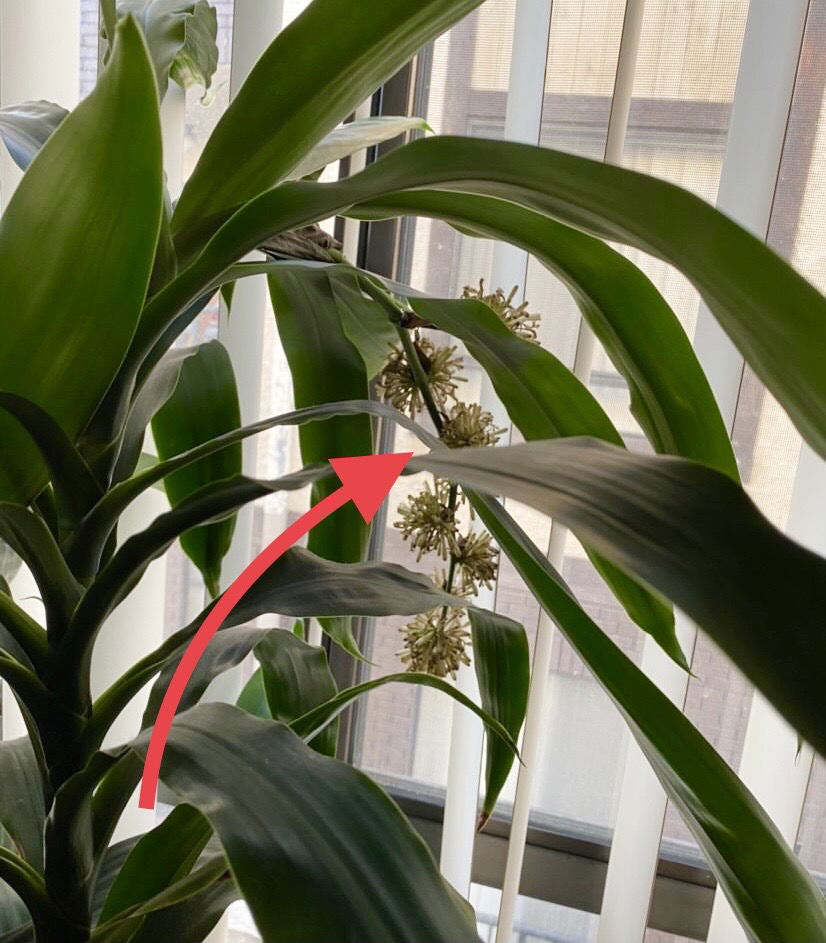 The flowers of Dracaena fragrans 'Massangeana' (Corn Plants) have a sweet-fragrance, lasting several weeks. Credit: @its_lourds_castelo
Repotting
Repot every three years in the spring, using a 'Houseplant' labelled compost and the next sized pot with adequate drainage. If your specimen lives in a shady area of the home, you can use a 'Cactus & Succulent' labelled potting mix to increase drainage and reduce the risk of over-watering. Hydrate the plant 24hrs before tinkering with the roots to prevent the risk of transplant shock. Add a thin layer of small grit in the pot's base and the lower portion of the new compost to improve drainage & downplay over-watering. Click here for a detailed step-by-step guide on transplantation, or via this link to learn about repotting with root rot.
Book a 1-to-1 video call with THE HOUSEPLANT DOCTOR™ if you'd like a personal guide to repotting your houseplant. This will include recommending the right branded-compost and pot size, followed by a live video call whilst you transplant the specimen for step-by-step guidance and answer any further questions!
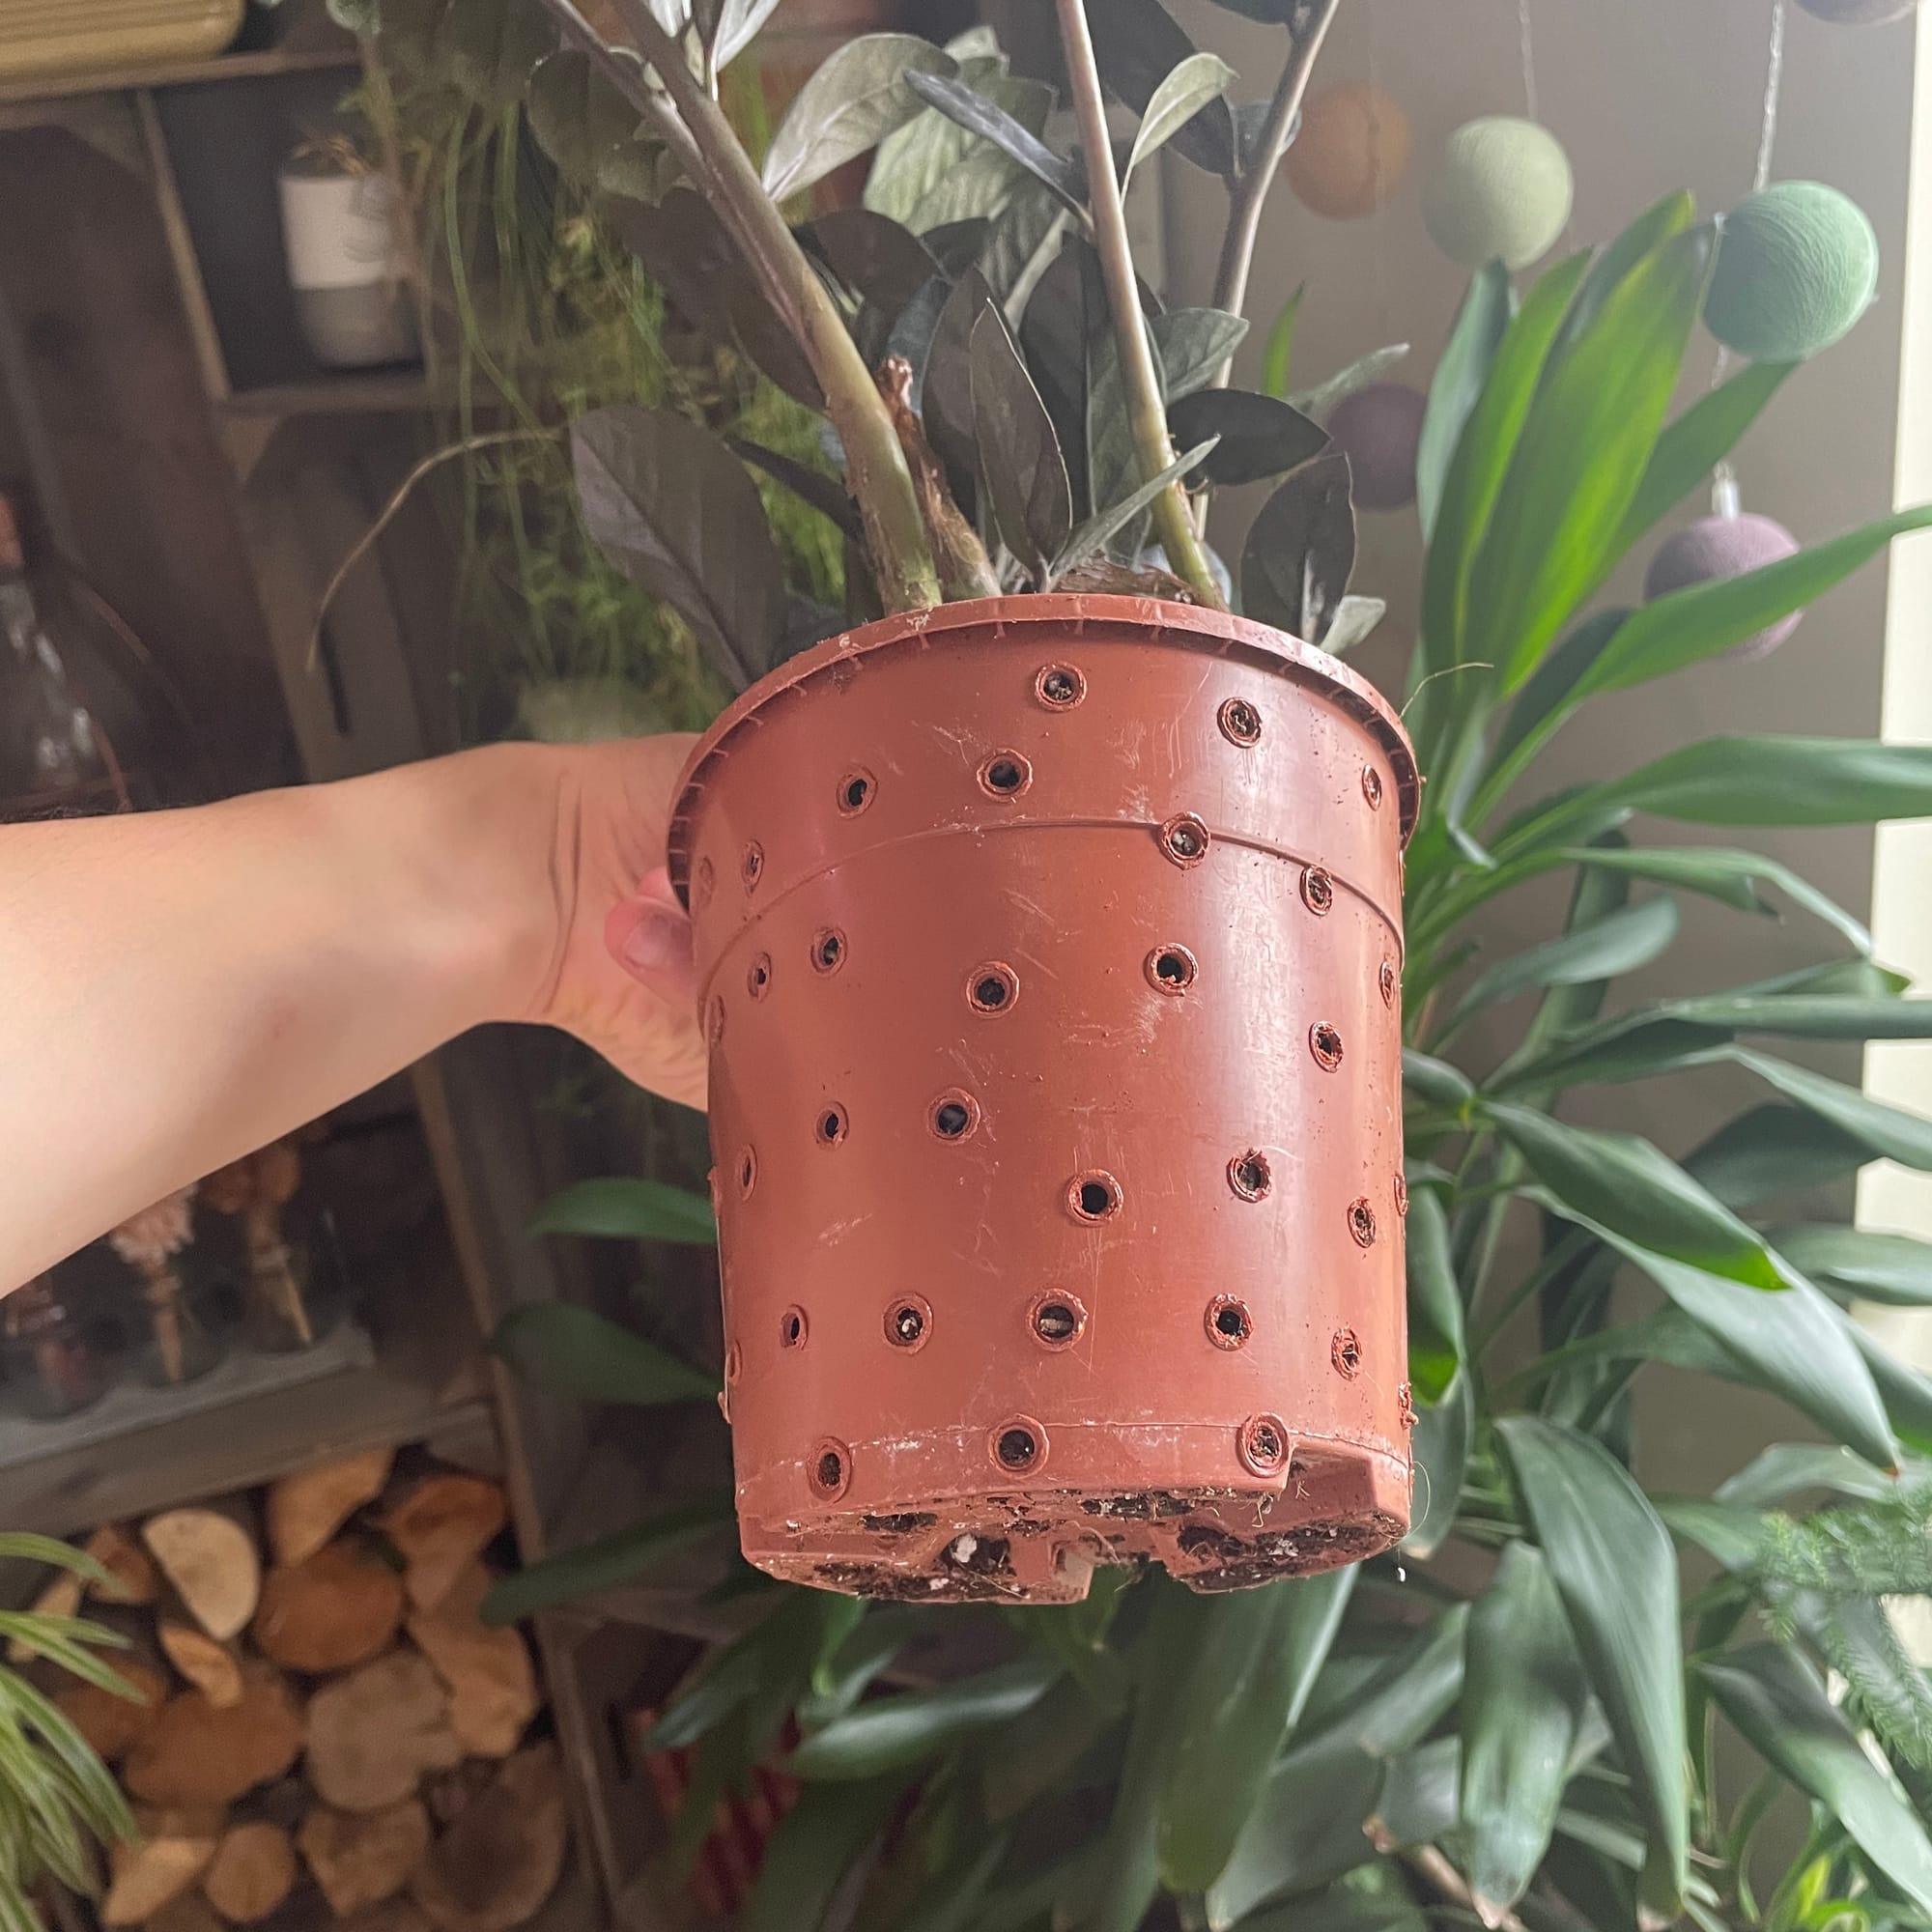 Similarly to the ZZ Plant (pictured), your Corn Plant will benefit from having a few holes in its plastic pot to reduce the risk of root rot. We recommend using a Soldering Iron.
Pests & Diseases
Keep an eye out for mealybugs, spider mites, scale, thrips & whitefly that'll locate themselves in the cubbyholes and undersides of the leaves. Common diseases are root rot, leaf-spot disease, botrytis, powdery mildew & southern blight - click here to learn more about these issues.
Toxicity
This plant is classified as poisonous. If parts of the plants are eaten, vomiting, nausea and a loss of appetite could occur. Consumption of large quantities must be dealt with quickly - acquire medical assistance for further information.
Retail Locations
B&Q, Dobbies, Homebase, IKEA, Online Stores.
Book a 1-to-1 Call with THE HOUSEPLANT DOCTOR™
If you need further advice with your houseplants, book an advice call with ukhouseplants' friendly and expert writer today! This can be done via a video or audio call on most apps, including Facebook, FaceTime & Skype. A ten-minute call costs £5.99 (US$7), or £15.99 for thirty minutes. You can ask multiple questions, including queries on plants, pests, terrariums, repotting advice and anything in between. Please consider supporting this service to keep ukhouseplants thriving!
Comments