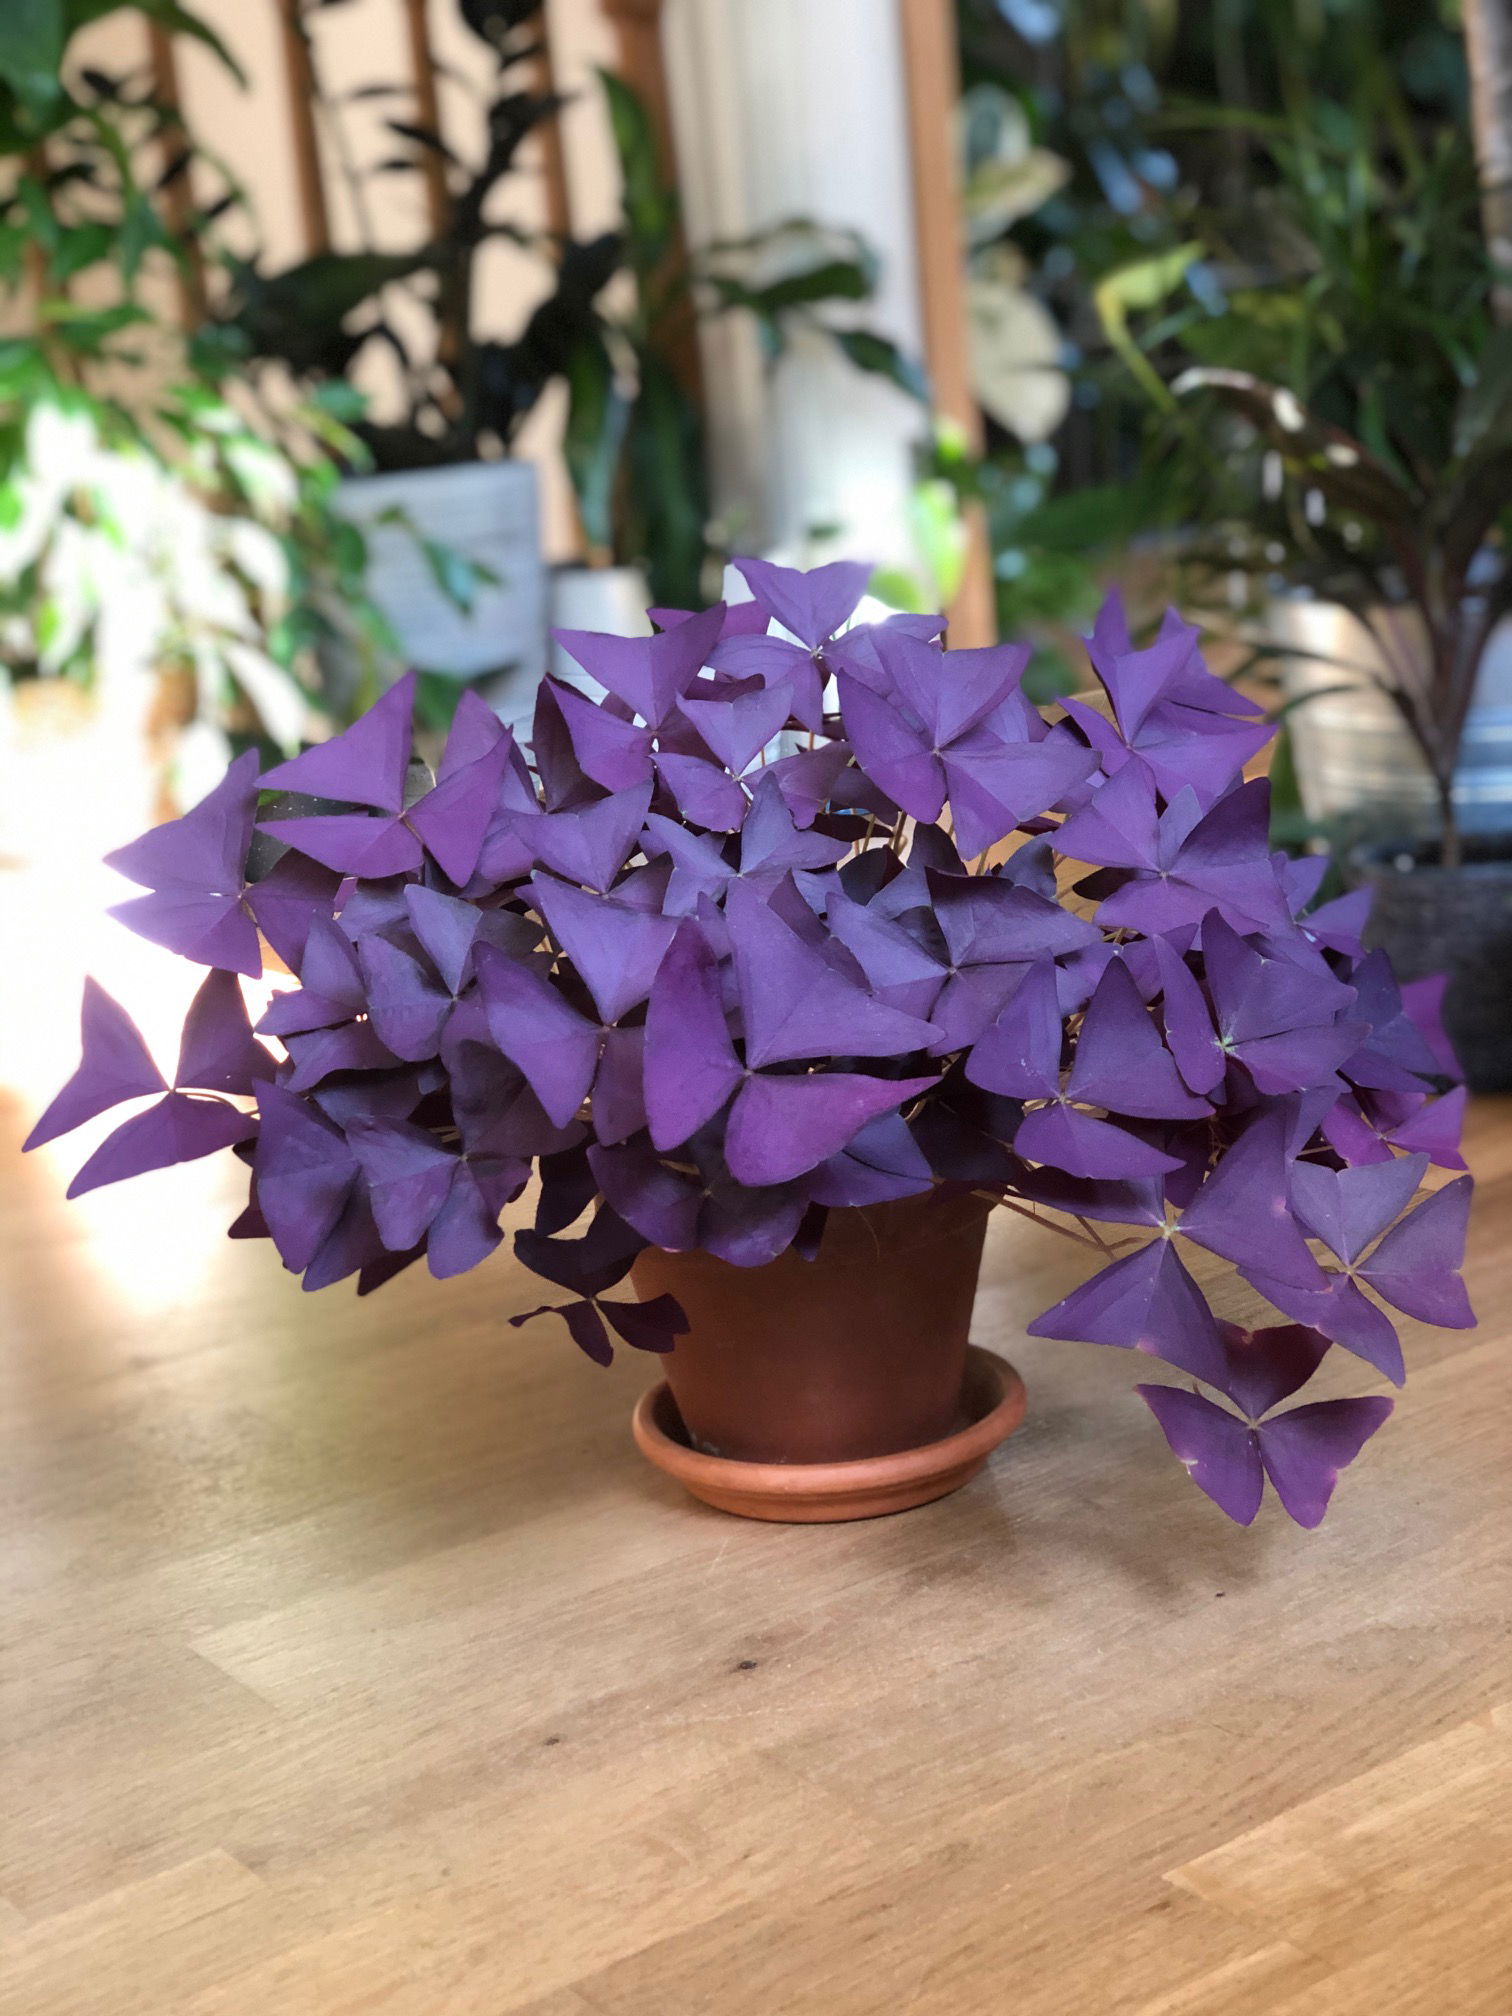
Oxalis triangularis
Listen to the Oxalis Podcast here!
Contents
- Top Tips
- Location, Water, Humidity & Fertilisation
- Dormancy Care (incl. Hard Pruning)
- Common Issues
- Origins, Temperature, Propagation, Repotting & Toxicity.
Need the answer to a specific plant query? Book a 1-to-1 video call with THE HOUSEPLANT DOCTOR™, the website's friendly author, to overcome and address your niggling problem! Available on iMessage, WhatsApp, Facebook Messenger & more.
Top Tips & Info
- Care Difficulty - Very Easy
- Provide a bright location with an hour of either morning or evening sunlight throughout the year. Settings that boast overhead lighting are at an advantage for better rates of growth (windowsills, grow lights, conservatories, etc.).
- Irrigate once the top third of the soil dries out, reducing this further in the autumn and winter months. Prevent droughts of any length throughout the growing periods.
- Provide a humid location by introducing a humidity/pebble tray to keep the surrounding moisture high during the winter (third image below).
- Fertilise using a 'Houseplant' labelled feed every third waters in the spring and summer, reducing this to every fourth in period of late autumn to late winter.
- Regularly check for pests, most notably Spider Mites that'll locate themselves under the leaves.
- Provide a resting period over the autumn and winter months by reducing the amount of watering and temperature. Successful dormancy periods will reward you with lush new growth in the spring, that'll carry on until mid autumn.
- The Oxalis triangularis is a prolific bloomer; prune off the flower spikes before they open to preserve energy for leaf production instead if you're not fussy about its flowers.
Location & Light - 🔸🔸🔸
Although a bright indirect location is great, a few hours of morning or evening sun is excellent to maintain quality growth. Never situate an Oxalis in a dark location with minimal light, as root rot and elongated phototropism will quickly take over. In terms of the ideal location around the home, a few metres within a north, east or west-facing window, or in a semi-shaded conservatory are best. Provide a sun-filled location with a few hours of morning or evening sun to counteract the darker days and longer nights.
Water - 🔸🔸
Oxalis are straightforward to cultivate, as long as you water them when they need it. During the growing period, keep the soil relatively moist, never allowing persistent droughts to take over. During the autumn and winter months, water liberally (i.e. loosely, but not too infrequent) and avoid over-watering during its dormancy period. The plant will need a few months to rest after the fierce growing period, so overloading it with soggy soil will result in root rot. Under-watering symptoms include stunted or unreliable growth and leaf loss; these issues are usually due to either too much heat/sunlight, being potbound, transplant shock (similar symptoms to under-watering) or forgetfulness. Alternatively, over-watering symptoms include rapidly yellowing leaves, zero growth and plant death; avoid water-logging and persistent soggy soil to eliminate the chance of disease. Always keep in mind that Oxalis are in fact alpines, whereby they thrive in bright, dry-ish locations with good air circulation.
Humidity - 🔸🔸
Introduce a humidity tray whilst the heaters are operating to provide and maintain a stable level of humidity around the plant. Dry air will cause nothing but grief in the likes of brown leaf tips and poor health over this delicate time.
Fertilisation - 🔸🔸
Supplement every third waters during the growing period, reducing this to every fourth from late autumn to late winter. Never use a 'ready to pour' fertiliser into the soil without saturating the soil beforehand as it'll burn the roots. It's recommended to use 'Houseplant' feed as it provides the best blend of essential nutrients for quality growth; however, 'General Garden Plant' food at half recommended strength will do fine, too.
Dormancy Care
Oxalis triangularis is a tuberous species, meaning it'll need a resting period during the autumn and winter. Don't be alarmed if your plant loses most of its leaves during this period as it'll burst back into life come mid-spring. Remember to reduce the frequency of waters and feed during the colder months, whilst still providing a partial-sunny windowsill for winter health.
| Time of Year (N. Hemisphere) | Care Requirements |
| January & February | Resting/Dormancy Period. Reduce irrigations and fertilisation, while still providing a north, east or west facing windowsill. Be cautious of over-watering. |
| March | End of Resting/Dormancy Period. Begin increasing watering and fertilisation using a nitrogen-based fertiliser every fourth water; 'Houseplant' labelled feeds are perfect. |
| April | Water once the top third of the soil dries out, or if the plant begins to wilt slightly. Increase fertilisation to every third water. |
| May & June | Flowering Period. Maintain moist soil and prune blooms as they fade. Relocate the plant outdoors (in a shaded area) if you don't have the room inside on a windowsill. |
| July, August & September | Water once the top third of the soil dries out. Supplement using houseplant feed or a general plant fertiliser, at monthly intervals. Be cautious of sun scorch & dehydration. |
| October - December | Resting/Dormancy Period. Reduce irrigations and fertilisation. Bring the Oxalis back indoors if it spent the summer outdoors & check for pests. During the month of December, consider a hard-prune whereby all of the foliage is cut back to the soil line. Keep reading to learn more! |
A Hard-Prune
N.B. - This step only needs to be performed every few years.
If the foliage begins to decline from late autumn, you may want to think about undergoing a hard-prune. This is where all of the foliage is cut back just above the soil line, to promote a better quality of leaves in the spring. Not only will it reward you with a fresh batch of purpleness, but it'll also eliminate any pests (for example Spider Mites) that fester in the cubbyholes of the prior foliage. Have a peak at this article's second-to-last image to get a grasp of what an Oxalis triangularis tuber looks like. Cut the leaves' petioles (sometimes called its 'stems') around an inch from the tuber and then remove them by hand once they brown over.
Situate the potted tuber in a cool, bright windowsill, keeping the soil on the dry side to life by allowing the top half to dry out in between waters. New foliage will develop in early spring, signalling the start of the new growing season where you can treat it as a mature specimen. If yours begin to produce flowers and no foliage, keep pricking the flower stalks off to preserve its energy for the new leaves.
Additional Note: This is also the perfect time to separate the clump of tubers into their own pots to double your Oxalis collection. Not only will the chance of transplant shock be at its lowest, but you also won't run the risk of damaging its delicate leaves. Scroll down to 'Propagation' for more information about this!
Common Issues with Oxalis triangularis
Over-watering is the biggest killer amongst Oxalis. They mustn't endure extended periods of soggy soil, or water-logging as both will quickly lead to tuber/root rot. If you're worried about over-watering, provide a bright, warm location that offers an hour or two of off-peak direct sunlight to dry out the soil quicker. Vertically stab the soil using a chopstick twice a year in several places to improve oxygen-flow around the roots, but be sure to refill the holes before another water.
When an Oxalis is severely dehydrated, most of its leaves will crisp-up and fall off - leaving you with a bare pot. Although it may spell the end of juvenile plantlets, there may still be light at the end of the tunnel for more established specimens. If its tubers are still plump without any signs of retraction, prune-away any seriously affected leaves and contain the plant (with its pot) in a transparent bag. Keep the soil continually moist, providing a good level of indirect light and temperatures above 15°C (59°F). Remove from the bag once the plant produces its fourth leaf.
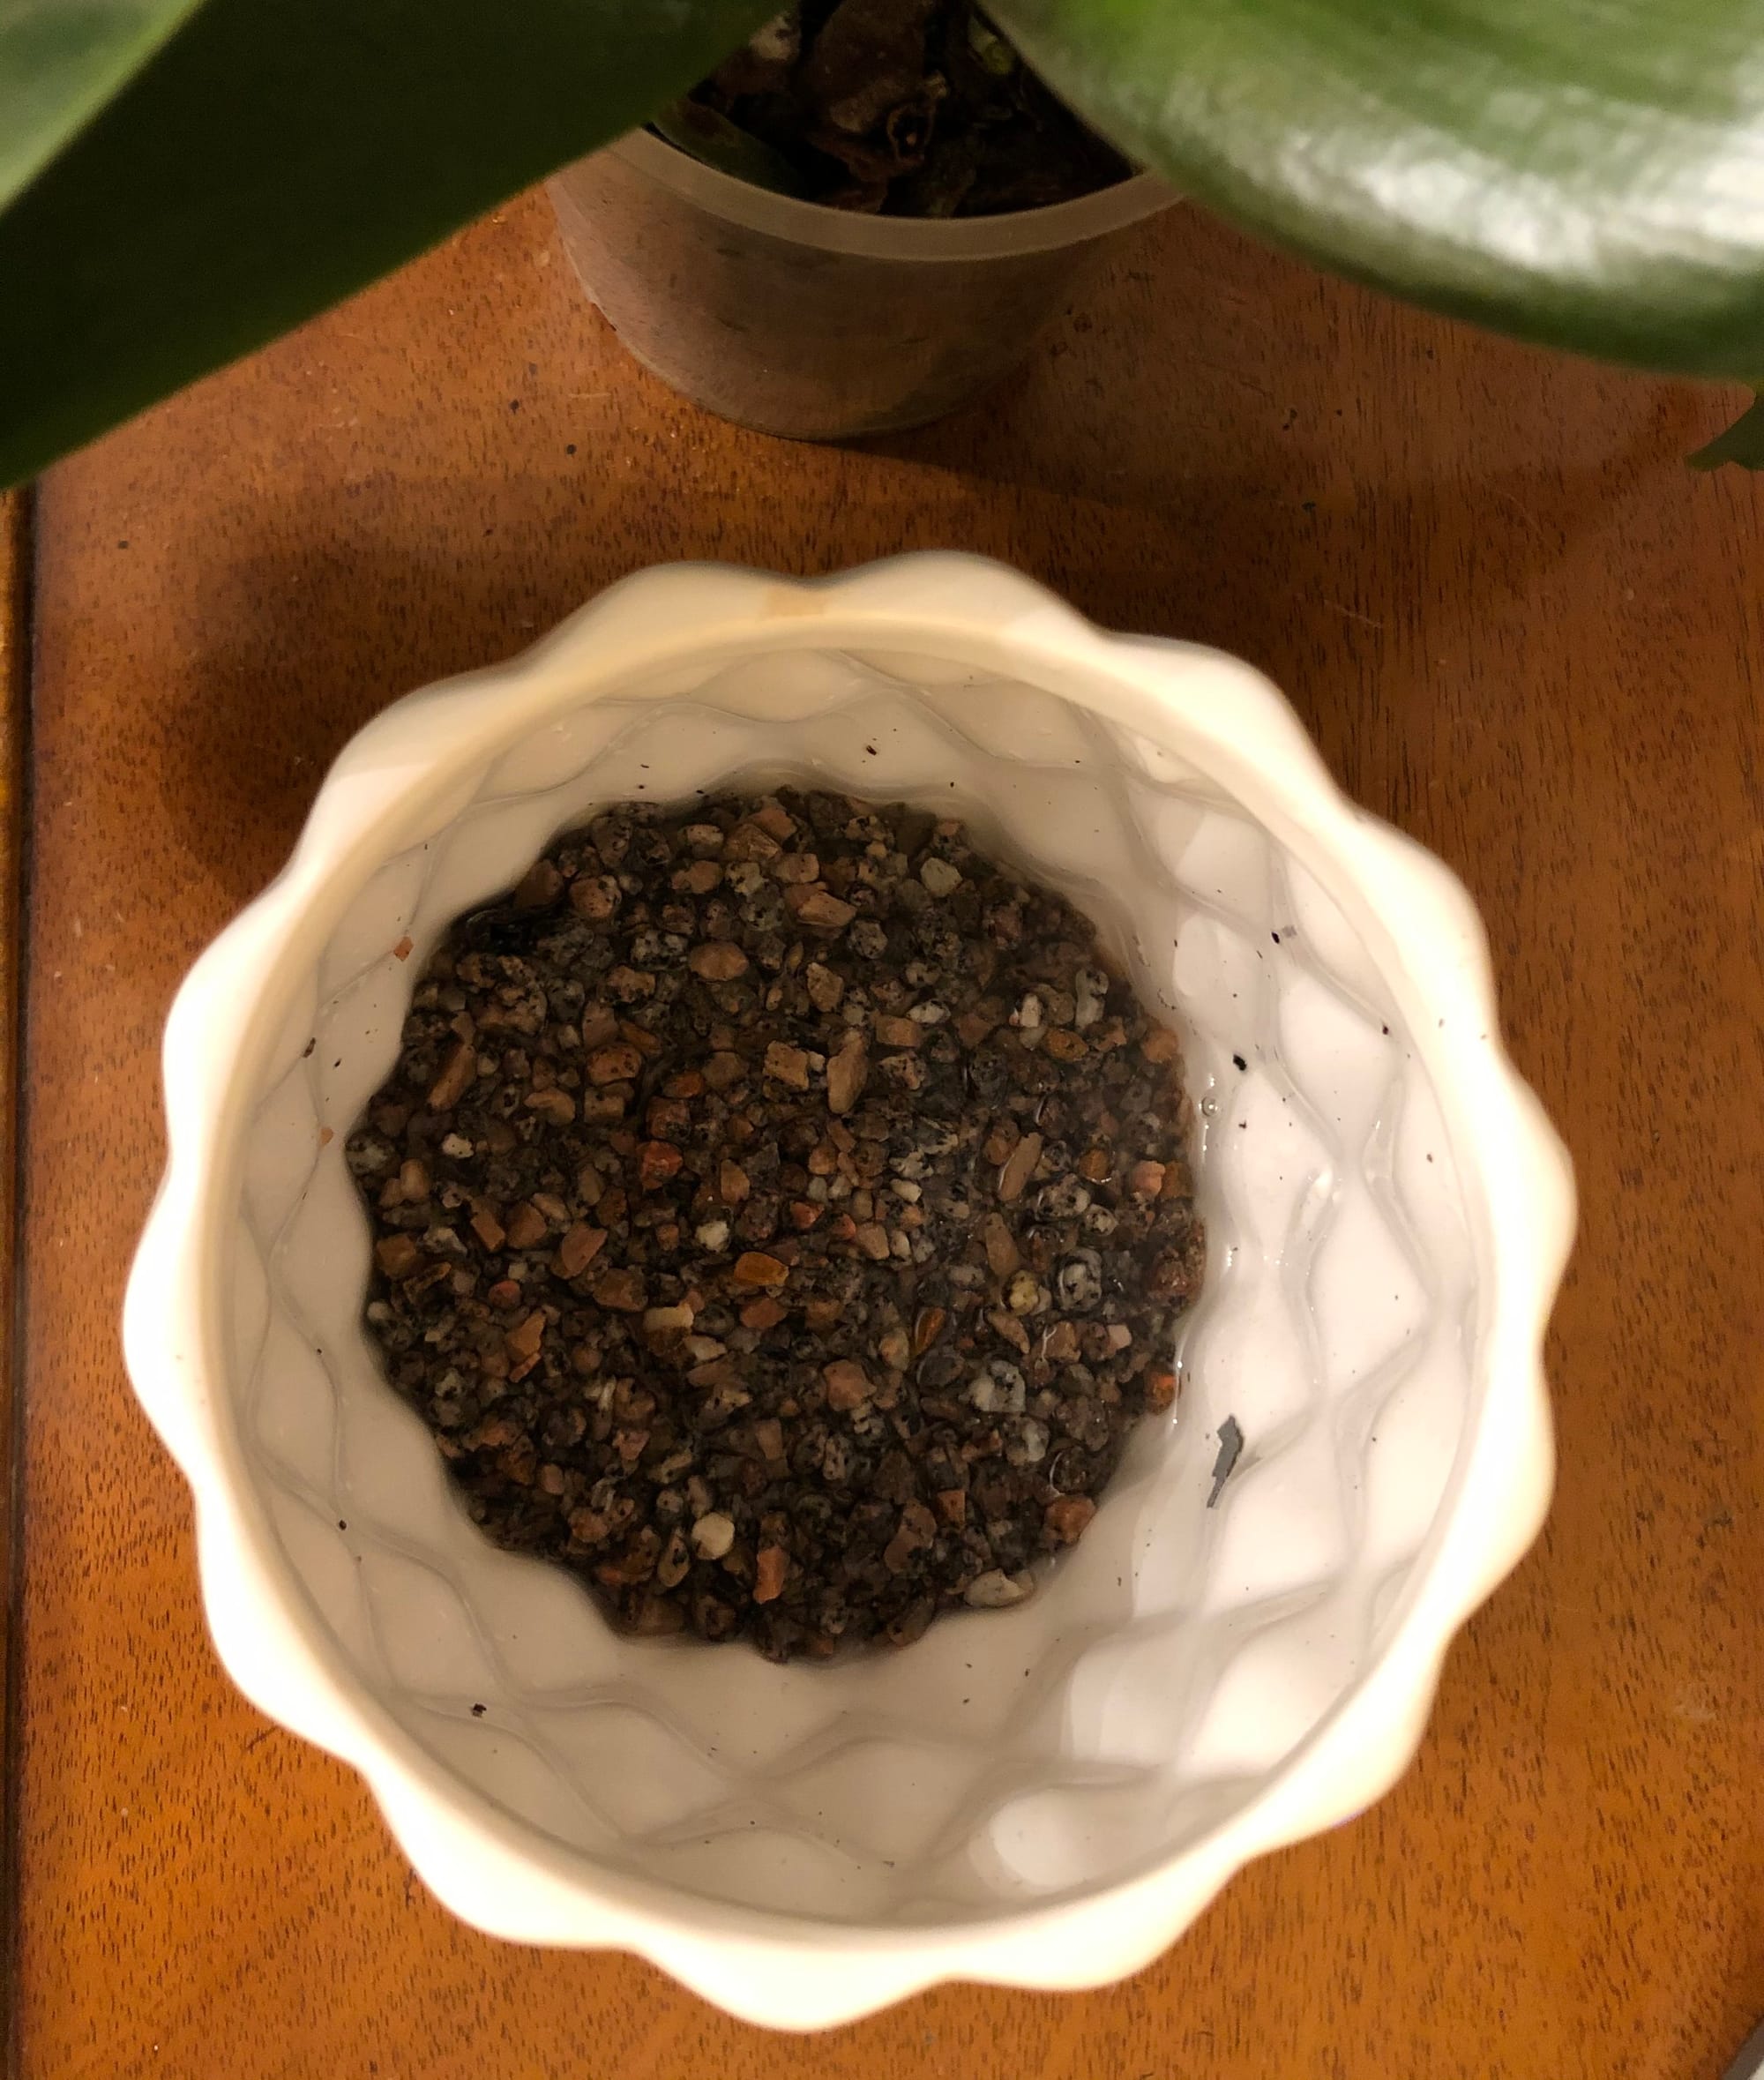 Humidity/Pebble Tray: If you're forgetful with watering or battling with dry air, why not fill the decorative pot's bottom sixth with small grit? This will promote more reliable soil moisture that'll help encourage better growth & all-round health as the excess moisture will drain from the plant's plastic pot, thus creating a humid environment for root interaction.
Mould developing on the soil means two things - too little light and over-watering. Despite the harmlessness of the mould, it'll prove unsightly to most gardeners and is therefore removed once known. To remove, replace the top two inches of the soil for a fresh batch of houseplant compost. Either increase the amount of light received (no direct sunlight for the first few weeks to prevent environmental shock) or decrease the frequency of waters slightly. If the mould is accompanied by yellowing lower leaves, you may also have a case of root rot.
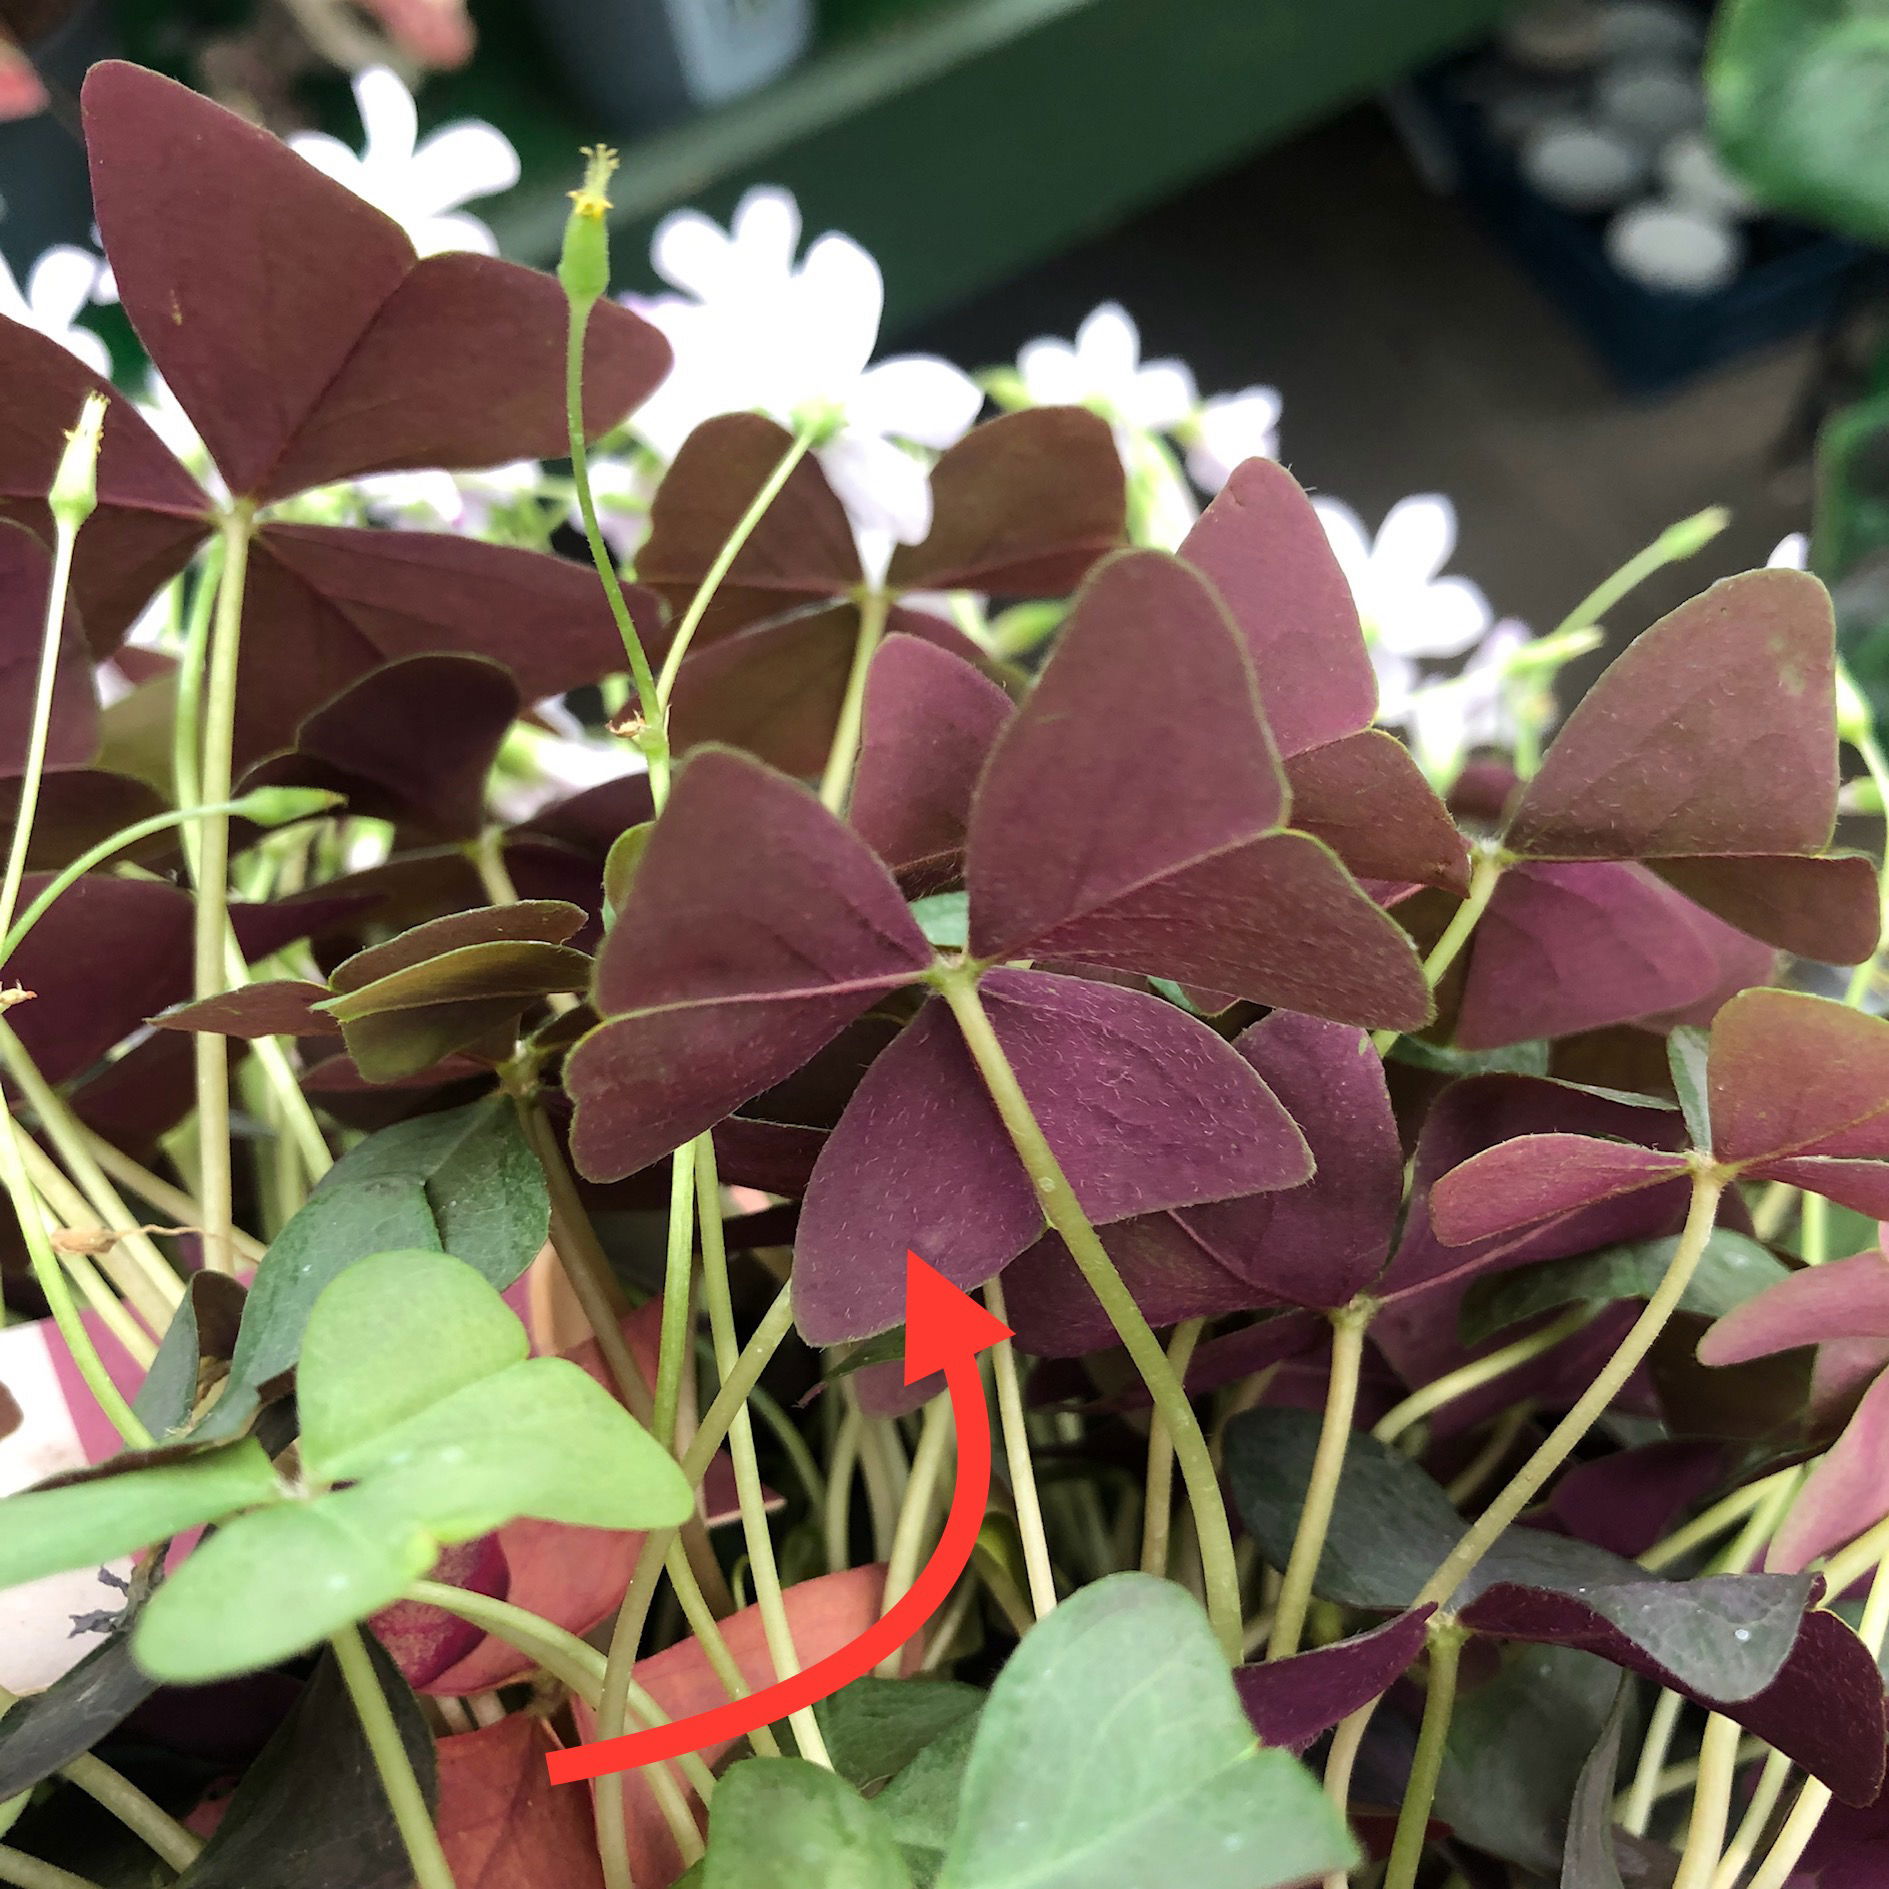
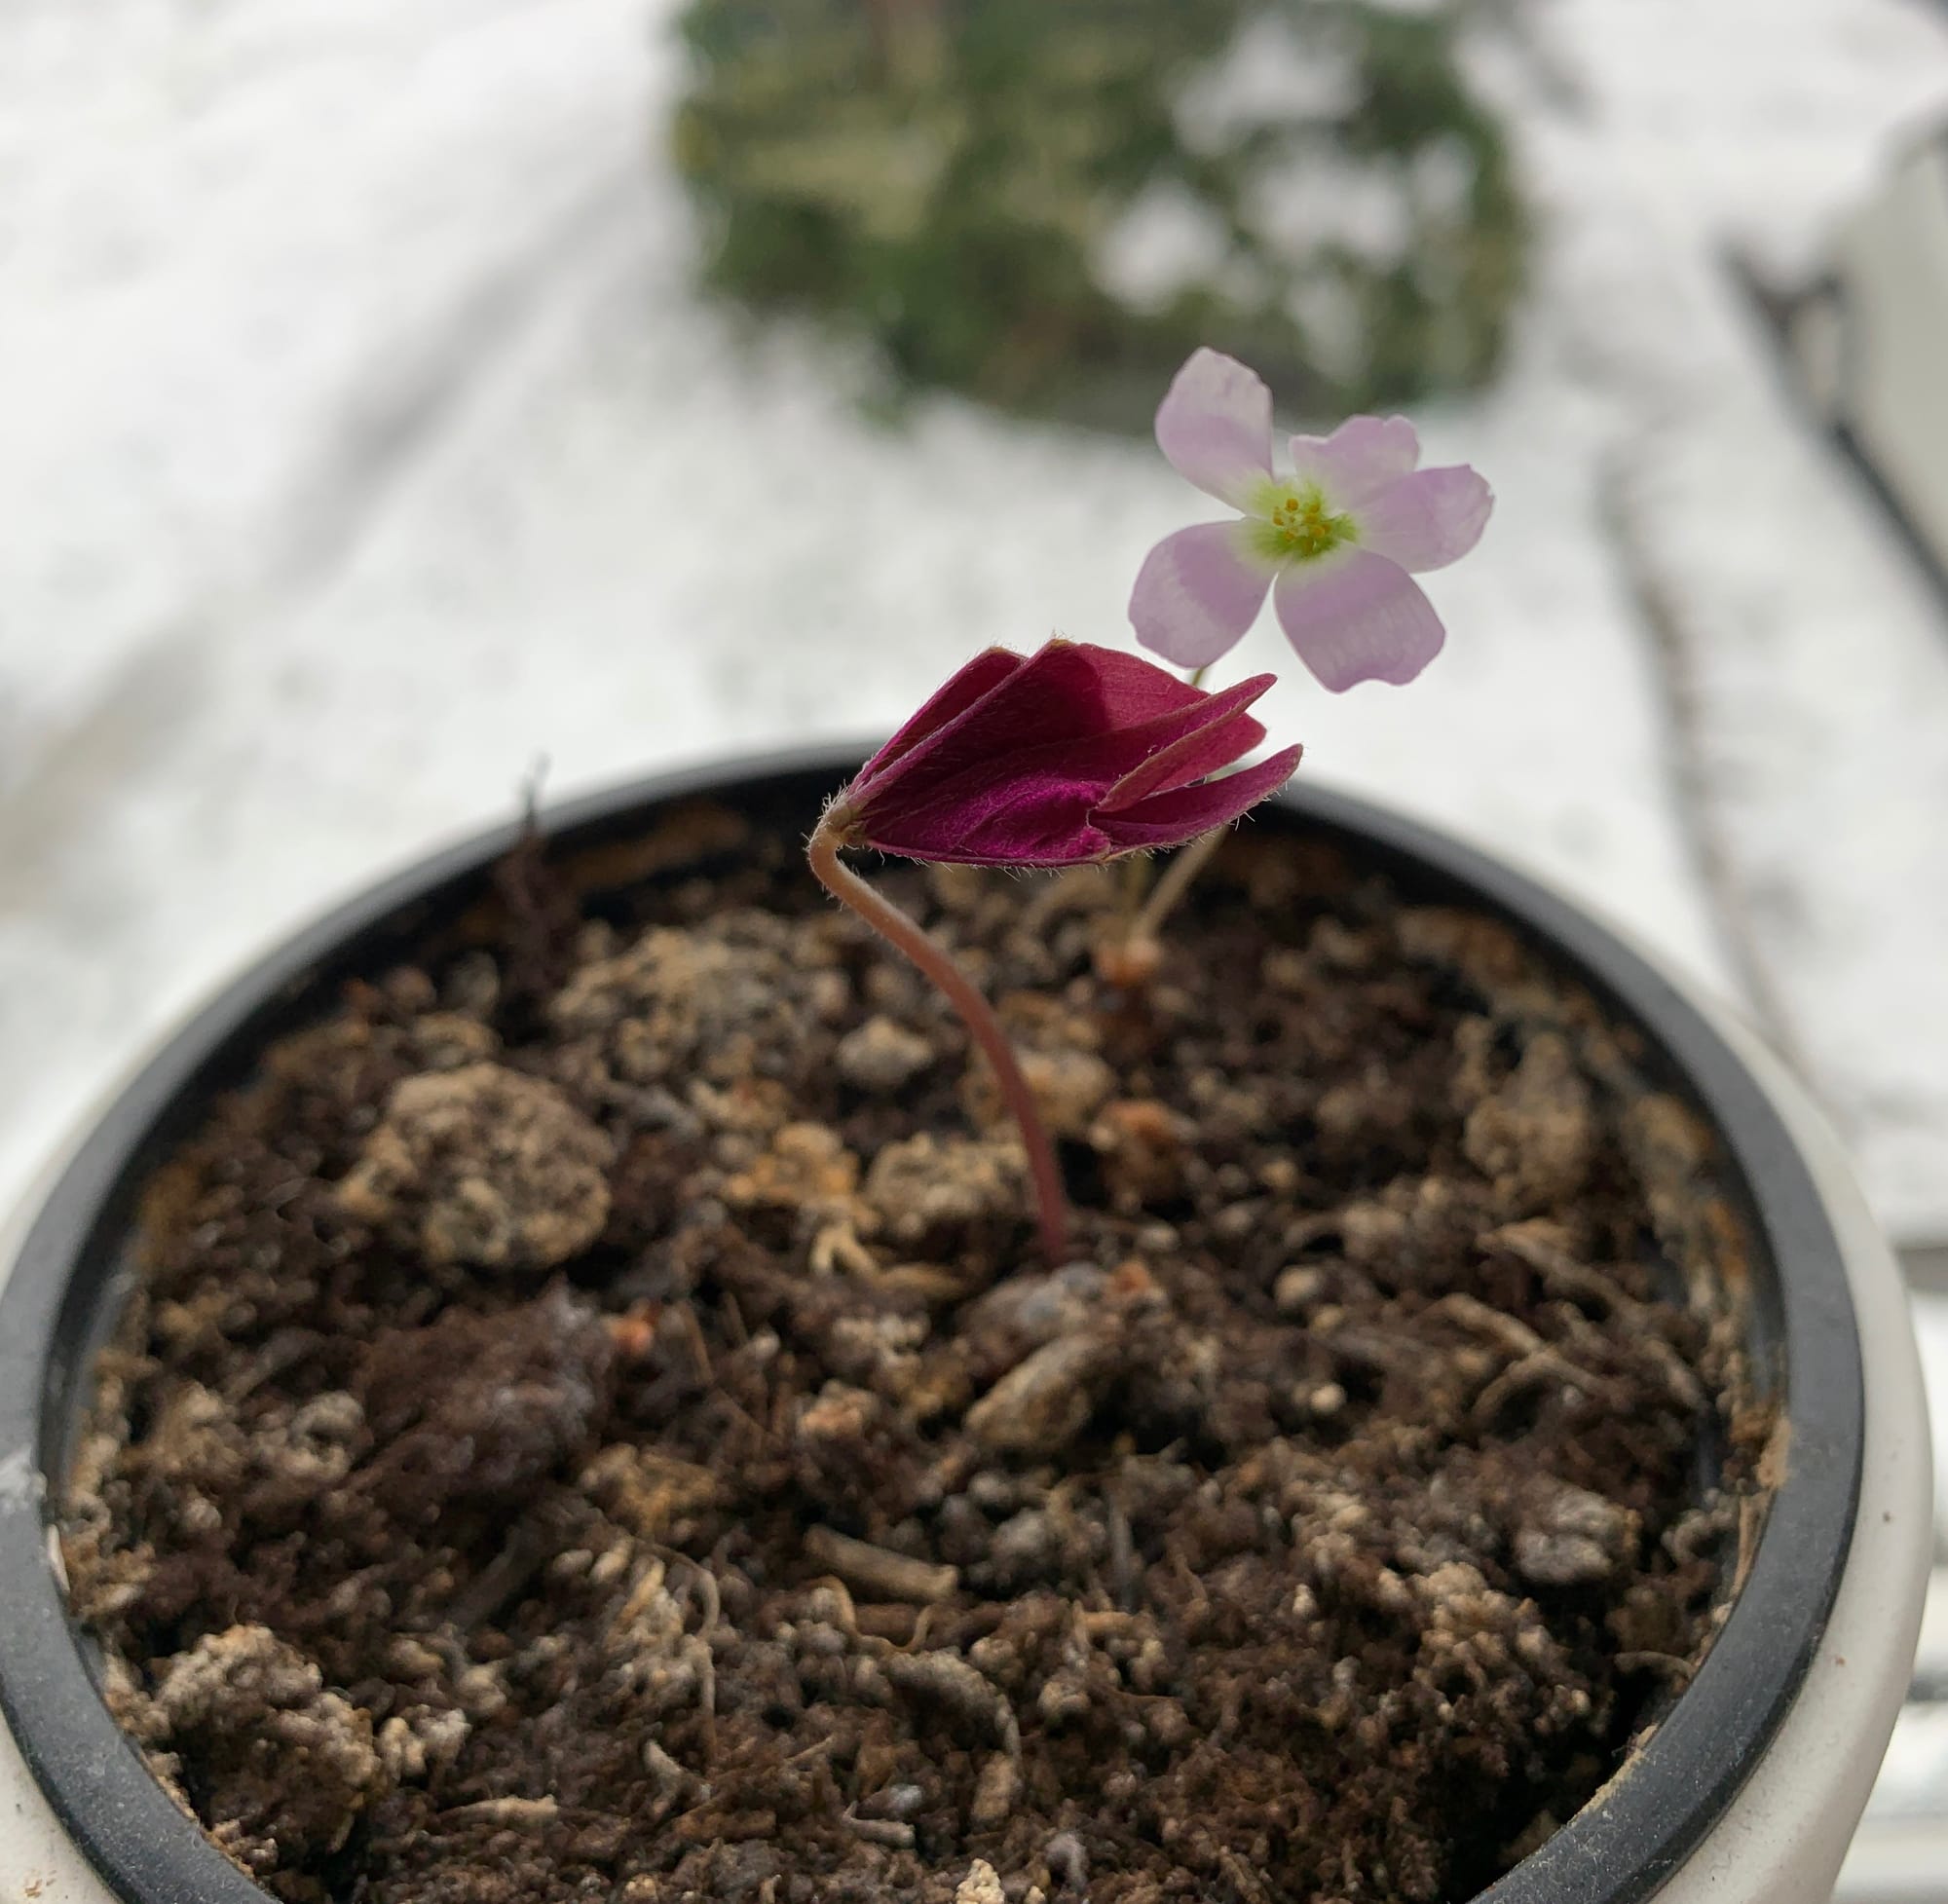 If your Oxalis develops flowers instead of foliage as it emerges from the dormancy period - prick them off. Allowing your specimen to produce lots of flowers with no foliage will zap it of energy, leaving you with a smaller-foliaged plant in the coming months. Like the image above, keep its leaves attached to the plant to help it gain more energy from photosynthesis.
Due to the Oxalis’ sensitivity to chemicals, Leaf Shine shouldn't be used to improve the appearance of the foliage, and instead should be cleaned using warm soapy water. Failure to do so may cause yellowed, mottled spots that cannot be undone.
Spider Mites are small, near-transparent critters, that'll slowly suck out the chlorophyll out of the leaves. Have a check under the leaves, most notably along the midrib, for small webs and gritty yellow bumps. Click here to read our article about the eradicating Spider Mites, along with some extra tips that you may not find elsewhere!
Too low humidity can cause browning leaf tips with yellow halos. Although this won't kill your specimen, you may want to increase the local moisture to prevent the new growth from adopting these symptoms. Mist or rinse the foliage from time to time and create a humidity tray whilst the heaters are active to create a stable environment for your specimen.
Stunted or slowed growth during spring or summer can usually be blamed on too much sunlight or not enough water, but will commonly go hand in hand. Persistent droughts will cause yellowing leaves, stunted growth and foliage decline. If the soil is constantly dry and it doesn't receive direct sunlight, it may just be pot bound. Click on this link for more information about how to perform the perfect transplantation.
Pink, green or reddish leaves are normal behaviour for Oxalis. Both at the start and end of the leaf's cycle, it should adopt a pink or reddish tone to it; simply remove the dying leaf to improve the growing conditions and overall appearance of the plant.
A steady decline in leaves is caused by either poor care or a natural dormancy. If your Oxalis triangularis has lost most of its foliage during the colder months of the year (autumn & winter), don't worry as it should bounce back in time for spring (scroll up to 'Dormancy Care) to learn more. For those that are reading this in spring or summer, here are a few reasons for its loss of leaves; too little light, dehydration, low temperatures, pests (most notable Spider Mites).
Leggy or spindly leaves/stems are the result of too low light. Increase your plant's light levels by relocating it to a windowsill that offers up to two hours of morning or evening sunlight. Don't prune the already-leggy foliage and instead wait for more compact growth that may take up to four weeks to grow.
Origins
The Oxalis triangularis forms part of the Oxalidaceæ family, which consists of 570 species, largely originating from South America. The name, Oxalis, derives from the organic compound (oxalic acid) found within its leaves and stems. The species was first described by Augustin Prouvençal de Saint-Hilaire in 1825, during a voyage to Central America. The leaves can be eaten raw or cooked and sport an acidic taste when eaten; however, you must be highly cautious as it can cause irritations for sensitive people.
Did You Know that like the Mimosa pudica, Oxalis are nyctinastic meaning that the leaves will move in concordance to the light levels. A slight difference between the two is that this species is actually bulbous, whereby the tubers can be divided during a transplant (every two or three years). For the UK, it's much harder to find these plants in garden centres, so the best bet would be to search the internet. If you're interested in keeping the Oxalis for years, have a read through the section above, as this will have lots of information about the much-needed period.
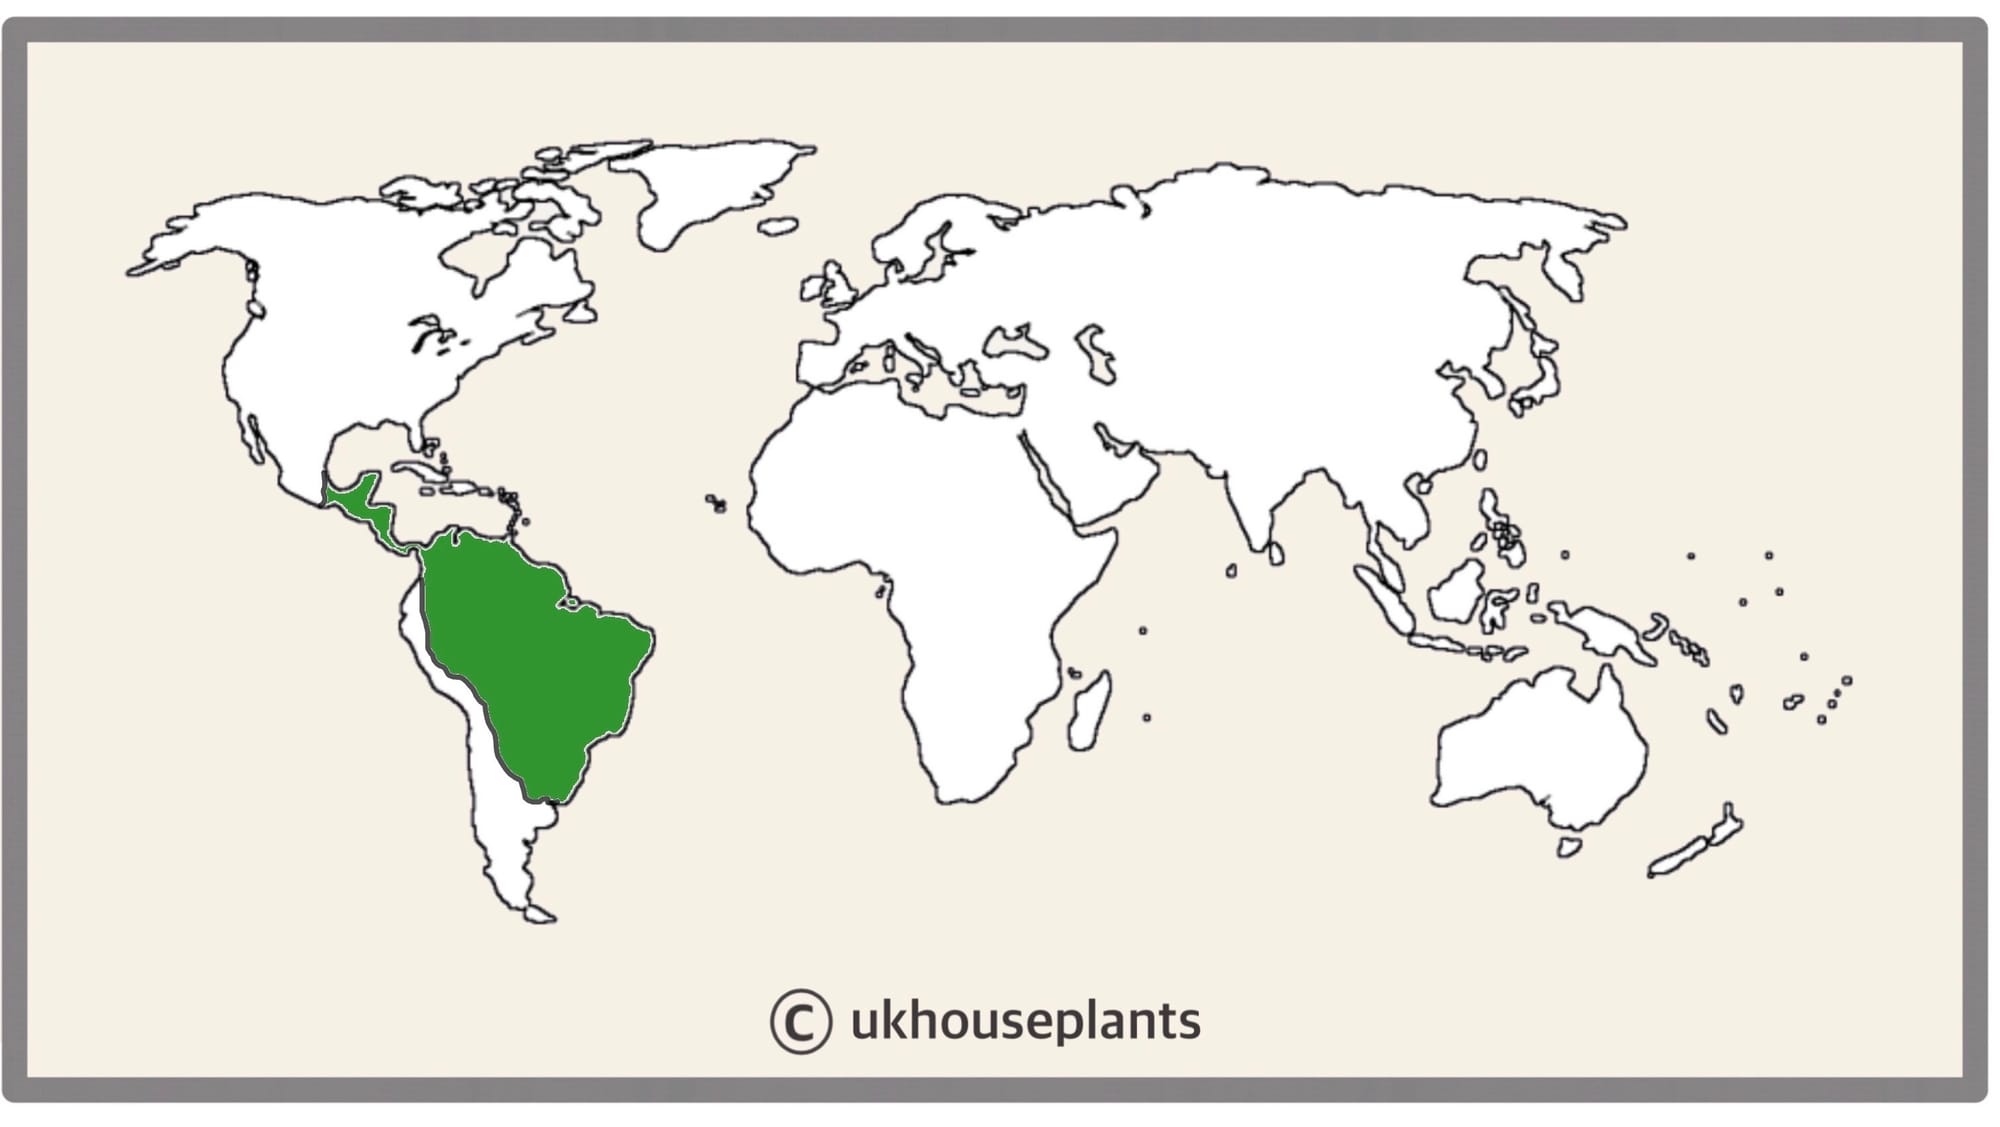 The Distribution of Oxalis triangularis
Temperature
12° - 24°C (54° - 75°F)
H1b (Hardiness Zone 12) - Can be grown outdoors during the summer in a sheltered location with temperatures above 12℃ (54℉), but is fine to remain indoors, too. If you decide to bring this plant outdoors, don't allow it to endure more than an hour of direct sunlight a day as it may result in sun-scorch and dehydration. Regularly keep an eye out for pests, especially when re-introducing it back indoors.
Spread
Up to 0.5m in both height and width. The ultimate height will take between 3 - 5 years to achieve, when quality dormancy periods are served in winter.
Pruning & Maintenance
Remove yellow or dying leaves, and plant debris to encourage better-growing conditions. While pruning, always use clean scissors or shears to reduce the chance of bacterial and fungal diseases. Never cut through yellowed tissue as this may cause further damage in the likes of diseases or bacterial infections. Remember to make clean incisions as too-damaged wounds may shock the plant, causing weakened growth and a decline in health.
Propagation
Via Seed or Tuber Division.
Tuber Division (Easy) is best performed during the dormancy period in the winter months. Of course, you can still propagate in the spring or summer, but you'll run the risk of transplant shock or damaging the delicate leaves.
Once the tubers are around 3cm in length, propagation can begin - have a look at the image below to see where to divide them.
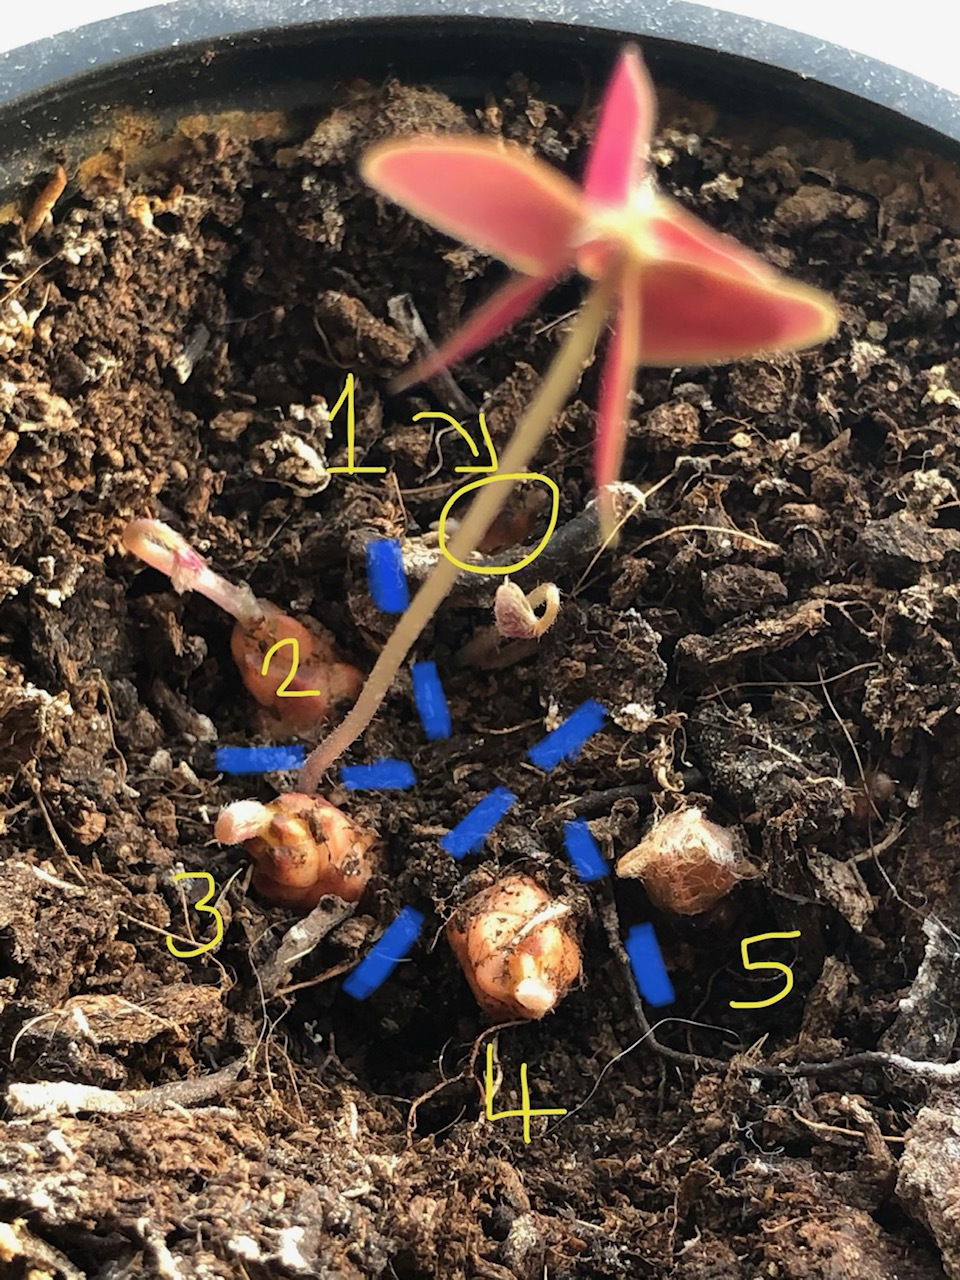 Oxalis tubers that can be cut or pulled apart along the blue dotted lines.
Take the plant out of its pot and place your fingers in between the two tubers; soil may have to be removed to get a better grip. Gently break them apart with a few sections of separate root systems. Place the new tuber around 1cm (0.4 inches) deep in a well-draining potting mix, much similar to the original soil, and maintain the same care routines. 'Houseplant' compost is acceptable, or you can make your own via using multipurpose compost with grit or perlite. Be sure not to use a pot that is too big; a ratio of roots-soil that much leans towards the latter will cause root rot. Keep the potted tuber in a bright, indirect location with slightly cooler temperatures - new shoots should appear in early spring, signalling the start of the new growing season.
Flowers
Your Oxalis triangularis will flower almost all-year round with its white-pink flowers that grow amongst the foliage. There's nothing special needed to achieve a show of flowers; simply keep the plant moist and provide a windowsill with either morning or evening sunlight to entice a bloom. The flowers will close at night and open in the day, similar to the leaves itself. They do this to preserve the pollen at night for the airborne pollinators during the daylight hours.
Note: If you're not overly fussed about its flowers, prune the blooms before they open to preserve energy for its foliage instead.
 Each individual inflorescenc can last up to five days, folding up at night to prevent the pollen being blown away in high winds.
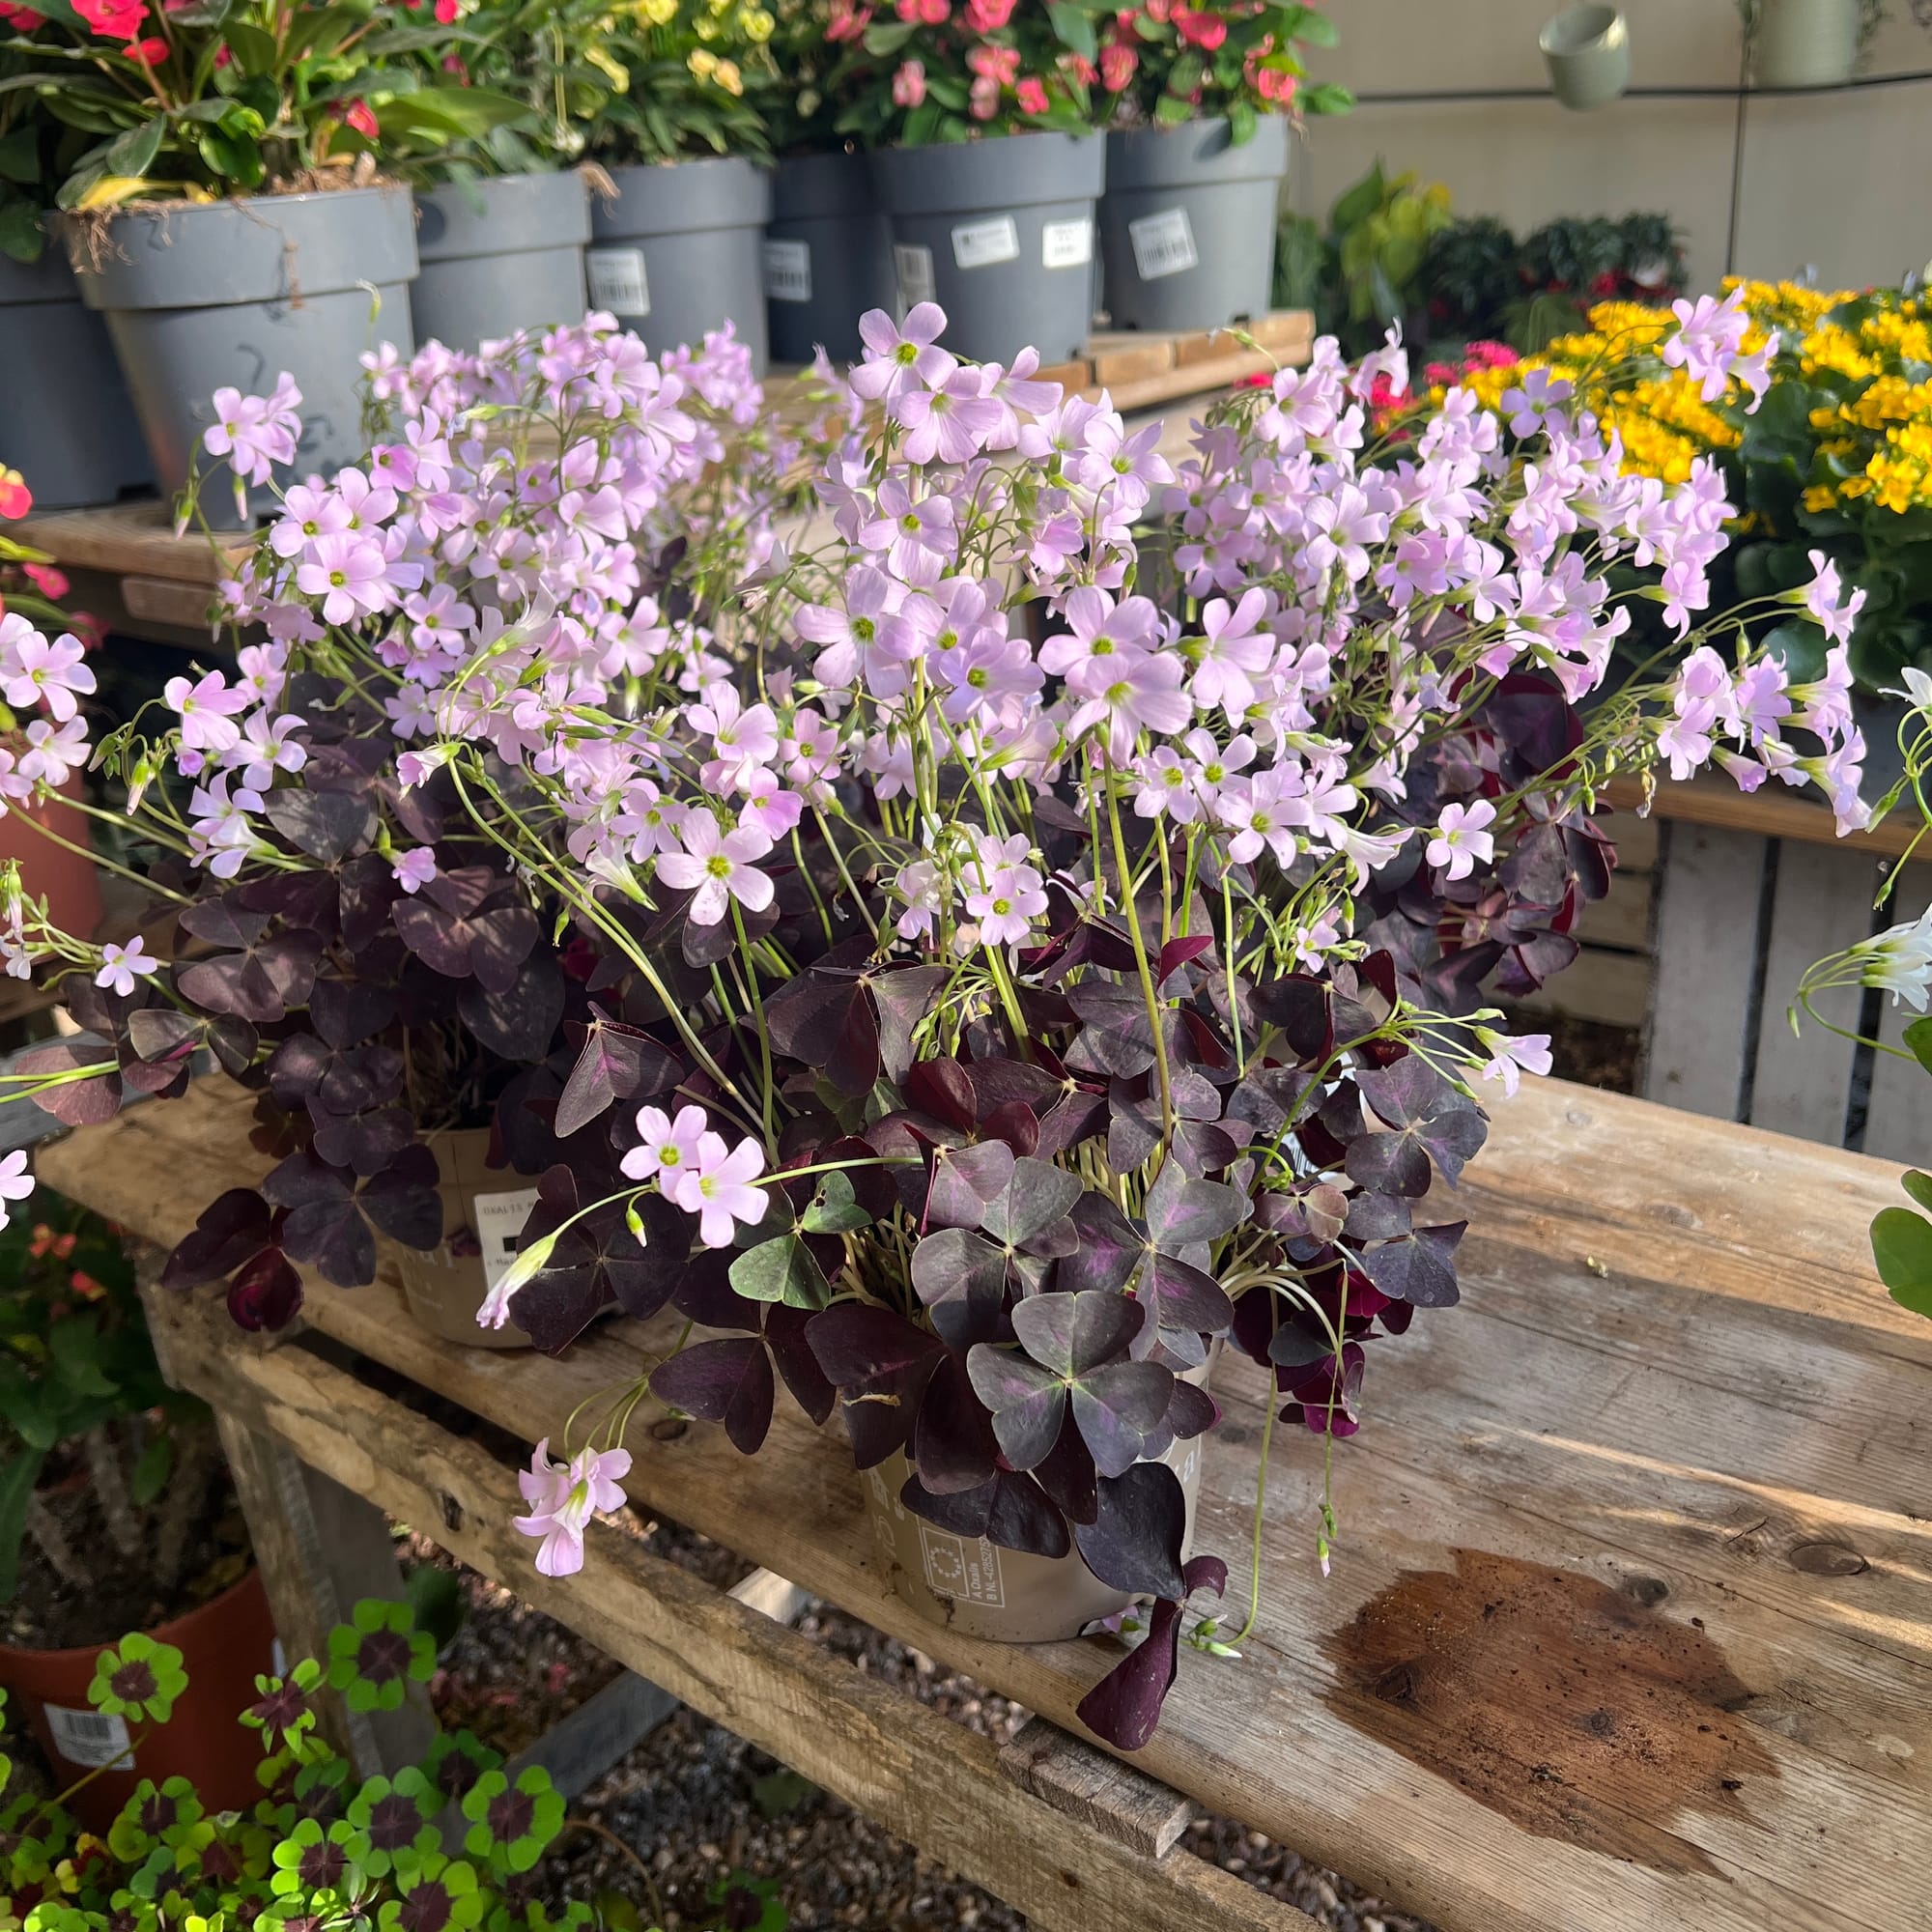
Here is another example of how well an Oxalis triangularis can flower!
Repotting
Repot every three years in the spring, using a 'Houseplant' labelled compost and the next sized pot with adequate drainage; this is the perfect time to separate the tubers into separate specimens. Hydrate the plant 24hrs before tinkering with the roots to prevent the risk of transplant shock. For those that are situated in a darker location, add a thin layer of small grit in the pot's base to improve drainage and downplay over-watering. Click here for a detailed step-by-step guide on transplantation, or via this link to learn about repotting with root rot.
Book a 1-to-1 video call with THE HOUSEPLANT DOCTOR™ if you'd like a personal guide to repotting your houseplant. This will include recommending the right branded-compost and pot size, followed by a live video call whilst you transplant the specimen for step-by-step guidance and answer any further questions!
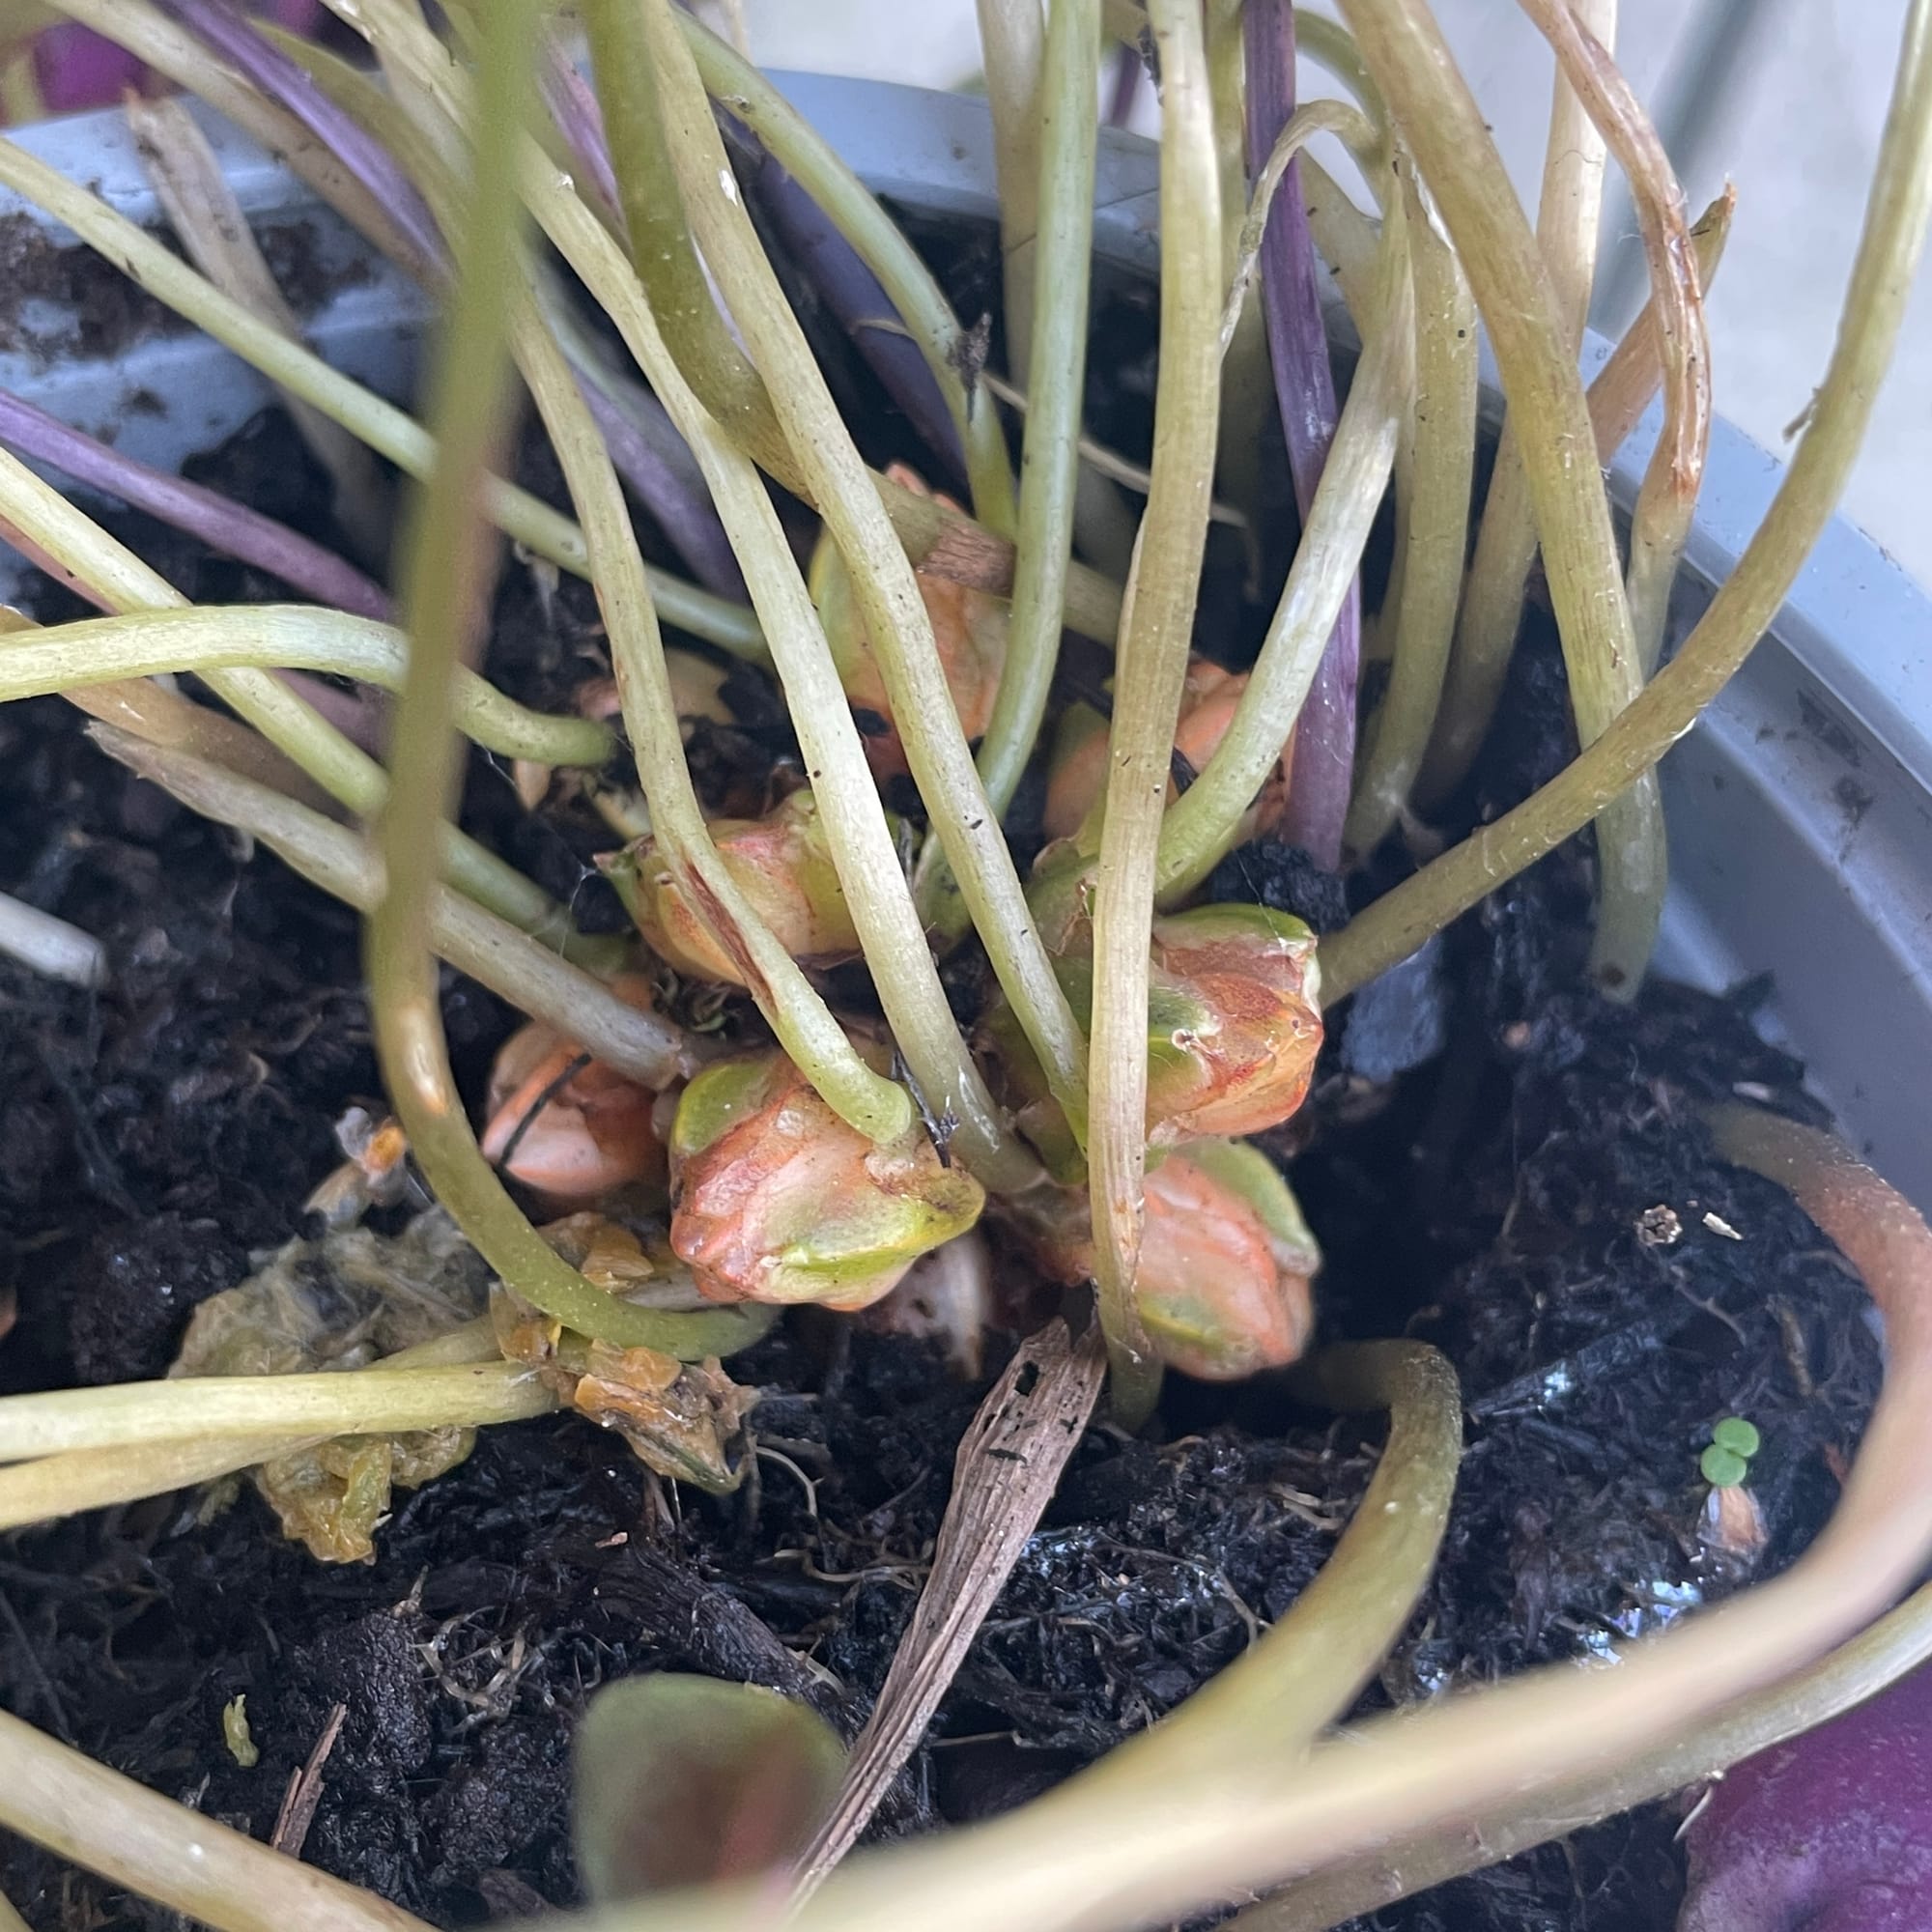 When repotting, be sure not to snap its delicate petioles that join the tuber (bulb) to the leaf.
Pests & Diseases
Keep an eye out for mealybugs, aphids, spider mites, thrips, blackfly, vine weevils & root mealybugs that'll locate themselves in the cubbyholes and undersides of the leaves, with the exception of the latter two in the soil. Common diseases associated with Oxalis are root or tuber rot, leaf-spot disease, botrytis, powdery mildew & southern blight - click here to learn more about these issues.
 The best way to search for pests is by checking the leaf's undersides - this is where most infestations will occur.
Toxicity
This plant is classified as poisonous when large quantities are eaten - keep away from pets and children who have tendencies to eat things. If parts of the plants are eaten, vomiting, nausea and a loss of appetite could occur, but is generally not considered highly toxic.
Retail Locations
Online Stores.
Book a 1-to-1 Call with THE HOUSEPLANT DOCTOR™
If you need further advice with your houseplants, book an advice call with ukhouseplants' friendly and expert writer today! This can be done via a video or audio call on most apps, including Facebook, FaceTime & Skype. A ten-minute call costs £5.99 (US$7), or £15.99 for thirty minutes. You can ask multiple questions, including queries on plants, pests, terrariums, repotting advice and anything in between. Please consider supporting this service to keep ukhouseplants thriving!
Comments