Plant Closest: Echeveria 'Miranda'
Contents
- Top Tips
- Location, Water, Humidity & Fertilisation
- Dormancy Care & Annual Flowers
- Common Issues
- Origins, Temperature, Propagation, Repotting & Toxicity
Need the answer to a specific plant query? Book a 1-to-1 video call with THE HOUSEPLANT DOCTOR™, the website's friendly author, to overcome and address your niggling problem! Available on iMessage, WhatsApp, Facebook Messenger & more.
Top Tips & Info
- Care Difficulty - Easy
- A few hours of morning or evening sun is mandatory, especially in the winter months.
- Echeveria must endure periods of droughts in between waters - if you're stuck with when to water it, think of the ukhouseplants' phrase of 'Drenches Between Droughts'.
- Be careful when watering - allowing excess moisture to sit in the cubbyholes of the stem will result in diseases like southern blight and 'heart rot'.
- Fertilise every two or three months using either a 'Cactus' or 'Houseplant' labelled feed.
- Repot every two to three years during the spring, using a Cactus & Succulent potting mix. This is the perfect time to propagate the small offshoots that'll form at the base of the crown. Carry on reading to learn more about the top tips mentioned above.
Location & Light - 🔸🔸🔸
A few hours of direct sunlight is a must; shady locations could lead to diseases associated with over-watering. The frequencies of irrigations solely rely on the amount of the sun received. If the Echeveria begins to develop a discoloured white crown, this is typically down to too little light. Newly-propagated 'pups' must not receive any sunlight as their insufficient root systems will not soak up enough moisture to survive the harsh rays.
Water - 🔸
During the growing period, thoroughly water the soil every ten to fourteen days, allowing the soil to dry out in between. Winterising your Echeveria is essential to maintain good health; keep the plant 'ticking over' by reducing the number of irrigations to every three weeks and avoid over-fertilisation. One word of advice is never to allow excess moisture to settle either in the actual crown of the plant or underneath the pot, as both will cause southern blight or even black rot. Under-watering symptoms include drooping leaves, stunted growth, and drying leaves; these can be a range of different issues, including forgetfulness, too much sunlight, or the plant being pot-bound. Over-watering symptoms include root rot, a rotting base, or sudden plant death. Echeveria must have sufficient light levels (at least two hours of direct sunlight a day) to counteract the chance of root rot. For more severe cases, click on this link below to learn about how to address root rot.
Humidity -
This is not a factor; however, if the Echeveria is situated indoors, a quick hose down from time to time will reduce the number of dust particles covering its leaves.
Fertilisation - 🔸
Fertilise every two months during the growing period and every three months in the autumn & winter to replicate its dormancy period. Although a 'Houseplant' fertiliser will still do the job, we'd recommend using a specific 'Cactus' labelled feed as it'll support the vital thirteen nutrients that this species will need to grow.
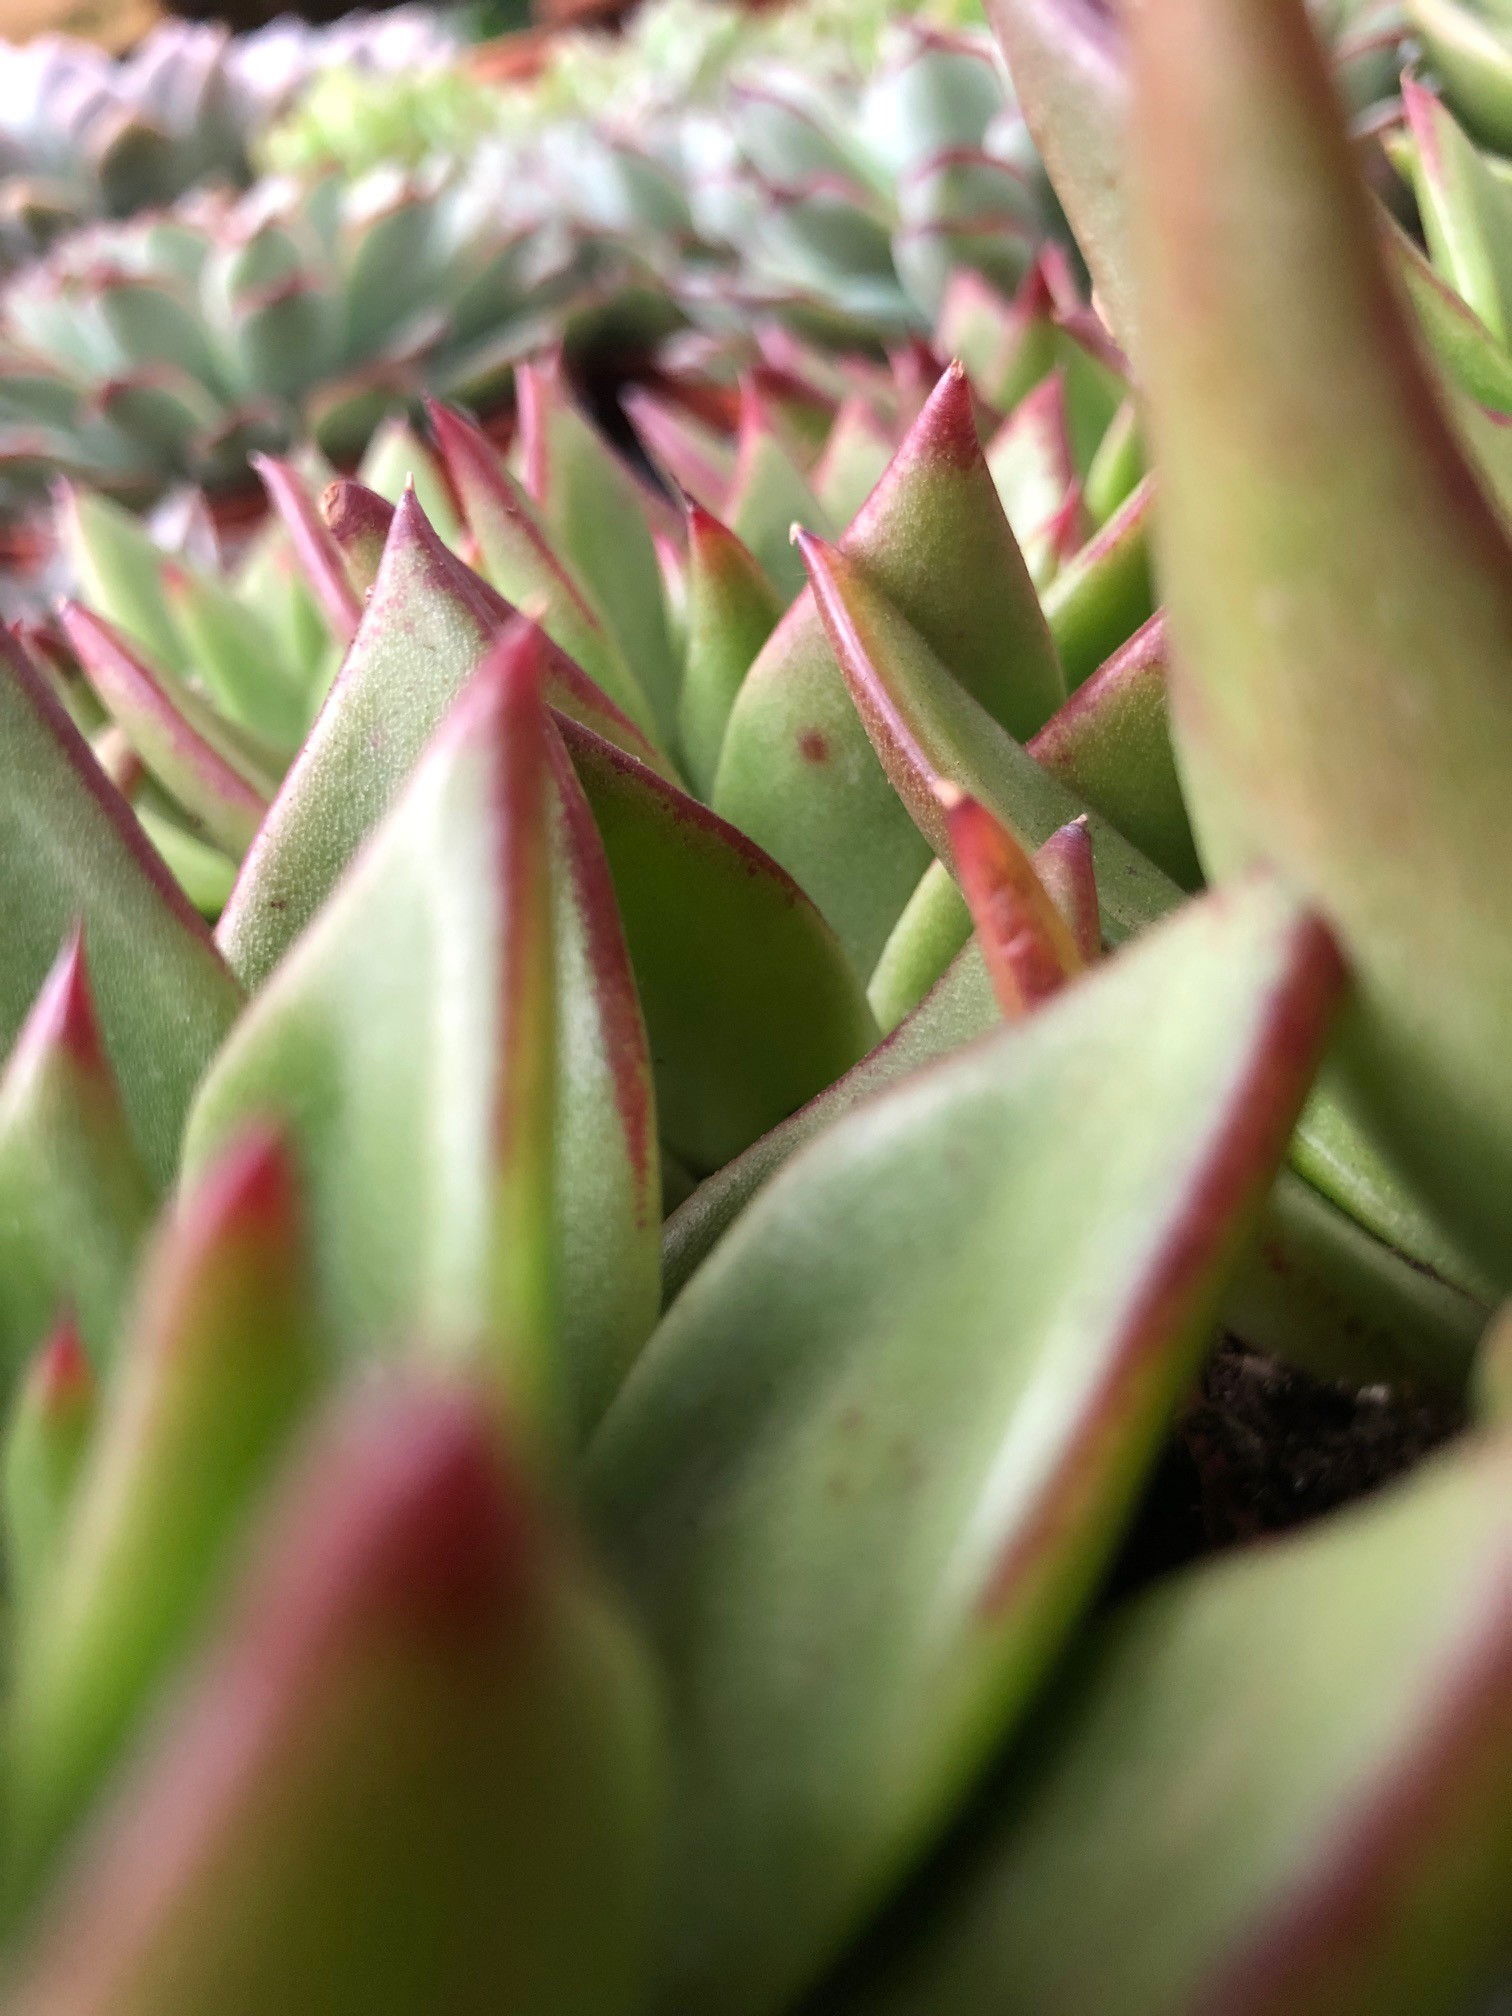
 Echeveria grosso
Dormancy Care & Annual Flowers
Provide a cool autumn and winter period around 15℃ (59℉) to reinforce its dormancy. Keep the roots pot-bound to add further stress onto the specimen, which in turn will significantly heighten the chance of flowering. Blooms will generally appear in the summer, during the active growth season. The following steps should be taken from early autumn until the end of winter.
Sunlight & Location
Be sure to provide a bright location with a few hours of direct sun. Although the winter rays won't necessarily hurt the plant, be careful not to fall in the trap of sun-scorch and severe dehydration. Avoid deep shade and the use of artificial lighting at night or locations that boast temperatures higher than 18℃ (64℉).
Hydration
Reduce waters so that ALL of the soil becomes dry for several weeks. It's essential to keep them on the drier side to life, as they'll think that hard times are ahead and therefore will need to pass its genes on to the next generation.
Occasional Feeds
During the autumn and winter, fertilisation should be performed every two months with a 'Cactus' feed. While the flowers are in development or in bloom, use a Tomato fertiliser to provide fortnightly nourishment of potassium, at monthly intervals.
Reduce Everything
This is to remind you that everything needs to be reduced - especially the watering and temperature.
Temperature
This is the most significant step; reduce the temperature down by around 5℃ compared to the summertime or place in a room that's between 10º - 15℃ (50º - 59℉). You'll be at a significant disadvantage if the ambient temperature is kept constant throughout the year, as Echeveria will only respond in locations that have daily fluctuations of around 7℃. Never exceed the minimum temperature as it may lead to plant death or yellowed foliage at a bare minimum. If these steps are followed successfully, you could see a show of blooms in the following summer - but remember, dealing with nature may not always provide the results you'd relish!
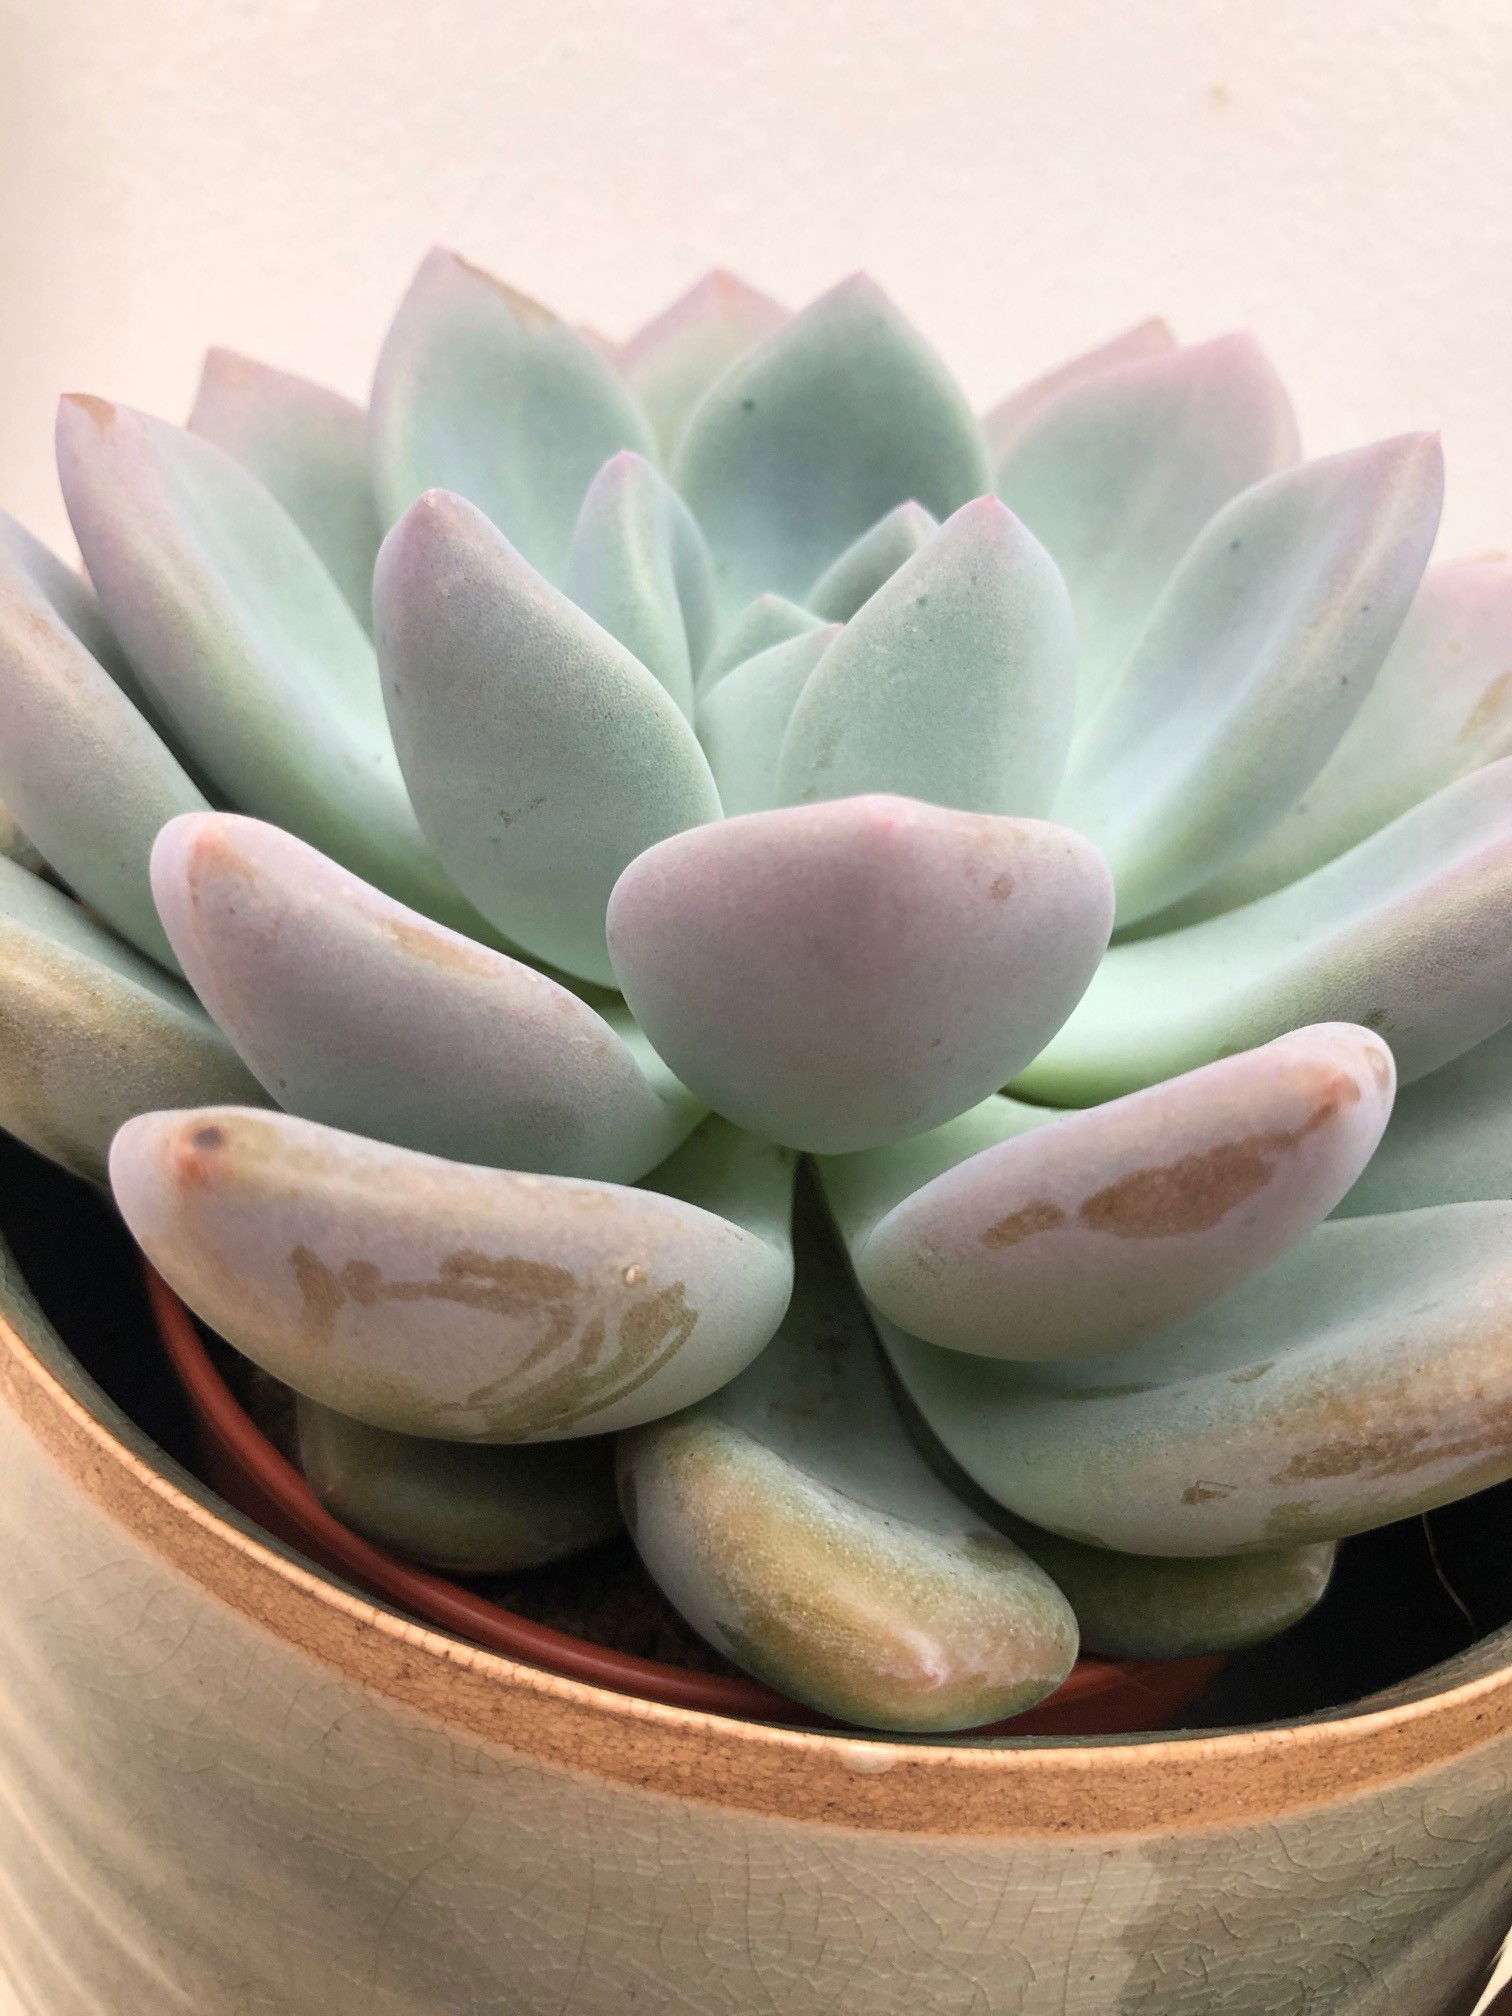
 Echeveria 'Miranda'
Common Issues with Echeviera
Over-watering is the most common issue, with typical signs including a softened yellow stem and stunted growth. There must be periods of droughts to replicate the habitats of the central-east American deserts, as well as limiting the chance of diseases. Avoid waterlogging as there's no point fulfilling the phrase 'drenches between droughts' if the base of the pot is submerged. For more information about over-watering related issues, be sure to click on this link.
A pale centre and deformed growth are typical signs of too little light. Offer at least an hour of direct sunlight, especially in the winter months, to provide the vital nutrients that'll be converted into plant sugars.
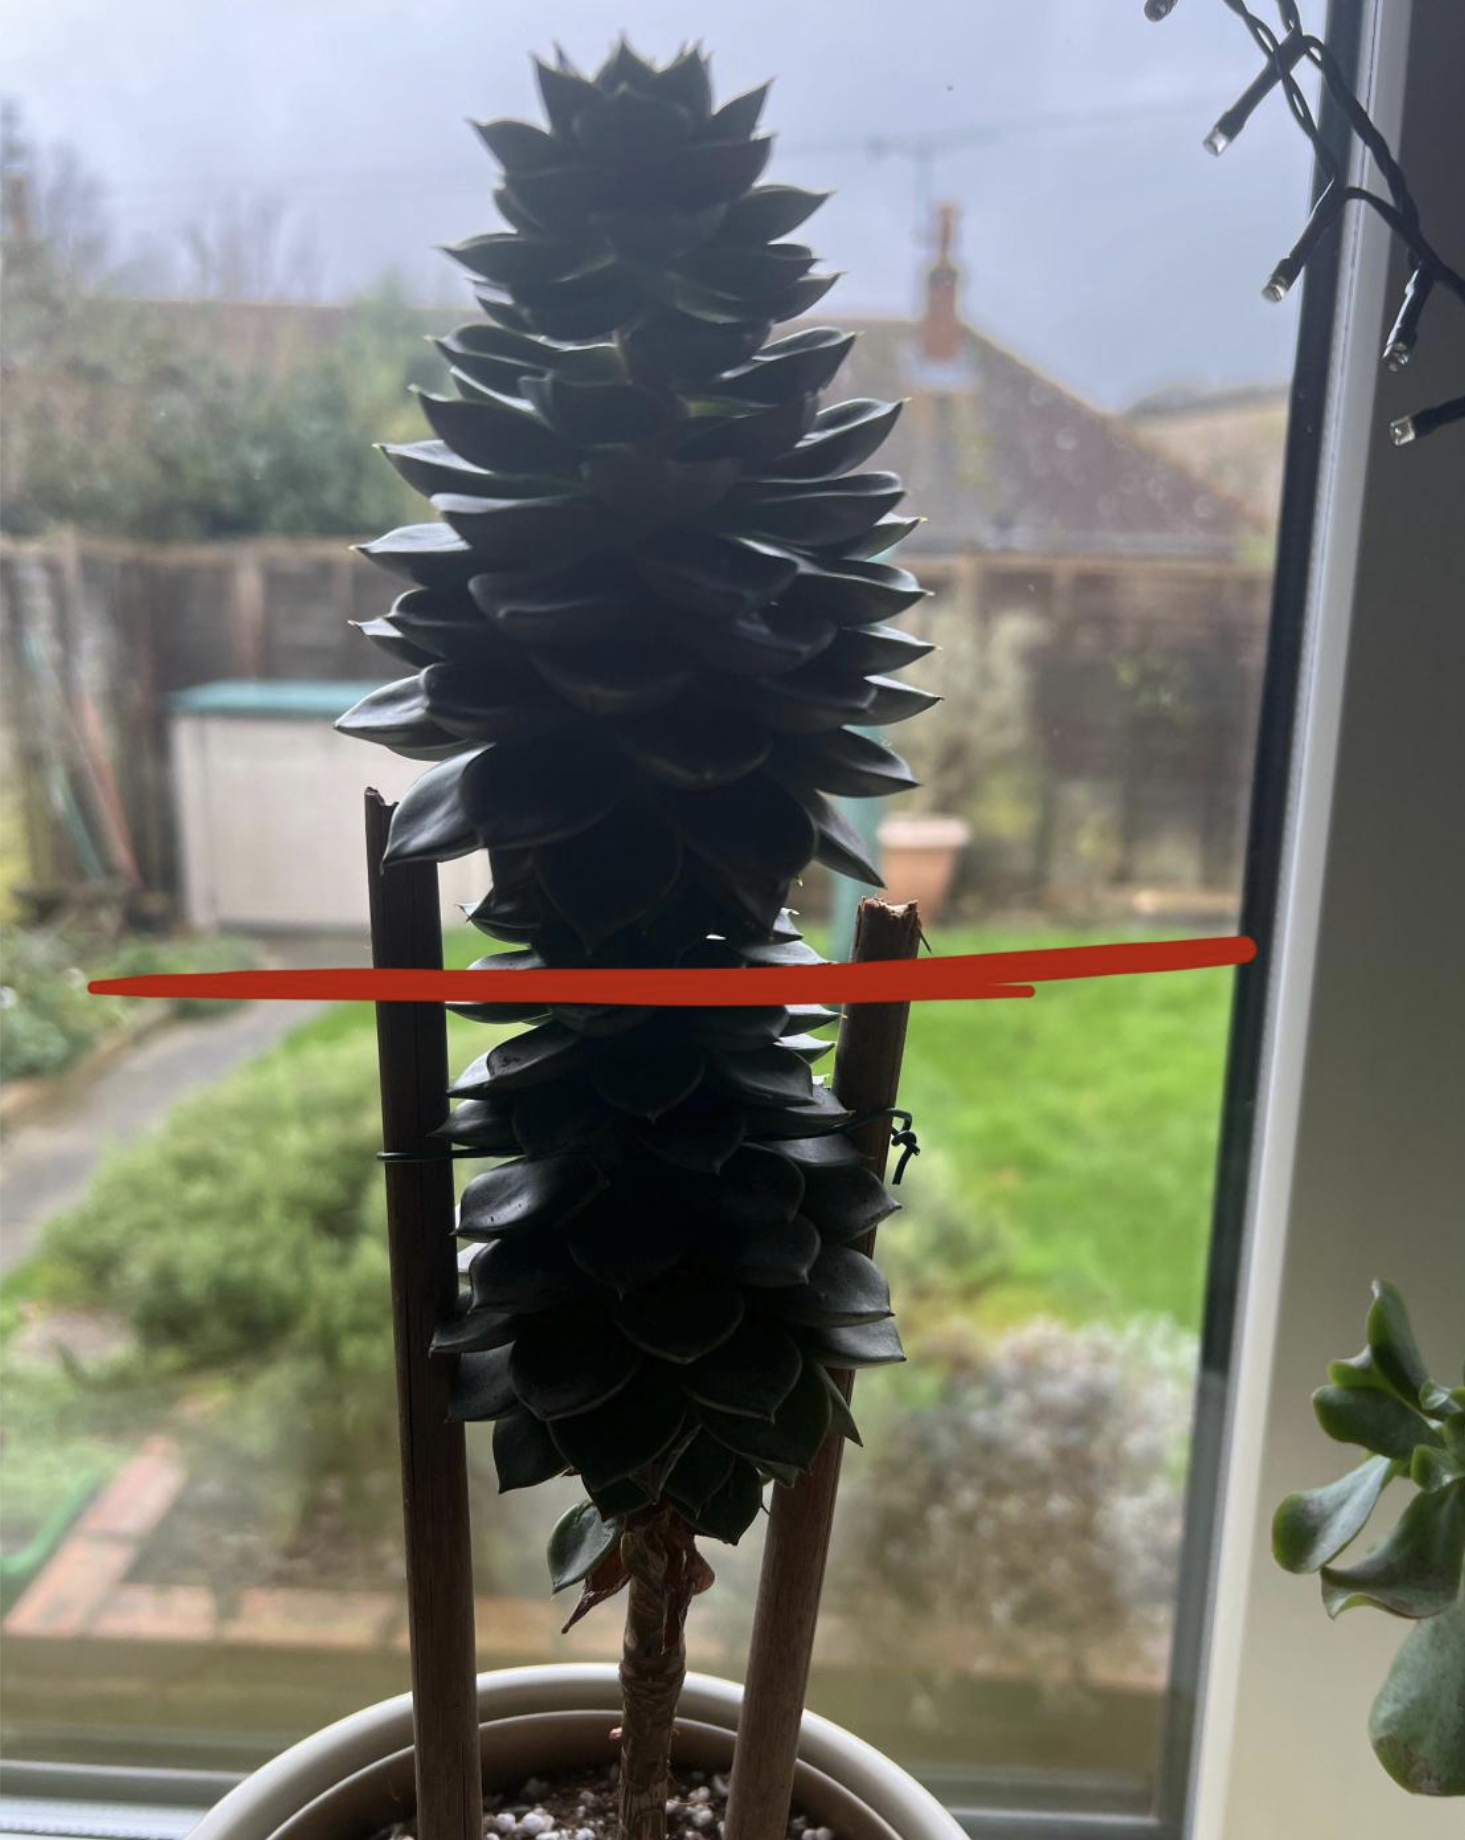
If your Echeveria has become tall and leggy with no leaves at the stem's base, you can always cut it back via the red line. Leave the plant's bottom half in the soil to produce new branches, while rooting the top half in a 7cm pot of 'Cactus & Succulent' labelled soil by a sunny windowsill. One big 'however' is that when you prune the stem back, you'll inhibit the chances of it flowering. See the image below...
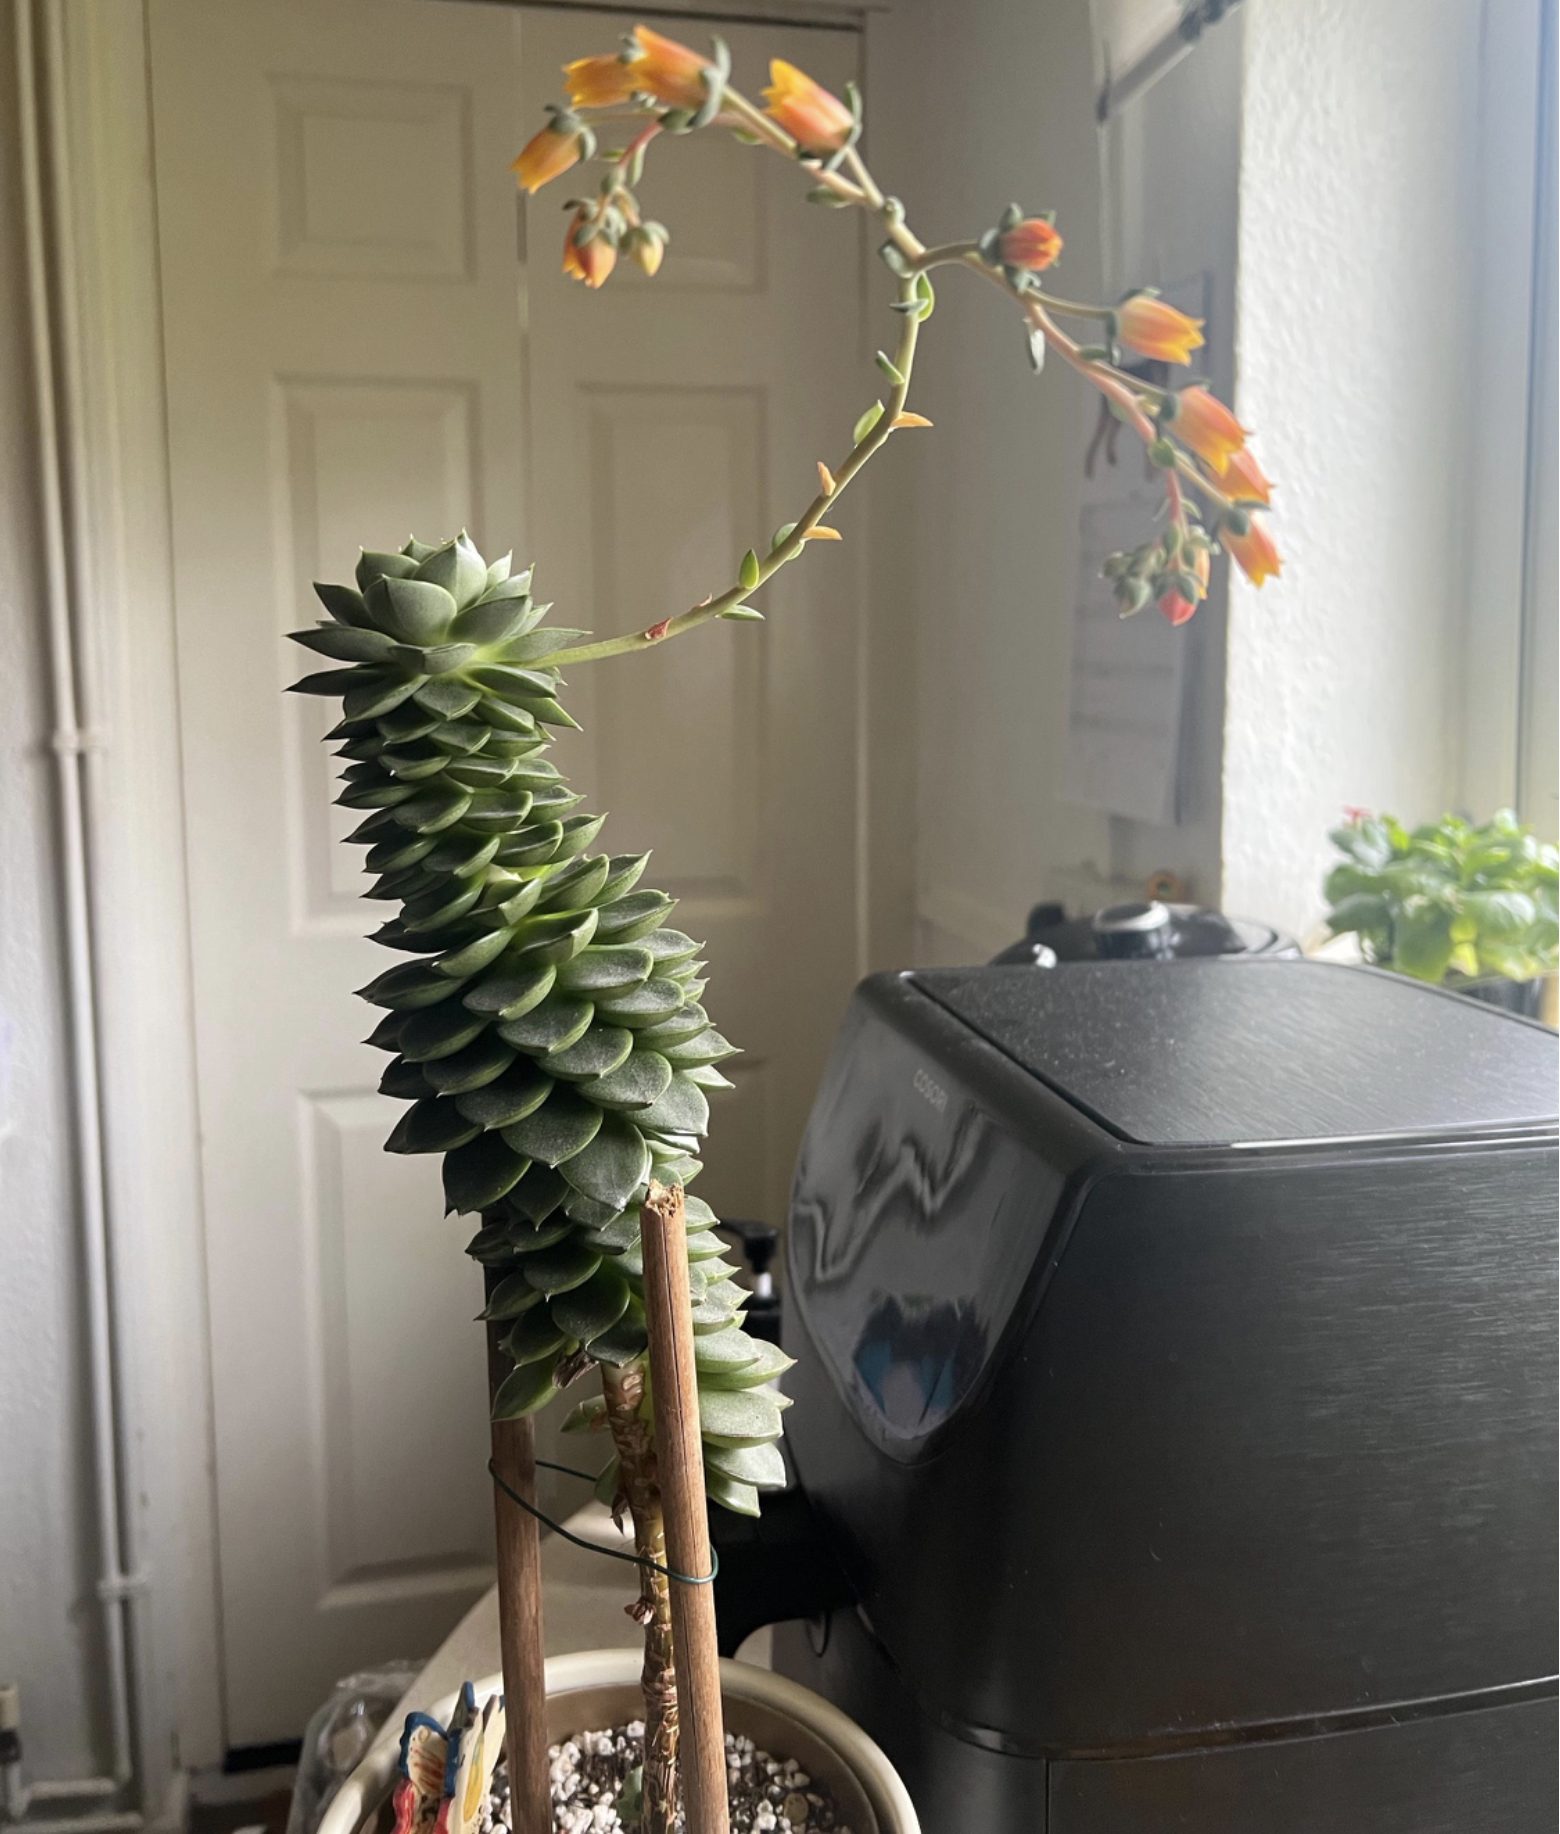 Although you can prune leggy Echeveria and take stem cuttings to reduce its overall height (photo above this one), you might be stopping the chance of it producing flowers. Here's one of our customer's Echeveria desmetiana which has been left to continue growing, which rewarded them with a beautiful show of orange flowers!
Scorched or browned edges are the result of too little water and over-exposure to the sun. Although Echeveria are a superb choice for plants in sunny locations, those that haven't acclimatised to the harsh rays will show signs of sun-scorch and environmental shock. Prolonged exposure will significantly speed the process of dehydration, so consider transplantation into a bigger pot (in the spring) to wrap the roots around moister soil.
Over-feeding an Echeveria will bring nothing but grief in the likes of yellowing leaves and weak, dramatic growth. Although regular feeds are an excellent way to promote good health, dry soil and fertiliser salts will quickly lead to the burning of roots. The advice for this issue is to pre-moisten the soil beforehand and reduce the frequency of fertilisations somewhat.
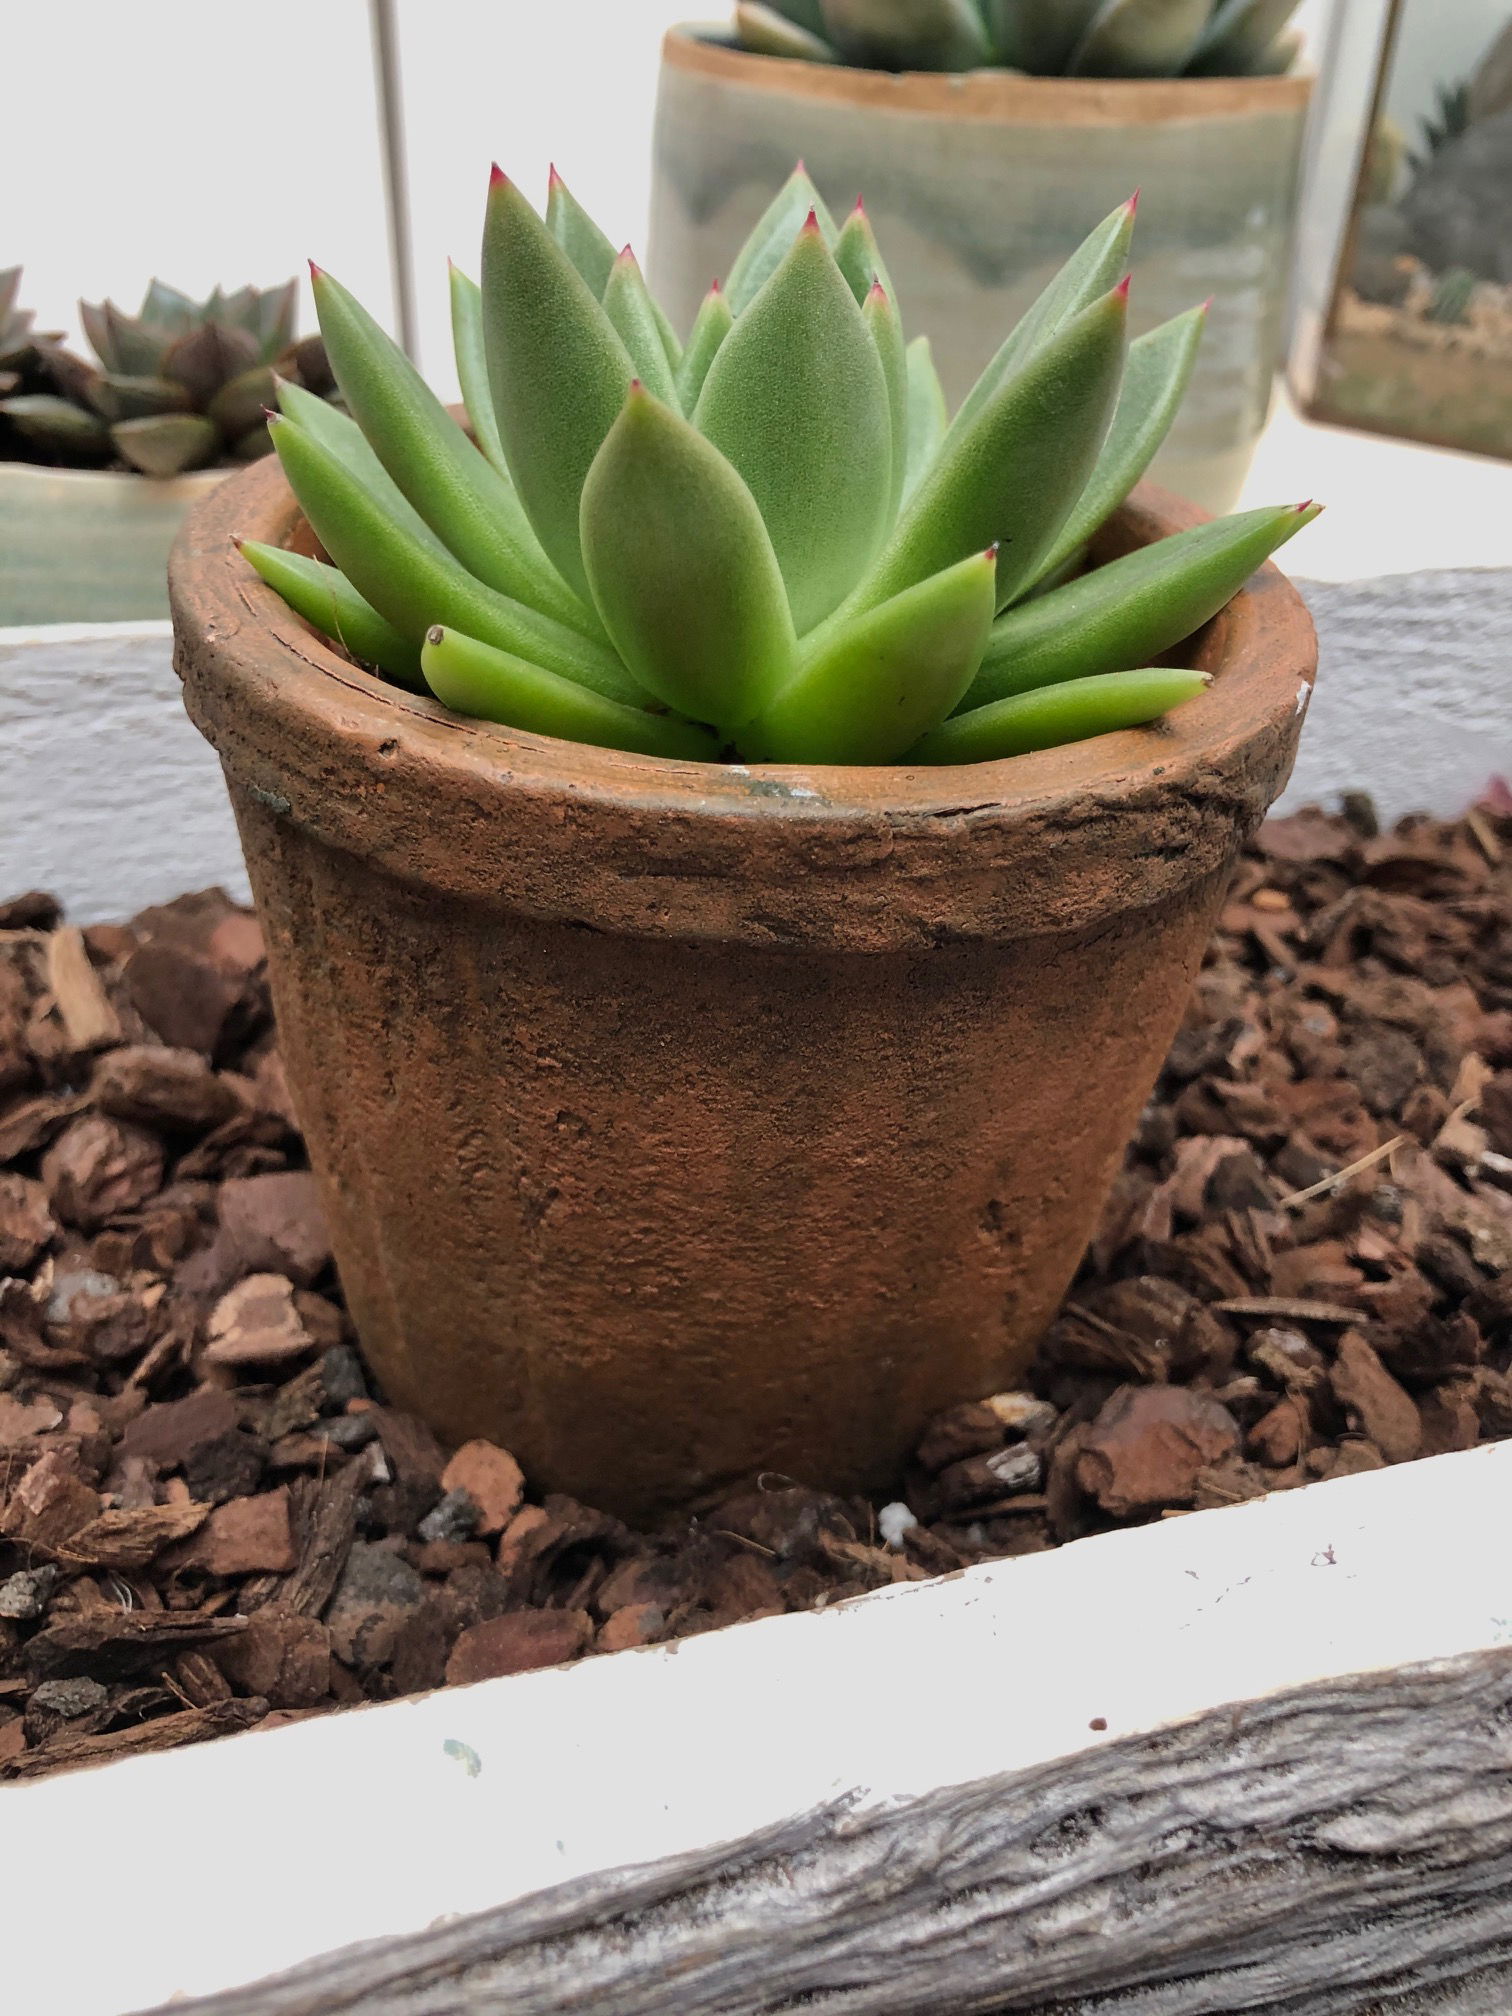
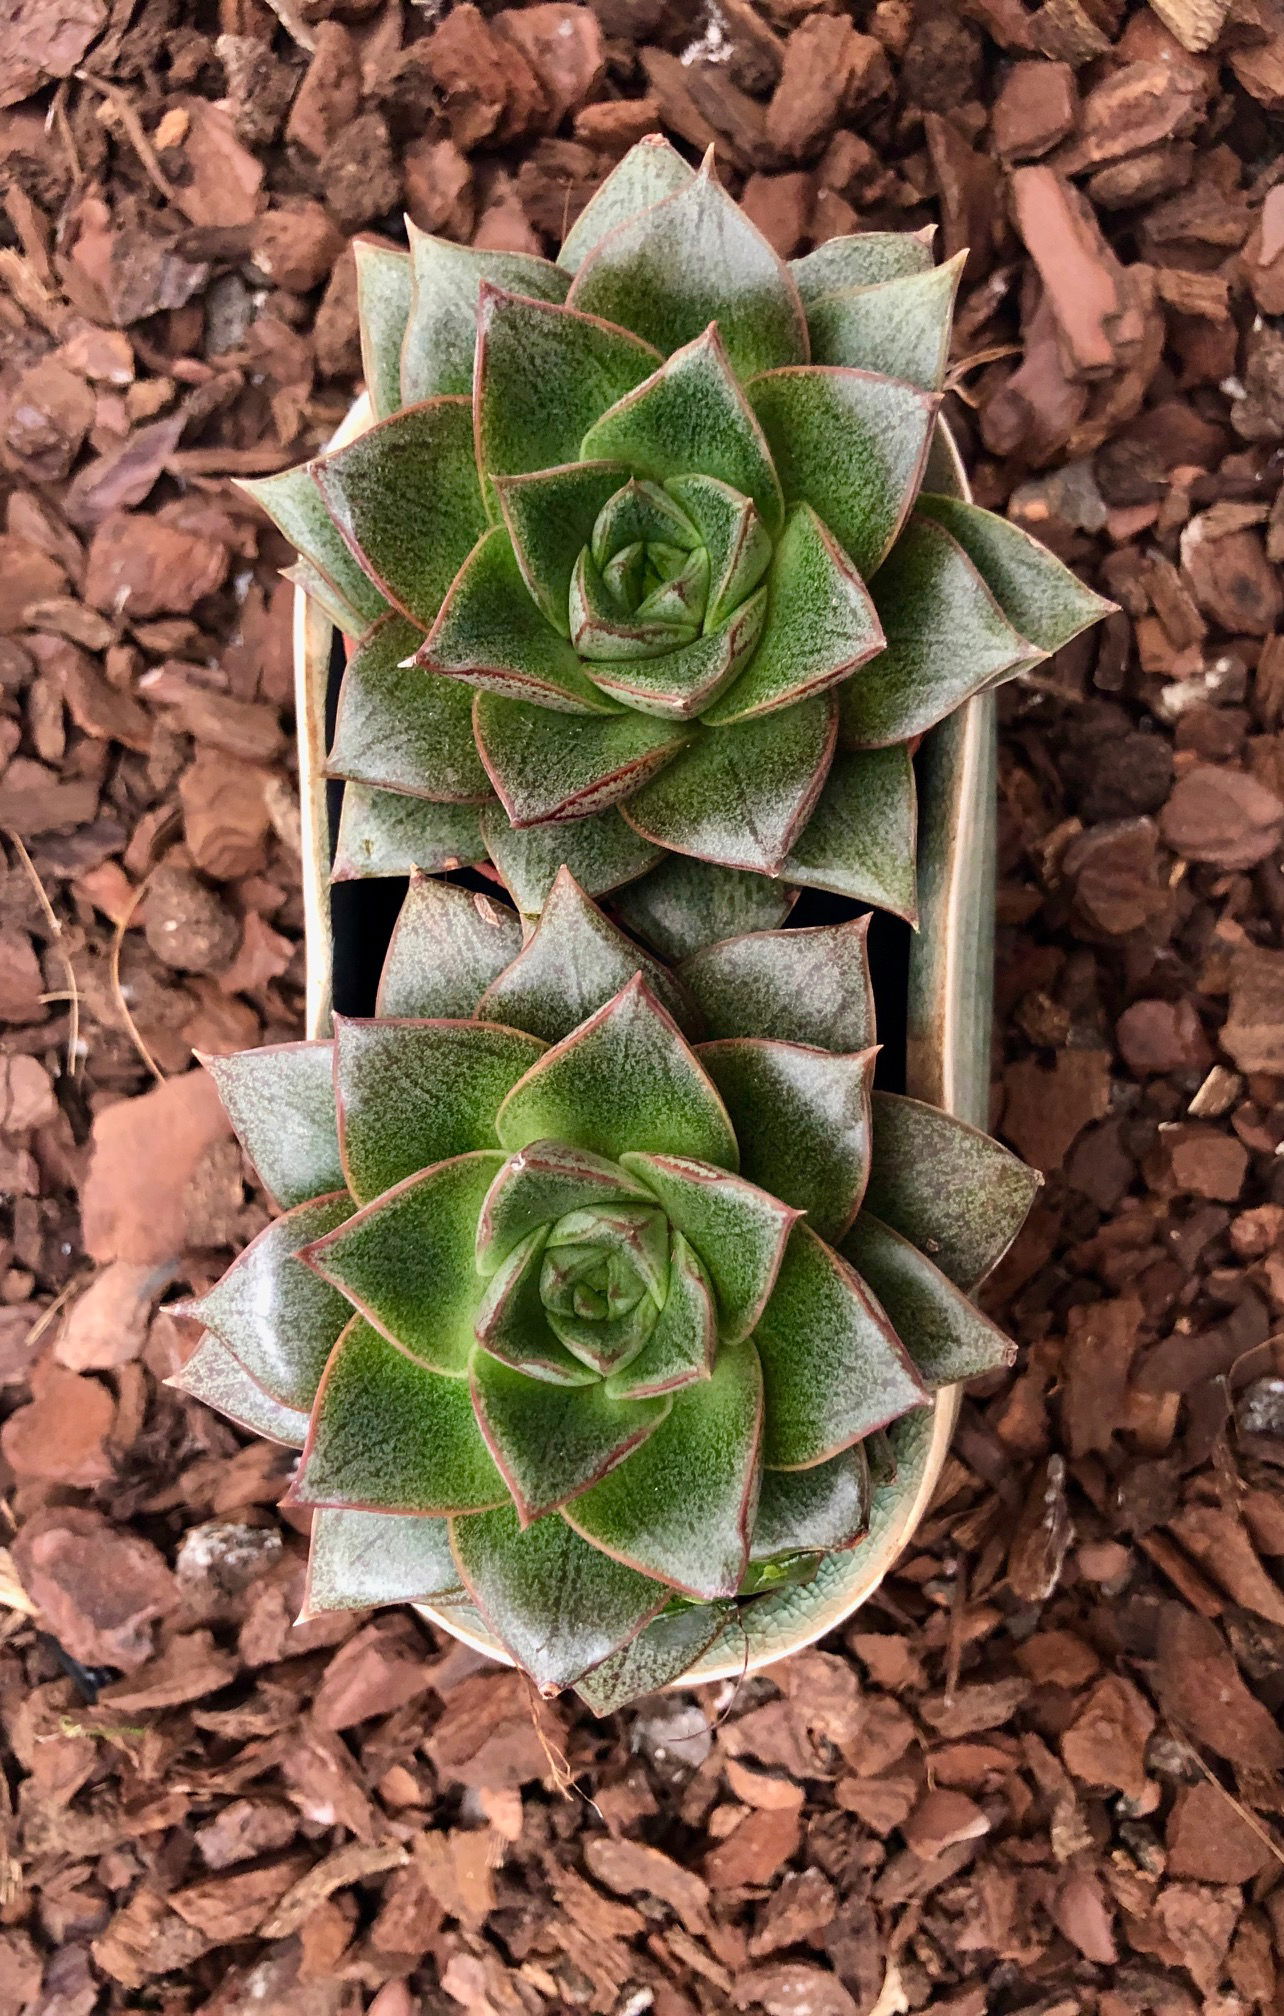 Echeveria purpersorum
Origins
Echeveria consists of over one hundred and fifty species, originating from semi-desert locations in Mexico, Central America and northwestern South America. The genus was first described back in 1828 by Augustin Pyramus de Candolle, honouring 18th-century Mexican artist - Atanasio Echeverría y Godoy.
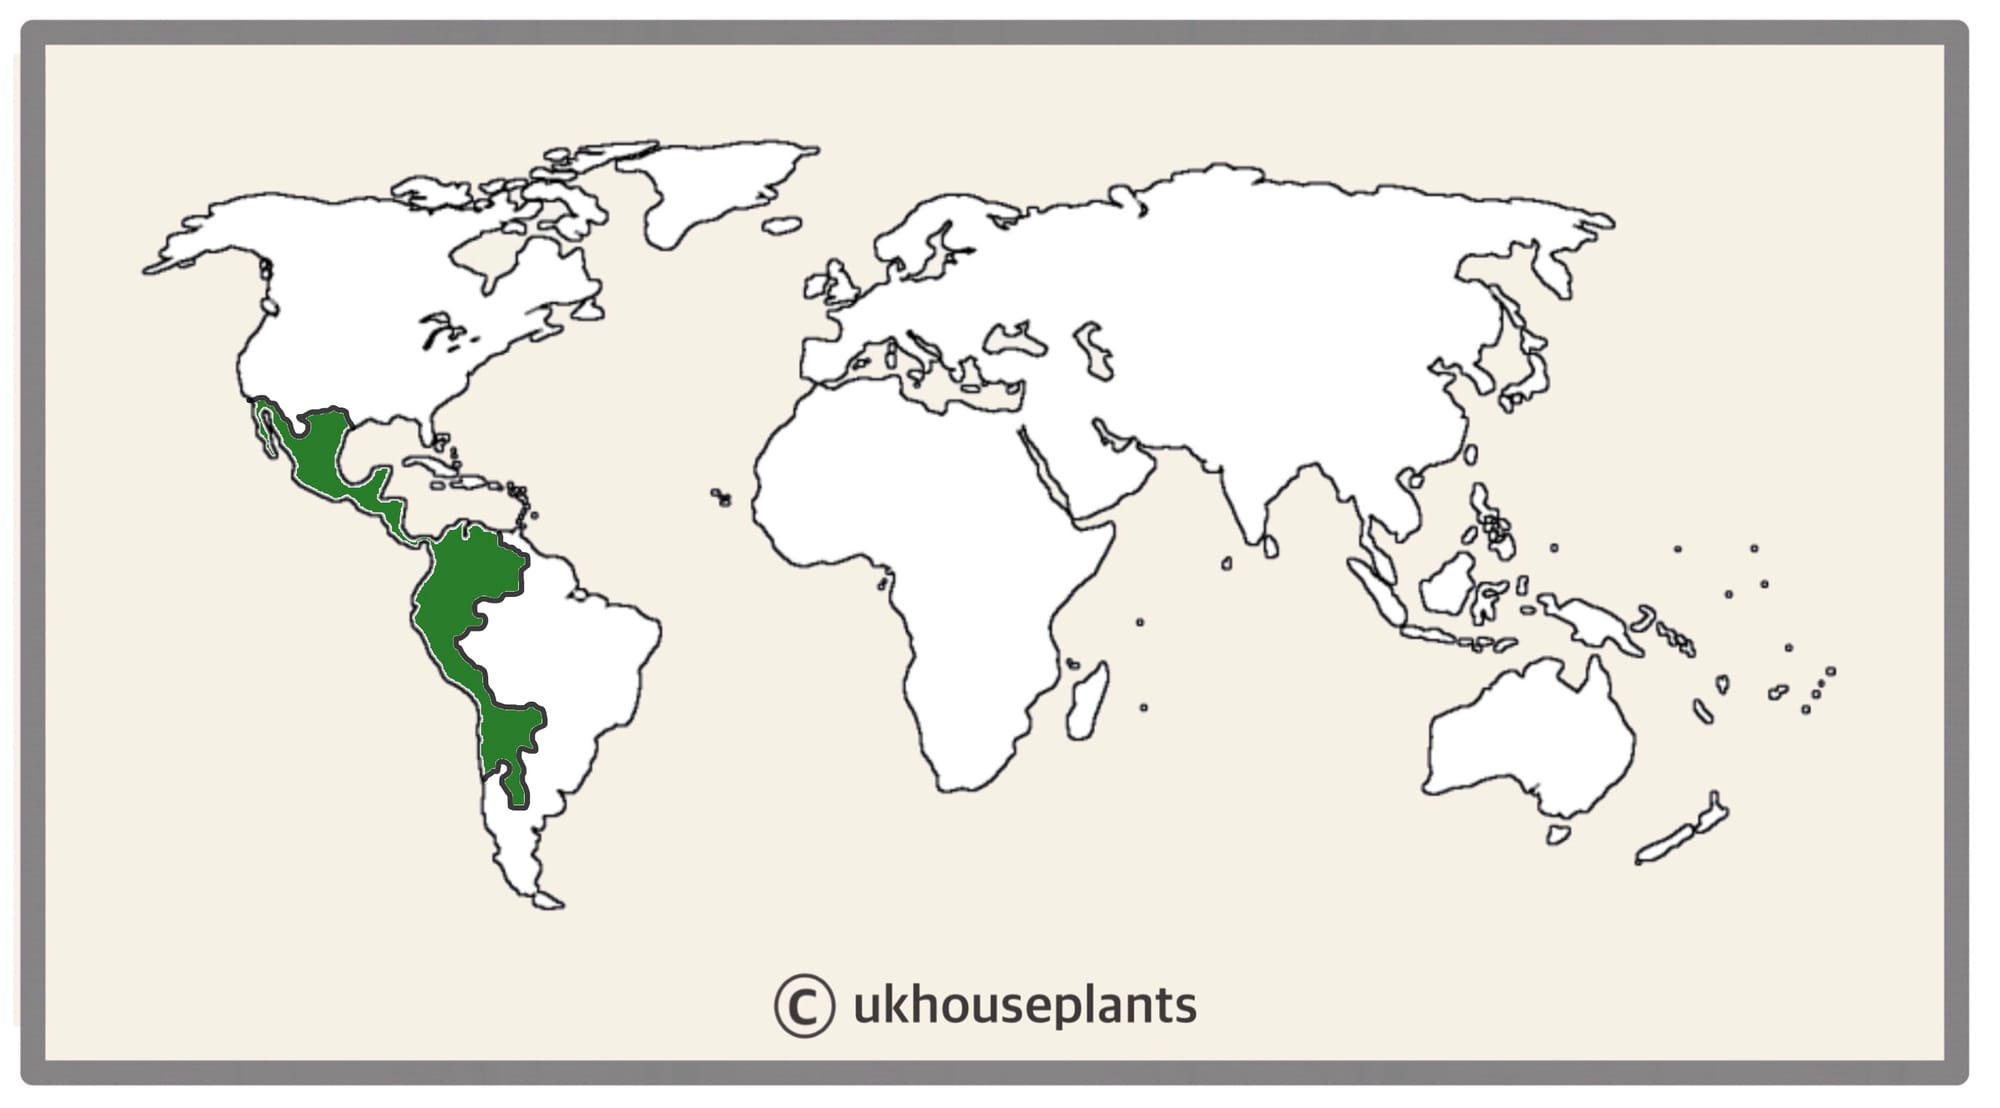 The Distribution of Echeveria.
Temperature
10° - 25°C (50° - 78°F)
H1b (Hardiness Zone 12) - Can be grown outdoors during the summer in a sheltered location with temperatures above 12℃ (54℉), but is fine to remain indoors, too. If you decide to bring this plant outdoors, don't allow it to endure any direct sunlight as it may result in sun-scorch and dehydration. Regularly keep an eye out for pests, especially when re-introducing it back indoors.
Spread
Most species will reach heights of 0.4m in height and 0.8m in width. Larger specimens, like the E. gigantea can reach heights of over 0.7m in the correct environment. The ultimate height will be reached within 5 - 8 years.
Pruning & Maintenance
Remember to remove yellow or dying leaves to encourage a better overall appearance and better-growing conditions. After a few years, your Echeveria will become tall and leggy, with a bare stem at the base. You have an option to either prune the plant's stem by half (and propagate the top in water to root), or leave the plant as it is. Those who choose to leave their Echeveria alone (by not pruning it) will be rewarded with flowers in the spring or summer, usually when the plant is around 4-5 years old!
Propagation
Via Seed, Offset Division, or Leaf Cuttings.
Offset (Pup) Division - For this method, it's best to divide in spring or summer and once the offshoots are at least a quarter of the mother plant's size. Remove its pot and place your hand in between the junction that connects the two; soil may have to be brushed away to get a better grip. Gently push the pup downwards while supporting the mother plant until you hear a snap. Cautiously separate the root systems, keeping great care in keeping them damage-free. Place the new plantlet in a small pot with a moist 'Cactus & Succulent' compost, much similar to the original soil, and maintain the same care routines. Provide a bright setting with temperatures around 18°C (64°F) with the majority of the soil drying out in between waters. New leaves should emerge within the six weeks, as long as the soil is kept on the drier to life.
Leaf Cuttings (Photos Below) - Leaves that are halfway along the stem have the most potential due to their size and maturity. Not only are the plant's main leaves suitable for rooting, but any leaves that develop on its flower spike are also able to root, too. Gently place your fingers between the mother's stem and the leaf's base, pulling it downwards until you hear a snap. Ensure the wound is wholly intact with no damage as a bruise or tear will result in unsuccessful propagation. Set the leaf ON TOP OF a bed of moist 'Cactus & Succulent' compost for root growth. Not only will this callous the wound (to prevent disease), but it'll also speed up the propagation process considerably. Once there's 0.3cm of root development, place it one third into the compost, at a slight angle. Provide a bright setting with temperatures around 18°C (64°F) with the majority of the soil drying out in between waters. New leaves should emerge within the next month, as long as the soil is kept on the drier to life.
Stem Cuttings - Nip two inches off from the leading growths, located at the edge of the foliage line using your fingers or sterile scissors. Be sure to choose damage-free, the juvenile growth as any cuts and bruises will lead to disease. Place the stems a third into the soil, making sure no leaves are submerged - you may have to remove the lower leaves to reinforce this step. Use a 5cm pot and with a well-draining potting mix, preferably 'Cactus & Succulent' compost, to reduce the risk of over-watering and basal rot. Provide a bright setting with temperatures around 18°C (64°F) with the majority of the soil drying out in between waters. New leaves should emerge within the six weeks, as long as the soil is kept on the drier to life. If you need any more help with propagating succulents, send us an email via this link!
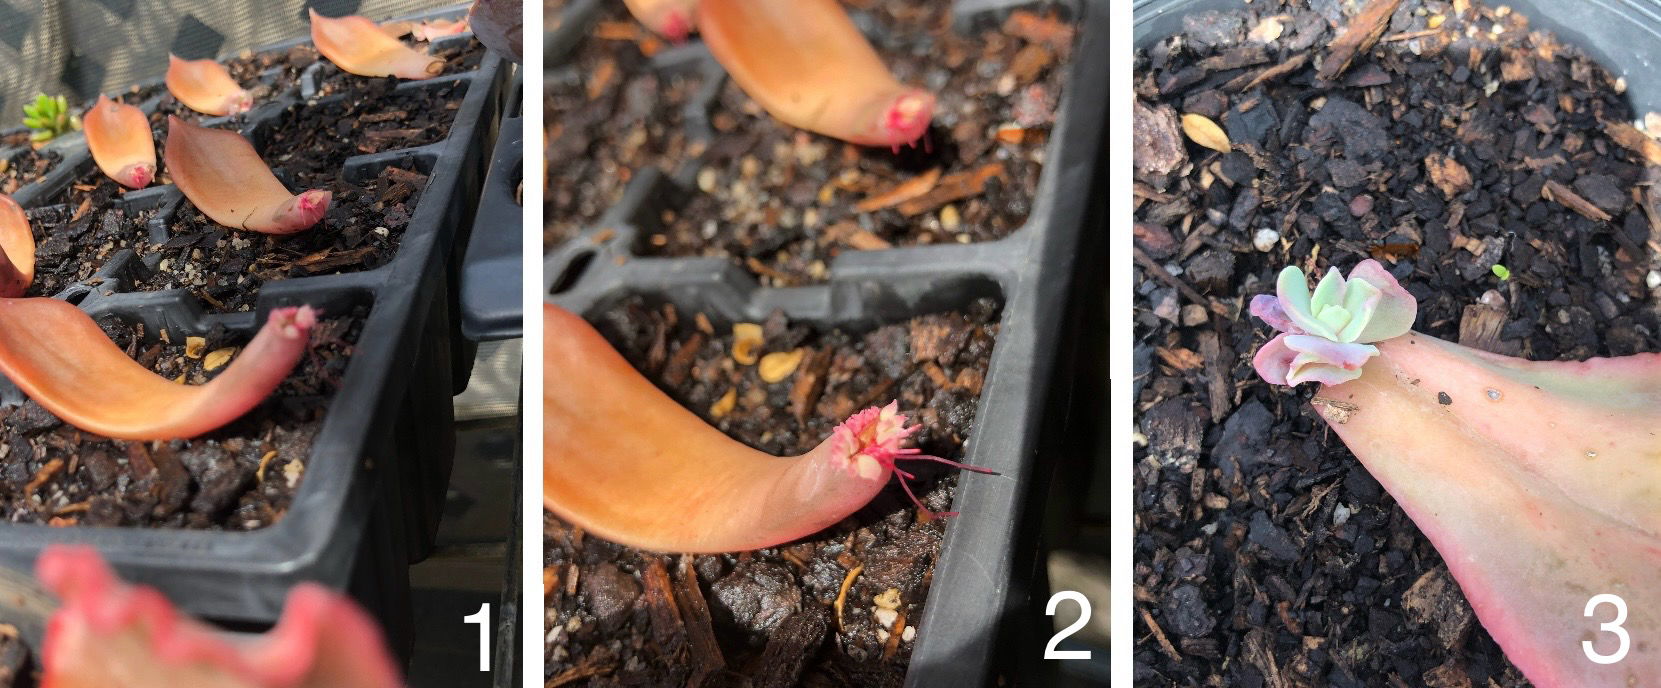 Echeveria leaf cuttings are completed in three main stages. The first stage (1) is the callousing/hardening over of the wound, followed by root development within a few weeks (2). Set the leaf diagonally into the mix once roots appear, so that the rosette cluster of leaves can emerge from the wound whilst still rooting. (Stage 3).
Flowers
Yellow flowers are held by a spike that'll develop each year, reaching up to 40cm in height. Each flower can last up to several days, with the blooming process lasting several weeks. Ensure to keep the plant sufficiently hydrated with a fortnightly feed of 'Cactus' feed during this time to prolong this period. Gorgeous flowers are produced in spring if a good dormancy period from the previous winter is served. Reduce temperatures to around 10°C (50°F) accompanied by little watering to promote the plant to enter this vital stage of the year.
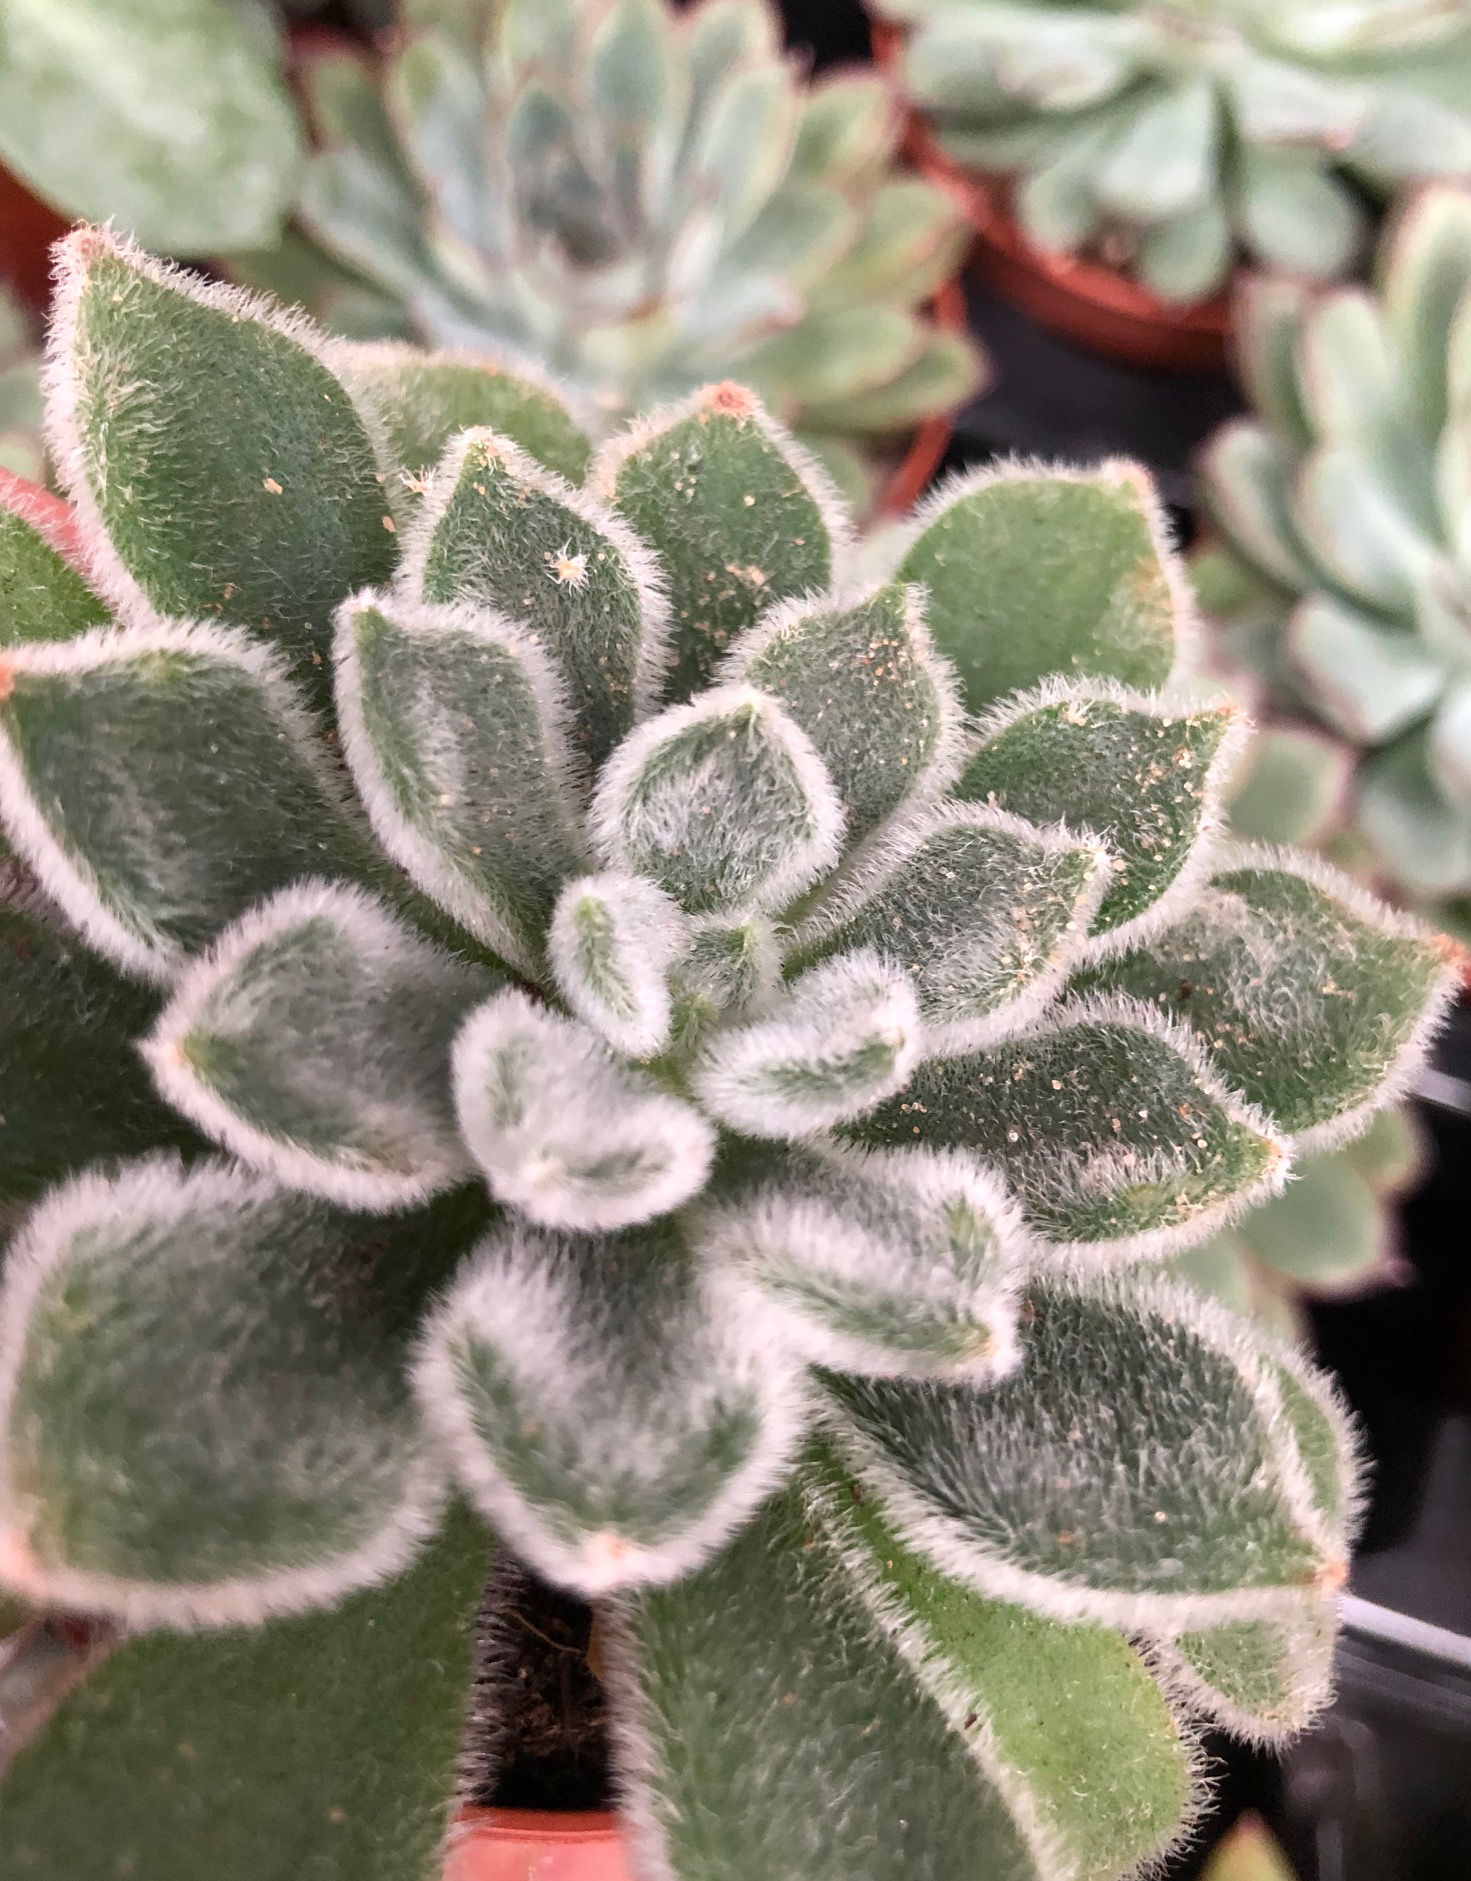 Echeveria setosa has furry leaves in order to reduce the moisture loss caused by wind and sunlight in its natural habitat.
Repotting
Repot every two to three years in the spring, using a 'Cactus & Succulent' labelled potting mix and the next sized pot with adequate drainage. Hydrate the plant 24hrs before tinkering with the roots to prevent the risk of transplant shock.
Echeveria is a 'family plant' whereby the mother plant can happily grow with its pups for many years, even if this means over-filling the pot. They prefer to be potbound as this will downplay the risk of over-watering (& root rot), so only repot if necessary or if you're interested in propagating the offsets to expand your collection.
Book a 1-to-1 video call with THE HOUSEPLANT DOCTOR™ if you'd like a personal guide to repotting your houseplant. This will include recommending the right branded-compost and pot size, followed by a live video call whilst you transplant the specimen for step-by-step guidance and answer any further questions!
Pests & Diseases
Keep an eye out for vine weevils (uncommon indoors), spider mites & mealybugs. For more info on how to address any of these issues, hit this link. Common diseases with Echeveria are root, crown or heart rot, sun-scald, soft rot, scabs, nematodes, leaf-spot disease and powdery mildew. Identifying Common Houseplant Diseases & Viruses
Toxicity
This genus is classified as non-poisonous. If, however, large parts of the plants are eaten, vomiting, nausea and a loss of appetite could occur. Consumption of large quantities must be dealt with quickly; acquire medical assistance for further information.
Retail Locations
B&Q, Dobbies, Homebase, IKEA, Online Stores.
Book a 1-to-1 Call with THE HOUSEPLANT DOCTOR™
If you need further advice with your houseplants, book an advice call with ukhouseplants' friendly and expert writer today! This can be done via a video or audio call on most apps, including Facebook, FaceTime & Skype. A ten-minute call costs £5.99 (US$7), or £15.99 for thirty minutes. You can ask multiple questions, including queries on plants, pests, terrariums, repotting advice and anything in between. Please consider supporting this service to keep ukhouseplants thriving!
Comments