Dendrobium nobile
Contents
- Top Tips
- Location, Water, Humidity & Fertilisation
- Dormancy Care & Annual Flowers
- Common Issues
- Origins, Temperature, Propagation, Repotting & Toxicity.
Need the answer to a specific plant query? Book a 1-to-1 video call with THE HOUSEPLANT DOCTOR™ to overcome and address your niggling problem! Available on iMessage, WhatsApp, Facebook Messenger & more.
Top Tips & Info
- Care Difficulty - Easy
- Situate in a bright, indirect location that's away from the sun or an operating radiator. Be sure to allow its compost to see the natural light, too, as soil mould is a key issue with too shady areas.
- Keep the soil evenly moist, allowing the top third to dry out in between hydrations. Avoid persistent droughts and the use of cold water, especially while it's in bloom.
- Supplement with an Orchid-labelled fertiliser once a month.
- Read the third section (Dormancy Care) to learn about re-blooming Dendrobiums in the early spring.
- Repot every three years using an Orchid Bark and a slightly larger pot, during the spring.
Location & Light - 🔸🔸
Direct sunlight should be avoided at all costs, due to the heightened chance of dehydration and sun-scorch. In the wild, Dendrobiums are protected by the tree's canopy and therefore aren't tolerable to the harsh spring or summer rays. During the dormancy period, move the plant into a brighter location with the possibility of morning sunlight; this will highly benefit the specimen and may reward you with flowers. The ideal location would be somewhere that dips to below 15°C (59°F) with good airborne moisture. Those situated in darker locations will be at risk of root rot, along with the minimal chance of another bloom.
Water - 🔸🔸
Maintaining moist soil while the plant is in flower is vital. Periods of droughts will significantly disturb the blooming process, with sudden older flower or bud loss being the most significant issue among growers. Allow the top third to dry out in between hydrations, using lukewarm water if possible. Applying cold water each time the plant is irrigated will shock the roots and potentially lead to weak growth, including flower loss. Hydrate the soil from the top, or submerge the pot for five minutes, around a quarter deep. Under-watering symptoms include flower loss, pale leaves, stunted growth and a gradual decline in health. Never allow full sun or forgetfulness to take over, as both will result in a premature flower loss and a weakened plant. Most Orchids are situated in moist nooks of jungle trees, meaning that persistent droughts cannot be tolerated. Over-watering symptoms include lower yellowing of leaves, a rapidly declining stem, flower loss and a rotten base (pseudobulbs). These issues are commonly down to either too much soil moisture, an incorrect soil medium, too little light, or foliage that has allowed to remain wet for long periods. Click here to learn more about repotting with root rot.
Humidity - 🔸🔸🔸
Browning leaf-tips or short-lasting flowers are the result of dry air, commonly caused by heaters during the winter and early spring. Place the plant on a pebble tray to increase the surrounding air moisture, avoiding the use of misters due to potential diseases. Excess moisture in the Dendrobium's cubbyholes or flowers will entice botrytis or powdery mildew to the table. The use of artificial humidity methods isn't needed during the summer but is still much welcomed.
Fertilisation - 🔸🔸
Although regular plant food isn't ideal, it won't do too much damage to the plant's overall health. Orchid Feeds are purely tailored for all members of the Orchidacæ Family, that can be in the guise of drip feeders or dilatable bottles. Many species of Dendrobium have open-stomata whereby the leaves can absorb atmospheric nutrients. With this in mind, purchase a foliar feed (along with monthly soil fertilisations) to supplement the Orchid throughout the year, especially during the spring.
Dormancy Care & Annual Flowers
Dendrobium blooms are easily achieved when its dormancy irrigations are reduced by half; those who have a cooler room without artificial light at night will also be on the upper-hand. Keep the roots pot-bound to add further stress onto the specimen, which in turn will significantly heighten the chance of flowering. Blooms will generally appear in the late winter, but may occur at any given time.
The following steps should be performed from the autumn through until early spring, when they enter their dormancy.
N. B. - Each individual stem (basal offset) will only flower once, so if you only have already-flowered foliage, you'll have to wait until the following year for a new offset to appear. New stems will develop in the spring and maybe ready to bloom in the latter stages of the same season if your cultivation skills are up to scratch.
Sunlight & Location
Be sure to provide a bright location with little to no direct sunlight. Although the winter rays won't necessarily hurt the plant, be careful not to fall in the trap of sun-scorch and severe dehydration.
For a specimen to fully become seasoned, avoid the use of artificial lighting or locations that boast temperatures higher than 18℃ (64℉).
Hydration
Reduce waters so that about half of the soil becomes dry. It's essential to keep them on the drier side to life, as they'll think that hard times are ahead and therefore will need to pass its genes on to the next generation.
Occasional Feeds
Whilst in bloom, use a Tomato feed to provide monthly nourishment of potassium; the use of fertiliser isn't needed until the first flower spike emerges from the stem.
Reduce Everything
This one is to remind you that everything needs to be reduced - especially the temperature.
Temperature
This is the most significant step; reduce the temperature down by around 5℃ compared to the summertime or place in a room that's between 12 - 15℃ (54 - 59℉). The drop in temperature should ideally last until the inflorescence finishes blooming, although it can still be transferred into the main house as long as it sits on a pebble tray. You'll be at a significant disadvantage if the ambient temperature is kept constant throughout the year, as Dendrobiums will only respond with flowers in cooled environments. Never exceed the minimum temperature as it could lead to plant death or yellowed foliage at a bare minimum.
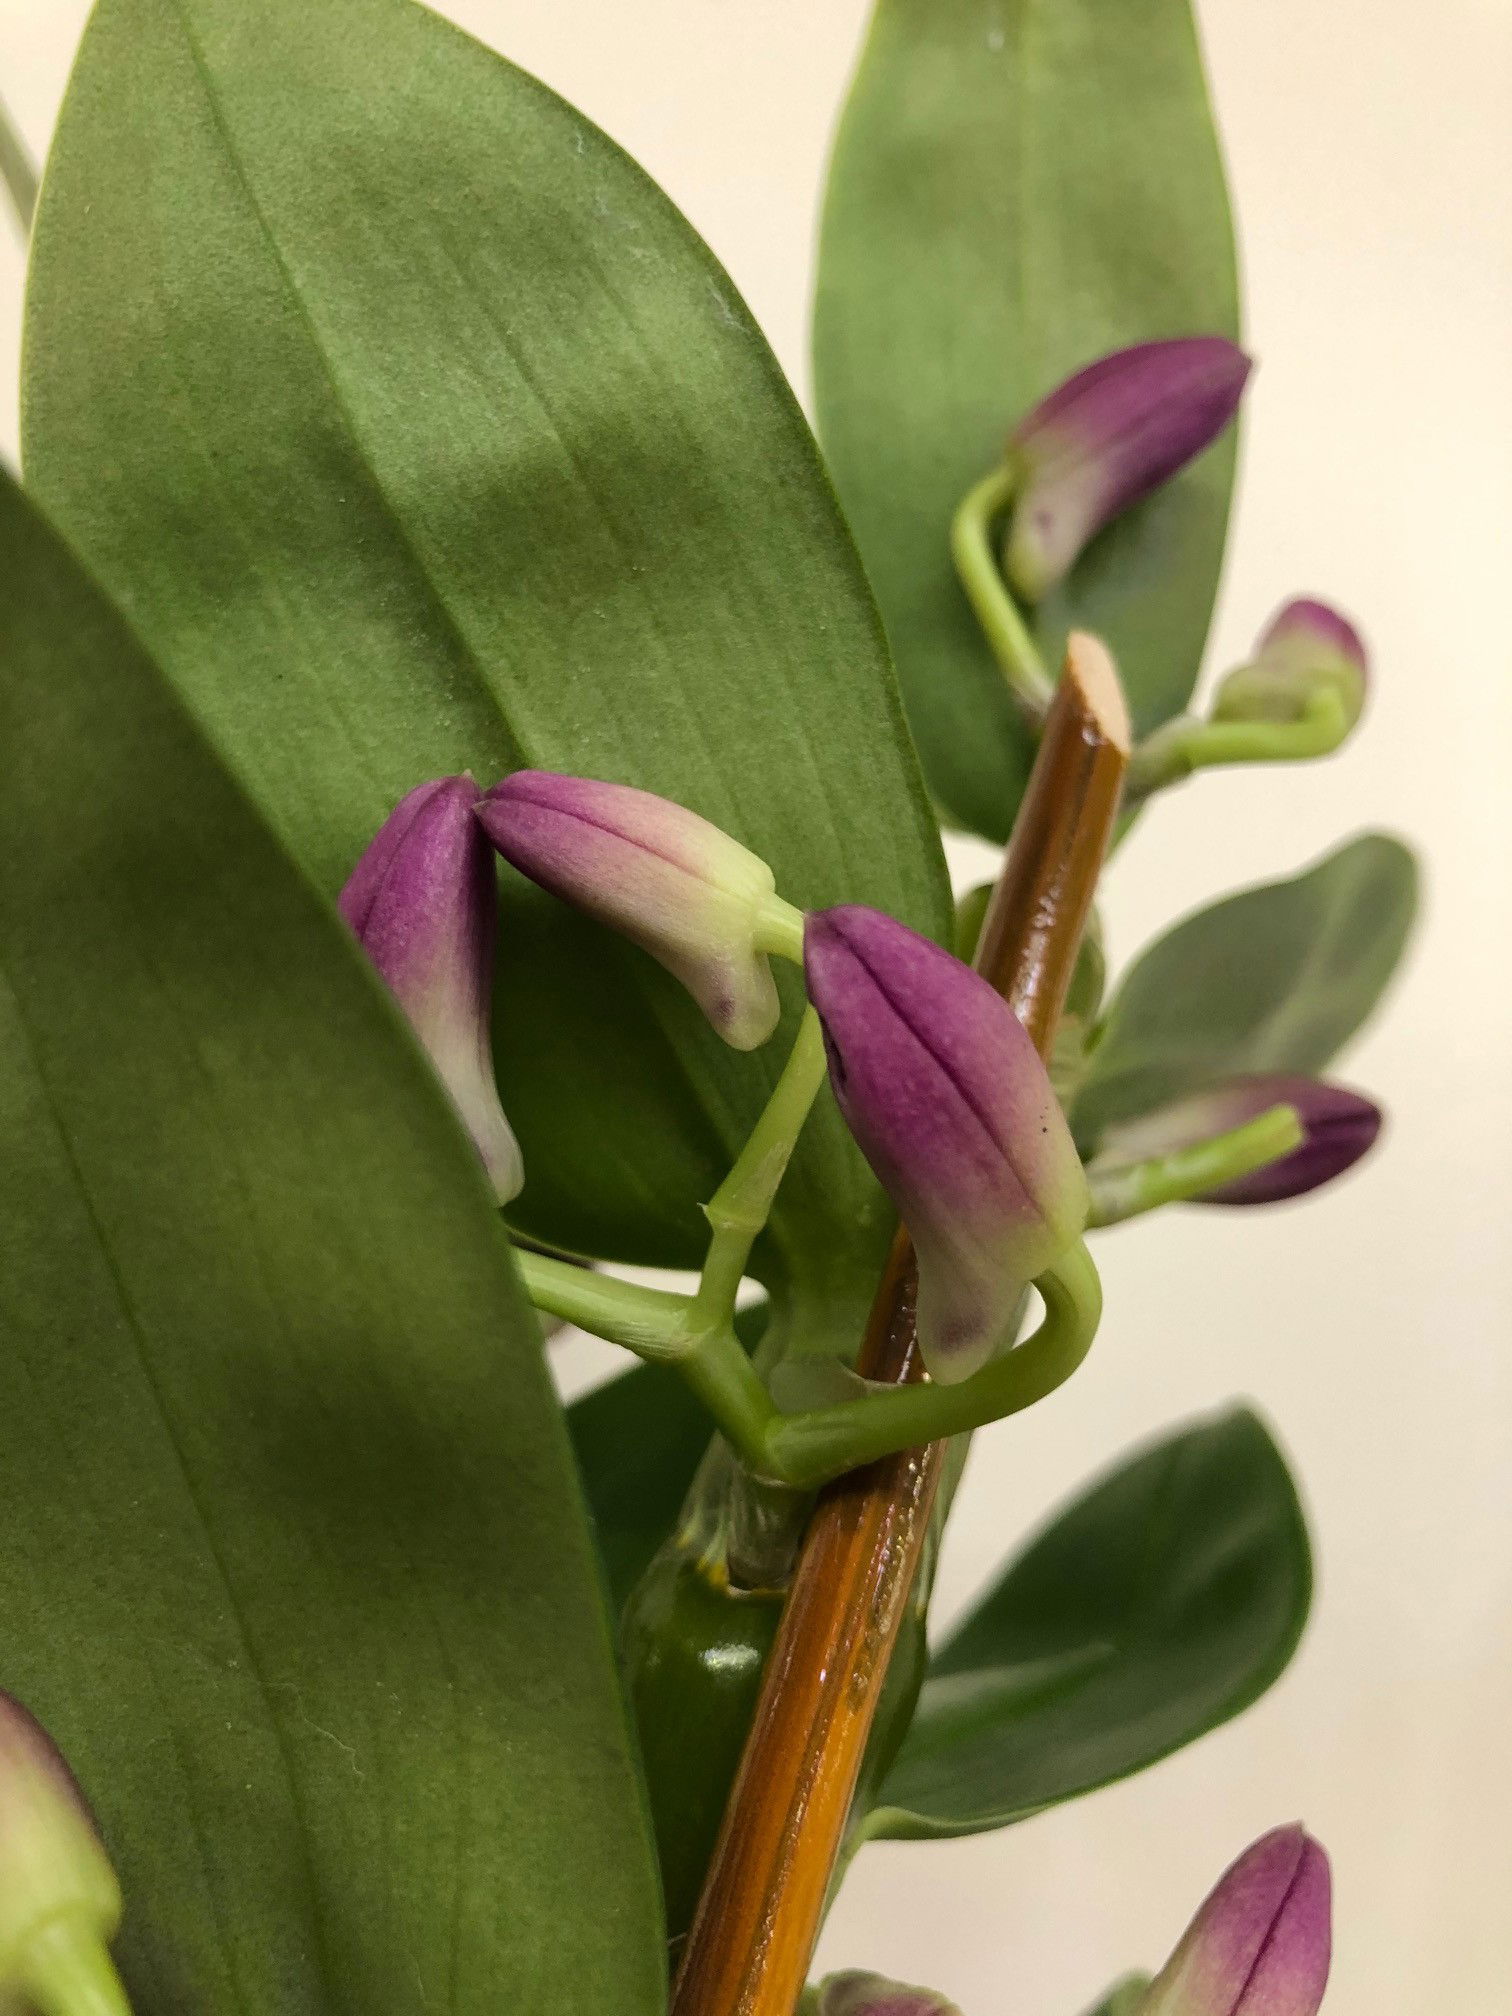
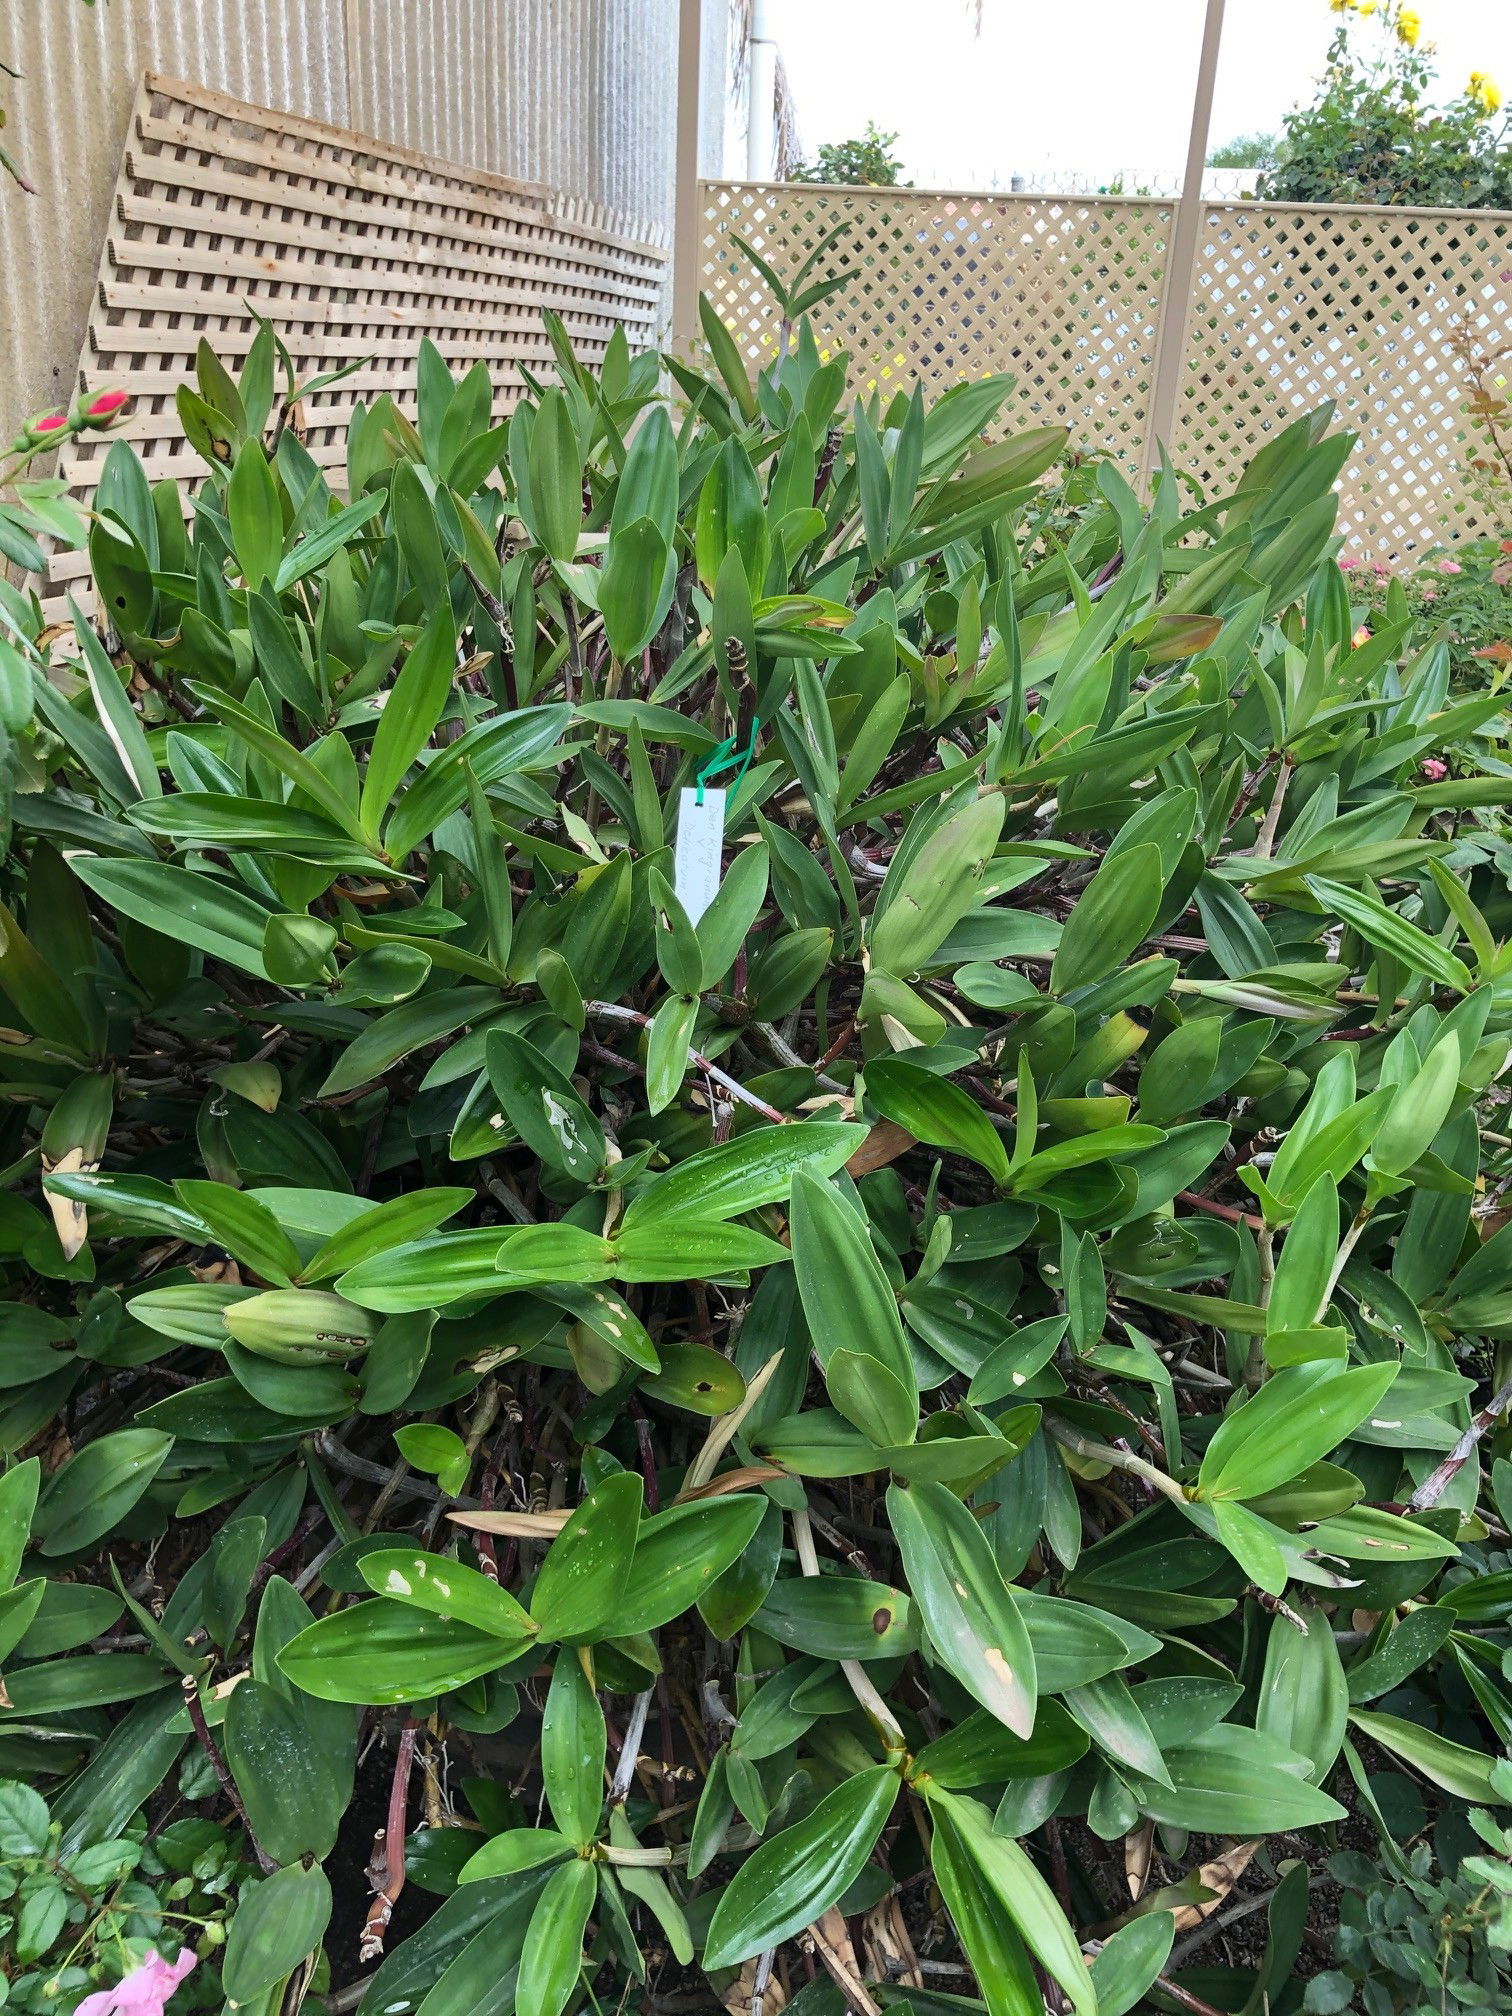 Dendrobium x delicatum: A naturally-occurring hybrid between D. kingianum & D. tarberi.
Common Issues with Dendrobiums
Directly pinpointing yellow leaves is quite hard due to the many different issues that could be at fault. Problems include watering-related abuse, too much or too little light, and fertilisation issues. If you'd like to speak to ukhouseplants in regards to this issue, be sure to book a 1-to-1 video call for more detailed advice.
Root rot is a common issue with specimens sat in too moist or waterlogged soil for long periods. Symptoms include rapidly yellowing leaves, stunted growth and a rotten brown base. Take the plant out of the pot and inspect health below the soil line. If the roots sport a yellow tinge, you're good to go, but if they're brown and mushy, action must be taken immediately. More information about addressing root rot can be found on this link.
A lack of flowers is caused by an insufficient dormancy period, where the temperatures are kept more or less the same over the year. Reduce the temperature by a couple of degrees over the autumn and winter months, along with fewer irrigations.
New buds won't develop on an already-flowered stem. As soon as the blooms drop off, this will spell the end of both foliar and flora growth on that particular shaft. Wait until the new stems become mature for another show of flowers - you'll know when it has reached maturity once no juvenile leaves develop at the top.
A sudden loss of older flowers with a yellowed stalk is a sign of prolonged droughts. Especially during the flowering process, near-continuous moist bark is mandatory for extended blooms; allow the roots to turn a green-greyish colour in between irrigations.
Short-lived flowers could be the product of low humidity. Place the Dendrobium on a humidity/pebble tray, keeping the reservoir topped up with water while the heaters are operating. Never mist the flowers due to the high risk of developing Botrytis.
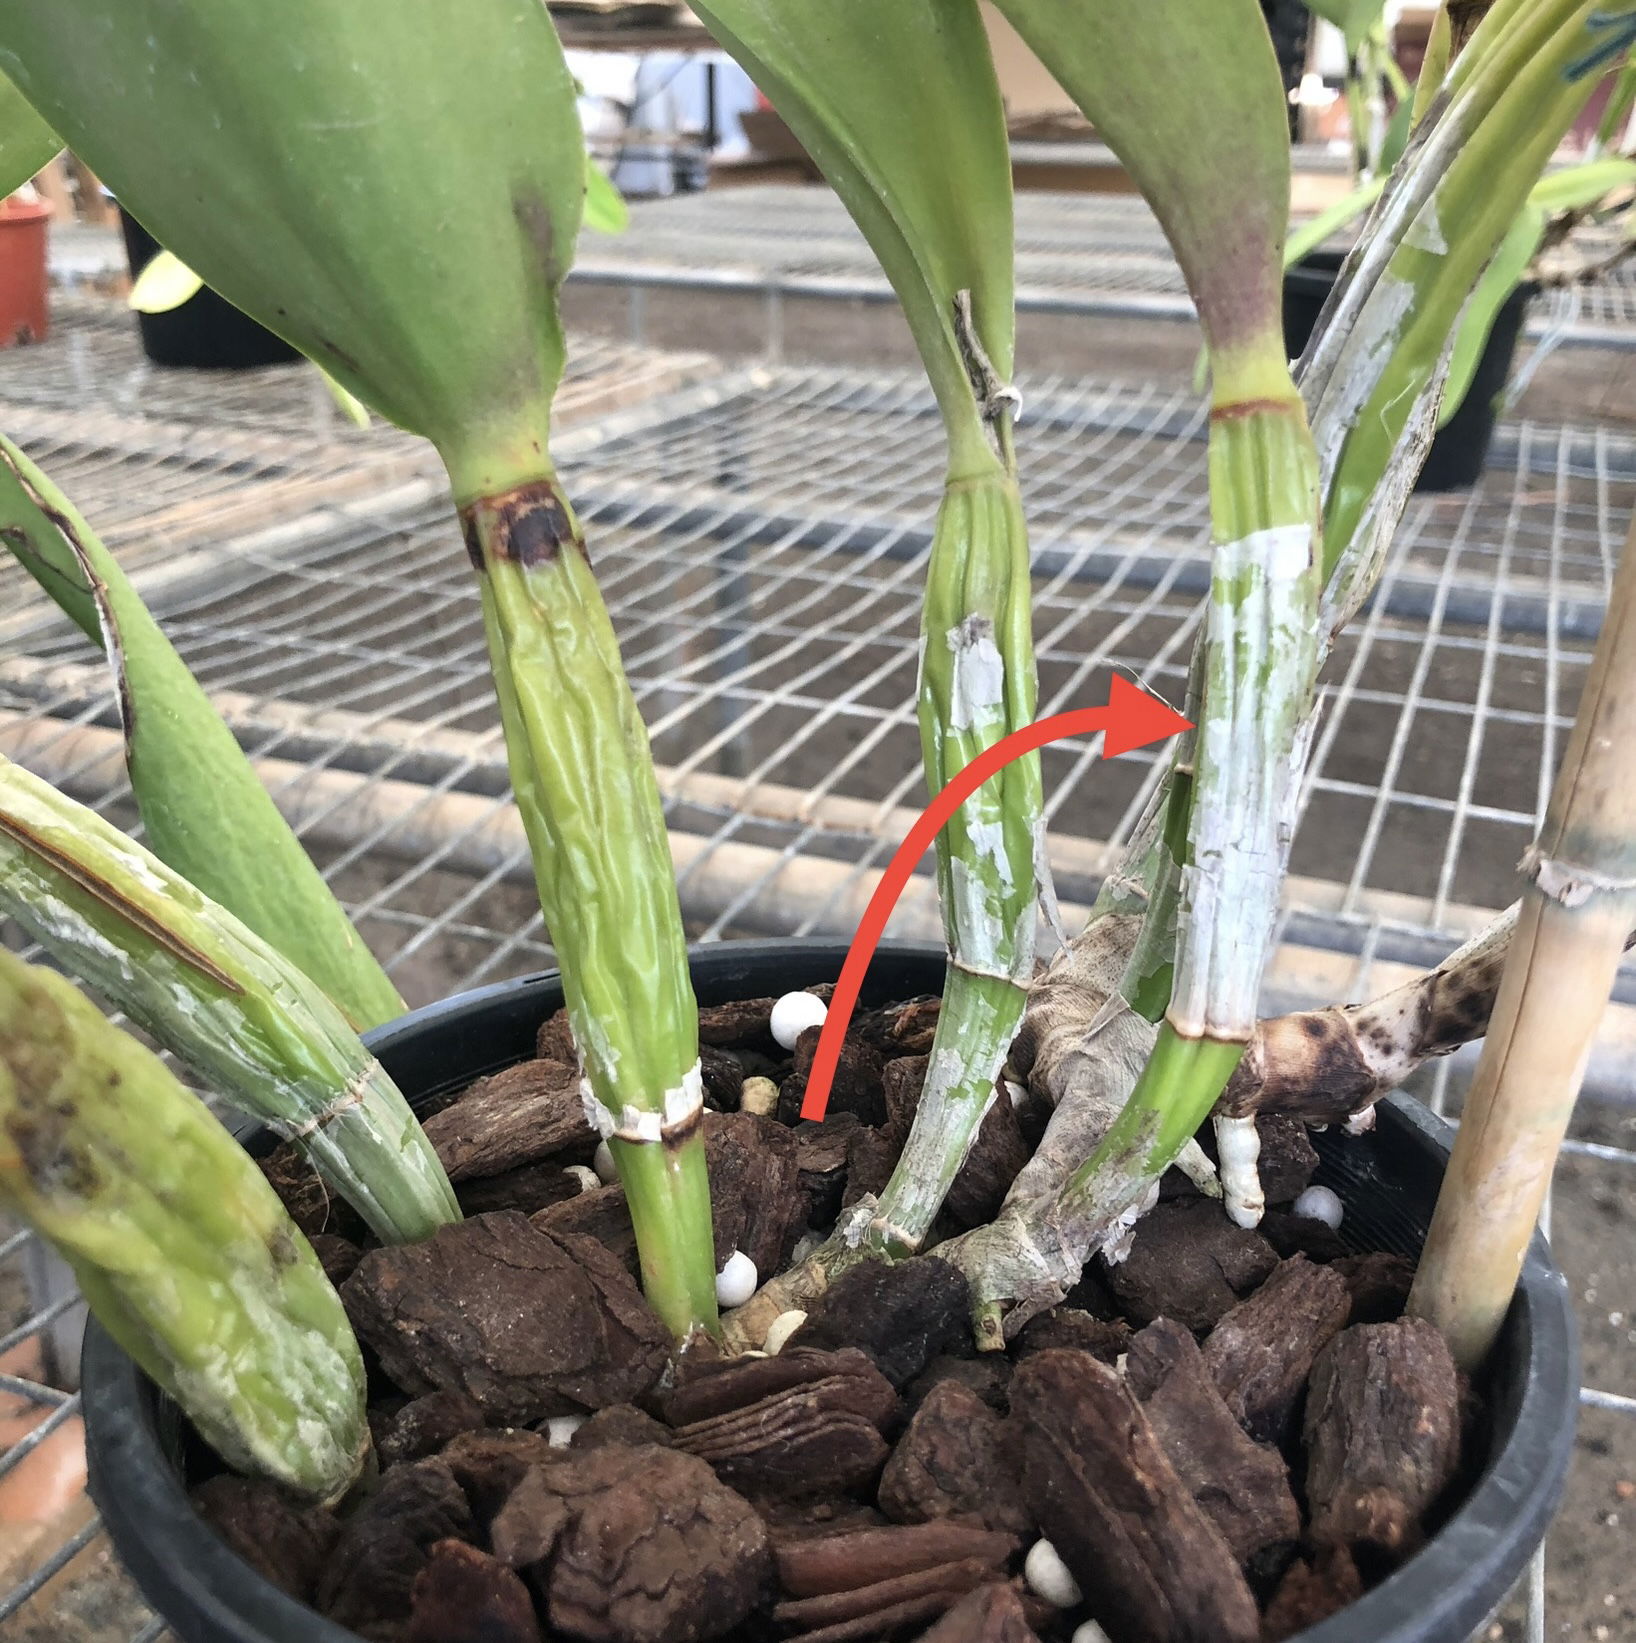 Silver flaky coverings (sheathes) are entirely natural on Dendrobiums and don't pose any threat to its health. The plant photoed here is a Cattleya but the principal & symptom are the same.
Total flower loss can be caused by an array of different issues, including a change in location, too little hydration, too hot or cold temperatures or droughts and pests. While the plant is in bloom, keep the bark evenly moist to hydrate the thirsty work of producing flowers. Locations that are outside of the recommended temperature bracket (below), or have drastic fluctuations must also be kept off the cards. Alternatively, a setting that offers similar temperatures all year round can inhibit blooms. They'll respond very well if the autumn and winter months are a couple of degrees cooler than in summer. In essence, this will not only winterise the plant, but it'll also force it into a dormancy period which is a crucial ingredient for successful flowers. The final issue is pests. Although it's highly unlikely that an infestation will cause a sudden change in health, have a quick inspection for Spider Mites, Aphids and Mealybugs.
Large quantities of aerial roots that cascade over the pot shouldn't cause concern. Once the flowers have fully elapsed, take the plant out of its pot and remove any brown roots when repotting into a bigger pot. If there are a couple still above the soil, either direct them face-down into the compost or allow them to carry on cascading. Be sure to mist the aerial roots while watering the bark to ensure sufficient hydration. If they begin to split, it's the result of too little water or humidity or sun-scorch. Remove once they've fully yellowed over.
Botrytis Petal Blight are small spots or patches that'll develop on the flowers' bodies, usually caused by misting or an over-humid location with poor air circulation. Remove the infected flowers or the complete stalk with sterile utensils to put a stop the airborne disease. Improve the air circulation and move to a slightly brighter location with no direct sunlight. Be careful not to saturate the flowers from there on in, and regularly inspect to see if it has spread. Click here for more info - Common Orchid Diseases
Origins
There are over a thousand species of Dendrobiums, all of which originate from tropical locations from South-East Asia to Northern Australia. Most specimens are epiphytic or lithophytic, meaning that they grow on trees or rocks, with very few growing on the jungle floor. The genus was first described by Olof Swartz in 1799, using the Ancient Greek words for tree, 'dendro', & life, 'bios', in reference to their epiphytic nature.
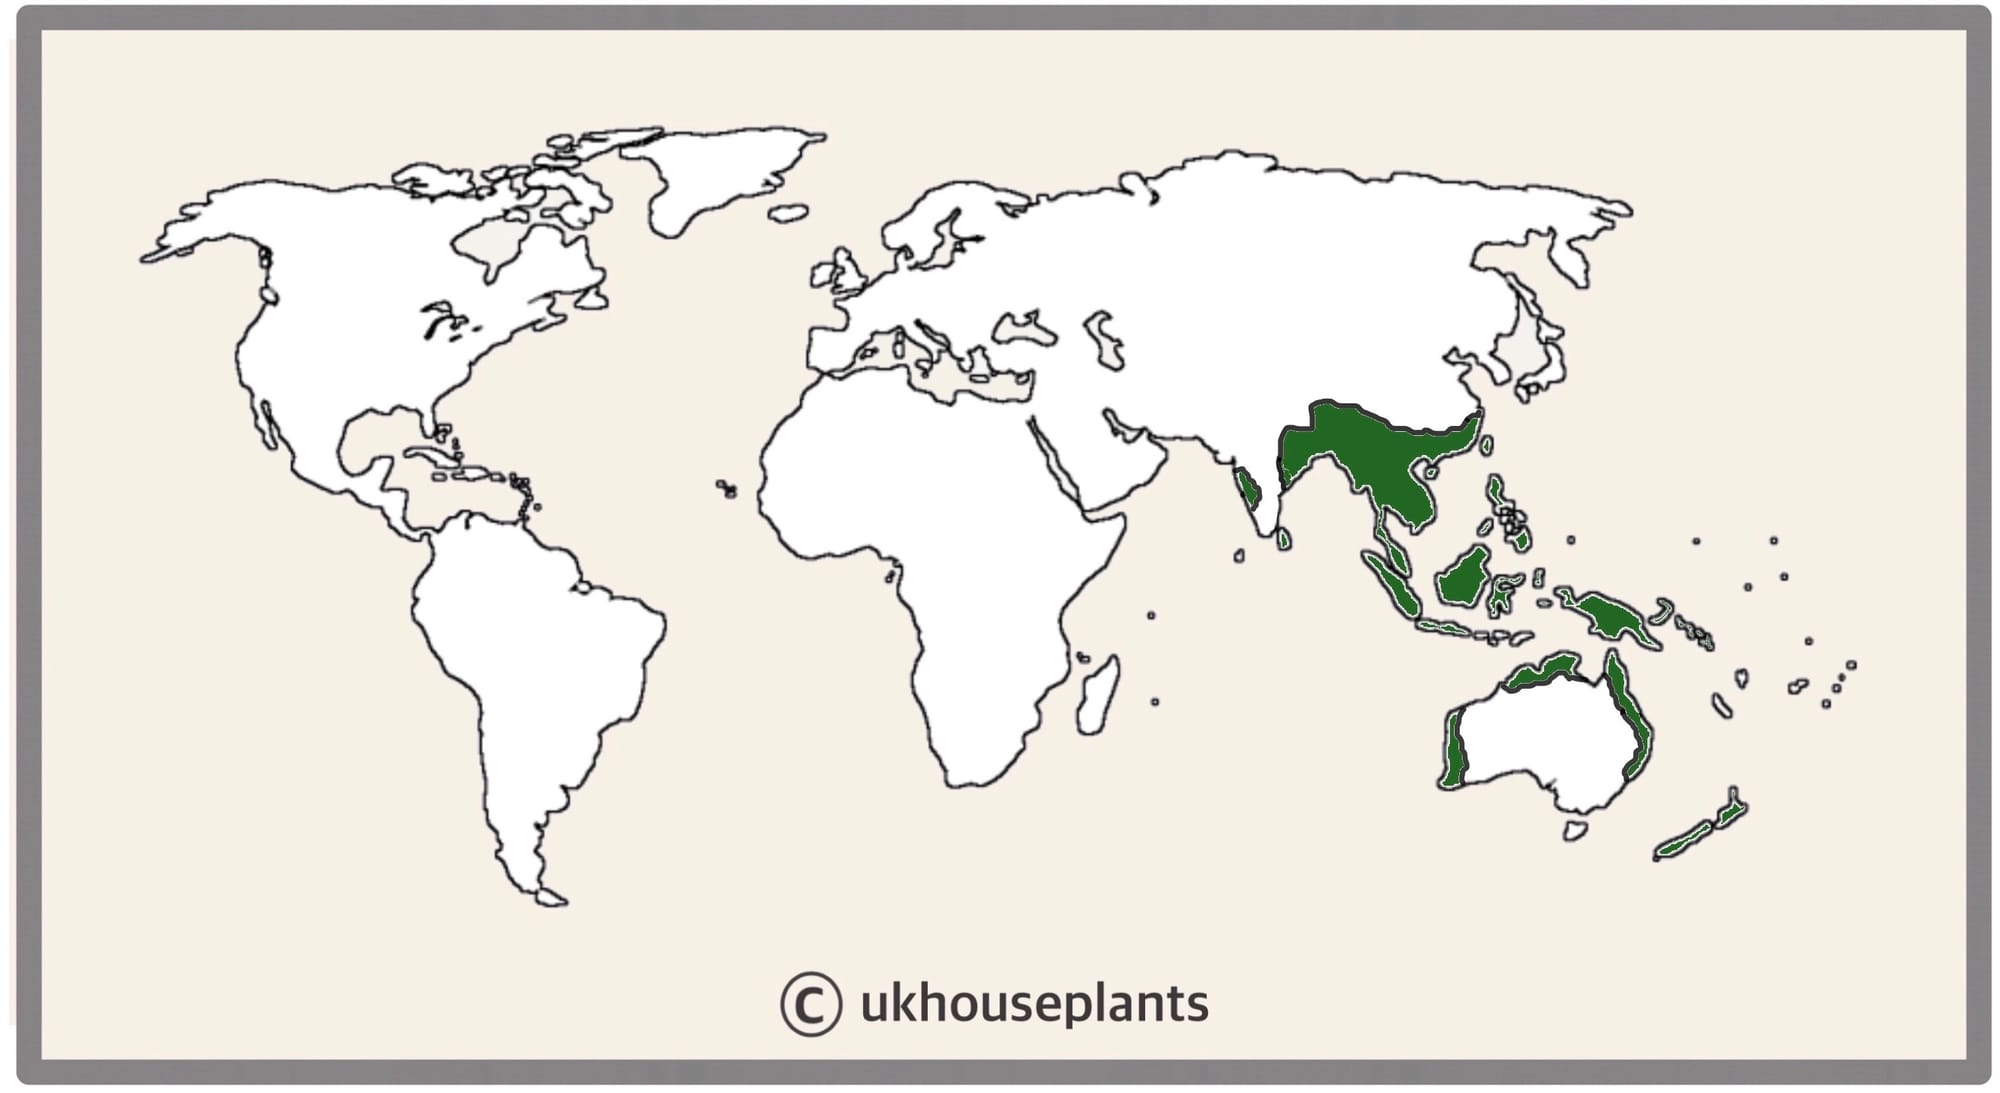 The Distribution of Dendrobiums.
Temperature
10° - 27°C (50° - 80°F)
H1b (Hardiness Zone 12) - Can be grown outdoors during the summer in a sheltered location with temperatures above 12℃ (54℉), but is fine to remain indoors, too. If you decide to bring this plant outdoors, don't allow it to endure any direct sunlight as it may result in sun-scorch and dehydration. Regularly keep an eye out for pests, especially when re-introducing it back indoors.
Spread
Up to 1m in height & 40cm in width. Maturity can be achieved in around 5 - 8 years, with several new basal offsets grown per season.
Pruning & Maintenance
Remove yellow or dying leaves, and plant debris to encourage better-growing conditions. While pruning, always use clean scissors or shears to reduce the chance of bacterial and fungal diseases. Never cut through yellowed tissue as this may cause further damage in the likes of diseases or bacterial infections. Remember to make clean incisions as too-damaged wounds may shock the plant, causing weakened growth and a decline in health.
Do not cut the shaft off (if the flowers were housed between the leaves) as its foliage will still provide vital nutrients to the pseudobulb. Take stem cuttings if the bottom of the stem begins to rot or yellow.
Propagation
Via Seed, Basal Offset Divison, 'Keiki' Cuttings & Stem Cuttings.
Seeds (Difficult & Long-Winded) - Place the seeds on some seaweed agar in a transparent tub (with a lid). Close the lid to maintain high humidity and situate the tub in a bright, indirect setting with bottom-heat of 25℃ (77℉). Germination may take up to three months, so don't discard any unsuccessful seeds until this threshold has been exceeded. Don't open the tub until they reach a maturity state (up to nine months) for the prevention of disease. Remove the seedlings once they surpass two inches in height, along with an adequate amount of roots. Add water to the agar to remove it from the plant and set them in a 5cm (2 inches) bed of Orchid Bark. Maintain high humidity and bright indirect light to alleviate the severity of environmental shock, which can be achieved using a pebble tray. Follow the care requirements mentioned at the top.
Basal Offset Division (Easy) - It's best to divide between spring and summer with plantlets that are at least a third of the size of the mother plant with several developed roots. Take the plant out of its pot and place your hand in between the two plants; soil may have to be removed to get a better grip. While placing your hand as close to the nodal junction, gently push the pup downwards, while supporting the mother plant - you should hear a snap. Cautiously separate both the mother plant and pup's roots systems, keeping great empathise in keeping the roots intact and undamaged. Place the new plantlet in Orchid Bark, much similar to the original soil, and maintain the same care routines. Don't use a pot that is too big as a ratio of roots-soil that much leans towards the latter will cause root rot.
Stem Cuttings - During springtime, choose stems that are around 15cm (6 inches) in length and cut into 8cm (3 inches) intervals with at least node bud that hasn't flowered. Wrap the cuttings tightly in moist sphagnum moss (found at most garden centres in the hanging basket department), and keep it in enclosed pot with a semi-perforated lid for reliable humidity. Keep it away from direct sunlight or avoid water-logging during this period and maintain moist sphagnum via misting. Pot up the new 'Keiki' cuttings as they develop after a few months (pictured below).
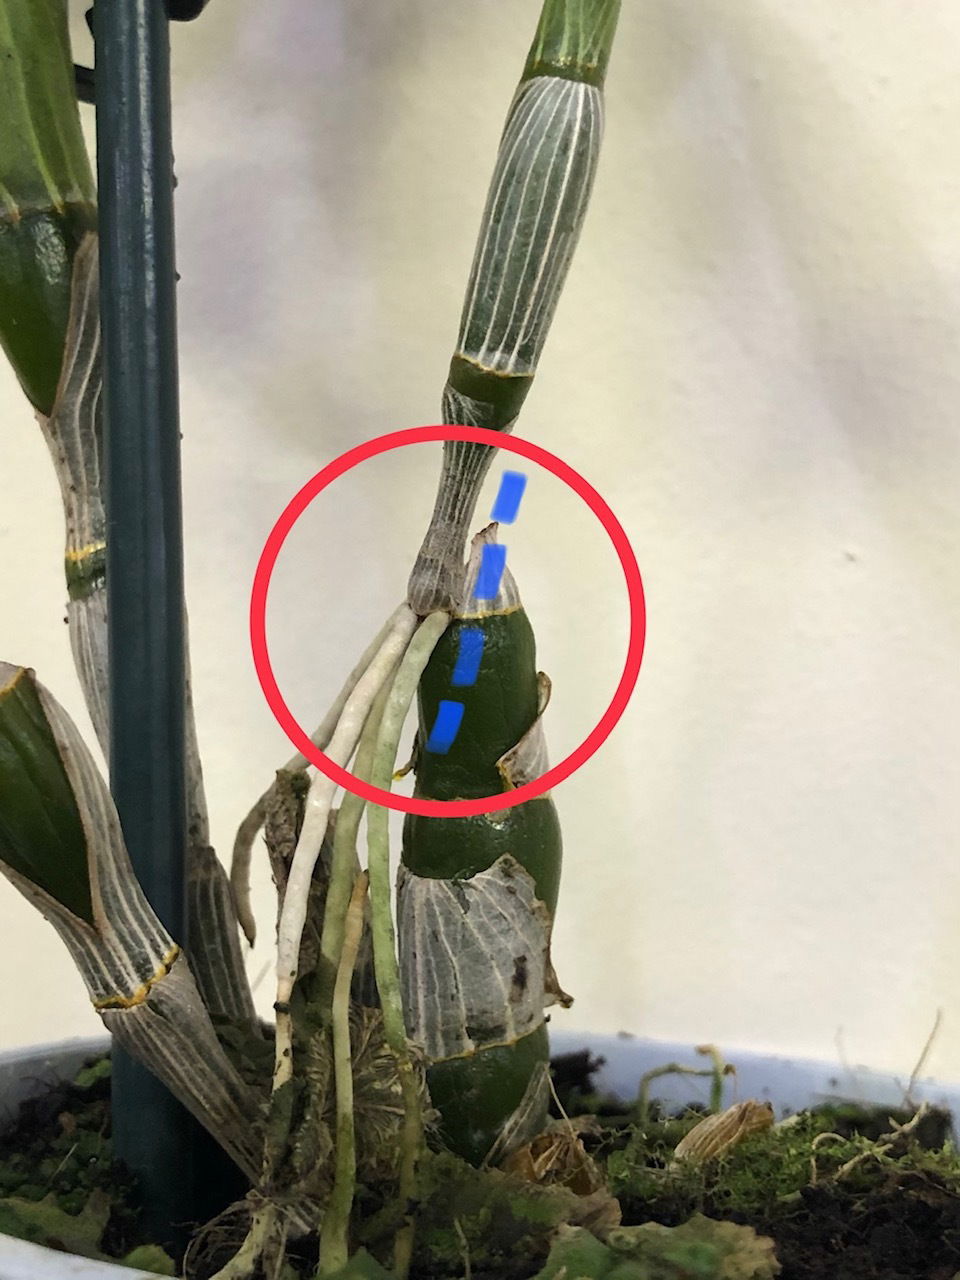 Here's a 'Keiki' cutting that is ready for propagation, due to the presence of aerial roots. Remove it from the original base using a clean pair of scissors, along the blue dotted line pictured above.
'Keiki' Cuttings - Small offsets, or 'Keiki's', will develop along the mother plant's flower stalks on various non-flowering nodes (pictured above). Once the roots are more than 3cm (2 inches) in length, cut the Keiki off, keeping a small section of stem with it. Use a 7cm pot and a potting mix that's got an equal part of Orchid Bark and Houseplant Soil. Keep the soil evenly moist and always prevent any threat of sun-scorch. Provide a humidity tray to alleviate the severity of environmental shock and treat like an established specimen after two further months.
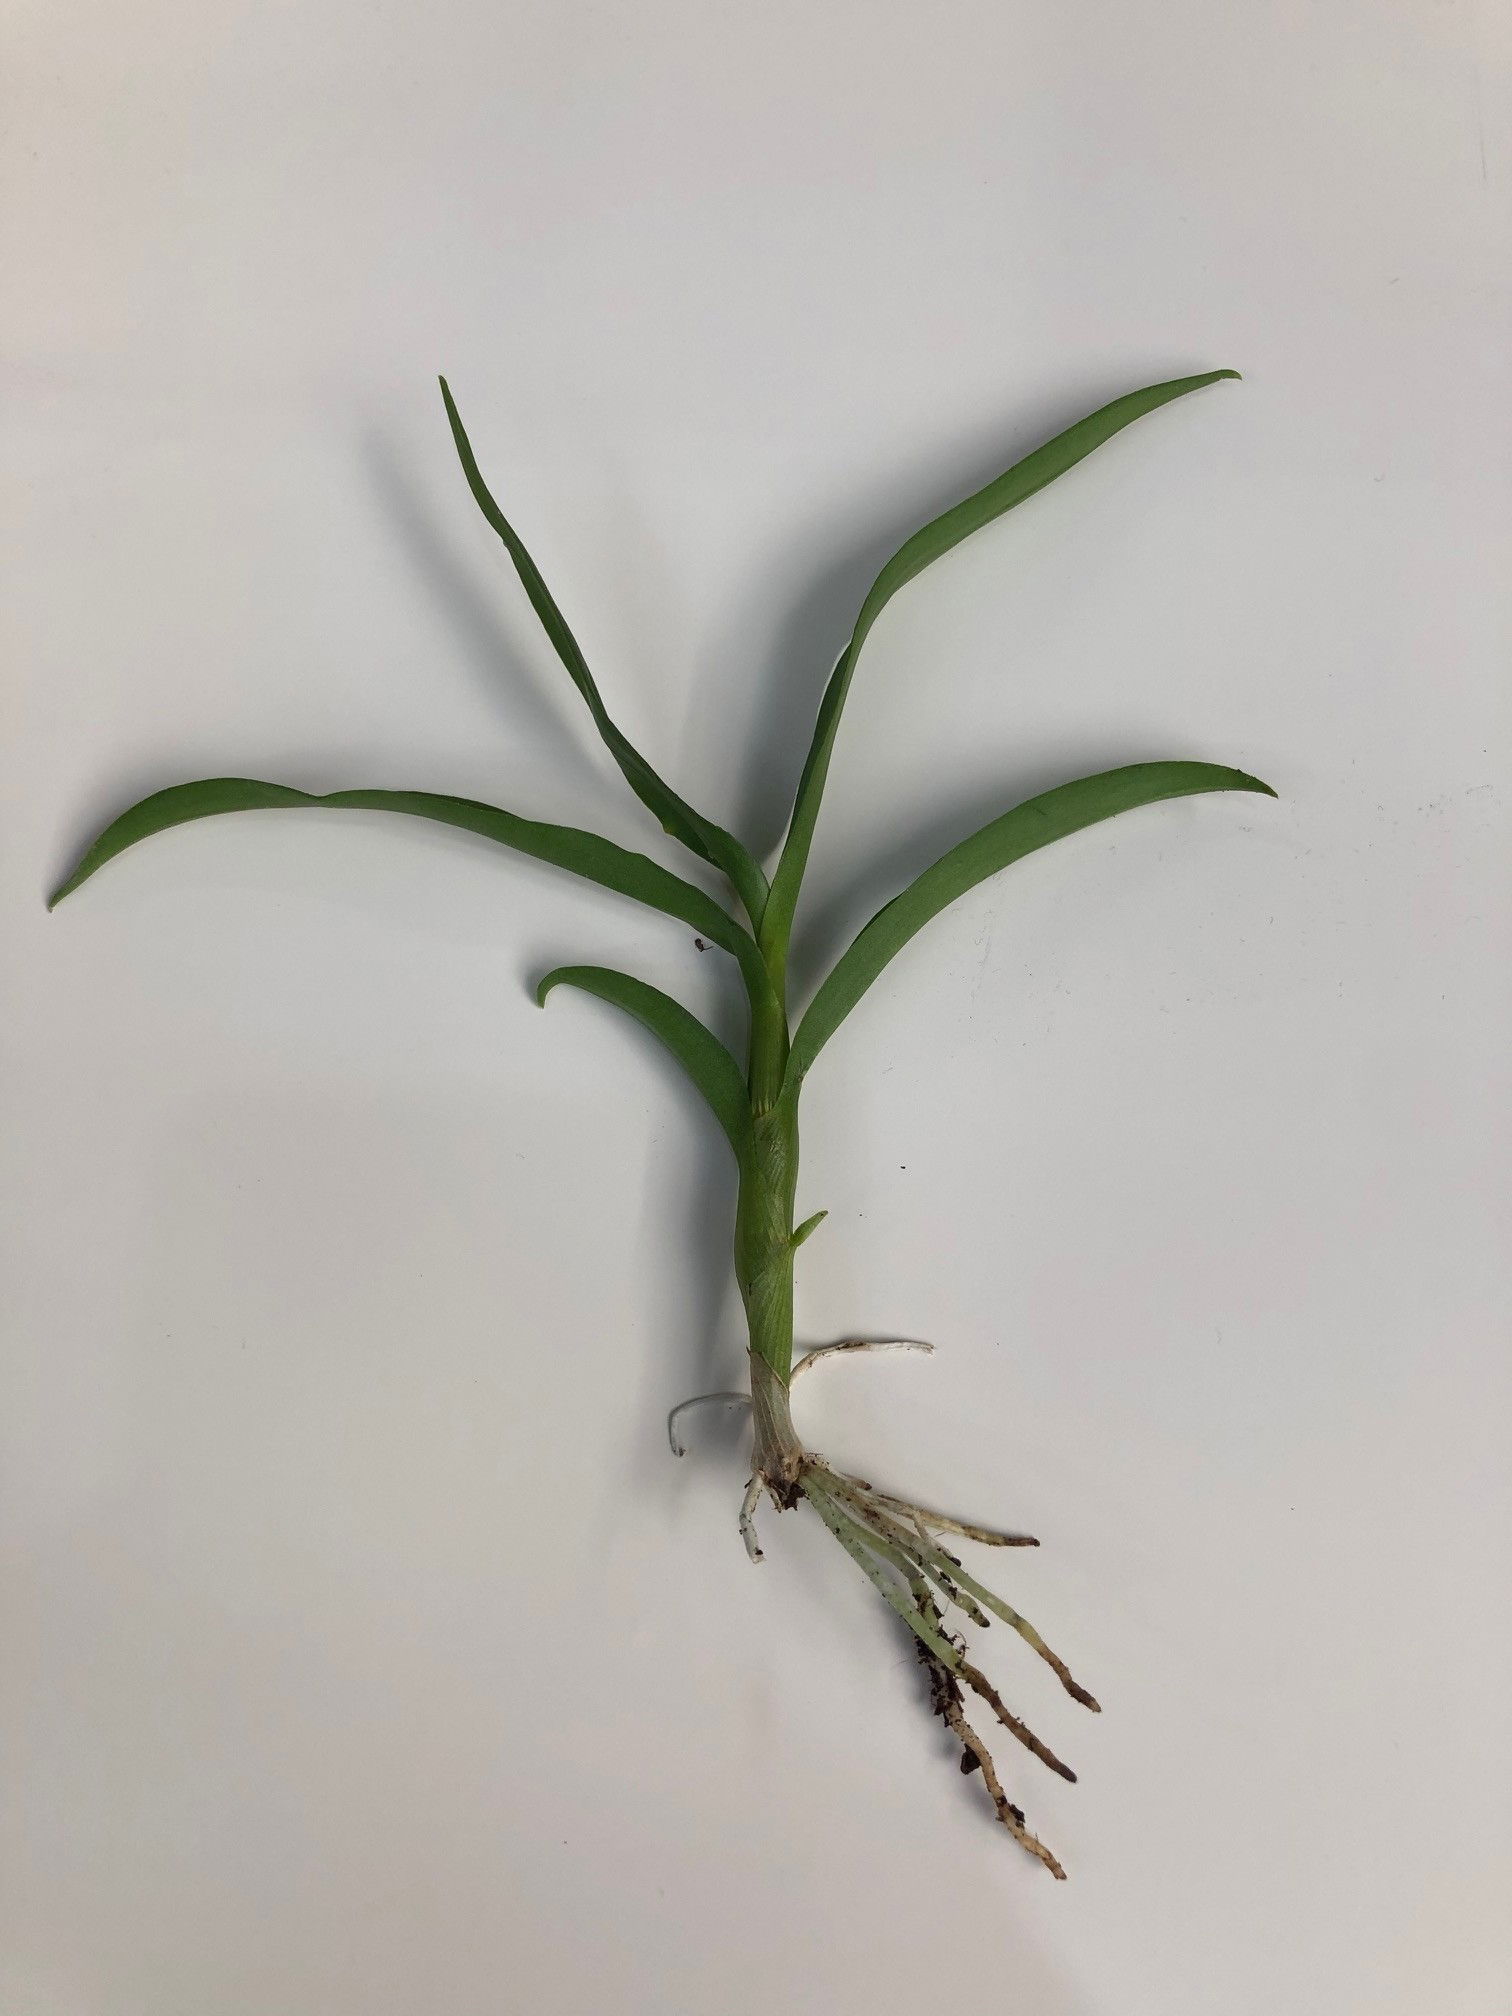 The perfect example of a Dendrobium 'Keiki' cutting.
Flowers
There are two types of Dendrobiums; those that produce flowers along the shaft in between the leaves (Nobile), and others that produce a spike at the top (Phalaenopsis). The flowers can last up to two months and can bloom at any time, most commonly during late winter. The best way to tempt any Orchid into flowering is by reducing the temperature in the winter; have a read of the 'Dormancy Period & Annual Flowers' above for more information on this...
Repotting
Infrequent repots will restrict its growth for a potential bloom. They'll be under threat by the challenging environment, and as they'll potentially die (so they think), a flower shaft will be produced to pass on its genes to the next generation.
Repot every two or three years in spring (& when not in bloom) using Orchid Bark and the next sized pot with adequate drainage. Don't worry if you snap the Velamen (white spongy epidermis) that covers the roots as it'll re-fuse again within the following few weeks. Hydrate the plant 24hrs before the tinkering with the roots to prevent the risk of transplant shock. For those that are situated in a darker location, add a thin layer of broken polystyrene in the pot's base to improve drainage & air circulation, and to downplay over-watering. Click here for a detailed step-by-step guide on transplantation, or via this link to learn about repotting with root rot.
Pests & Diseases
Keep an eye out for mealybugs, aphids, spider mites, scale, thrips, whitefly, blackfly, vine weevils & root mealybugs. Please be aware that applying general pesticide or spray could damage both the plant's foliage when used excessively. Common diseases include collar rot, root rot, botrytis petal blight, guignardia, black rot & anthracnose - click on this link to learn more about addressing these issues.
Toxicity
Not known to be poisonous by consumption of pets and humans. If high quantities are eaten, it may result in vomiting, nausea and a loss of appetite.
Retail Locations
Many supermarkets and garden centres will unreliably stock Dendrobiums throughout the year, especially in the spring months.
Book a 1-to-1 Call with THE HOUSEPLANT DOCTOR™
If you need further advice with your houseplants, book an advice call with ukhouseplants' friendly and expert author today! This can be done via a video or audio call on most apps, including Facebook, FaceTime & Skype. A ten-minute call costs £6.95 (US$8), or £15.95 for thirty minutes. You can ask multiple questions, including queries on plants, pests, terrariums, repotting advice and anything in between. Please consider supporting this service to keep ukhouseplants thriving!
Comments