Codiaeum variegatum 'Petra'
Contents
- Top Tips
- Location, Water, Humidity & Fertilisation
- Common Issues
- Origins, Temperature, Propagation, Repotting & Toxicity
Need the answer to a specific plant query? Book a 1-to-1 video call with THE HOUSEPLANT DOCTOR™, the website's friendly author, to overcome and address your niggling problem! Available on iMessage, WhatsApp, Facebook Messenger & more.
Top Tips & Info
- Care Difficulty - Moderate
- Bright, indirect light is key to quality growth; avoid excessively dark locations as it'll significantly increase the risk of soil-mould & root rot.
- Allow the top third of the soil to dry out in between waters, reducing this slightly in the autumn and winter months.
- Provide a humid, reliable location by introducing a pebble tray. A constant level of humidity & temperature (12°C, 54°F +) is mandatory to prevent sudden leaf-loss.
- Fertilise using a 'Houseplant' labelled feed every four waters in the spring and summer, reducing this to every six in the colder months.
- Repot every three years with a 'Houseplant' labelled potting mix; be sure to respect the roots as transplant shock is a big issue that could cause wilting, sudden leaf loss or even death.
- Keep an eye out for Spider Mites & Mealybugs that'll inhabit the plant's cubbyholes and foliage.
Location & Light - 🔸🔸🔸
Acing the amount of light a Croton receives is crucial for a long-lasting specimen. During the spring and summer, be sure to provide a brightly lit spot away from any direct light. Excessive exposure during this time will negatively affect the plant in the likes of sun-scorch and dehydration. Once the autumn kicks in, be sure to include an hour or two of direct light per day to get it through the dormancy period.
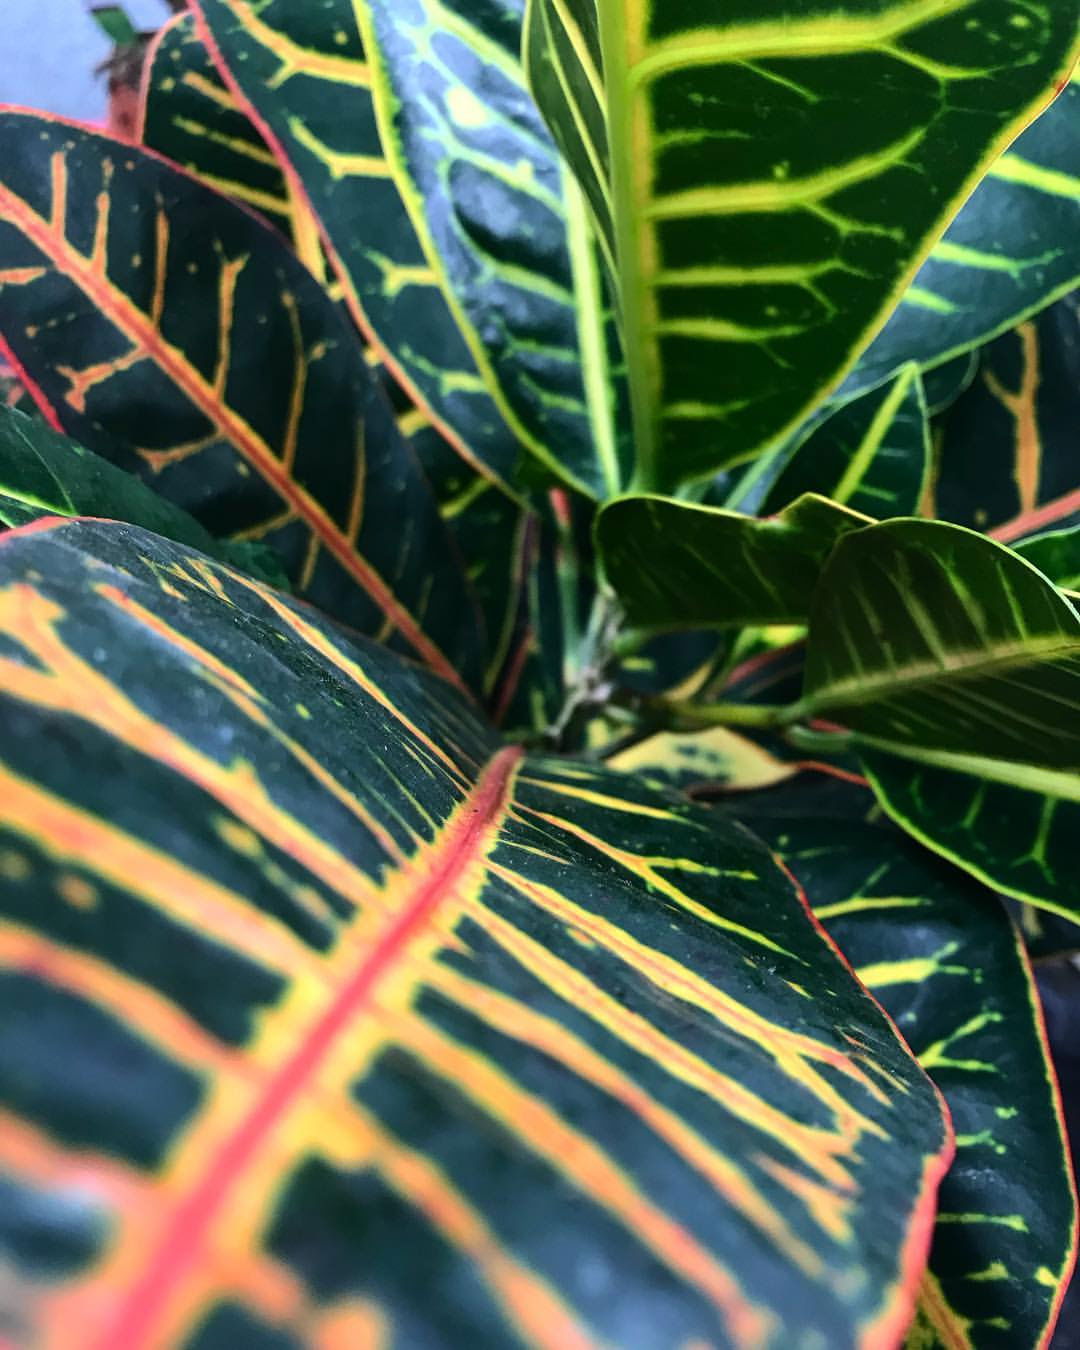
A loss of variegations is a typical sign of too low light; if a newspaper can't be read while having your back towards the window, it generally means there's not enough light. The better the light levels/location, the more vibrant your Croton’s variegations will be…
Water - 🔸🔸
During spring and summer, maintain good soil moisture by only allowing the top third dry out in between irrigations; reduce this further during the colder months to replicate its dormancy period. One word to mention is that Crotons situated in darker locations must be watered far less than those located in brighter ones to reduce the chance of root rot. Furthermore, never pour cold water directly into the soil as the root systems are susceptible to temperature change, which can subsequently result in lower leaf loss. If you decide to use tap water, allow it to stand for at least 24hrs to allow the fluoride to evaporate; large quantities could build up in the soil, damaging both the roots and the overall health of the plant. Under-watering symptoms include stunted growth, dry spots appearing on the leaves and yellowing older leaves - these issues are either due to an over-crowded pot, too much light or forgetfulness. Over-watering symptoms include yellowing lower leaves, brown mushy patches developing in the stems and mouldy soil. For cases of root rot, be sure to click on this link.
Useful Things to Remember;
- Prolonged under-watering is almost as bad as over-watering; extended dehydration will kick the plant back into its dormancy periods, where growth will be halted until better weather arrives.
- Crotons grown in darker locations will require much less watering than those situated in bright/warmer areas - failure to do so will quickly lead to over-watering and possible death.
Humidity - 🔸🔸🔸
Create a humidity tray to provide a moist and stable environment for your plant. If the surrounding saturation is too low or the heat too high, its leaves may start to brown over and curl, especially in the direct sunlight. It's vitally important that a reliable, constant level of humidity is provided as fluctuations is one of the leading causes for sudden leaf loss. Hose the foliage down from time to time to hydrate the leaves and keep the dust levels down.
Fertilisation - 🔸🔸
Fertilise every four waters during the growing period before reducing this to every six in the autumn & winter. Although an 'All-Purpose' fertiliser will still do the job, we'd recommend using a specific 'Houseplant' labelled fertiliser as it'll support the vital thirteen nutrients that this species will need to grow.
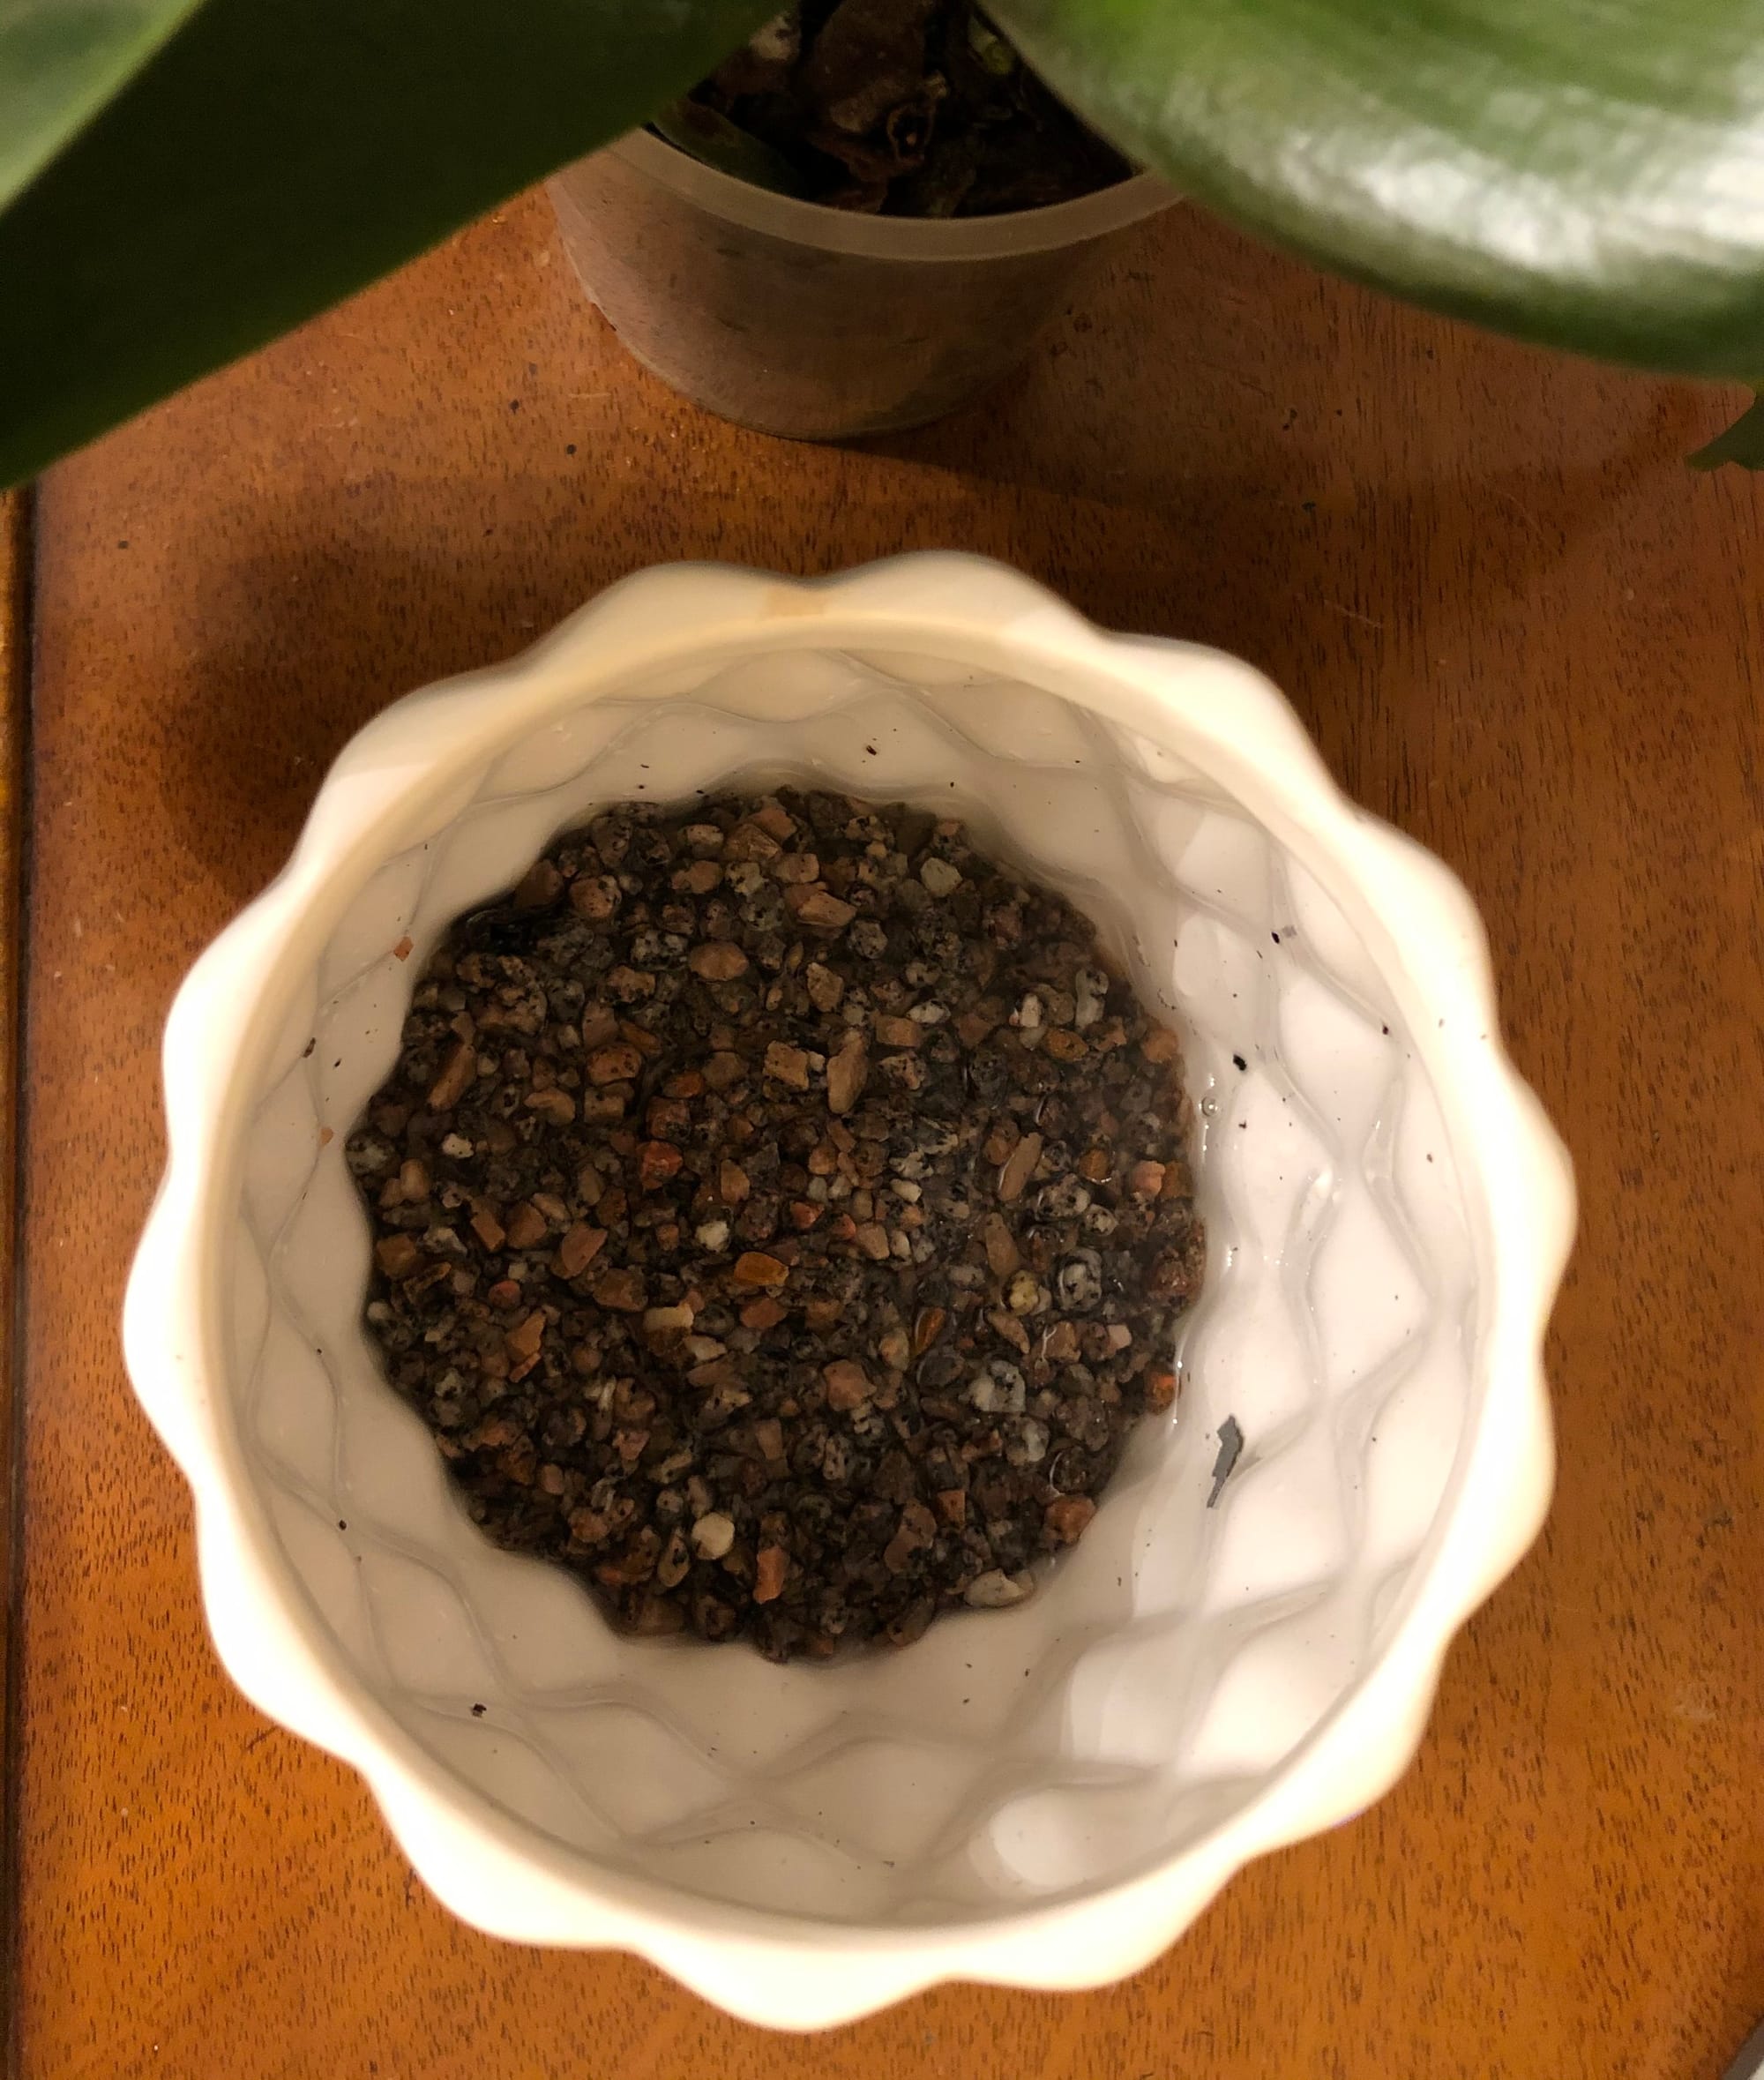 If you're forgetful with watering or battling with dry air, why not fill the decorative pot's bottom sixth with small grit? This will promote more reliable soil moisture that'll help encourage better growth & all-round health.
Common Issues with Crotons
Sudden lower leaf-loss is a common and significant issue among indoor gardeners. This unfortunate phenomenon could be a product of several different problems, most notably being dark locations, water-related abuse or environmental shock. Introduce the plant to a more well-lit area with a splash of off-peak sunlight; if caught in time, the leaf-loss should stop within a few weeks. If you feel that you're watering habits aren't up to scratch, familiarise yourself with our care tips provided at the top of this article. It's always best to under-water an indoor Croton than over-do it, purely on its poor ability to endure continued sogginess. The final culprit could be down to a sudden relocation; if you've recently purchased the specimen within the last six weeks, the chances are it is still acclimatising to the new environment. Although this shouldn't happen, a vastly different setting will cause sudden foliage-loss and stunted growth. You'll have two options of either waiting it out or presenting a more Croton-friendly environment, mentioned in the 'Location & Light' section. We would fertilise the plant the next time it needs a water, using a 'Houseplant' labelled feed. If you're still unsure of what to do, never hesitate to book a 1-to-1 call with THE HOUSEPLANT DOCTOR™ (Author of ukhouseplants.com) to get his expert advice on this issue!
Watering-related abuse will also annoy Crotons. Periods of both droughts and water-logging can cause yellowed leaves, with the latter adding root rot to the equation, too.
Too low humidity can cause browning tips with yellow halos on juvenile leaves. Although this won't kill your specimen, you may want to increase the local moisture to prevent the new growth from adopting these symptoms. Mist or rinse the foliage from time to time and create a humidity tray while the heaters are active to create a stable environment. The browning of leaf-tips on older leaves is wholly natural and is the product of extensive photosynthesis during its life.
Spider Mites are small, near-transparent critters, that'll slowly extract the chlorophyll from of its leaves. Have a check under the leaves, most notably along the midrib, for small webs and gritty yellow bumps. Click here to read our article about the eradicating Spider Mites, along with some extra tips that you may not find elsewhere!
Clean the leaves regularly. Although this isn't too much of an issue, a build-up of dust particles can clog up the plant's pores, causing lowered light capturing-efficiency. Rinse the topsides of the leaves down once a month to keep levels down and improve growing conditions.
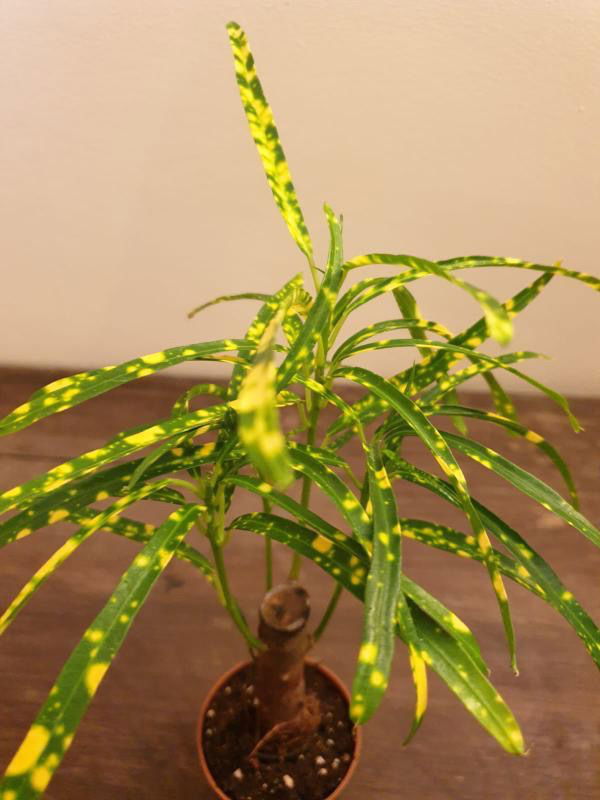 Crotons are often commercially propagated & sold via stem cuttings to sell, much like the Dracaena or Yucca. Plant: Codiaeum variegatum punctatum 'Aureum'
Origins
Codiaeum consists of around seventeen species that originate from south-east Asia, forming part of the Euphorbiaceæ family. This taxonomic group is the fifth-largest flowering plant family that includes Poinsettias, Phyllanthus & The African Milk Bushes.
The genus was first erected by Carl Linnaeus in 1753, with the most popular species, C. variegatum, being formally classified by Adrien Laurent de Jussieu in 1824. The common name, Croton, is derived from the Greek word for tick (κρότος (krótos)), that refers to some of the species' shaped seeds. The genus, Croton, should not be confused with Codiaeum, despite their similar names and growth patterns.
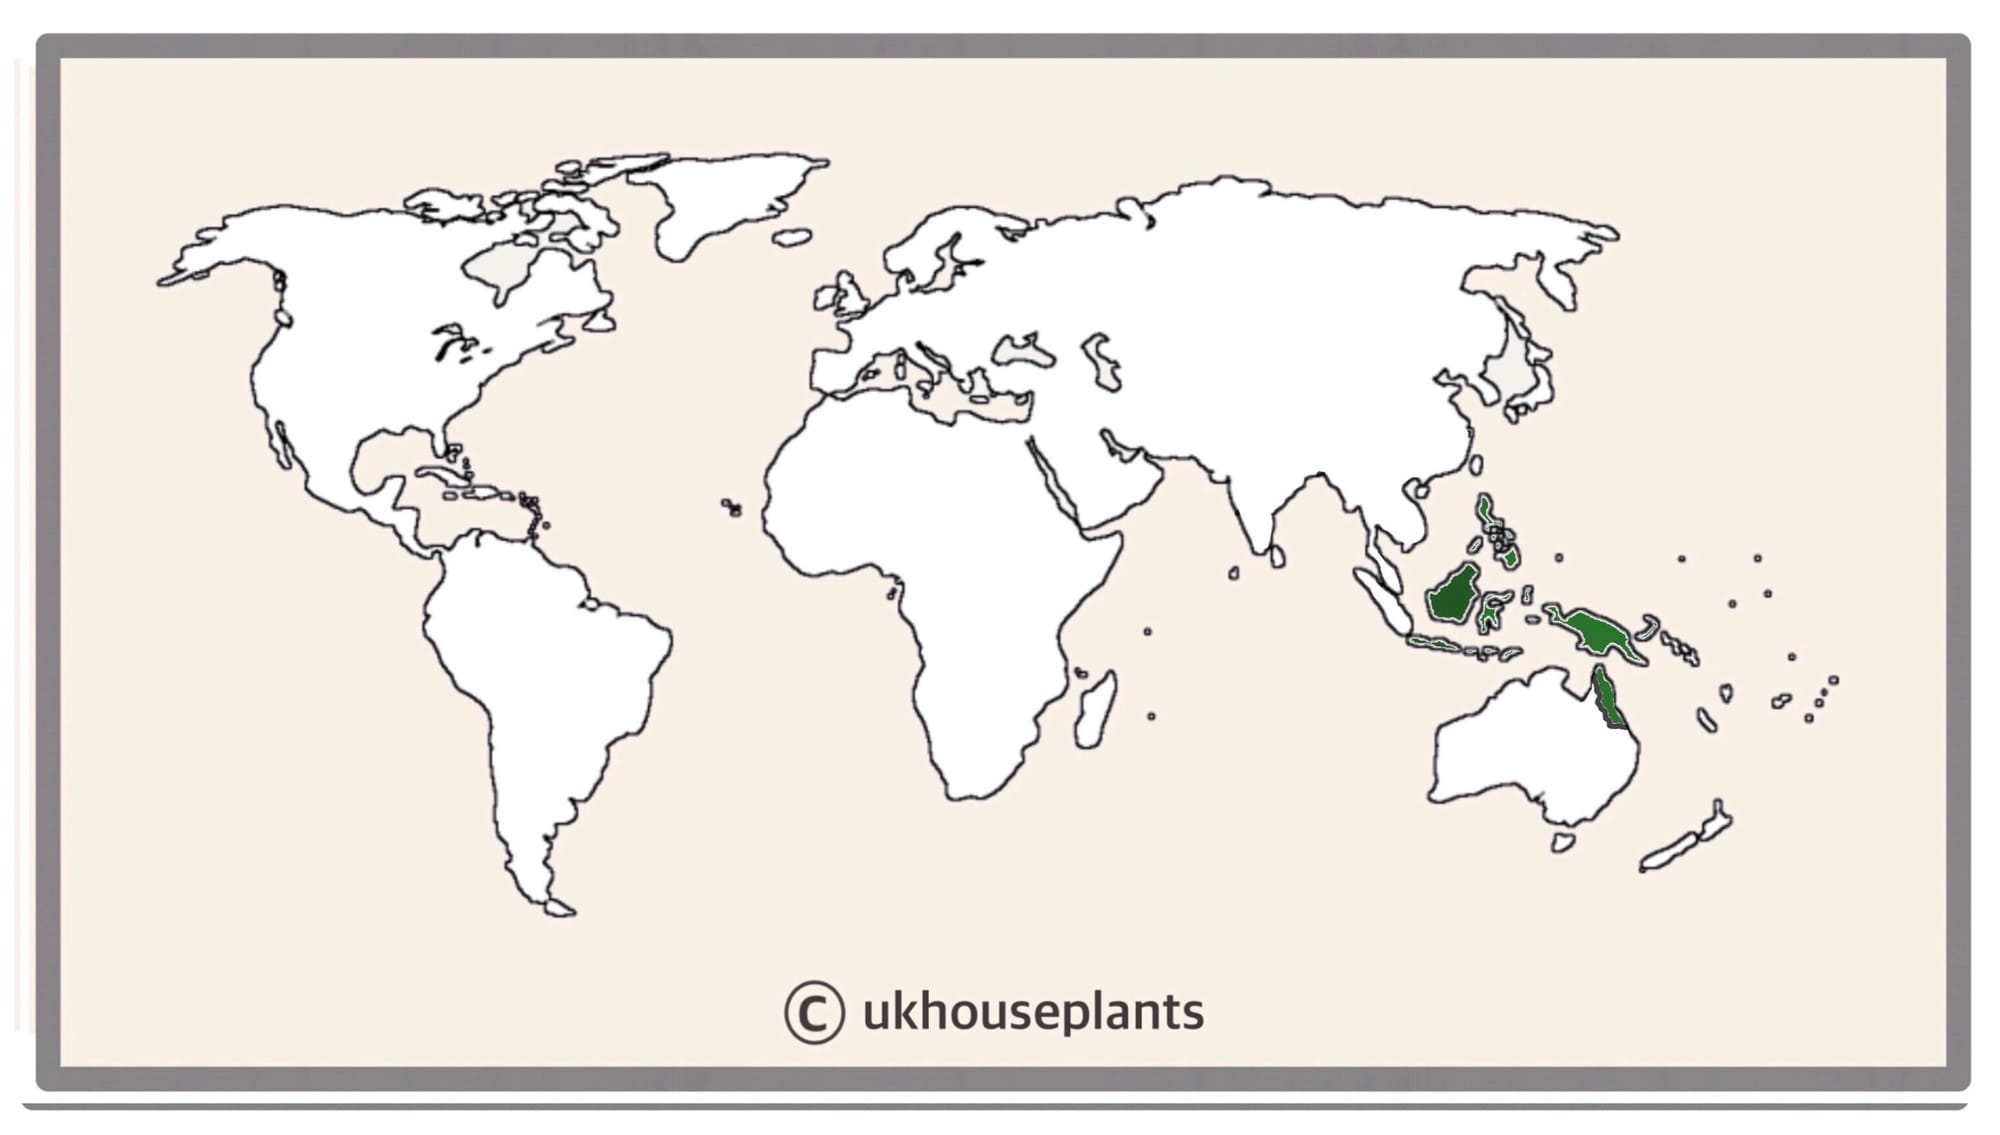 The Distribution of Codieaum (Crotons)
Temperature
15° - 27°C (59° - 80°F)
H1a (Hardiness Zone 13) - Must be grown indoors or under glass all year round. Never allow temperatures to dip below 15℃ with sudden fluctuations as permanent damage may occur in the likes of stunted growth, yellowing foliage & leaf loss.
Spread
Over 1m in height and 0.5m in width once they reach maturity. The ultimate height will take between 5 - 10 years to achieve, with 5cm of new growth per season.
Pruning & Maintenance
Remove yellow or dying leaves, and plant debris to encourage better-growing conditions. While pruning, always use clean scissors or shears to reduce the chance of bacterial and fungal diseases. Never cut through yellowed tissue as this may cause further damage in the likes of diseases or bacterial infections. Remember to make clean incisions as too-damaged wounds may shock the plant, causing weakened growth and a decline in health.
Propagation
Via Seed, Stem or Petiole Cuttings (difficult).
Stem & Eye Cuttings (Difficult) - This method of propagation is troublesome without the aid of bottom-heat and a controlled environment. Choose the healthiest, most established stems that are wooded, yet still juvenile enough to bend slightly, being just thicker than a pencil. Each cutting should only have ONE leaf, and a small portion of the stem to either side of the node. Cut directly below a node using a clean knife to reduce bacteria count. Situate the cutting into moist 'Houseplant' compost, with the only the leaf sticking out of the soil. Blackleg can occur when the bottom wound becomes infected, resulting in propagation failure - typically caused by water-logging or a too-damaged wound. Maintain bright light and evenly moist soil with the avoidance of direct sunlight or cold draughts. Wrap the pot (& foliage) in a transparent bag or within a miniature greenhouse, and provide bottom heat of temperatures above 18°C (54°F). Remove the bag and place into individual 7cm (3 inches) pots once the second new leaf emerges. Follow the same care routines, as mentioned in the article's top half. This method will take up to six months, so patience and the correct environment are paramount for success!
Petiole Cuttings (Moderate) - This form of cuttings is best done in late spring, from an established plant that isn't displaying signs of stress. Although using undamaged leaves that are shed by the plant are acceptable, manually-pruned leaves that are halfway down hold the best success rates. While using a clean pair of scissors, cut the petiole (the area between the leaf & stem) as close to the stem as possible. Immediately place the cutting in lukewarm water and replace the water each week to maintain adequate hygiene. It should take around five weeks to root, and once the roots are approximately a fifth of the leaf's size, set the cuttings into a 'Houseplant' labelled potting mix and an 8cm pot. Wrap the pot (& foliage) in a transparent bag or within a miniature greenhouse, and provide bottom heat of temperatures above 18°C (54°F). Remove the bag once the second new leaf emerges and follow the same care routines, as mentioned in the article's top half.
Flowers
Crotons are perennials, producing small firework-shaped flowers during late spring that can last up to a week. Have a look at the images below for its flowers and berries (when successfully pollinated!).
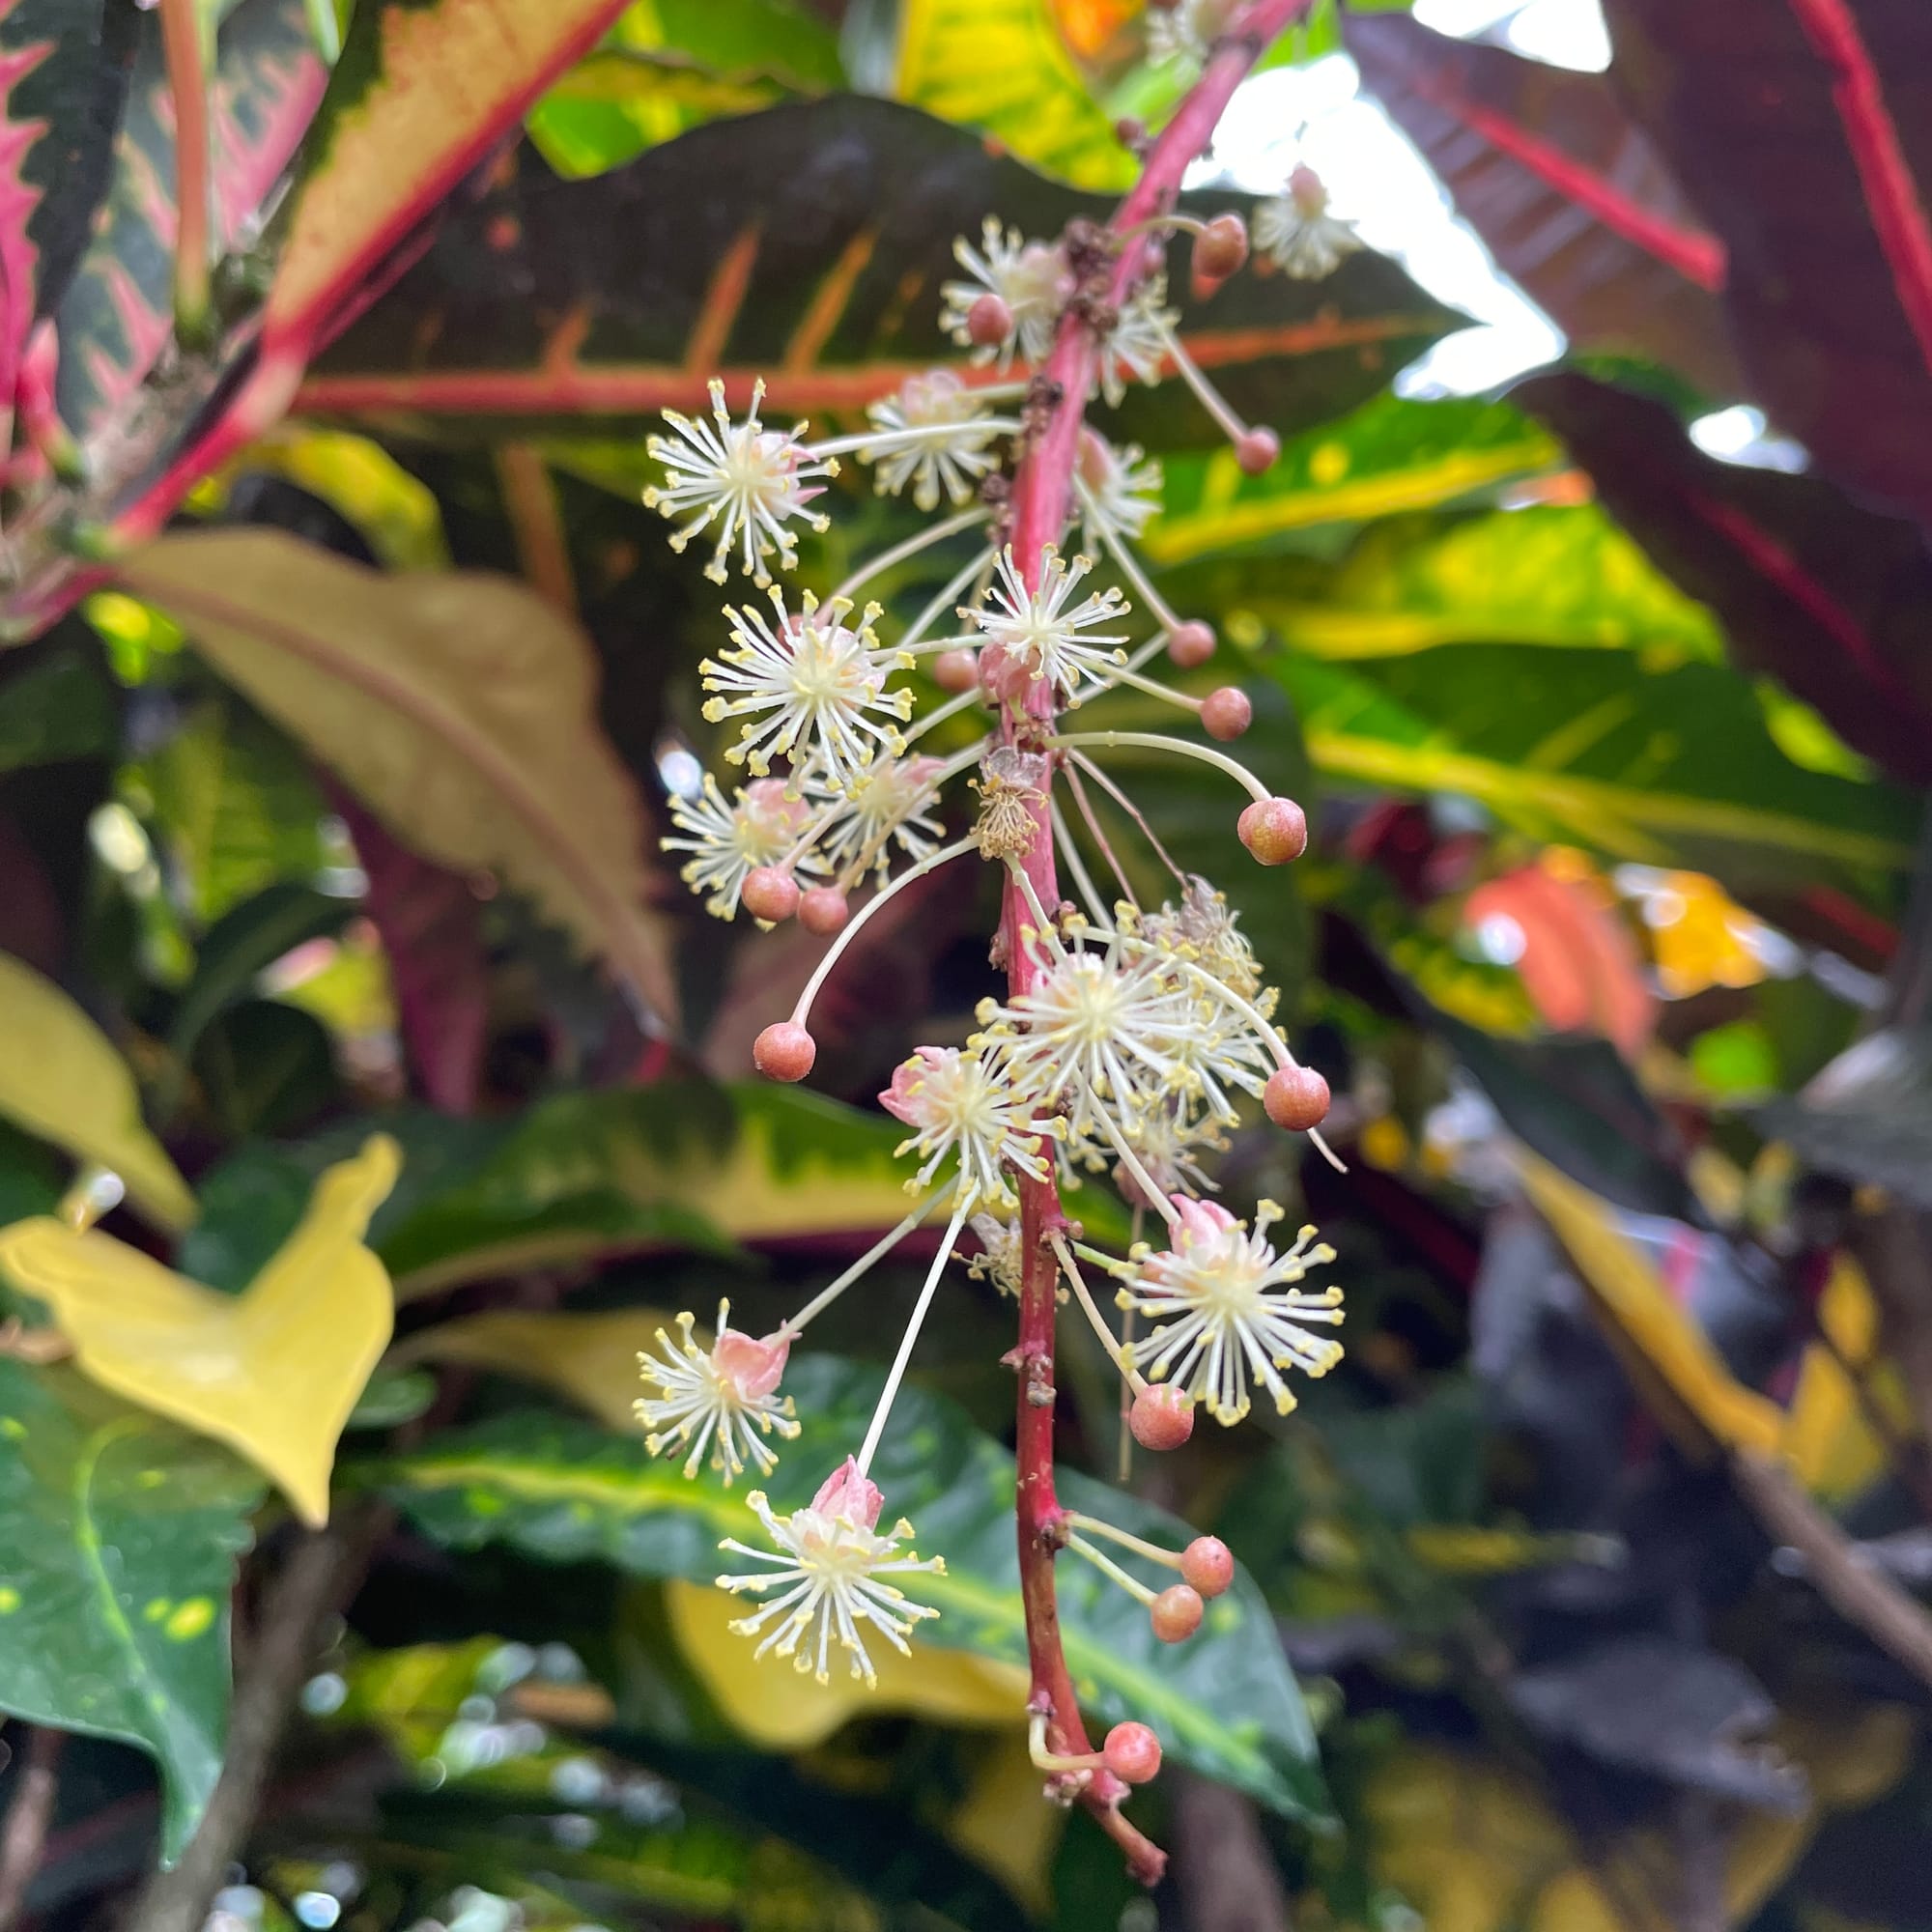 The flowers of Codiaeum variegatum 'Petra'.
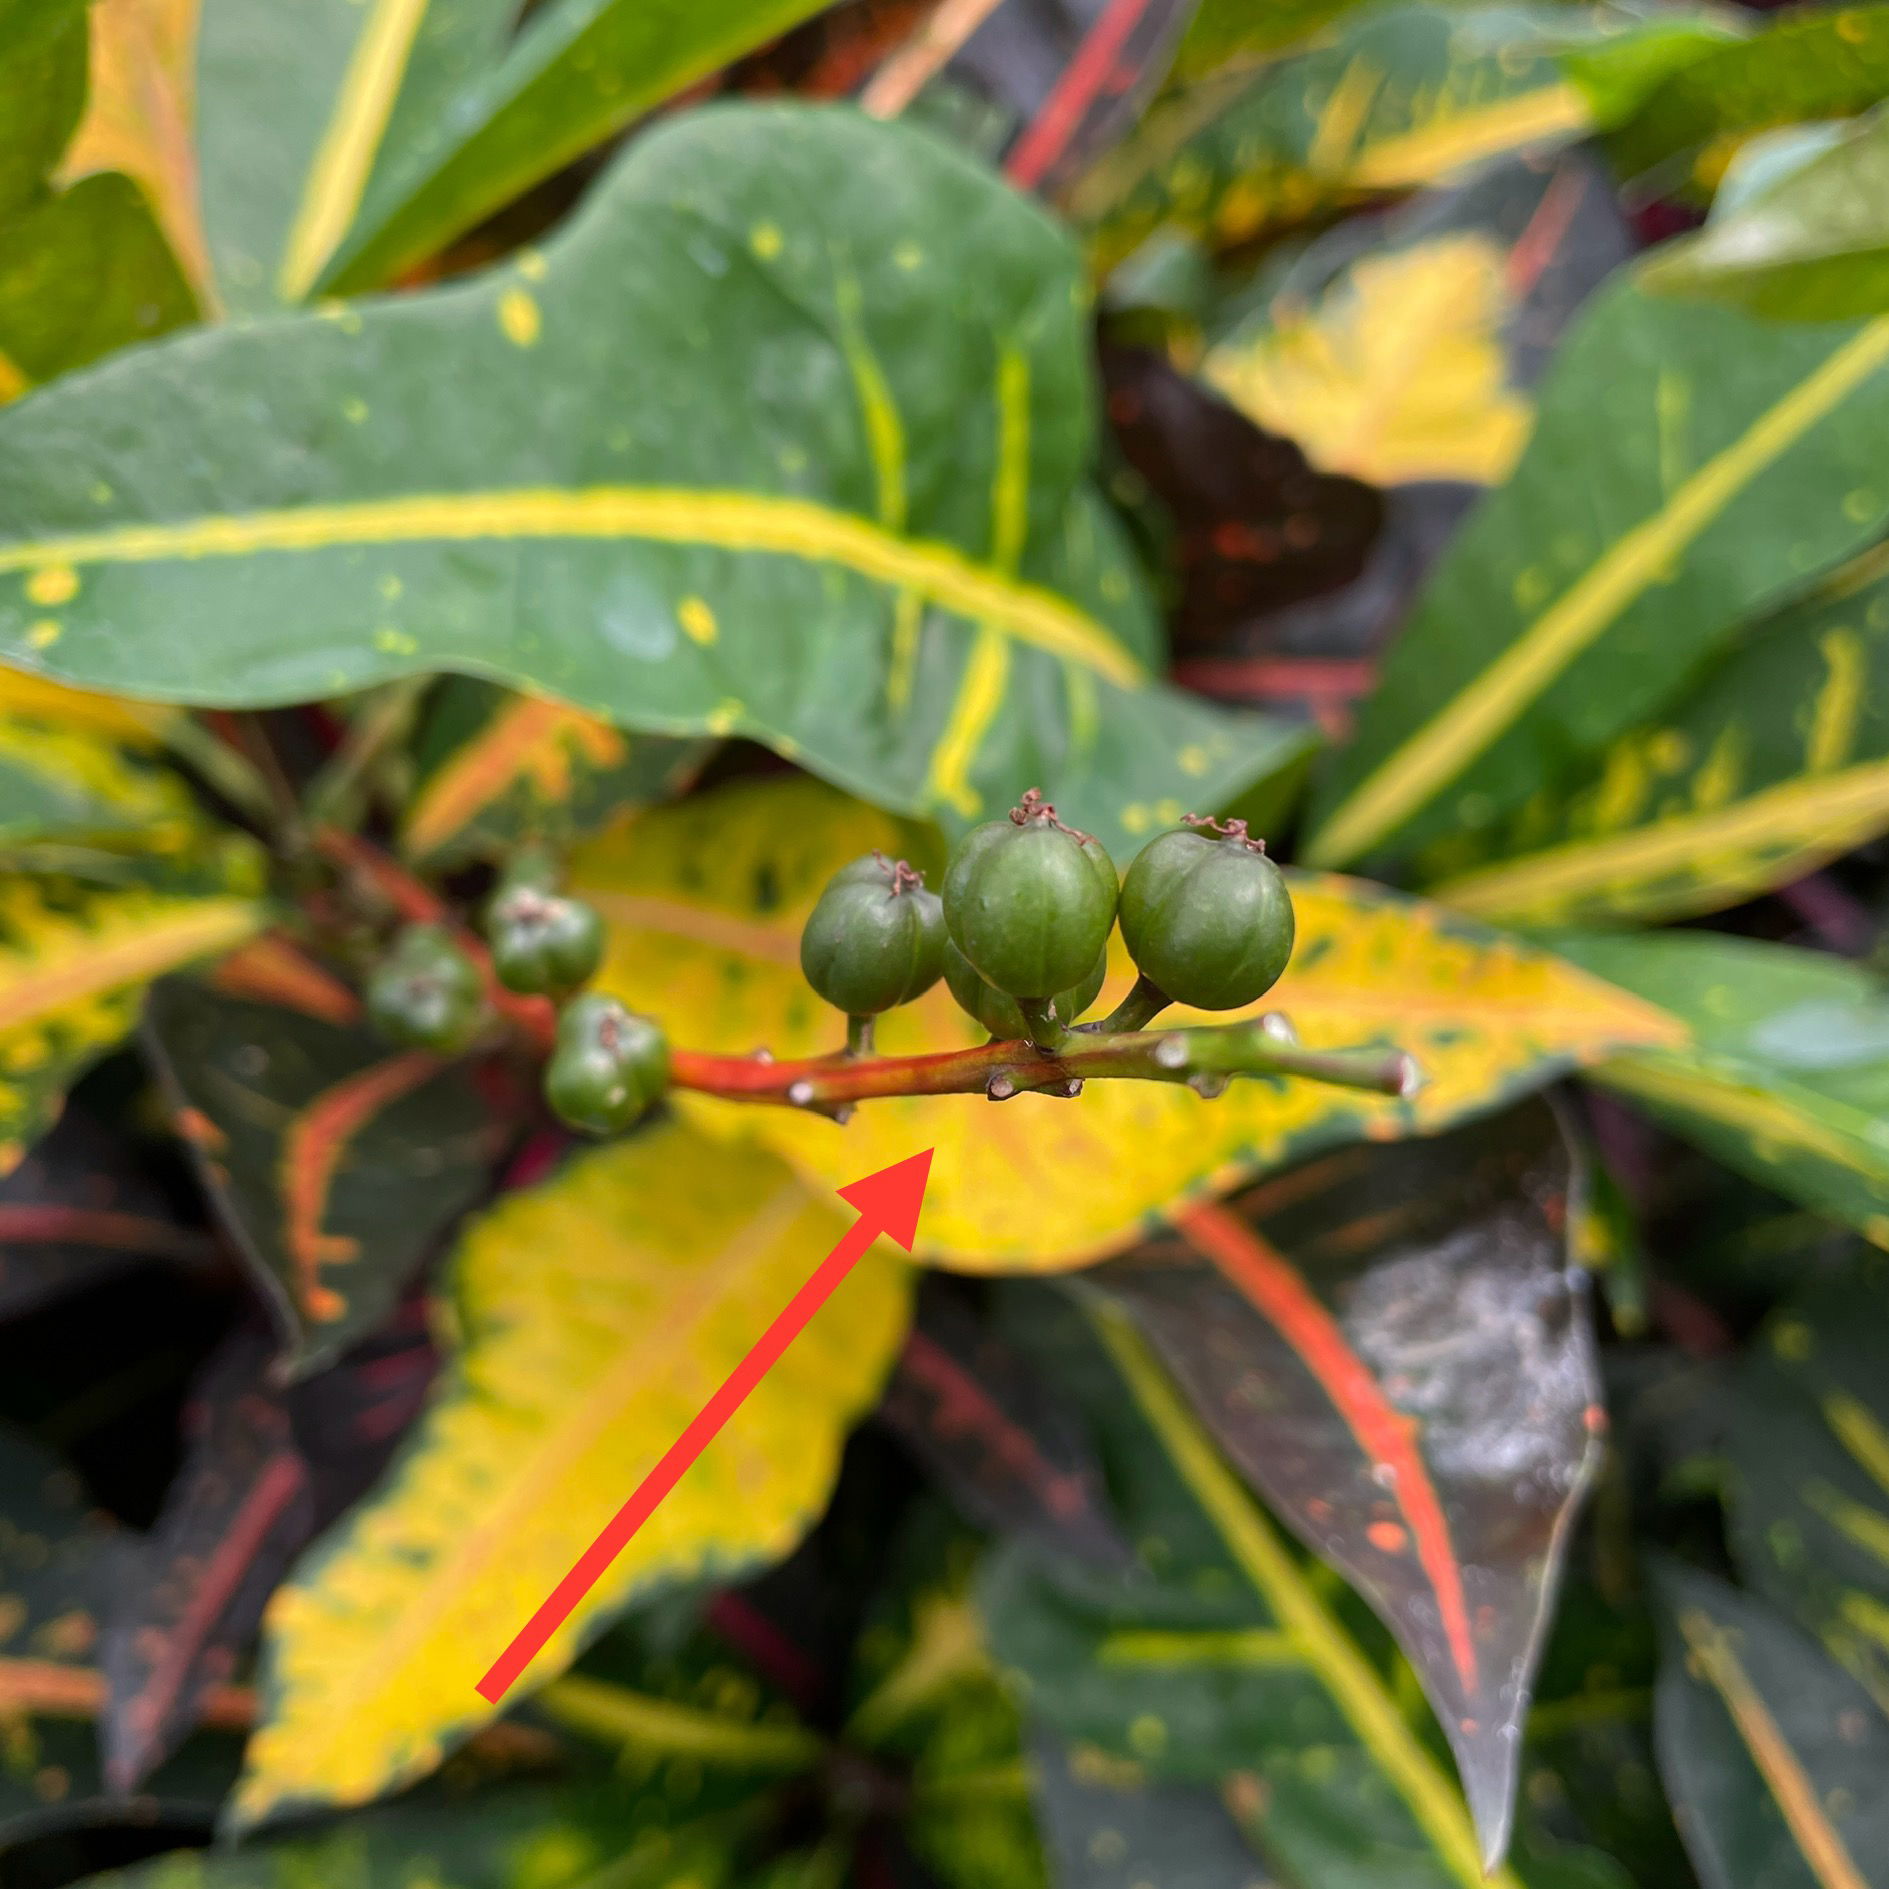 If your Croton is successfully pollinated, it'll produce small green berries that turn orange-brown when the seeds are ready to collect!
Repotting
Repot every three years in spring, using a 'Houseplant' labelled compost and the next sized pot with adequate drainage. Hydrate the plant 24hrs before tinkering with the roots to prevent the risk of transplant shock. For those that are situated in a darker location, add a thin layer of small grit in the pot's base to improve drainage and downplay over-watering. Click here for a detailed step-by-step guide on transplantation, or via this link to learn about repotting with root rot.
Book a 1-to-1 video call with THE HOUSEPLANT DOCTOR™ if you'd like a personal guide to repotting your houseplant. This will include recommending the right branded-compost and pot size, followed by a live video call whilst you transplant the specimen for step-by-step guidance and answer any further questions!
Pests & Diseases
Keep an eye out for mealybugs, spider mites, scale, thrips, whitefly & root mealybugs that'll locate themselves in the cubbyholes and undersides of the leaves, with the exception of the latter in the soil. Common diseases associated with Crotons are root rot, leaf-spot disease, botrytis, rust, powdery mildew & southern blight - click here to learn more about these issues.
If the specimen has dry white crusty patches on its foliage or stem, this is its sap, commonly caused by damage via touch.
Toxicity
This plant is classified as poisonous; if parts of the plants are eaten, vomiting, nausea and a loss of appetite could occur. Consumption of large quantities must be dealt with quickly; acquire medical assistance for further information. The sap can also cause dermatitis and skin allergy to sensitive individuals, so be sure to wear gloves when handling.
Retail Locations
B&Q and Online Stores.
Book a 1-to-1 Call with THE HOUSEPLANT DOCTOR™
If you need further advice with your houseplants, book an advice call with ukhouseplants' friendly and expert writer today! This can be done via a video or audio call on most apps, including Facebook, FaceTime & Skype. A ten-minute call costs £5.99 (US$7), or £15.99 for thirty minutes. You can ask multiple questions, including queries on plants, pests, terrariums, repotting advice and anything in between. Please consider supporting this service to keep ukhouseplants thriving!
Comments