Introduction & Synopsis
Making your own monstera wall vine is fun and straightforward to make. Although it's best to create a vine that runs vertically against a wall, vines can even be trained around other areas of the house, for example a wooden staircase. To create the latter, follow all of the tips and read the ending two paragraphs.
Before we get started, here's a synopsis of how to create your very own vine!
- Cut a piece of rope so that it's slightly longer than the desired length of the display, and lay it onto the ground - this is the spine that'll attach the monstera leaves to the centrepiece.
- Lay the monstera leaves diagonally across the 'spine', and move the leaves around to improve the visual aspect. Have a look at Image 4 for more information. Bend the monstera leaves so that half of the stem (petiole for horticulturists) follows the 'spine' - cable tie the bent junctions to the spine rope - see Images 5 & 6.
- Wrap the longer piece of rope (coiling rope) around both the attached monstera stems and 'spine', so that it hides the mechanics of the display. Have a look at Image 7 for more info.
- Place the nails or hooks into the wall, and hang the display up. Vines that are curved or trail along bannisters / beams will need to be attached to the walls via each curve as well. Scroll to the bottom Image (10) for more information on this.
 Image 1a: My 2m long display that cost around £90.
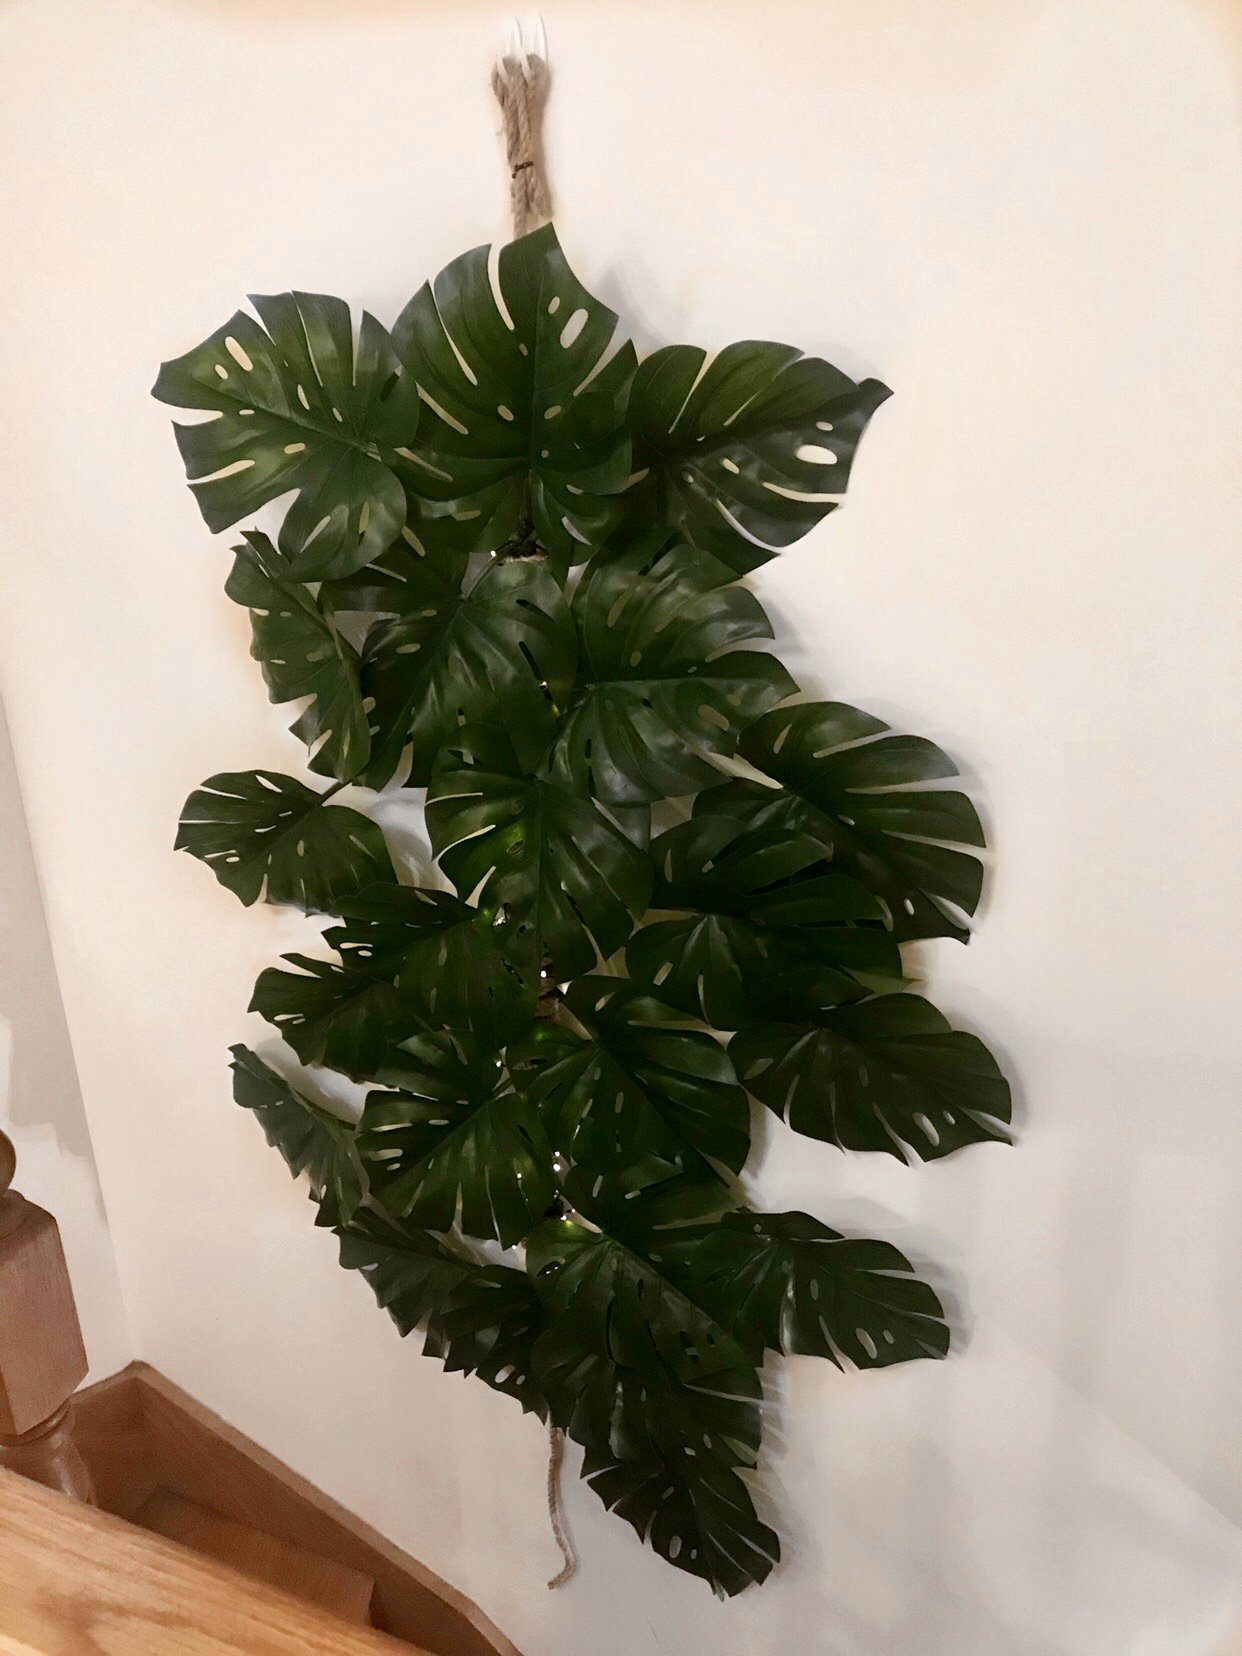 Image 1b: Another angle from the top of the stairs, overlooking the display.
Preparation
The first big question is not how to do it, but rather where to find the four main ingredients. Instead of writing pages and pages of information about where to find them, ukhouseplants whittled it down to just four bullet points for quicker reading.
Rope
Thick, tripled woven rope must be used to withstand the weight of the display. Most hardware stores will sell rope of some sort; however, rustic varieties (recommended) most likely will be sold online. In terms of length, have over four times the length of the display itself, as it'll serve both the main column 'the spine' and the 'trunk' that'll hide the cable ties and monstera stems.
For those wondering, the 'spine' will house the monsteras' flexible stems, and the 'trunk' to be coiled around the 'spine' and leaf spines. Scroll down to Image 8 to see what the 'trunk' looks like.
Cable Ties
Again, most hardware stores will sell this item. If you're lucky, the local 'pound/dollar store' or cheap retailers will sell these. You don't need overly-strong ties as they won't be holding the actual structure to the wall.
Nails or Sticky-Pad Hooks?
The two different methods to hold your vine largely depend on whether or not you want to penetrate the wall. If you don't mind about making a few permanent holes, be sure to use nails as they'll hold far more strength. Sticky-pad hooks, however, will not need to be drilled and therefore won't damage the wall. Before we get started, evaluate the strength of the wall - is it bricked, or boarded? For the latter, we'd recommend using sticky hooks as boarded walls will not hold the nails well. Use two sticky hooks, (like this one) so that the weight is distributed between the two.
As ukhouseplants is currently based in an eighteenth-century guest house, we opted for the sticky hooked method to maintain the overall integrity of the building. For those who are asking, we used 3M Command Adhesive Hook Medium White (Pack of 2), which are primarily found online; however, some retailers will sell these during the festive period to hang stockings, etc. The price varies from £2 up to £6 in the UK, and something equivalent can be found in other international markets.
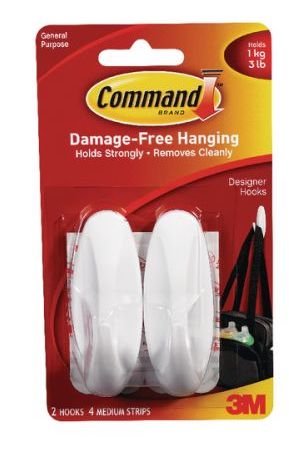 Image 2:ukhouseplants recommended stick-pad hooks by 3M. Copyright: 3M
Monstera Leaves
For those who aren't in the know, the best monstera leaves to use are of course, from IKEA. Not only are they the best quality, but steel wire found in each stem, enables it to be bent and re-bent into a specific angle, holding the corner superbly. Each individual stem will keep the leaf in its place without it wilting over time, which forms the visual aspect of the decoration. Just for the record, the pictured display is 2.2m x 0.8m. (86in x 31.5in) and costed around £90. Although this may sound expensive, think about the exclusivity that it holds; it's homemade and unique to this household that others simply don't have.
Here's the information regarding each leaf:
- Cost - £3.50 (US $5.99) (AUD $6.99) (CAD $9.99) (SGD $17.90) (EUR 4,99 €)
- Dimensions - Overall height is 80cm (31.5in). The leaf size is 37cm (14.5in) in height and 32cm (12.6in) in width. It's approximately 3cm (1.2in) in depth.
- Retail Locations - Online via the IKEA website, or in-store. Visit your country's IKEA website to learn about stock levels and localised prices.
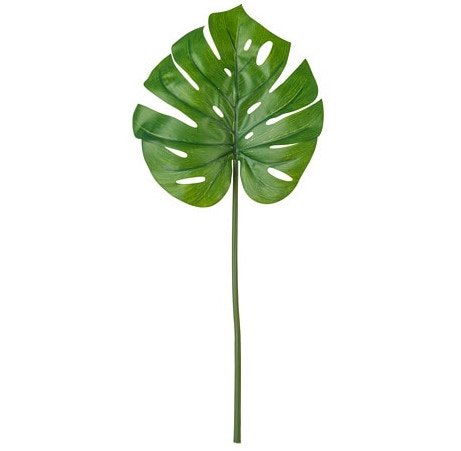 Image 3: IKEA's monstera leaves. Copyright: IKEA.com
The Creation
Chose the Wall
Decide where you'd like the vine, and remember that the leaf size is roughly 35cm², so the size proportion compared to the display is critical! There's no point in having a fifty-centimetre tall vine when the leaves are over half the length of the overall decoration, as it'll look cramped and frankly, rubbish...
Instead, a larger display is far better than a small one, purely based on this very problem. As mentioned earlier, the type of wall will significantly influence the type of hook/nail that you'll use; bricked walls can have either nails or sticky-pad hooks, whereas boarded walls can only have the latter.
The Spine
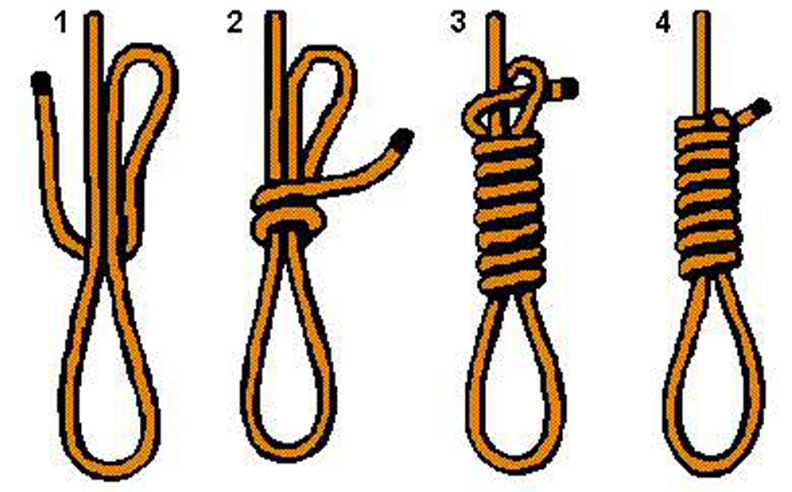
The main attraction of this display is, of course, the leaves and roped vine that the monsteras would grow up. However, the 'spine' and coiling (visible) rope are two separate body parts. The first is the main body that will allow the monstera leaves to be attached, as well as the noose at the top. To make the spine, cut the rope so that it's slightly longer than the desired size - you can always cut the rope to fit your needs later on. Lay the cut rope straightly onto the floor in an open space, allowing you to gain access around the whole piece. Choose either end to be the top; we used the cut end for the top to hide the frayed section. Create a tied noose at the top - have a look at the image below for further help.
For the eagle-eyed readers, you'll notice that mine has two hooks - this is because of the weight of the piece needing two nooses to hold it. You'll not need to create two hooks if metals nails are used. We'd recommend two sticky-pad hooks for extra strength as they are only relying on the pads to stay on. To create the second hook, you'll have to create another noose at the top end of the latter, coiling rope (the 'trunk') that'll carry half the weight on each sticky hook — more on this in a moment.
The Laying & Attachment of Monstera Leaves
Depending on the location of the display, the leaves and/or vine must be angled in specific ways to compliment the surrounding shapes. In other words, if the vine is going to be placed on an oddly shaped wall, make sure it acknowledges the walls by running parallel them. Have a look at mine - sparse at the top, and widens at the middle. The bottom has unequal levels; the right leaf is higher than the left to flow with the angle of the stairs.
With the 'spine' rope still on the ground, begin to lay the leaves down with the leaf's stem (petiole) intersecting the 'spine' halfway - have a look at Image 4 below for a clearer understanding. Move the leaves around to match your desired look, keeping the top 20% of the rope bare so that you can prepare the nook. Always keep in mind about the leaves wilting downwards slightly once on the wall because of gravity.
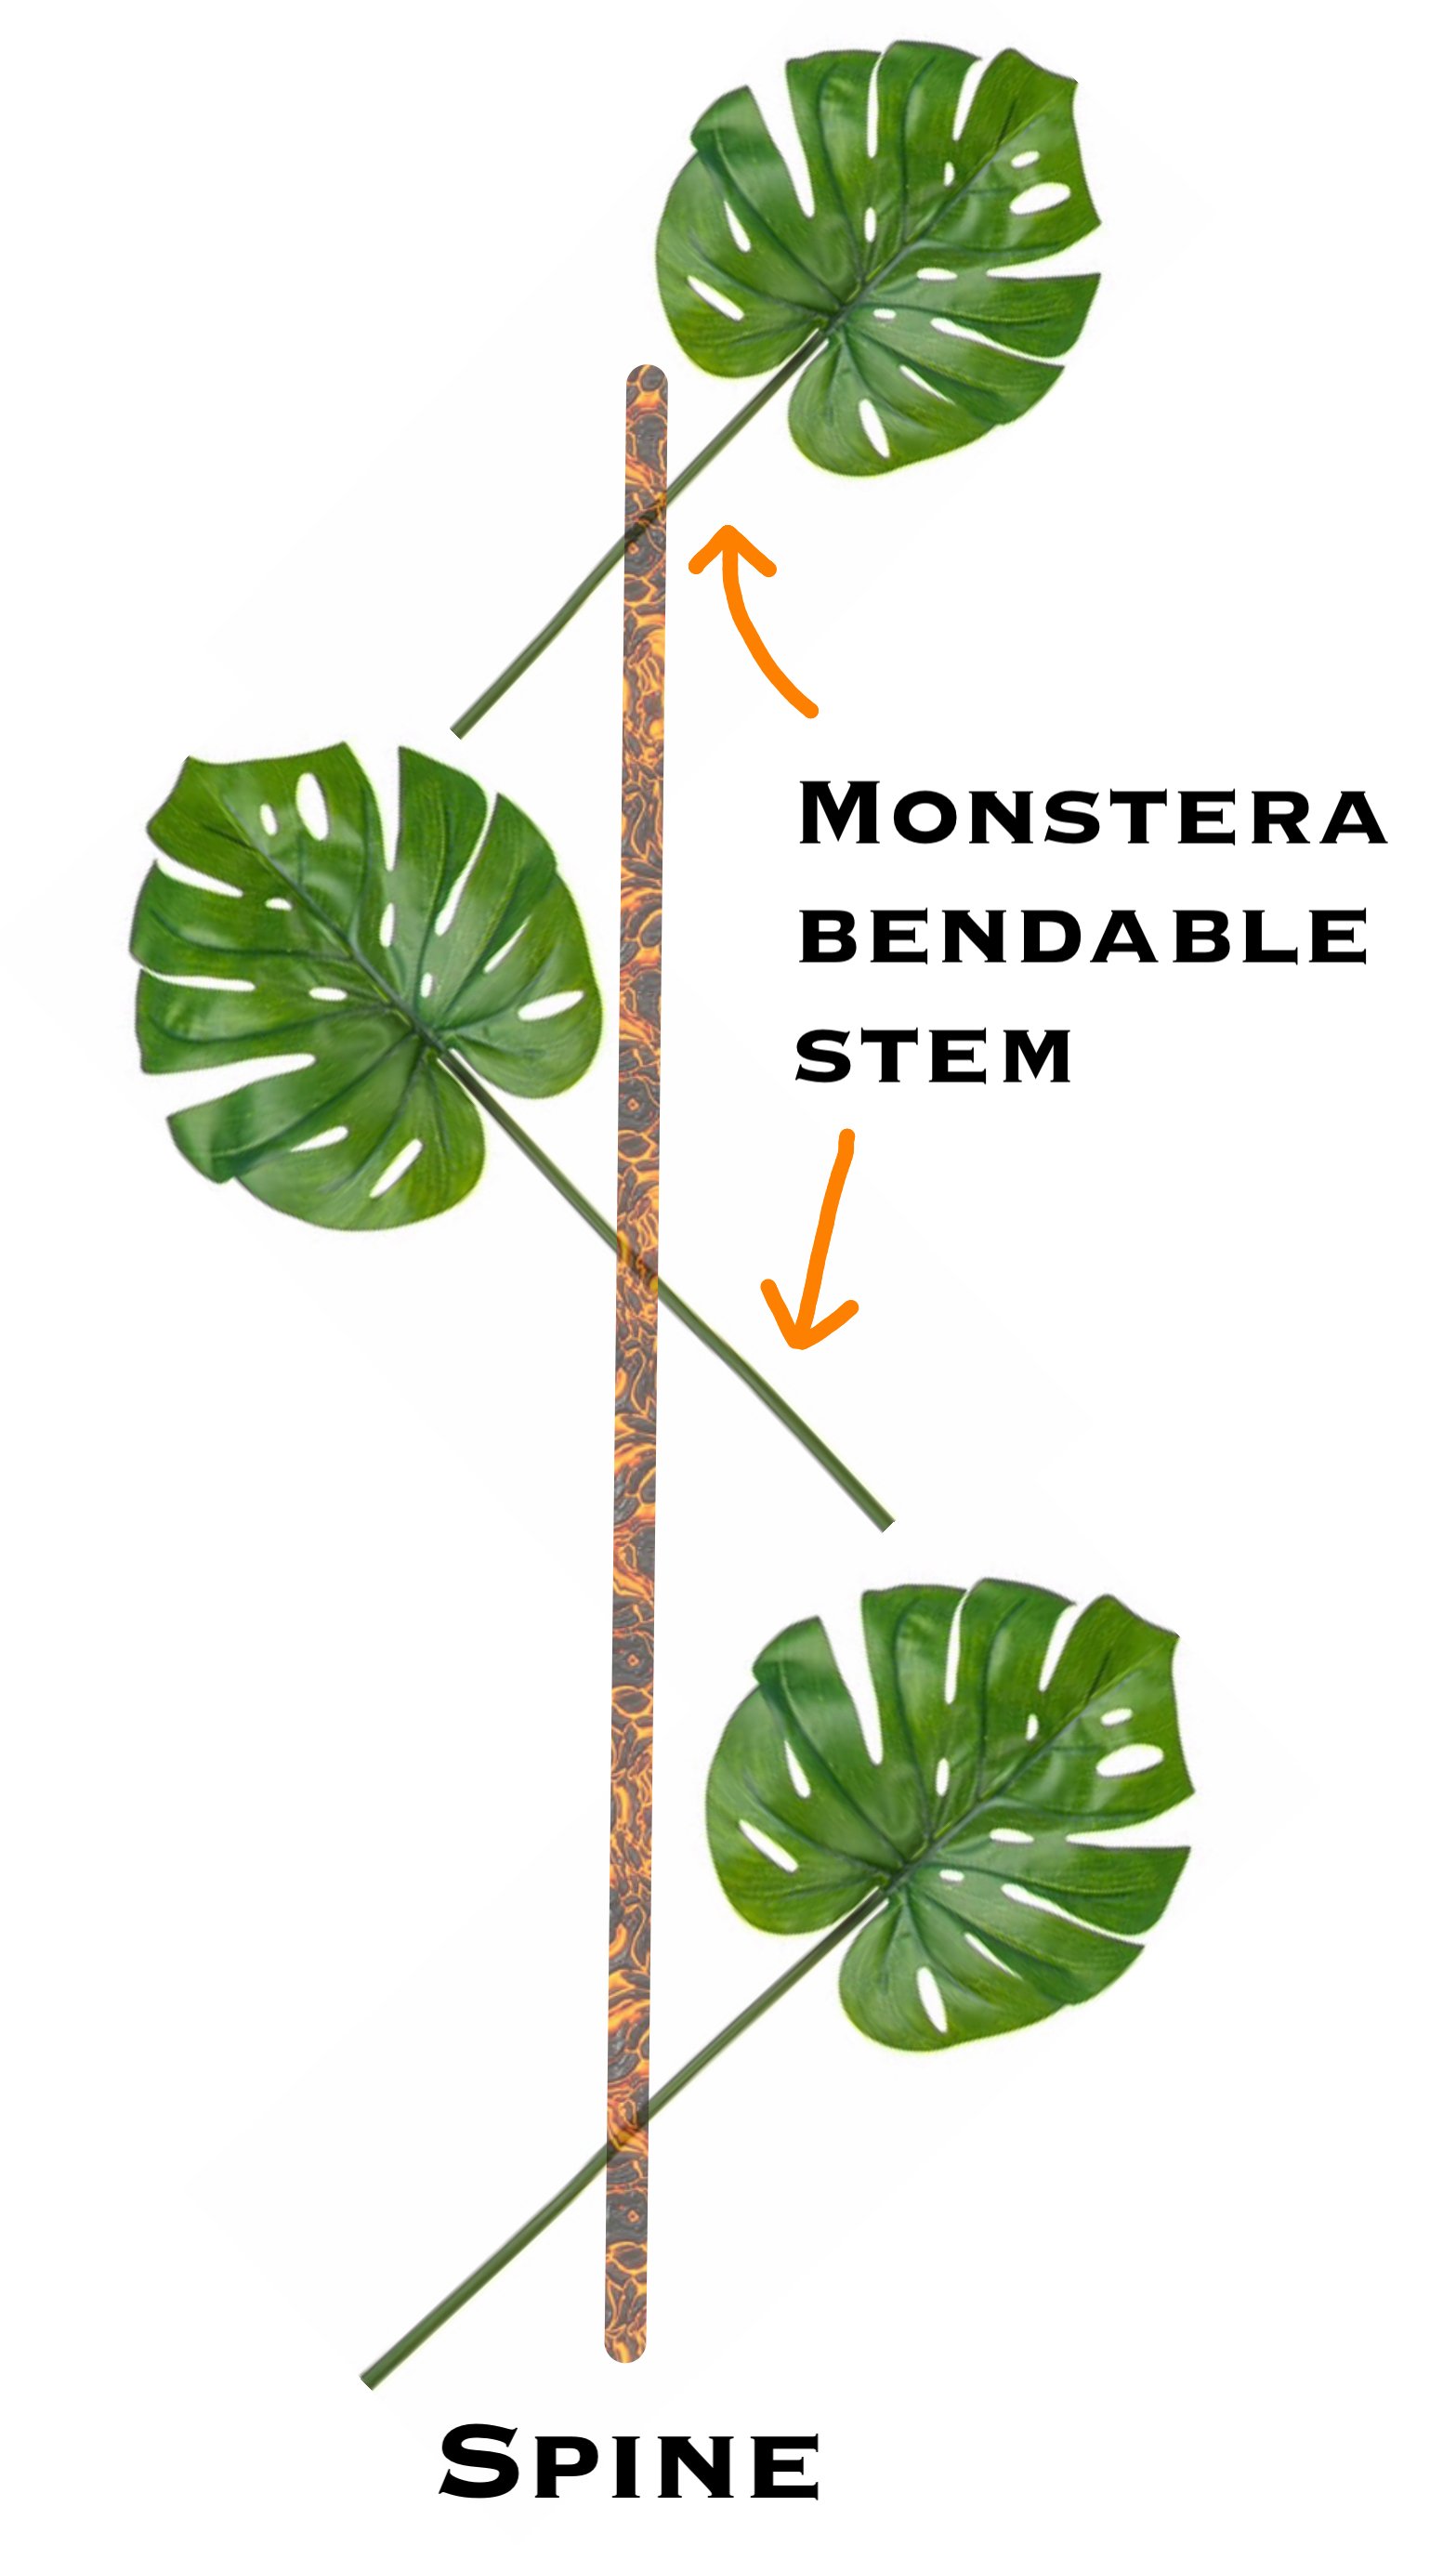 Image 4: Lay the monsteras diagonally across the spine, so it intersects the stems at the stem's midpoint.
Once you've laid the leaves in the desired format, it's now time to bend the monstera stems (petioles) so that the non-leaved end follows the 'spine'. As this is quite a hard step to describe, Image 5 below will show you the areas in which to bend.
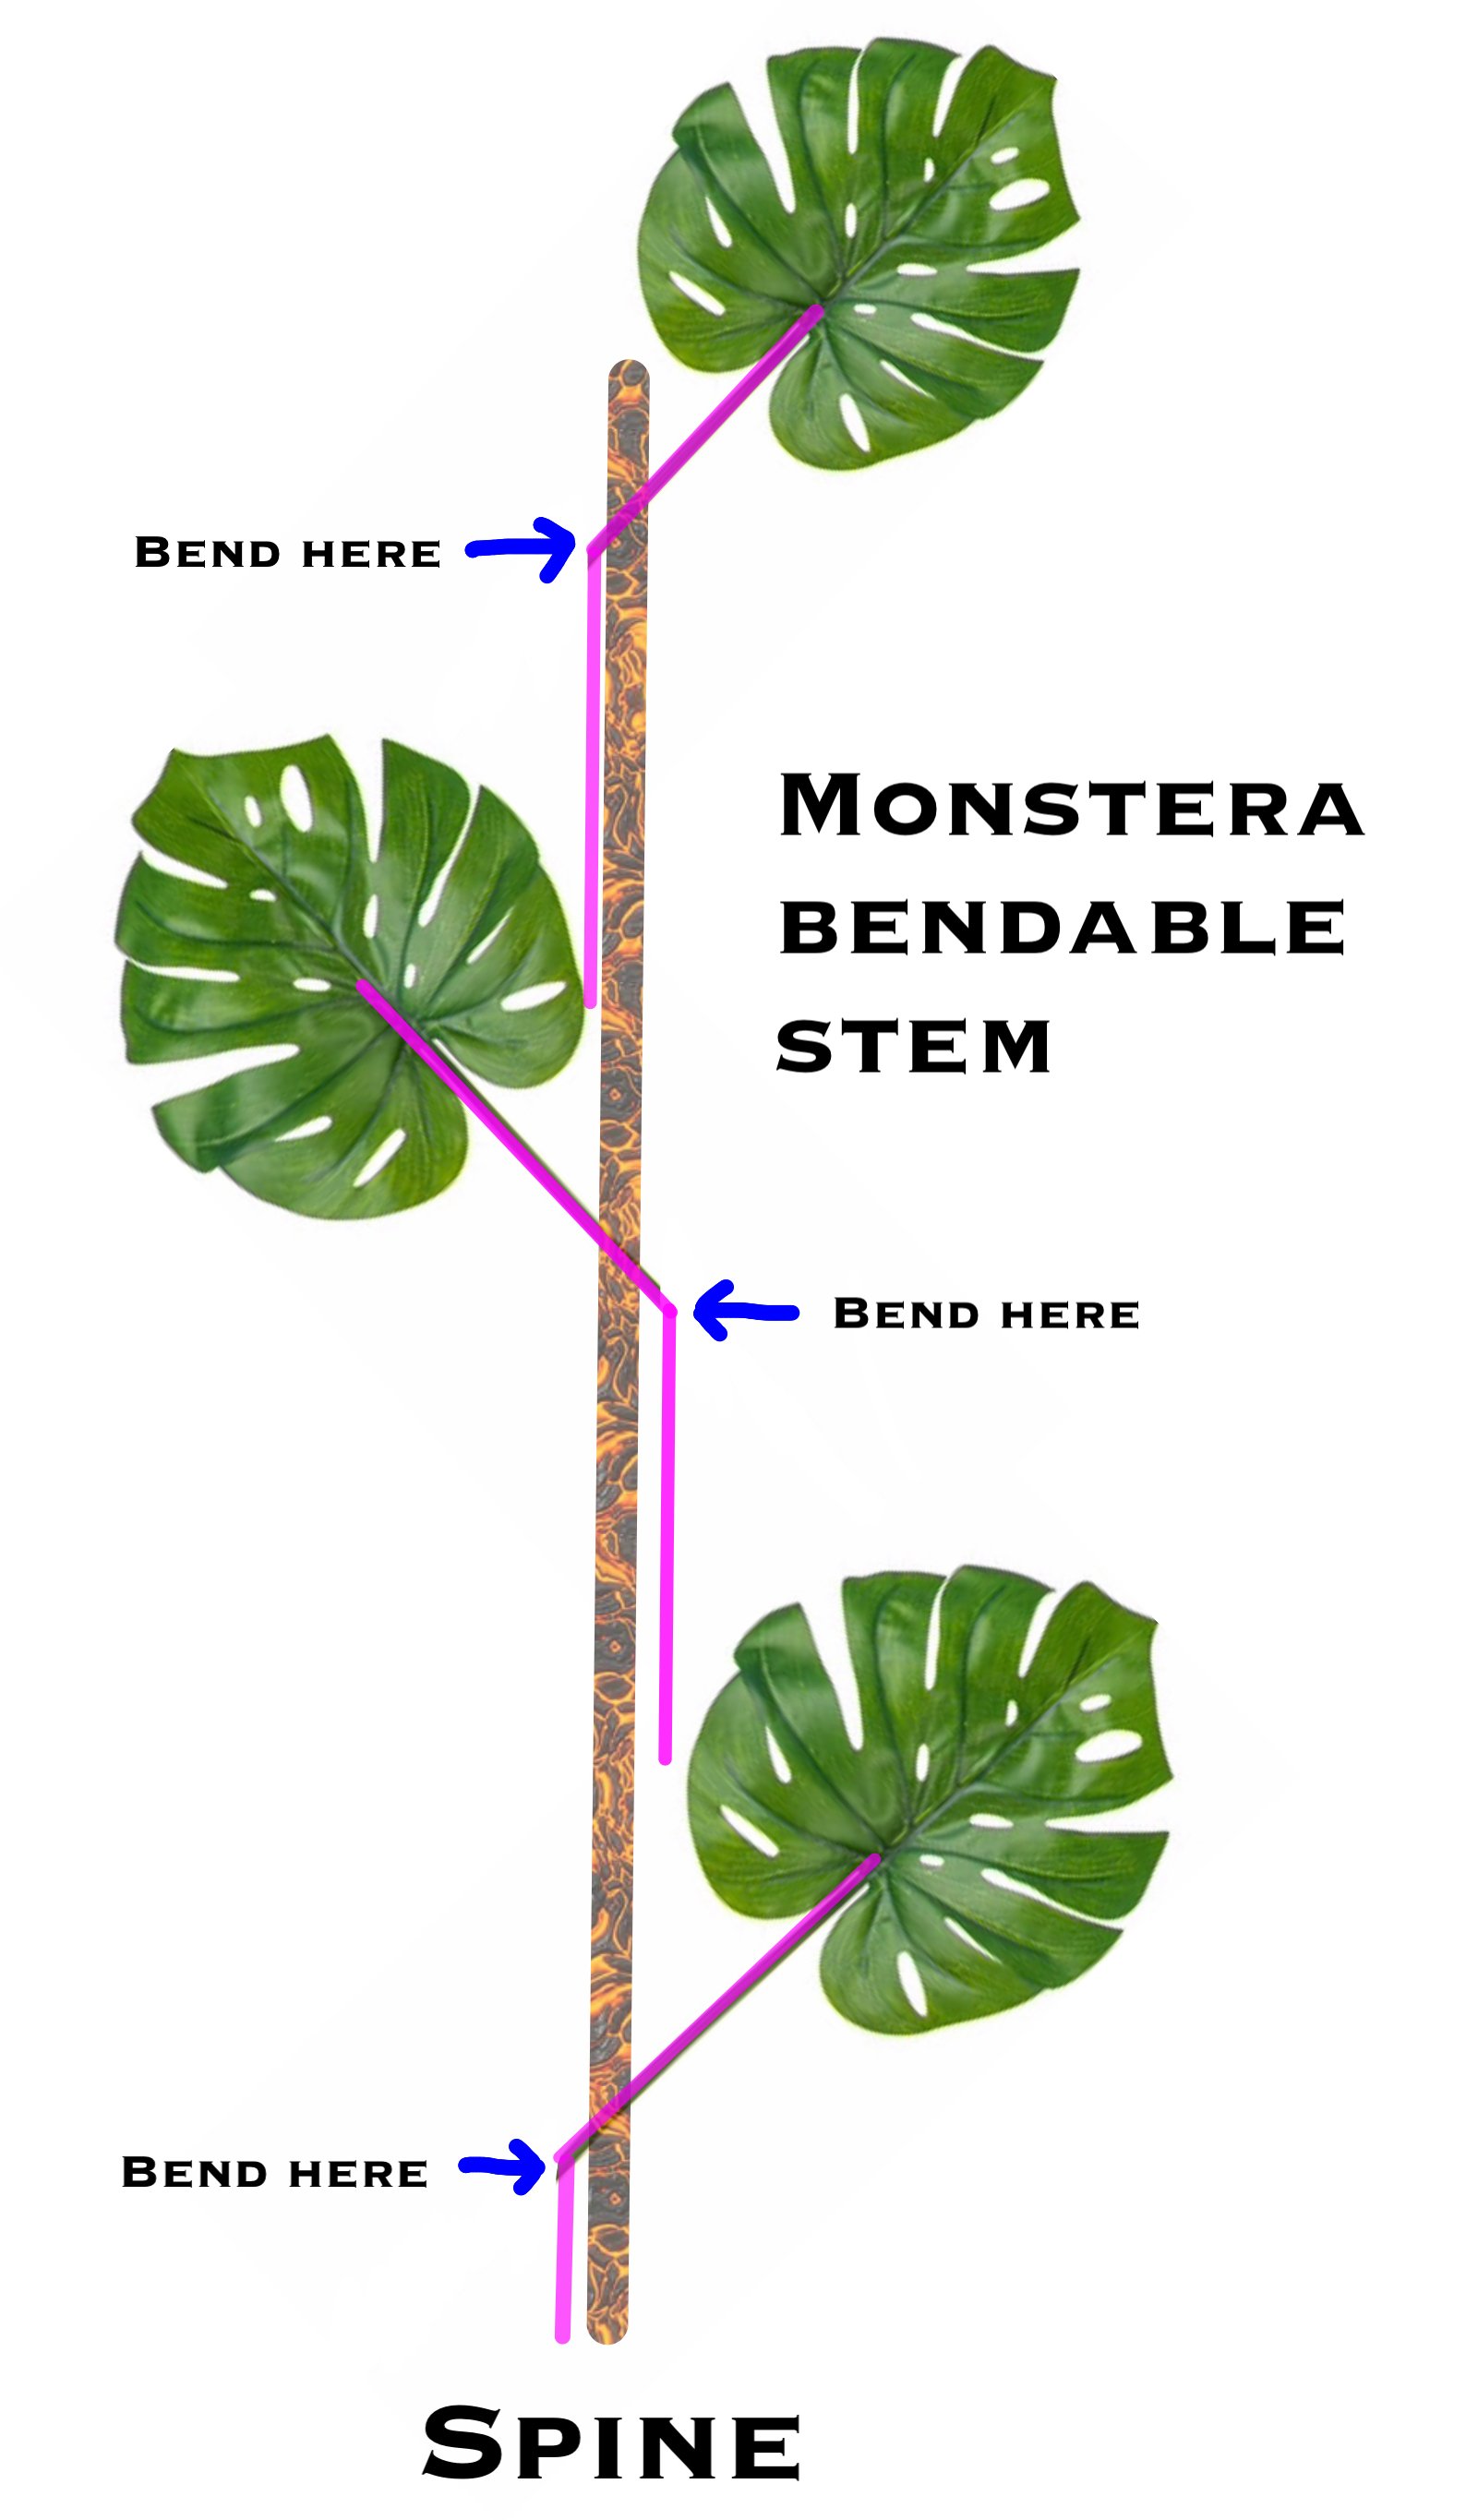 Image 5: Bend the stems at the point of intersection. The bottom half of the monstera stem should be parallel to the spine.
Attach the cable ties securely around the bent stem-section and 'spine' rope. Attach the cable tie at the top of the bend to avoid capsizing the leaf (due to the weight). The black rectangles on the image below are where the cable ties must sit.
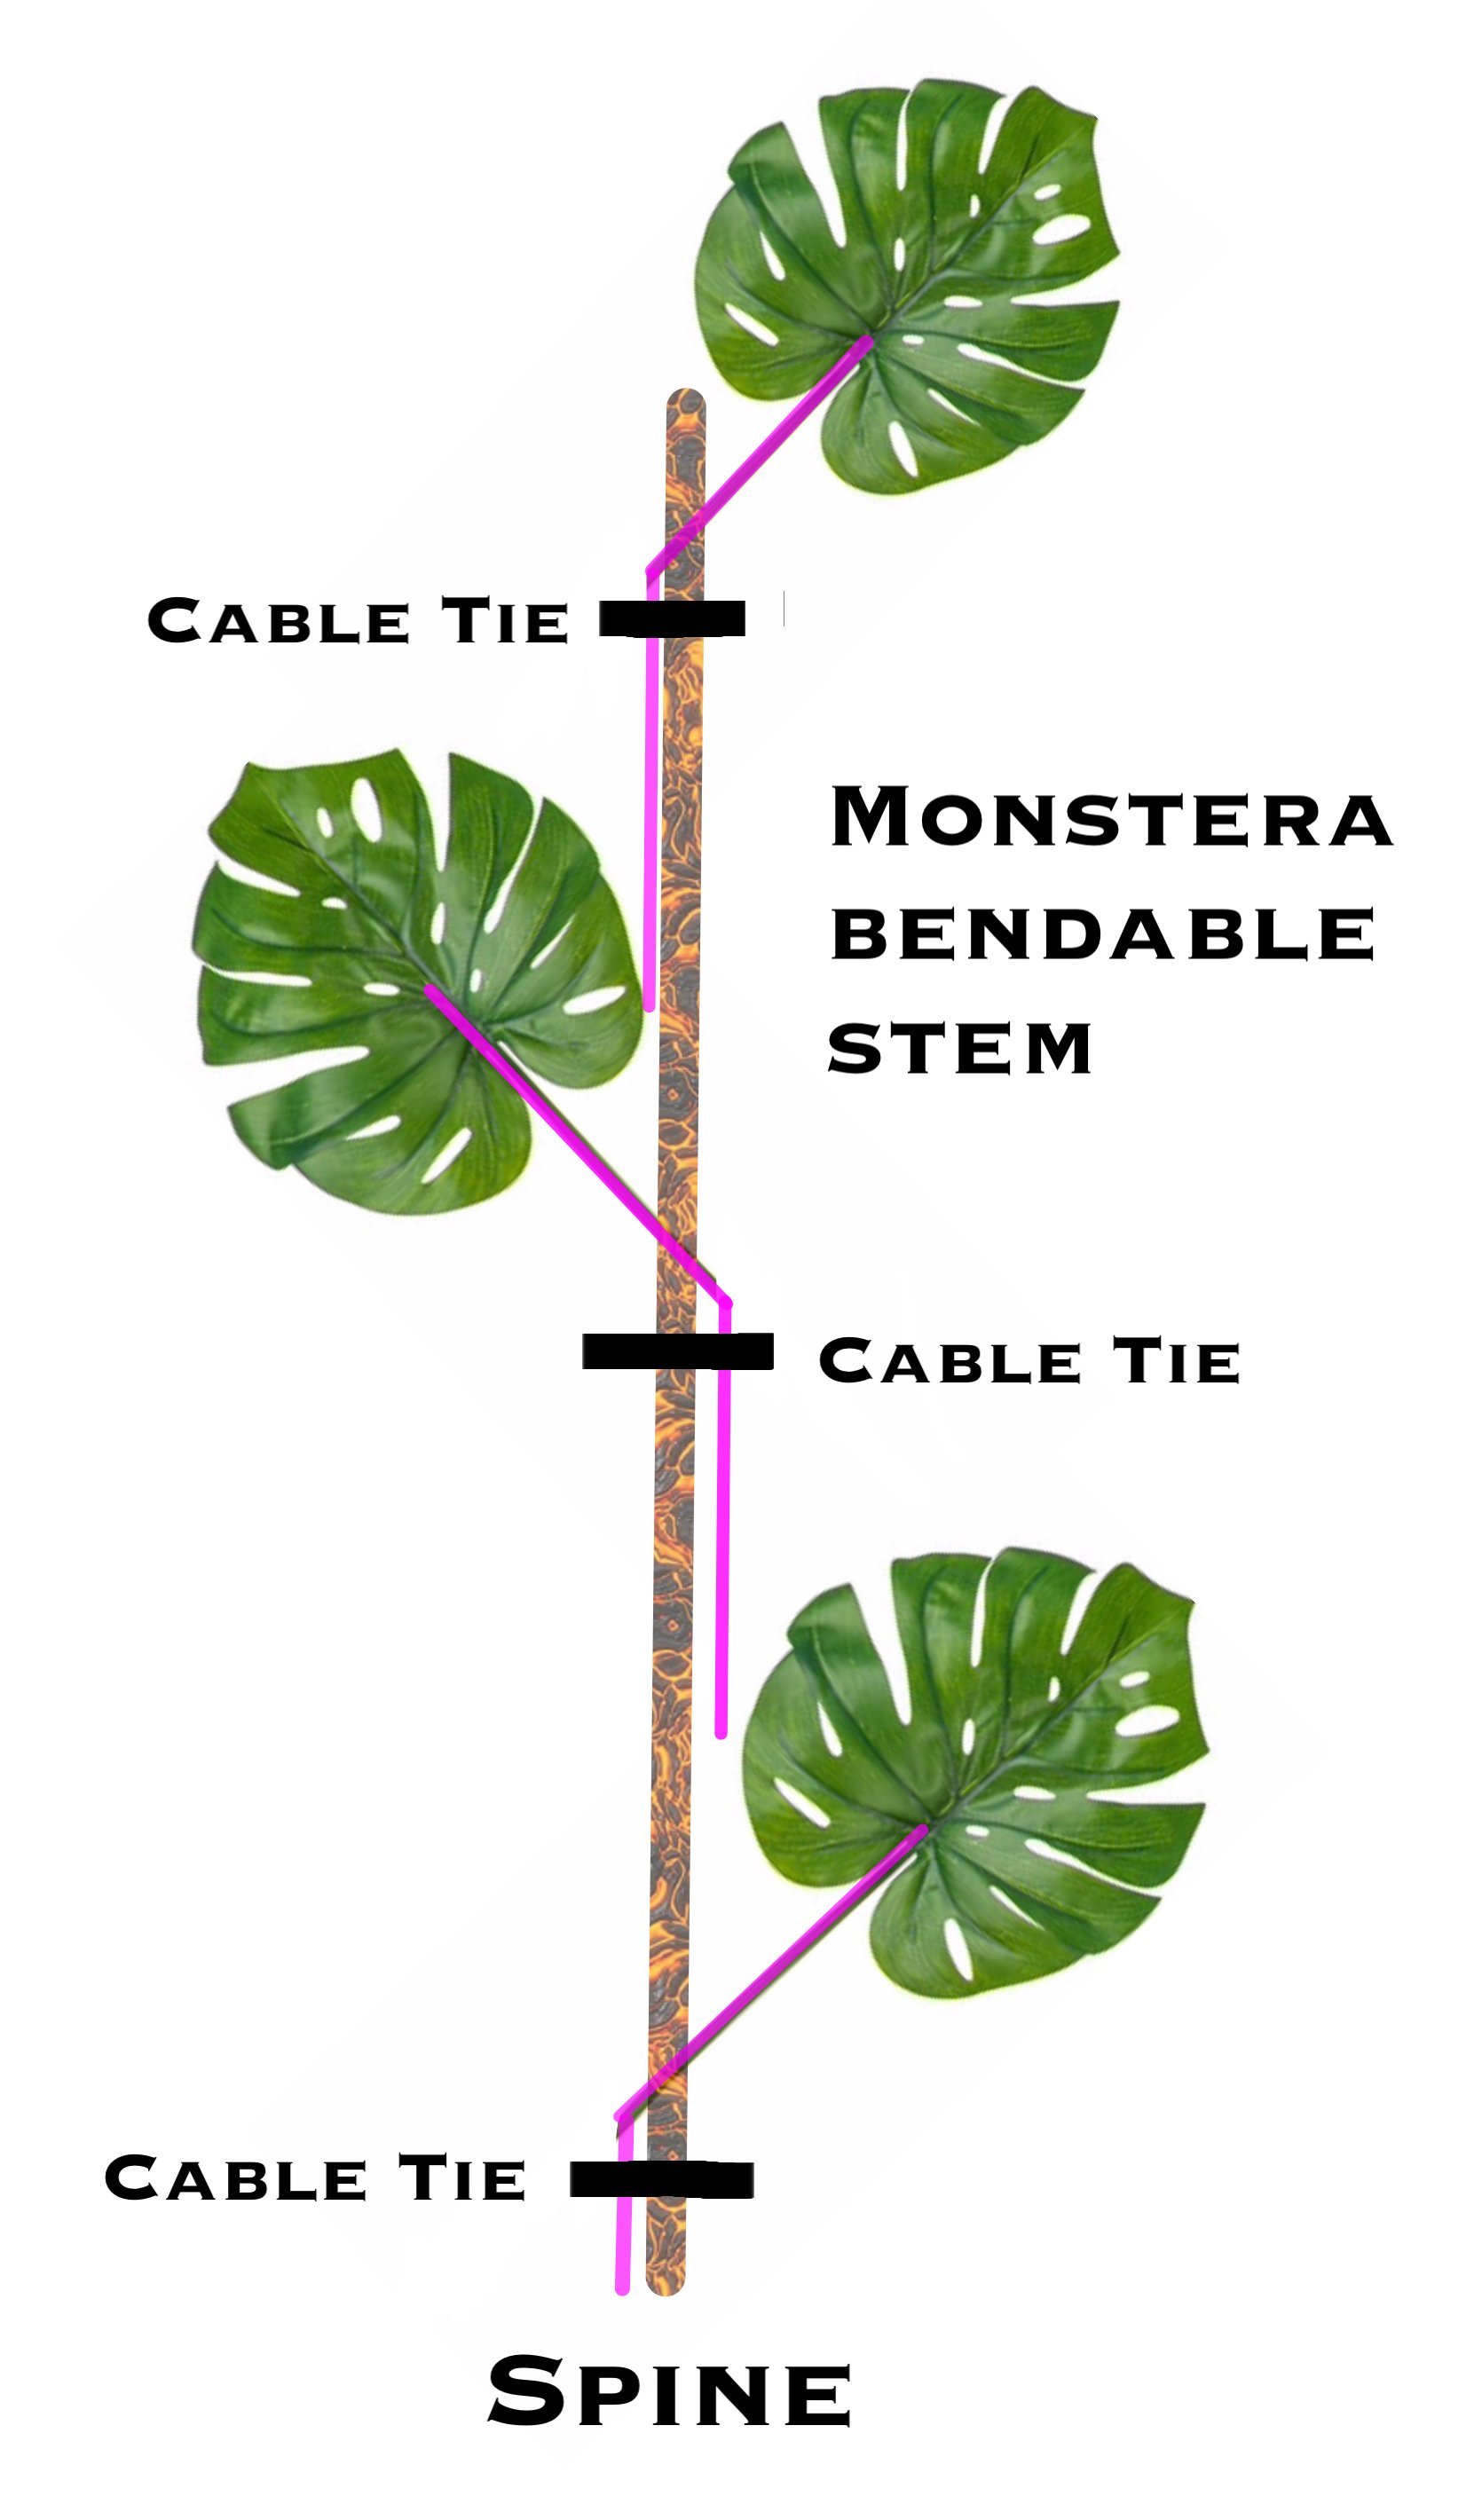 Image 6: Attach the cable-ties at the site of where the bend and spine meet.
Wrapping the Second Rope
The final step is to wrap the 'trunk' around both the spine to hide the display's mechanics. For those that are attaching the display to nails, you won't need to create a second hook at the top as the nail will be able to hold the weight on its own. However, if sticky-pad hooks are used, create a further noose to share the load between the two hooks. The second noose will come from the 'trunk's' top end of the rope. Give an extra 40cm at the top of the 'trunk ' rope to have enough room for the knot.
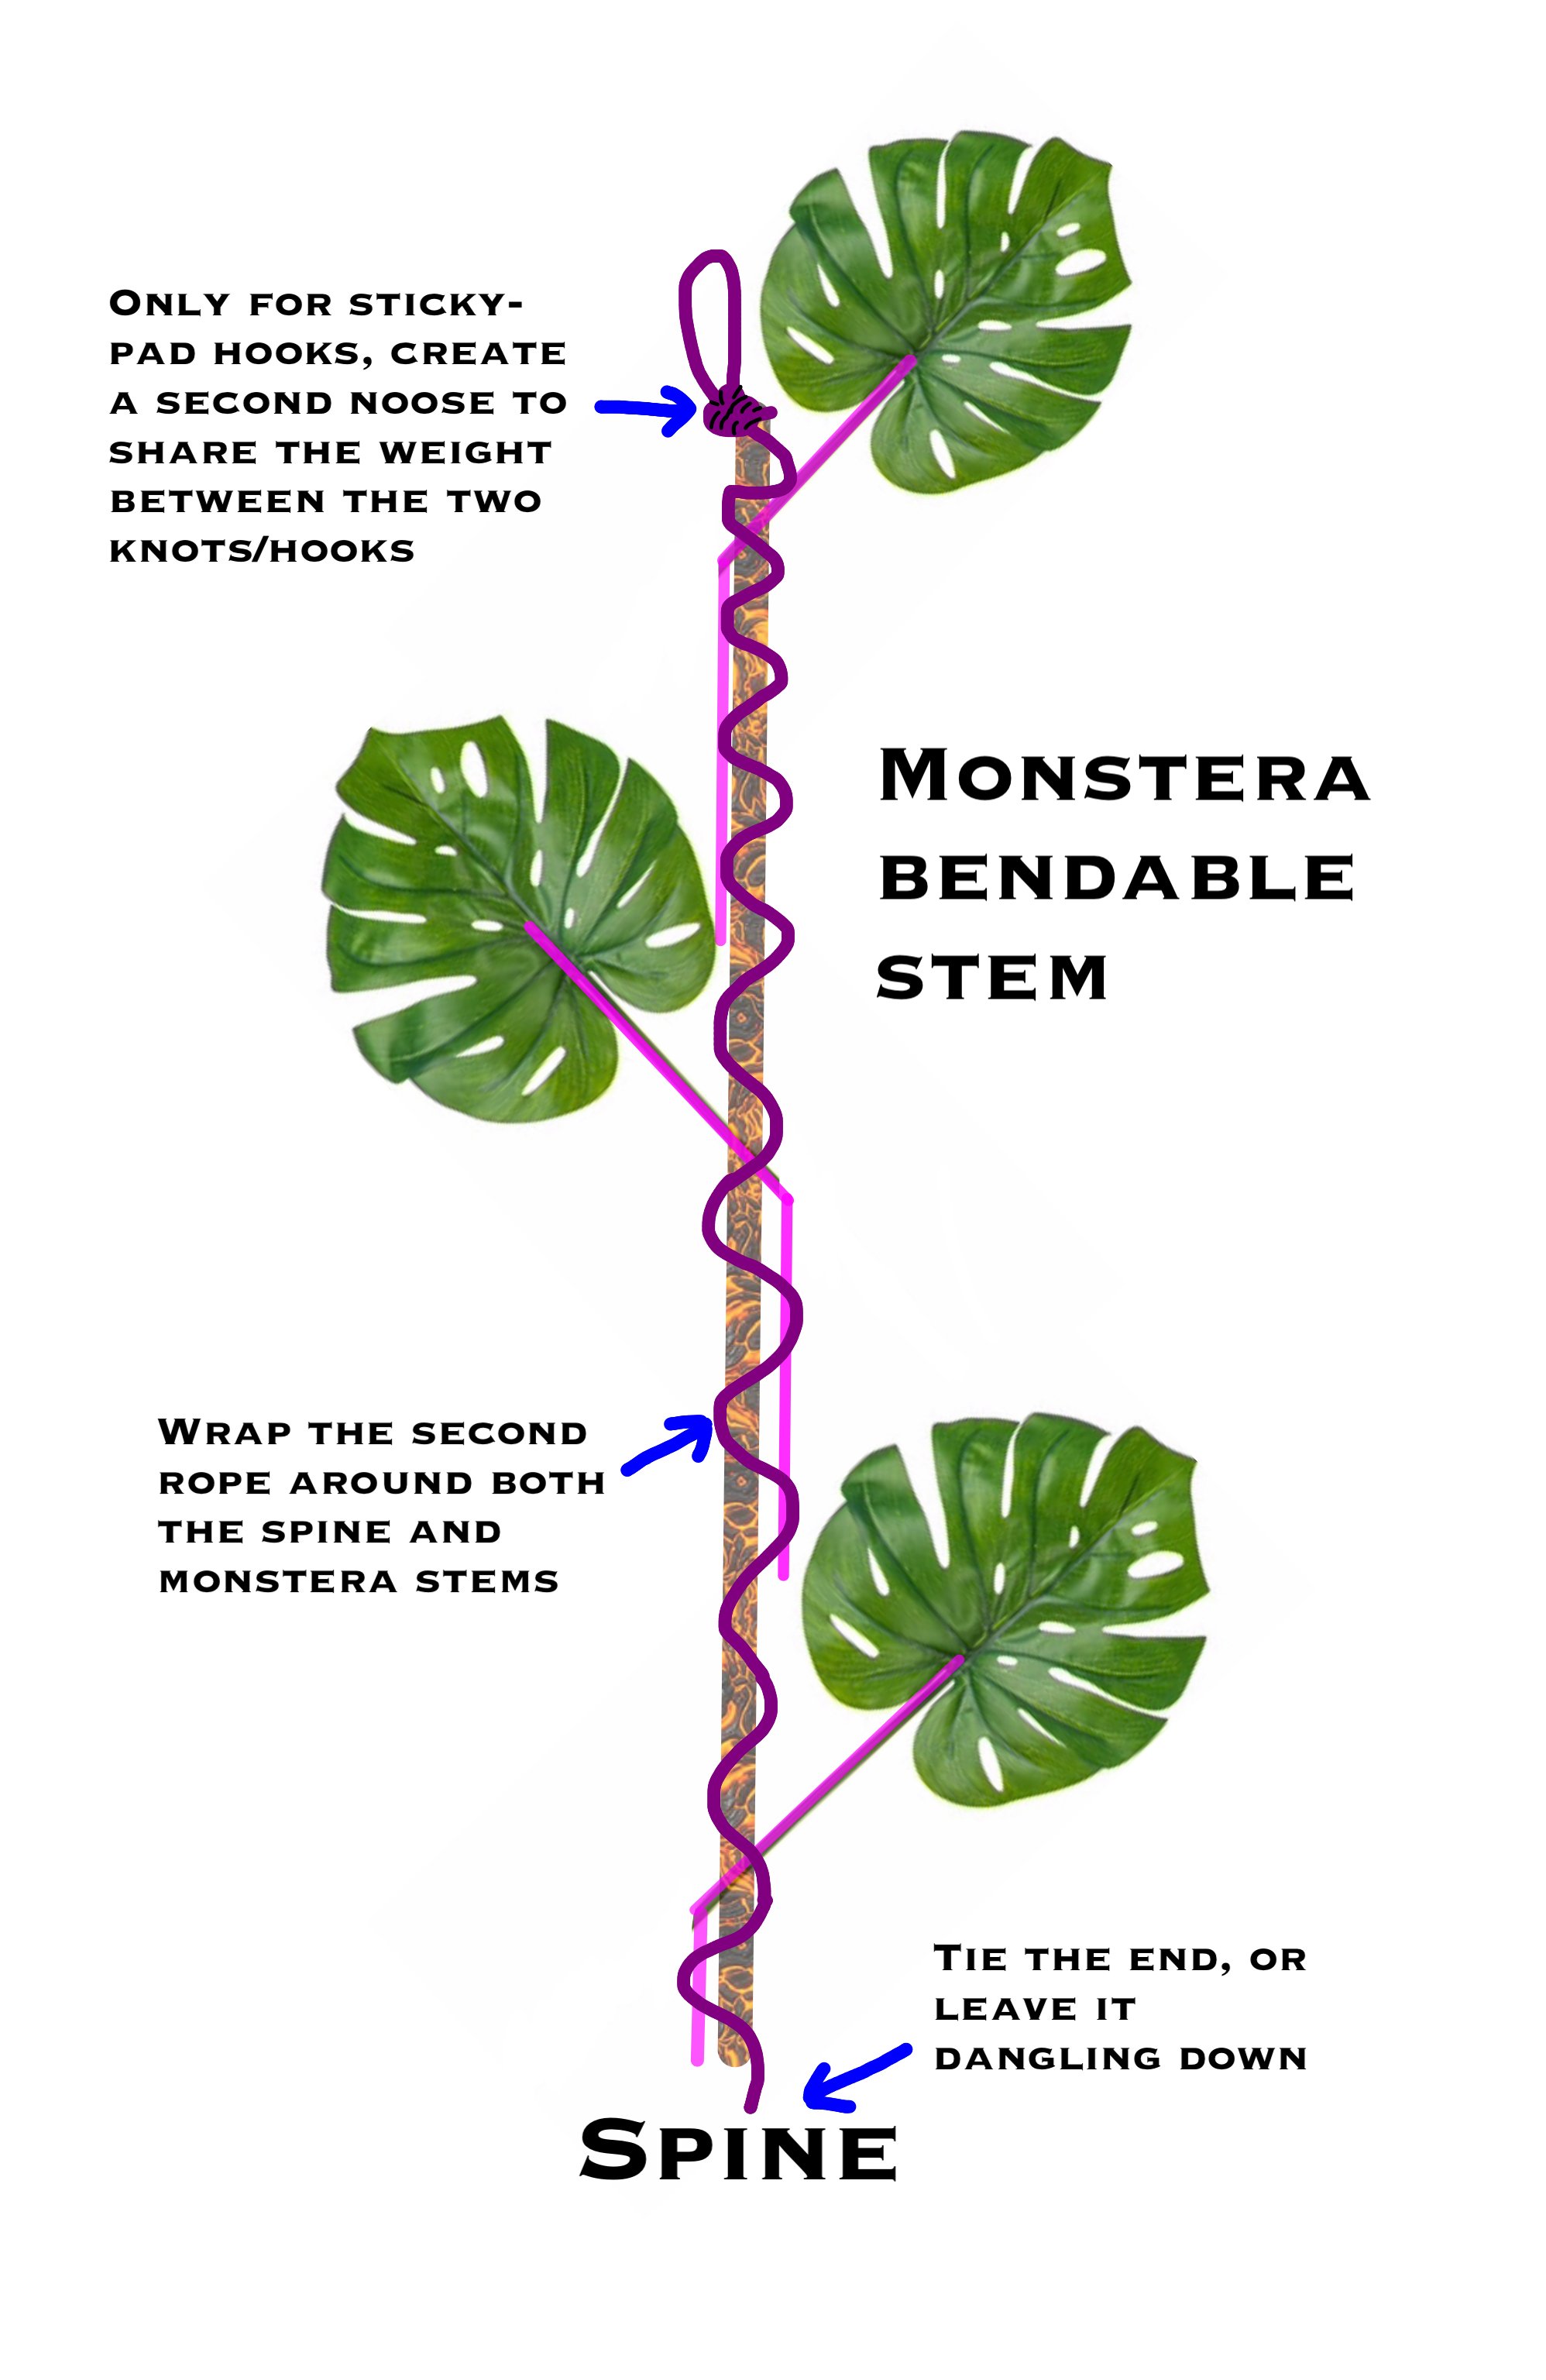 Image 7: Wrap the 'trunk' (coiling rope) around the 'spine' and attached monstera leaves to hide the display's mechanics. Be sure to wrap compactly for better aesthetics.
 Image 8: A photo of what the 'trunk' (coiling rope) should look like around the 'spine'.
Once the 'trunk' (coiling rope) has been wrapped, it should look like the photo below. If you have done it correctly, you won't be able to see the cable ties or monstera stems. It's now time to create the second noose at the top for sticky-pad hooks variants. Remember you don't have to create the second noose if you've chosen to use nails. Like how you did with the first knotted noose, create the second noose from the top end of the 'trunk's' rope so that it's the same height and level as the first one.
 Image 9: Noose 2 will be needed for sticky-pad hooked displays for extra support. The knotted noose will come from the top end of the 'trunk' (coiling rope). Noose 1 is the original knot that'll be on all displays via the 'spine' rope. The orange dots represent battery-operated fairy lights that can be wrapped the coiling rope.
Cut off the excess rope and make sure the noose(s) are strong enough to bear the load. Now the moment of truth - either drill or stick the nails/hooks onto the wall. Be mindful of how high or low you are placing the nails or hooks, as you want to fill the wall equally both from the top and bottom of the display. The last thing you want is the display to be to hire up or to lay down, as from different angles as it can look messy and unequal. Try adding some battery-operated fairy lights to the vine for special visual effects by wrapping them around the 'trunk'. And that's it! Hook the display on to the wall, and enjoy for months or years to come.
For Vine Displays That Curve
Instead of just a simple vertical display like ours, why not trail it over wooden structural beams or at 45º angles? The main mechanics of the vine is similar mainly; the only difference is how you'll attach it to the chosen areas. Instead of having just two hooks/nails to keep the structure on the wall, you'll have to put several up in crucial points (like angles or pivotal points, etc.). Check the photo below for a better visual explanation. As the weight will be divided into several sections across the vine, we'd recommend using sticky-pad hooks to prevent drilling unnecessary holes into the beams or walls.
 Image 10: Displays that'll curve or structures or walls must be secured on each 'pivotal' angle/corner for additional support.
Book a 1-to-1 Consultation with THE HOUSEPLANT DOCTOR™
Need realtime advice for your houseplants? Book a video or message consultation with expert Joe Bagley, THE HOUSEPLANT DOCTOR™ (author or ukhouseplants.com). Choose between a ten or thirty-minute session & a platform of your choice (WhatsApp, FaceTime, Facebook Messenger or Zoom). Ask unlimited questions in one session, including queries on your dying/challenging plants, pests eradication, terrariums, repotting advice & everything in between! Available worldwide.
Comments